
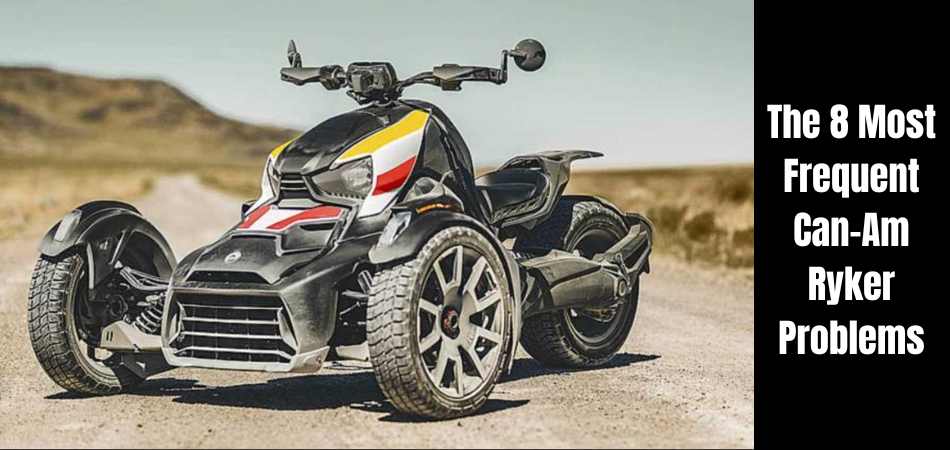
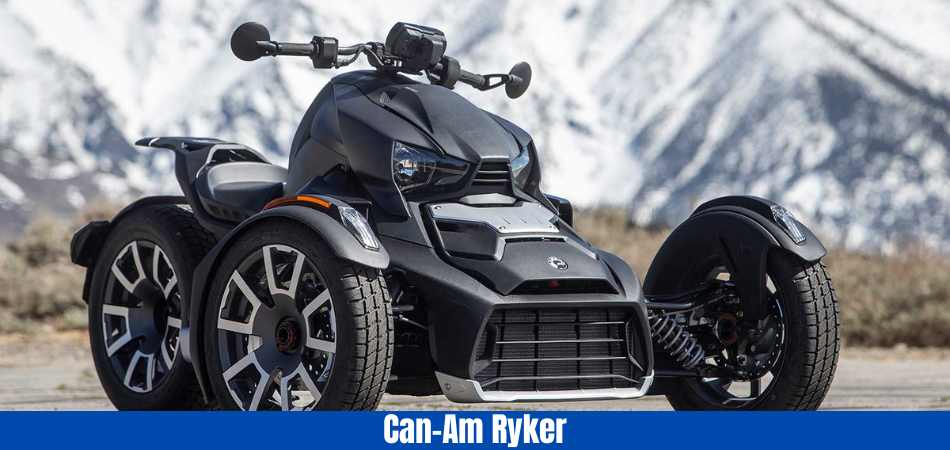
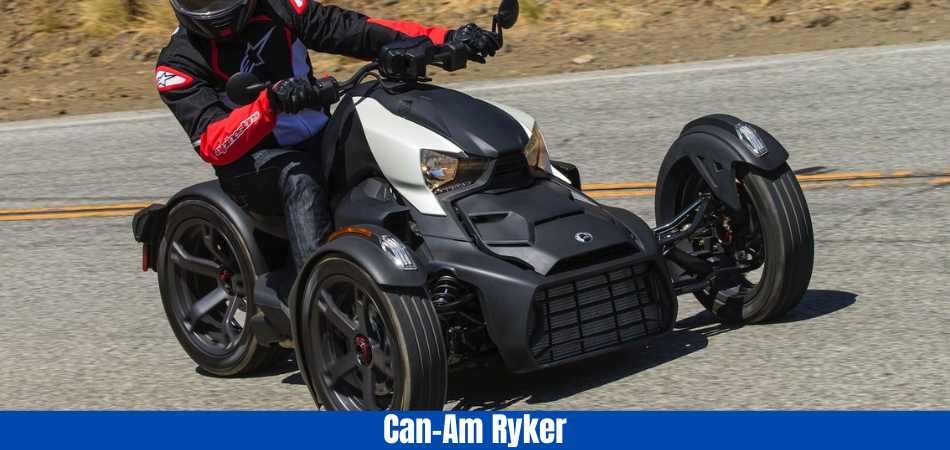
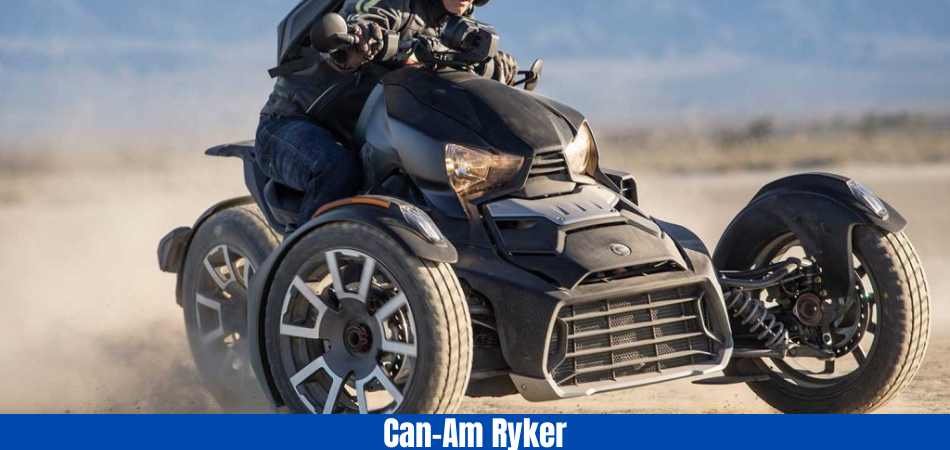
The Can-Am Ryker is a well-liked three-wheeled motorcycle for riders eager for continuous adventures. It is designed to traverse treacherous terrain, freeways, and city streets. Yet there are numerous Can-Am Ryker Problems that you should be aware of.
The Ryker is the ideal car for people who want a bike and a car. It combines the ease of a car with the rapid and difficult riding of a bike. Driving an off-road vehicle like this is never boring. Even though the Can-Am Ryker offers endless opportunities for everyday adventures, it has a few drawbacks.
Hard starting, CVT issues, overheating, electrical issues, malfunctioning knuckles, leaking antifreeze reservoirs, and high maintenance expenses are the most frequent Can-Am Ryker problems.
Therefore, whether you are now experiencing the issue or are considering purchasing the Can-Am Ryker problems, understanding the solution will quickly resolve your issues.
What are the Main Can-Am Ryker Specs and Features?
Engine Options:
Rotax 600 ACE: 600cc, liquid-cooled, inline twin-cylinder engine.
Rotax 900 ACE: 900cc, liquid-cooled, inline triple-cylinder engine.
Transmission:
Automatic CVT (Continuously Variable Transmission) with reverse.
Power Output:
Rotax 600 ACE: Approximately 47 horsepower.
Rotax 900 ACE: Approximately 77 horsepower.
Suspension:
Front & Rear Suspension: Double A-arm with anti-roll bar and Sachs twin-tube shock absorbers.
Brakes:
Front &Rear Brakes: Hydraulic disc brakes with 270mm rotors.
Can-Am Ryker Decals
The Can-Am Ryker is available with various decal options that allow you to customize its appearance.
Can-Am Ryker Seat
It features a single seat for the rider, similar to a traditional motorcycle.
Can-Am Ryker Cover
Can-Am offers official covers specifically designed for the Can-Am Ryker, which are typically made of durable and weather-resistant materials.
What are the Most Common Can-Am Ryker Problems and solutions?
The most common Can-Am Ryker Problems include-
- Starting Issues
- CVT Problems
- Overheating
- Problems With Brake
- Wiring Problems
- Leaking Antifreeze Reservoir
- Front and Rear Knuckles Issues
- High Maintenance cost
Let’s check out these problems briefly.
1. Starting Issues of Can-Am Ryker
There are two possible beginning issues for the Can-Am Ryker: either it runs sluggish or not at all.
The machine could grumble after you turn the throttle before it ultimately starts. This happens despite owning a fully charged battery and an entirely full tank. Starting problems might be caused by inadequate fuel, a broken ignition switch, or a weak battery, among other things.
Solution:
Push the throttle up and ensure that your foot is on the brake pedal if the car won’t start, even with a full tank of gas and a fully charged battery. If your Ryker won’t start, it can have trouble cold starting. Use a wooden stick to tap the starter to restart the machine.
2. Can Am Ryker CVT Problems
Can-Am Ryker CVT (continuously variable transmission) problems manifest on their own after more than 12,000 km. Your equipment may experience a slipping issue at higher speeds.
In addition, stopping can cause a burning smell and a check engine light with a warning for the Limp Home Mode.
In some circumstances, problems with CVT transmissions may have the CVT belt as their root cause. However, an air filter blockage may be the cause of CVT problems that start before 12,000 miles have passed.
Solution:
Check for wear or other problems with the CVT belt if your Ryker has more than 12,000 miles on it. Although the belt frequently appears to be in good condition, it may be challenging to detect such symptoms. Replace the old CVT belt by looking for one that is comparable.
3. The overheating problem of Can-Am Ryker
The Can-Am Ryker generates heat when traveling through difficult terrain. Riders may have trouble handling their three-wheeled bikes if they become much warmer.
Several customers have mentioned that the left panel, where they rest their legs, may get too hot. As a result, leaving the left leg there is difficult.
The location of the exhaust pipe, according to the manufacturer, encourages wind to blow, which is where the heat comes from.
Solution:
- There are two approaches that riders might take to solve this problem.
- Over the exhaust pipe, wrap a header.
- Put a heat shield over the exhaust pipe to reduce radiant heat by up to 70%.
4. Can-Am Ryker Problems With Brake
The most serious issue that could arise is brake-related. Accidental deaths may come from brake-related problems. You could experience total failure if your bike doesn’t have enough brake fluid. As a result, you must always make sure your bicycle has enough brake fluid.
Solution:
You must use additional braking systems if your front brakes fail in order to stop. You can reduce your speed for as long as you can by removing the gas pedal and downshifting if one or both of your brakes fail. Before riding on public roads, always check your brakes.
5. Wiring Problems of Can-Am Ryker
One of the most frequent Can-Am Ryker difficulties is wiring. Use of your Can-Am Ryker on rough terrain for an extended period of time may cause electrical problems. For instance, branches and tall plants may come into touch with the wiring system and cause it to shatter or come away.
This problem usually shows up close to the machine’s front axles. These wires could occasionally hit the revolving shafts and become loose. The battery and other parts’ grounding continuity may be hampered by improper wiring.
Solution:
Check the wiring to see whether it is unprotected or damaged. Any frayed or damaged wires should be replaced and tightened. Can-Am Ryker conductor lifespan is, regrettably, constrained. The machine’s connections could be changed out for more durable ones.
6. Leaking Antifreeze Reservoir of Can-Am Ryker
The refrigerant liquid in the tank may leak onto the wires while your Ryder is in use. Since this liquid poses a serious risk to electrical wire, it should never contact it. might-Am Ryker problems might arise if the fluid spills on the conductors and connection points.
Solution:
Check the anti-freeze reservoir for any leaks, especially at the connectors, and caulk those locations. You may also swap out the radiator lid to completely shut off any potential entry points. If the problem continues, replace the whole reservoir system and liquid.
7. Front and Rear Knuckles Issues of Can-Am Ryker
The Ryker’s front and back knuckles have been criticized by a number of users. This is typical of the older, poorer-quality Can-Am Ryker versions. The center radius rod of this knuckle has a propensity to distort, which may cause problems with the wheel bearings.
Solution:
Replacing the knuckles is the best line of action. Thanks to May-Am’s improved knuckle construction, you may choose reliable rear and front knuckles for your Ryker model.
8. Costly To Maintain
Can-Am Ryker have among the most expensive three-wheeled motorbike maintenance costs. The following components must be replaced or fixed on a regular basis:
Brake pads
Shocks
Tires
Additionally, you must hire a professional to service your Ryker’s gearbox mechanism. In order to replenish the gearbox fluid, a body panel must be removed. Experts charge more because the work requires specialized training and tools.
Solution:
Unfortunately, Can-Am Ryker’s pricey maintenance has no cure. However, maintain your system properly to avoid the onset of serious issues.
Learn more at here.
What are the Pros of Can-Am Ryker?
- Well-lit for increased visibility a night
- Unique style
- Ample storage capacity
- Optional Passenger Seat
- Customizable via OEM Accessories
- Comfortable
- Fun To Ride
- Automatic Transmission
- Reverse Gear
What are the Cons of Can-Am Ryker?
- Small Turning Radius
- Low to the Ground
- Poor Fuel Efficiency
- Expensive Maintenance
- Inconsistent Dealership Support
- ABS Overheats
What are the Maintenance Tips for Can-Am Ryker?
For maximum performance and longevity, your Can-Am Ryker must be properly maintained. Here is some important maintenance advice.
- Check your Ryker frequently for any indications of wear, loose or broken parts, leaks, or anomalies.
- Make careful to change the oil and filter in accordance with the suggested oil change intervals.
- Engine coolant, brake fluid, and transmission fluid levels should all be checked and kept at the right levels.
- In order to ensure optimal airflow to the engine, you should also clean or change the air filter as needed.
- Maintain correct tire pressure and routinely check them for wear and damage.
- Last but not least, go to the owner’s manual for detailed maintenance instructions. Always take care of any problems right away to avoid any damage or safety risks.
Is Maintenance Expensive for a Can-Am Ryker?
Can-Am Ryker motorcycles are renowned for their outstanding build quality and aggressive performance. They have strong engines and fast throttle response, which enable riders to accelerate swiftly and handle corners even at high speeds. Some models feature built-in LED lighting systems that improve visibility in dimly lit areas.
Can-Am Due to the motorcycle’s numerous complicated electronic parts and attachments, Ryker maintenance can be expensive. The cost of the motorcycle may increase if specific tools and methods are needed to service a Ryker.
Ineffective electric wiring might also result in used Rykers that are difficult and expensive to repair. The motorcycle’s intricate wiring is to blame for this. Inconsistent dealership expertise, experience, and honesty can also have an impact on a motorcycle’s dependability.
Can-am models may not be serviced by a dealer or mechanic in a way that provides optimum performance and safety if they are unfamiliar with them. In the future, that might necessitate expensive repairs or replacements.
Does the Can-Am Ryker Worth the Money?
The value of the Can-Am Ryker is subjective and depends on a variety of factors, including personal tastes, budget, and specific demands.
The Can-Am Ryker has a distinctive three-wheeled design and various engine options, letting you select the one that best meets your performance needs. Given the features, power, and handling qualities it offers, it is unquestionably worth the money.
However, it still has some issues that might be annoying at times. As a result, the Can-Am Ryker’s value is subjective and depends on your particular choices and priorities.
Final Thoughts
The Can-Am Ryker may give outdoor fans the most thrilling biking experience. This three-wheeled vehicle is reliable on any route, strong, and effective. However, if you run into any of the aforementioned typical Can-Am Ryker problems, utilize the suggested fix.
You can take action to stop Can-Am Ryker motorcycle problems from happening now that you are aware of their causes. The learning curve for motorcycle maintenance might be steep if you’ve never done it before. Fortunately, there are resources accessible online and for motorcycles specifically that may help you maintain your motorcycle’s operation and streamline routine maintenance.
If you are unable to fix the problems on your three-wheeled motorcycle yourself, take it to a professional mechanic or a nearby dealer.
Read more of our articles here.
FAQs
What is the most typical issue with the Can-Am Ryker?
One of the most often reported problems is with the drive pulleys. Belt slippage has been noted by several owners, which reduces performance and power.
Does the Can-Am Ryker have any electrical problems?
Although they are not very common, a few customers have reported electrical issues like faulty wiring, blown fuses, and broken sensors. These problems could make the car less functional overall.
What are the problems with the Can-Am Ryker’s suspension?
Some business owners have voiced concerns about the suspension. Vibration that is too intense, a rough ride, or problems with the suspension absorbers could all be present. It’s crucial to remember, though, that most car owners don’t have serious suspension problems.
Are there any known Can-Am Ryker powertrain problems?
Most Can-Am Ryker owners say they haven’t experienced any major motor issues. There have, however, been a few rare occurrences, such as engine misfires and overheating. These problems can be reduced with regular maintenance and care.
Is the Can-Am Ryker being recalled?
Numerous factors, including manufacturing flaws and safety concerns, can lead to recalls. Always confirm whether there are any active recalls for your model and VIN (Vehicle Identification Number) with the manufacturer or authorized dealers.

The Canadian company Bombardier Recreational Products (BRP) produces the Can-Am Ryker, a three-wheeled motorcycle. It was first introduced in 2018 as an entry-level option in BRP’s lineup of three-wheeled vehicles alongside the more advanced Can-Am Spyder. To get yourself one, search for a used Can-am Ryker near you.
The Can-Am Ryker features a unique design with two wheels in the front and one in the rear. This configuration provides added stability and a different riding experience than traditional motorcycles.
It is designed to be easier to ride and more accessible to many riders, including beginners and those with physical limitations.
Continue reading to learn about its unique features, specs, etc.
What are the Key Features Of Can-am Ryker?
1. Design
The Can-Am Ryker features a distinctive and modern design with two wheels in the front and one in the rear. This configuration offers stability and a unique riding experience.
2. Engine Options
The Ryker is available with different engine options to suit various riding preferences. These include a 600cc or 900cc Rotax engine, providing adequate power and performance.
3. Automatic Transmission
The Ryker has an automatic transmission, making riding more accessible for those who prefer not to shift gears manually. This feature simplifies the riding experience, especially for beginners.
4. Vehicle Stability System (VSS)
The Ryker incorporates a stability system called the Vehicle Stability System (VSS). It includes various safety features such as anti-lock brakes, traction control, and stability control, enhancing the overall safety and management of the vehicle.
5. Customization Options
Can-Am offers a range of customization options for the Ryker, allowing riders to personalize their motorcycles. It includes different color panels, graphics, and accessories to match individual style preferences.
6. Comfortable Seating
The Ryker features a comfortable seating position, ensuring a relaxed riding experience. The ergonomics are designed to reduce rider fatigue during long rides.
7. Front Storage
The Ryker includes a front storage bin, offering space to store personal items or smaller belongings while on the go.
8. Digital Display
The Ryker has a digital display provides essential information such as speed, engine RPM, fuel level, and trip data. This display helps riders stay informed about the motorcycle’s status.
9. Easy Maintenance
The Ryker is designed with ease of maintenance in mind. Regular maintenance tasks such as oil changes and filter replacements are typically straightforward and can be performed without extensive mechanical knowledge.
10. Accessibility
The Ryker is designed to be accessible to a wide range of riders. It’s stability and automatic transmission make it easier for beginners or riders with physical limitations to enjoy the thrill of motorcycling.
What are the Specifications Of A Can-am-Ryker?
The Can-Am Ryker’s specifications may differ based on the particular model and engine option selected. Here are some general specifications for the Can-Am Ryker:
1. Engine
Rotax 600 ACE: A 600cc, liquid-cooled, fuel-injected, inline twin-cylinder engine.
Rotax 900 ACE: A 900cc, liquid-cooled, fuel-injected, inline three-cylinder engine.
2. Transmission
Automatic Continuously Variable Transmission (CVT) with reverse function.
3. Power Output
Rotax 600 ACE: Produces approximately 47 horsepower.
Rotax 900 ACE: Produces about 77 horsepower.
4. Fuel Capacity
The fuel tank capacity of the Ryker is approximately 5.28 gallons (20 liters).
5. Vehicle Weight
The weight of the Can-Am Ryker can vary depending on the specific model and features, but it typically ranges from approximately 600 to 650 pounds (272 to 295 kilograms).
6. Dimensions
Length: Approximately 92.6 inches (235 cm)
Width: Approximately 59.4 inches (151 cm)
Height: Approximately 41.8 inches (106 cm)
7. Seating Capacity
The Ryker is designed to accommodate one or two riders, depending on the model and configuration.
8. Suspension
Front Suspension: Double A-arm with Sachs twin-tube coil-over shocks, offering up to 5.94 inches (15.1 cm) of travel.
Rear Suspension: Multi-link trailing arm with Sachs twin-tube coil-over shocks, offering up to 6.85 inches (17.4 cm) of travel.
9. Brakes
Front Brakes: Hydraulic disc brakes with a single 270mm rotor.
Rear Brakes: Hydraulic disc brakes with a single 220mm rotor.
10. Tires
Front Tires: 145/60R16
Rear Tire: 205/55R15
What are The Pros Of Can-am Ryker?
- The two-wheels-in-front design of the Can-Am Ryker provides enhanced stability. It makes it more approachable for riders of various skill levels.
- The Ryker is accessible and easy to ride, making it an excellent option for beginners or riders with physical limitations.
- The automatic transmission eliminates manual shifting. It makes the Ryker more user-friendly and convenient for riders who prefer a simpler riding experience.
- Can-Am offers a range of customization options for the Ryker. It allows riders to personalize their motorcycles with different colors, panels, graphics, and accessories.
- The Ryker has a stability system (VSS), including features like anti-lock brakes, traction control, and stability, contributing to safer rides and improved control.
- The Ryker provides a comfortable seating position, reducing rider fatigue during long rides and enhancing overall riding enjoyment
What are The Cons Of Can-am Ryker?
- The open design of the Ryker provides a different level of weather protection than fully enclosed motorcycles. Riders may be more exposed to the elements, especially during adverse weather conditions.
- While the Ryker does offer a front storage bin, its capacity is limited. Riders may need to consider additional storage solutions for carrying more oversized items.
- Some Ryker models are designed for a single rider, limiting the passenger-carrying capability. If riding with a passenger is a priority, specific models and configurations must be considered.
- While the Ryker offers adequate power for most riding situations, riders looking for high-performance or aggressive acceleration may find the power output modest.
- The Can-Am Ryker can be more expensive compared to traditional motorcycles in the same category. The additional cost may be a consideration for budget-conscious buyers.
Used Can-am Ryker Near Me: Things To Consider Before Buying!
1. Condition
Carefully inspect the used Ryker’s overall condition, including its exterior, interior, engine, and other mechanical components. Look for signs of damage, wear, and tear, and ensure the vehicle’s optimal performance.
2. Mileage
Consider the mileage of the used Ryker. Lower mileage generally indicates less wear and tear, but it’s also essential to consider the age of the vehicle and how it has been used.
3. Service History
Request Ryker’s maintenance records or service history to understand how it has been cared for. Regular maintenance and servicing are essential for the longevity and performance of the vehicle.
4. Ownership and Title
Verify the ownership and title of the used Ryker to ensure that the seller has the legal right to sell the vehicle. Check for any liens or outstanding financial obligations associated with the motorcycle.
5. Test Ride
Arrange a test ride to experience the Ryker’s performance and handling firsthand. It will give you a better idea of how it feels on the road and if it meets your expectations.
6. Reputation and Reviews
Research the reputation and reviews of the seller or dealership you are considering purchasing the used Ryker. Look for feedback from previous customers to ensure a reliable and trustworthy buying experience.
7. Warranty and After-Sales Support
Inquire about any remaining warranty on the used Ryker and whether the manufacturer or dealer offers any after-sales support or extended warranty options.
8. Insurance
Check with your insurance provider to determine the cost of insuring a used Can-Am Ryker. Insurance rates may vary based on factors such as the model year, location, and your personal driving history.
9. Availability of Parts and Service
Consider the availability of genuine Can-Am parts and authorized service centers near your location. It ensures that you can easily access maintenance and repairs as needed.
10. Research Market Value
Research the market value of the specific used Ryker model you want to ensure you are getting a fair price. Compare prices from different sellers and consider factors such as mileage, condition, and any additional accessories or modifications.
Learn more about it here.
Final Thought
Buying a used Can-Am Ryker can be an excellent option for those who want to experience its unique riding experience while potentially saving some money compared to purchasing a brand-new one. However, it’s essential to approach the purchase with caution and consider several factors.
Considering the discussed factors, you can increase your chances of finding a reliable and well-maintained used Can-Am Ryker that suits your budget, preferences, and riding needs. Buying a used Ryker can be an exciting opportunity to enjoy the thrill of three-wheeled riding while embarking on new adventures.
Read more of our articles here.
FAQs
Ryker or Spyder—which one is better?
If you are a beginner, you should get a Can-Am Ryker because its features make it easy to use and safe to ride. You can choose the Can-Am Spyder if you want a wild and exciting ride. It has high performance and advanced features that make it fast and reliable.
What is the Can-Am bike that costs the most?
The Can-Am Renegade X MR 1000R is the most pricey ATV from the company in 2022. It is only $100 less than the most expensive ATV, a tie between the two Polaris models.
Can two people drive Can-Am Ryker 600?
You should only carry a guest on your Can-Am Spyder or Can-Am Ryker if a seat is made just for that purpose. All Can-Am Ryker models need to have a passenger seat added as an accessory. Some Can-Am Spyder models have already installed passenger seats, and all models can add a passenger seat as an extra.
Does the Can-Am Ryker have front-wheel drive?
Unlike traditional three-wheeled bikes like the well-known Harley-Davidson trike, the Ryker has two wheels in front and a single wheel in the back that provides power.
Is off-roading possible with a Can-Am Ryker?
Spyders and Rykers are not called off-road vehicles because they have low ground clearance. Thus, your 3-wheel motorcycle can only be ridden on concrete, asphalt, or graded dirt roads.

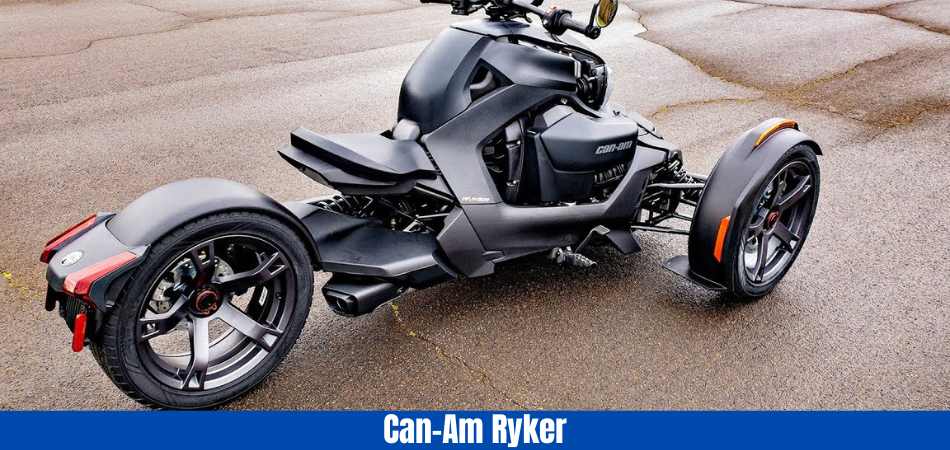
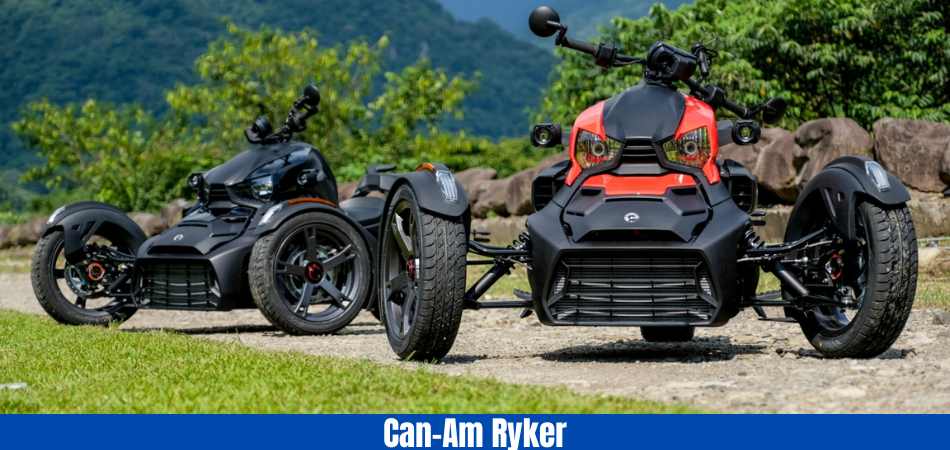
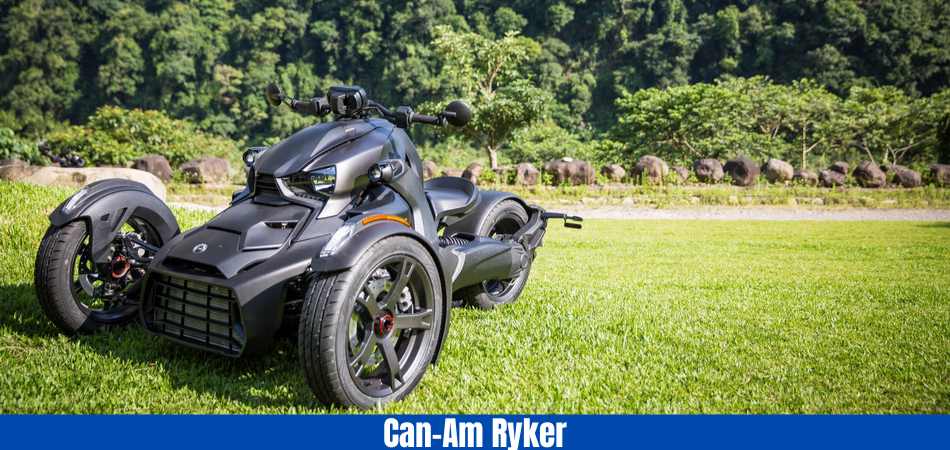
The quality of Can-Am Ryker Side by Side is important for consumers when purchasing one. Can-Am RYKER is a 3-wheel motorcycle. If you are looking for Can-Am Ryker for sale, you must know about the motorcycle very well.
But The Can-Am Ryker two-seater version offers a comfortable and enjoyable riding experience. For both the rider and the passenger. With its tandem seating arrangement, the Ryker provides ample space and seating positions.
You might be wondering why this motorcycle will be a good option. After all, you should be more cautious when you’re investing your cash in something. We’ve gathered all. In this Can-Am Ryker for sale information we will clear your confusion. Let’s dive in.
What is Can-Am Ryker?
Among Can-Am’s three-wheelers, the Ryker is relatively new. Ryker was introduced a couple of years ago, while Spyder was introduced in 2007. The Spyder 900 is significantly cheaper than the Honda Gold Wing, which is equivalent to a naked 900. In contrast to the Spyder, the Ryker lists for just $11,399, while the cheapest Spyder starts at $22,499 and can quickly reach $30,000 or more.
This is a very straightforward machine, more similar to a scooter than a motorcycle in many ways. To begin with, there are no gears, just a continuously variable transmission; once you engage Forward, forget about it, like an automatic. The Reverse also exists, but it doesn’t go backwards at the same speed.
What are the Specifications of Can-Am Ryker for Sale?
Engine
- Engine displacement: 600 cc
- Type: Rotax® 600 ACE™ in-line 2 cylinders, liquid-cooled with electronic fuel injection and electronic throttle control
- Bore & stroke: 2.9 x 2.7 in. (74 x 69.7 mm)
- Power: 50 hp (37.3 kW) @ 7300 RPM
- Torque: 36.7 ft-lb (49.7 Nm) @ 6000 RPM
- Drivetrain: Transmission Automatic (CVT) with reverse function
- Type: Automatic (CVT) with reverse function
Chassis
- Suspension: Front Double wishbone
- Suspension: Rear Multi-link – mono swing arm
- Brakes: Front 270 mm discs with Nissin 2-piston floating calipers
- Brakes: Rear 220 mm disc, 1-piston floating caliper
- Tires: Front MC 145/60R16 66T
- Tires: Rear MC 205/45R16 77T
- Fuel: Tank Capacity 5.28 gal (20 L)
Safety and Security
- ABS Anti-lock Braking System
- Anti-theft system
- HHC Hill Hold Control
Dimensions
- L x W x H: 92.6 x 59.9 x 41.9 in. (2,352 x 1,522 x 1,063 mm)
- Wheelbase: 67.3 in. (1,709 mm)
- Seat height: 23.6 in. (599 mm)
- Ground clearance: 3.8 in. (97 mm)
- Dry weight: 594 lb (270 kg)
Warranty
- 2-year BRP Limited Warranty with 2-year roadside assistance
- Extension B.E.S.T. extended service term available from 12 to 36 months.
About Can-Am Ryker for Sale
Three-wheeled motorcycles offer a balance between stability and maneuverability. They have larger engines and more stability-enhancing features. For providing a thrilling ride.
This can bring a real blast to your off-road performance. Can-An has emerged as the father of evolution.
Similarly, the Can-Am RYKER series has always been great for motorcycle enthusiasts. The young racers who still need to grow up are the focus of this.
Can-Am Ryker was first introduced to the market in 2018. It was launched as a new model by Can-Am. A division of BRP (Bombardier Recreational Products),
Apart from the powerful engine and stunning bodywork, the Can-Am RYKER features plush suspension. You will also have a much more convenient low seat. And many more modern features will surely enhance the biking experience.
What are the Differences Between Can-Am Ryker Models?
Basically, the Ryker is a base model available with a 600cc or 900cc engine. In addition to its sport-oriented features, the Ryker Sport is powered by a 900cc engine that is more powerful. When riding on gravel and dirt roads, the Rally has special tires and longer suspension travel.
In more detail, each Can-Am Ryker features the following features:

1. Can-Am Ryker 600/900
Currently, the base model of the Can-Am Ryker with 900cc or 600cc engines is the cheapest. Although these trikes are affordable, they come with a variety of luxury features, including:
- Rotax® 600 or 900 cc engine
- Transmission with auto twist-and-go
- Control of vehicle stability
- The drive shaft technology requires less maintenance
- Fuel-saving Eco Mode & drift-friendly Sport Mode (900cc only)
- Adapts to all riders; customizable to 100,000+
2. Can-Am Ryker Sport
The Can-Am Ryker Sport is very similar to the base 900 models, but it comes with some more advanced features, including:
(All standard Ryker (900cc) features, PLUS:)
- Styles exclusive to sport models
- Comfortable (still slays corners): KYB† HPG with preload adj.
- Seats with sport comfort
- The MAX Mount now allows passengers and cargo to travel long distances
- Handling is dynamic and drift-ready with Sport Mode
- Controlling the cruise
3. Can-Am Ryker Rally
In contrast to popular belief, the Can-Am Ryker is not designed for off-road use, but can be used on gravel and dirt roads. With the longest suspension travel and ground clearance, this model offers many useful features, such as:
All standard Ryker (900cc) features, PLUS:
- Traveling suspensions for longer periods
- Ground clearance that is higher
- Rims with more strength
- Tires designed for rallies
- Bar with pushbutton
- Plates for skids
- Pre-filter intake
- Flaps for mud
- LED lighting and Akrapovi exhaust systems
- Handguards for rally handlebars
- A comfortable seat and anti-slip pegs
- Full KYB† HPG shocks w/ remote adjusters and +1 in. suspension travel
- With MAX Mount, you can carry cargo and passengers long distances
- A dirt drift-friendly cornering mode exclusive to Rally Mode
- Controls for cruise control
What are the Top Features of Can-Am Ryker for Sale?
When you’re getting a 3-wheel motorcycle for yourself. Knowing the spaces and features of your motorcycle is essential. Because It’ll give you a better idea about the motormotorcycle.
1. High-performance Engine
Three-wheeled motorcycles are characterized by their powerful engines. This machine has an astonishing amount of power. With two cylinders and liquid cooling, the Can-Am Ryker 600 has electronic fuel injection and throttle control.
A Ryker with a 600 engine produces 50 horsepower (37.3 kW). With three cylinders and a liquid-cooled engine, the Can-Am Ryker 900 has electronic fuel injection and throttle control.
It’s a carburetor engine. However, an interesting part is that it ensures fast voltage rise and shorter Spark duration.
2. Convenient Transmission
The Can-Am RYKER comes with Automatic transmission (CVT) with a reverse function. It offers riders the ease and simplicity of operating a vehicle without the need for manual shifting.
The CVT transmission provides smooth acceleration and effortless gear changes. So, it provides a convenient and hassle-free way to explore the road ahead. Riders can focus on enjoying the ride rather than managing gears.
3. Super Durable Chassis & Suspension
Chassis and suspension systems are two of the most indispensable factors, especially for off-road motorcycles. Thankfully, the Can-Am RYKER has something to gratify in this sector. First up, it features twin-tube coil-over shocks with preload adjustments
The motorcycle provides excellent maneuverability and handling. Durable fork boots protect the fork seal and stanchion. At the same time, its eccentric chain adjusters in the steel swingarm add an extra layer of convenience.
Talking about the suspension system, this motorcycle features a motocross link single-shock rear suspension. It delivers smooth and dynamic suspension performance. In the front suspension, there’s a multi–link–mono swing arm.
4. Reliable Brakes & Wheels
You’ll never know when you meet any danger. In an emergency, the thing that will protect you is the brakes.
It has both drum and disk brakes. Foot-operated, hydraulic 3-wheel brakes are found on the Can-Am RYKER. Nissin 2-piston floating calipers grip the front 270 mm discs.
Front-wheel measurements are MC 145/60R16 66T, while the rear portion has a 220 mm disc with a floating piston caliper. Both wheels have durable aluminum spokes.
If we talk about the tires, we found them to be pretty good as there’re motocross-spec knobby tires.
5. Convenient Seat Height
This Can-Am RYKER has a convenient seat height, making it ideal for motocross and enduro riders. The Ryker with 600 engine seat height is 23.6 in. (599 mm). On the other hand, the Ryker with 900 engines has 23.5 in. (597 mm).
A correct fit requires that the rider sits in the saddle of the motorcycle. However, you can adjust the seat height to find the most comfortable position.
6. Can-Am RYKER Top Speed
There is a 102 mph top speed on the Can-Am RYKER. Around 105 mph is what that is. This is a remarkable speed for a motorcycle.
But you shouldn’t aim for this speed. Liquid-cooled engine and five-speed transmission allow this motorcycle to maintain a high-speed range. It has a decent speed, excellent handling, and high-tech systems.
However, if hitting the highest possible speed is something you are keen on, this motorcycle is not what you are looking for.
What are the Accessories Available for Can-Am Ryker?
The Can-Am Rykethree-wheeled motorcycle offers various accessories. To enhance its performance, comfort, and style. Some popular Can-Am Ryker accessories include:

1. Windshields: Different sizes and styles of windshields are available. To provide wind protection and improve rider comfort.
2. Storage options: Saddlebags, rear racks, and storage compartments for increased storage capacity for carrying personal belongings.
3. Comfort upgrades: Accessories such as adjustable handlebars, heated grips, and upgraded seats can enhance rider comfort during long rides.
4. Audio systems: You can install Bluetooth speakers and audio kits to enjoy music and navigation while riding.
5. Performance enhancements: Upgrades like performance exhaust systems, air filters, and fuel controllers can improve the Ryker’s power.
6. Lighting upgrades: Additional LED lights, fog lights, or accent lighting can improve visibility and enhance the motorcycle’s appearance.
What are the Pros of Can-Am Ryker?
1. Stability: The three-wheeled Can-Am Ryker provides enhanced stability. In contrast to traditional two-wheeled motorcycles. It offers a more confident and secure riding experience.
2. Easy to Ride: The Can-Am Ryker is known for its user-friendly nature. The automatic transmission option and intuitive controls contribute to its ease of operation.
3. Can-Am RYKER sport: Also, the Can-Am offers a sporty version called the Can-Am Ryker Rally Edition. The Ryker Rally Edition is designed with a more aggressive and sport-oriented look, featuring unique styling elements
4. Customization Options: Can-Am offers a wide range of accessories and customization options.
5. Comfort: The Ryker features a comfortable riding position with ergonomic seating and adjustable handlebars, ensuring a relaxed and enjoyable ride.
6. Maneuverability: The lightweight and nimble nature of the Ryker make it highly maneuverable. It is ideal for navigating through urban traffic or tight spaces.
What are the Cons of Can-Am Ryker for Sale?
1. Limited Weather Protection: As an open-air vehicle, the Ryker offers less protection from the elements compared to. Riders may need to consider additional gear or accessories for adverse weather conditions.
2. Storage Capacity: The Ryker has limited storage space. It may require additional accessories or modifications. For carrying luggage or personal items.
3. Passenger Comfort: The seating arrangement and lack of a backrest may reduce comfort during extended rides.
4. No Reverse Gear: Some earlier models of the Can-Am Ryker did not include a reverse gear. That’s making it more challenging to maneuver in tight parking spaces or when backing up.
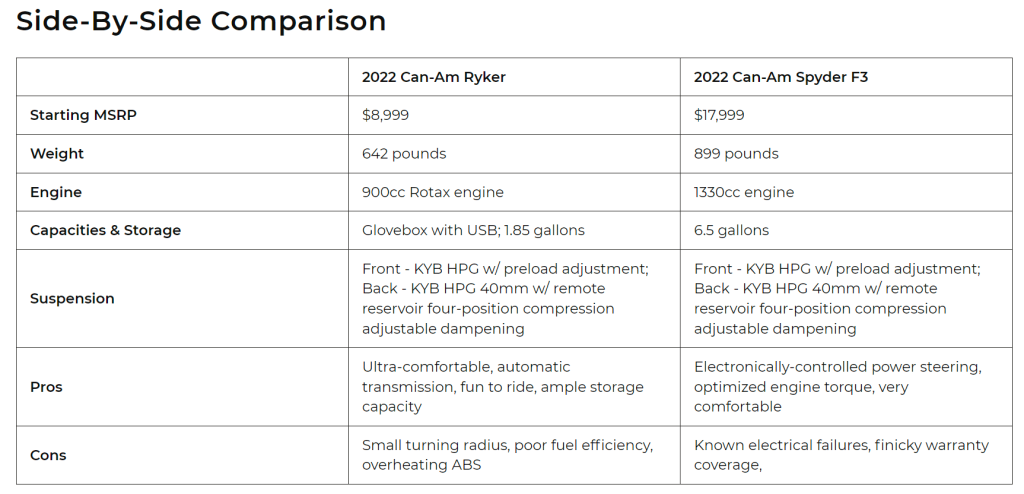
Can-Am Ryker Vs. Spyder: Which is better?
The Can-Am line of three-wheeled motorcycles is a great choice if you’re looking for a three-wheeled motorcycle. There are several unique features and an exciting writing experience included in these two Can-Am models.
Of course, there are many factors that go into determining which one is best for your needs, including your personal preferences and budget.
In addition to your budget and personal preferences, the best option for you depends on a number of factors. In the end, the Can-Am Spyder RT Limited and the Can-Am Spyder F3 Limited are two great options when it comes to three-wheeled motorcycles. There are a lot of features on both of them, so you can be sure that they will provide a pleasant ride.
Learn more at here.
Top 7 Reasons to Choose the Can-Am Ryker
1. Two or three cylinders are available
It produces 47 horsepower and 35 lb-ft of torque with a 600cc twin-cylinder engine. Spend another $1,500 and you’ll get a 900cc triple with 77 horsepower and 56 lb-ft of torque. The Ryker 600 weighs 22 pounds less (594 pounds) than the Ryker 900 (616 pounds).
For the Ryker to remain affordable, a manual transmission was out, and a semi-automatic dual clutch would have been too expensive. As a result, Can-Am went with the twist-and-go transmission that it has experience with: a CVT.
What makes it so important to make it twist and go? It’s more fun to drift when you’re not worried about gear changes, says engineering product manager Vincent Varaldi. And no one likes a manual transmission when you’re stuck in traffic.
2. It’s Perfect for Everyone
The majority of motorcycle customers choose their bikes based on their fit. Hard pass if the machine sits too tall, too short, or requires your arms to be outstretched uncomfortably. There will be no problem for Ryker riders in any of those situations.
Fore and aft adjustments of the handlebars and footpegs can be made quickly without the need for tools. For canyon riding, we pulled the bars and pegs closer, and pushed them back later in the day for highway cruising.
3. It’s designed for corners
Compared to the canyon hustler, the Can-Am Spyder was a better touring machine. The aggressive stability-control system would sap all the fun if you rode it too hard even at fairly low speeds. With a seat height of only 23.5 inches, the Ryker sits lower to the ground. There is a sense of plantedness when you hit a set of switchbacks.
The steering is manual, but it gives you that feeling of being connected to the road. The downside is that precise steering can be too sensitive at freeway speeds and can follow pavement undulations.
4. You can get a Badass Rally Edition
The vehicle costs $10,999 and includes adjustable KYB dampers, an inch more wheel travel, and off-road tires. As well as adding more foam, the seat has a softer cushion to absorb some of the impact of rough roads.
5. Stability Control Can Be Adjusted
In the Ryker 900’s instrument cluster, you can toggle between Eco and Sport modes by pressing a rubberized button. Smoky burnouts are possible when you engage Sport, which loosens up the stability control program. In contrast to the original Spyder’s stability-control system, this one is smooth and subtle.
For riders who want to drift completely sideways on a dirt road, Bosch developed a Rally mode for the Ryker’s Rally Edition.
6. The swing arm is a work of art
With no belt drive or chain, the Ryker’s single-sided aluminum swing arm looks clean and beautiful without a belt drive. Varaldi says a chain would have been too long and a belt would have required raising the seat, which would have raised the center of gravity.
There can be a clunky, jacking sensation in the driveline of some motorcycles with shaft drive, but the Ryker was easy to ride.
7. Colors change
A lot of attention has already been drawn to the Ryker. Aside from its flat black body panels and wheels, our test vehicle looked especially futuristic, as if it had been created by Wayne Enterprises. It takes about five minutes to swap the panels if we want to go orange.
Final Thought: Can-Am Ryker for Sale
To finalize, we can clearly say, the Can-Am Ryker is a great motorcycle for young riders and beginners. Today, we have covered all the facts about this 3-wheel motorcycle and what makes it great in Can-Am RYKER for sale.
With this 3-wheel motorcycle, you’ll enjoy a remarkable riding experience. Everything about this motorcycle is top-notch, from the powerful engine to the convenient electronic start.
Read more of our articles here.
FAQs
Where can I find a Can-Am Ryker for sale?
Can-Am Ryker motorcycles are available for sale at authorized Can-Am dealerships. Check the Can-Am website, and contact your local dealer for information.
What is the price range for a new Can-Am Ryker?
The price range for a new Can-Am Ryker can vary. Prices for new Can-Am Ryker models start from around $9,000 and can go up to $12,000 or more.
Are there any used Can-Am Ryker models available for sale?
Yes, used Can-Am Ryker models are often available for sale. Online marketplaces and local classified ads sell pre-owned Can-Am motorcycles.
What is the warranty coverage for a new Can-Am Ryker?
Can-Am offers a limited warranty for their vehicles, including the Ryker. The specific warranty terms may vary.
What are the different models and trim levels of the Can-Am Ryker?
Can-Am offers various models and trim levels of the Ryker. The Ryker 600 ACE, Ryker Rally Edition, and Ryker 900 ACEn for instance. Each model may have its unique features and specifications.
Are there any current promotions or discounts available for purchasing a Can-Am Ryker?
Can-Am periodically offers promotions, discounts, or special financing deals for their motorcycles. Keep your eyes on the Can-Am website.

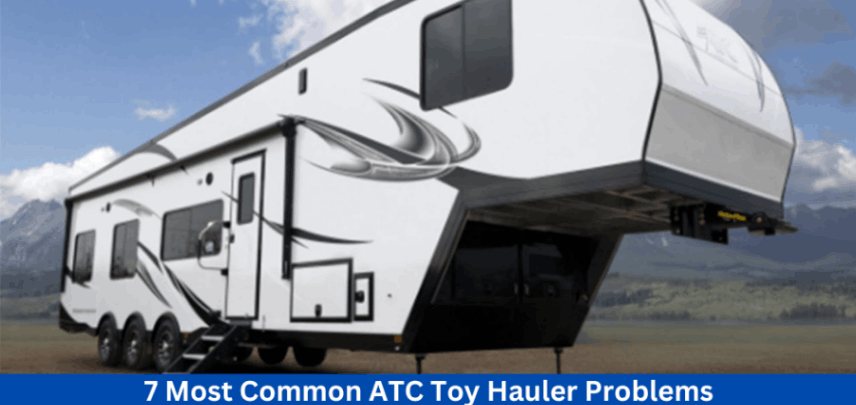
If you are a camping addict then you should get a Toy hauler for yourself. An ATC Toy Hauler RV is the best way to bring your favorite Powersports vehicle to the campsite when you are camping. However, the ATC Toy Hauler problems can bring difficulty when riding the RV.
Many RV-ers dream of having the flexibility that a toy hauler provides. But it also comes with some drawbacks. Knowing a little about ATC Toy Hauler can help, we will discuss ATC Toy Hauler Problems today to help you with that.
The most common ATC Toy Hauler Problems are sway problems, window and roof problems, tire problems, toilet problems, water problems, break problems, etc.
What Is an ATC Toy Hauler?
The ATC company manufactures RVs and trailers since 1999. When Steve Brenneman founded the company, he wanted to build and sell utility trailers that were more custom than one-size-fits-all. In the late 1990s, steel frame trailers were heavier and less durable than the aluminum frame trailers Steve created.
The same all-aluminum structure was soon used by ATC to make toy haulers as well. This unit features a modular furniture track system that can configured to meet your needs. As a result, owners can arrange furniture to suit their needs and create multi-functional spaces.
What Types of Toy Haulers Does ATC Make?
It makes two models of toy haulers called Game Changer and Game Changer Pro. In addition to travel trailers, both companies offer fifth wheels. Unlike the Game Changer models, the Game Changer models don’t have the configurable furniture track system. There is a permanent mount for the furniture.
Additionally, exterior colors are available in a variety of shades. Red, pewter metallic, charcoal, silver frost, black, and white are available in the Game Changer series, and silver frost is available in the Game Changer Pro series.
Why Are ATC Toy Haulers Unique?
Among the many brands and companies in the RV industry, what makes ATC toy haulers different? An all-aluminum construction used in the construction of ATC trailers as opposed to steel frames in steel-framed trailers.
As a result, many RVers will be able to tow the product with more vehicles since the weight has reduced. Furthermore, you will notice that many of their models feature aluminum cabinets and drawers, as well as light and bright color schemes. Most RVs have heavy wood interiors, which makes this a refreshing change.
While the company’s goals and focal points aim to distinguish them from the standard brand, they also seek to differentiate themselves from it. The first thing that stands out about ATC is its focus on quality over quantity. There aren’t any quotas to meet when trailers are being assembled. Assembly-line defects can avoided by slowing down for the larger companies by slowing down the assembly line.
Another aspect that distinguishes ATC from its competitors is its adherence to “True North” principles. The principles include respect for all people, meeting all customer requirements, delivering zero defects, and adding value to every activity.
According to them, this philosophy has created a company culture that values collaboration, honesty, and integrity in order to offer its employees and customers the best workplace and products.
How Good Are ATC Toy Haulers?
The construction of ATC’s products is one of its greatest assets. With an all-aluminum frame, this bag is durable and will last for years. As toy haulers, owners expect to transport their motorcycles, ATVs, bikes, golf carts, and other toys without worrying about the weight of the load on the trailer. No fasteners or fasteners used to fasten the six-sided aluminum box.
The construction does not include any wood. As a result, the wood will not rot or break over time. Additionally, it means that the trailers are lightweight. Consequently, owners of ATC units can tow them more easily than other competitors.
ATC Toy Hauler Overview
Nature is becoming a refuge for people who are tired after a hard week in this eco-conscious era. As a result, you have a wide selection of toy haulers to choose from. Toy haulers like ATC Toy Hauler are among the best.
ATC’s Game Changer toy haulers have flexible garage space. It features the industry’s first configurable furniture track. This allows you to easily move or remove your furniture.
In addition to transporting and accommodating recreational vehicles, ATC Toy Haulers also hold large vehicles, like ATVs, motorcycles, and dirt bikes.
The ramp door of the ATC Toy Hauler made of all aluminum can carry anything. With no wood to rot, it’ll last for years.
What are the Major Features of ATC Toy Haulers?
1. Construction
As far as the trailer industry concerned, ATC’s construction is well known for its quality. The aluminum in the trailer carried throughout by ATC, which stands for Aluminum Trailer Company.
In contrast to RV roofs made from rubber or vinyl, the one-piece aluminum roof made from a single roll. To ensure durability and performance, it bent over the sides of the roof bows and glued in place.
The frame made of aluminum tube and welded around the entire perimeter, with an aluminum extruded floor on top. It does not contain any wood. A sturdy, all-aluminum ramp door can hold anything you can fit inside the toy hauler, and since there is no wood to rot, it will last for years to come.
2. Flexibility
You can customize the garage space in ATC’s Game Changer toy haulers to fit your needs. When the toys are gone, you can use it as a comfortable living room or bedroom when it’s not full of toys.
A configurable furniture track makes it easy to move and remove your furniture with the Game Changer PRO.
3. Simple to clean
There is nothing wrong with getting dirty in the garage. When you are riding ATVs and dirt bikes all day, the last thing you want to worry about is the mess they will make inside your trailer. A hose can easily used to clean the extruded aluminum floor, allowing you to fully enjoy your getaway.
4. Efficacious
The upfront costs may be higher, but that’s the price you pay for ATC’s quality. The trailers they manufacture built to last and retain their value for years to come. The value of an RV depreciates immediately after you drive it off the lot. ATC, however, does not operate in that manner.
Toy haulers built to last longer, so you’ll spend less time getting them repaired than you would with an average RV. Therefore, you have more time to enjoy it and less time and money to spend on repairs.
Additionally, since it’s made of aluminum, it’s 10-15 percent lighter, so you don’t need a large tow vehicle to tow it.
5. Cargo Capacity
It also means you will be able to haul more inside your toy hauler thanks to the 10-15 percent lighter weight. After all, if you want to haul your toys, why shouldn’t you be able to carry everything you need? ATC Game Changer toy haulers designed to maximize space without sacrificing comfort.
What are the Common Problems of the ATC Toy Hauler?
Let’s discuss the usual ATC Toy Hauler problems you might face.
1. Sway Issues in ATC Toy Hauler
Unevenly distributed weight within the trailer can lead to instability and sway during towing. Crosswinds or passing vehicles can exert lateral forces, and insufficient or incorrect hitch setup is the main cause of the sway.
Improper balance can sway in the slightest breeze, causing a variety of problems. It is possible to blow out your tires even in windless conditions due to uneven weight distribution.
The Sway issues often arise due to a sliding clutch, evident by higher engine pitch, Incorrect tire pressure, and reduced traction. Learn more at here.
Solution:
First, check the weight distribution of your cargo. Check the distribution and security systems. Uneven weight distribution can contribute to sway.
Next, inspect the tire pressure. Install sway control devices such as sway bars or weight distribution hitches. They help improve towing stability. Practice safe driving techniques.
2. Window and Roof Issues in ATC Toy Hauler
The Toy Hauler’s roof and windows consist of materials suitable for long-term exposure to the weather. The roof of your RV is identical to the sides. The usual shingled or tiled roof is seen on a house, to keep the weight down.
Prolonged exposure to bright sunshine and low-hanging debris (tree branches) can damage your roof.
Solution:
Keep the windows and roof clean from dirt, debris, and any buildup. Regularly wash them with mild soap and water. If you encounter window and roof problems contact the manufacturer or dealer.
Determine if they are covered under warranty. Seek the assistance of qualified RV service technicians for a thorough inspection.
3. Tire Problems in ATC Toy Hauler
You should be familiar with flat tires if you have driven any land-based vehicle before your ATC Toy Hauler. It should come as no surprise that tire blowouts are a prevalent problem with recreational vehicles.
Solution:
Maintaining adequate inflation levels, inspecting tread wear regularly, and having a spare tire in excellent operating order.
4. Toilet Problems in ATC Toy Hauler
When camping in an ATC Toy Hauler, there are various alternatives to address the need to use the toilet. While opting for natural surroundings or utilizing a public restroom are valid choices.
They may negate one of the significant advantages of having a private bathroom within your ATC Toy Hauler. However, encountering issues with toilets can lead to costly water damage repairs.
Water not staying in or continually pouring into the toilet bowl due to valve or rubber seal difficulties are two concerns with RV toilets.
Solutions
If the toilet becomes clogged, avoid excessive flushing and use an RV-specific plunger to clear the blockage.
Ensure the black water tank is sealed and vented. Consider using holding tank treatments or deodorizers made for RV waste tanks. For controlling unpleasant smells.
5. Water Troubles in ATC Toy Hauler
Most ATC Toy Hauler users prefer utilizing their recreational vehicles in warmer months. A few people enjoy unnecessary exposure to the cold. Because of this, the majority of RV owners park their vehicles for the winter.
Damage to water pipes and pumps is a typical issue. Also, leaks, plumbing issues, water pump malfunctions, or problems with the freshwater or wastewater systems.
Solution:
When storing your RV, make sure your water tanks are empty to avoid the expansion that happens when water freezes, which can cause pipes to rupture or damage your pump.
Repairing work on RVs is a common occurrence nationwide. Occasional oversight or neglect of minor aspects, leading to the need for repairs across the country.
6. Cold interior in ATC Toy Hauler
When it comes to living in a comfortable and cozy RV during the cold winter months, the interiors are very important. People have difficulty sleeping and living in such an environment if the interior does not match the surrounding environment.
During winter months, many people complain that their trailers are too cold, so they run their blower motors constantly. Blower motors that run all night consume more power from batteries and shorten their lives.
In the ATC trailers, the walls are poorly insulated, resulting in a cold interior environment. Heat can escape from your heater due to poor insulation, increasing its efficiency.
Other factors contributing to the temperature change are their aluminum or metal floors.
There is more heat flow from the metal or aluminum interior, so you feel colder than with wooden interiors. They also complain about not being able to sleep well at night because the RV is out of power and the air conditioner or propane heater cannot run.
As a result of dampness or humidity inside the RV, the metal or aluminum floor remains cold. Add thick-layer carpets to your rooms and living rooms to solve this problem.
As well as heavy curtains, you should have curtains that keep the internal environment as conducive to your comfort as possible. It is also better to use insulated water pipes to reduce the heat loss from your rooms and living rooms.
7. Brake Repair in ATC Toy Hauler
Proper braking is essential when operating a large truck. Different brake components wear down with time. This wear is necessary as it generates the friction required to prevent forward movement in the first place!
If you’re comfortable doing mechanical work on other vehicles. You can translate those skills to your ATC Toy Hauler.
Stopping is vital regardless of the vehicle you’re driving. Of course, you’ll need the right tools, such as a sturdy jack to lift your travel trailer.
Solution:
From topping off your brake fluid to replacing the brake shoes, drums, or rotors. If you’re comfortable doing mechanical work on other vehicles. You can translate those skills to your RV.
Other Problems
The toy transporter will occasionally waver even if everything is done correctly. Do not panic; there are a lot of things you can do to control and stop swaying. Immediately use the manual brake-control override if you sense sway.
Take your foot off the accelerator, and use your tow vehicle’s brakes sparingly. This might exacerbate wobble. If you’re already in the right lane, you should steer straight or attempt to get off the road as safely as possible.
You should pull over or stop at a rest stop if you are driving in strong winds.
What are The Pros of a ATC Toy Hauler?
1. Vehicles of Versatility
There are many reasons why people use toy haulers. Besides hauling off-road toys, you can also use it as a mobile workshop, an art studio, or a live-in toolshed for landscaping or construction. The only limit is your imagination.
2. A safe, secure transportation system
A Your powersports vehicle or other valuables are much more secure in a toy hauler than in an open bed trailer. Furthermore, they are waterproof, snowproof, and mudproof.
3. Luxury and comfort
In addition to being self-contained RVs, you also have a full-service living area with a kitchen, bathroom, beds, and couches. With party lighting and entertainment systems, you can make it even more deluxe!
What are The Cons of a ATC Toy Hauler?
1. Space is sacrificed
There is only so much space an RV can have. The space dedicated to toys cannot used as a living space for at least a short period of time.
2. Fumes and dirt in your home
It is likely that your off-road vehicle will shed some dirt and introduce gas and oil odors into your RV.
3. Towing requires heavy-duty trucks
The weight of a toy hauler is higher than that of a similar-sized conventional travel trailer because they built to carry cargo. As soon as your toys loaded, you’ll be hauling significant weight, so you’ll need a powerful tow truck.
Can an ATC Toy Hauler be Worth the Money?
In order to understand how RVs and toy haulers differ, let’s first explore the differences.
On a basic level, toy haulers built to haul toys – such as ATVs, UTVs, dirt bikes – whereas RVs built to live in. The following are some other differences: Due to the lack of a garage, RVs tend to have more luxurious features and a greater living space.
While toy haulers have less living space due to the garage space, most are multifunctional, with fold-down sofas and tables, and the fold-down rear ramp functions as a porch. A typical RV is designed for highway travel, whereas a toy hauler is designed for off-roading.
Due to the fact that motorsports equipment is hauled with toys haulers, they are generally heavier.
If Stealth Nomads, which are more basic and have more basic features, are an affordable option if you’re looking for a toy hauler on the lower end of the price spectrum. Despite this, ATC toy haulers are where you will be able to compete with RVs in terms of price and features.
What are the Tips for Maintaining ATC Toy Haulers?
1. Beware Of Leaks
No RV roof leaks are a common issue with all RVs, no matter how high quality they are. RV roofs deteriorate over time due to exposure to the elements, high winds, and low hanging branches.
2. Cleanse Frequently
The chances are high that you’re planning on having fun and spending time in the great outdoors when you take your toy hauler camper out for the weekend or on an extended trip. Your camper can easily become cluttered, dirt can get tracked in, and food can spill during these trips.
You should thoroughly clean the interior of your toy hauler camper after every trip. The flooring and countertops will protected in this way.
3. Lubricate Moving Parts
There are many different styles of toy hauler campers, but all of them contain at least a few moving parts. To ensure that these parts continue to function as intended, they must lubricated properly. Spend some time every season lubricating parts as needed.
Final Thought: ATC Toy Hauler Problems
ATC Toy haulers have a place in the RV industry. Especially for people who bring a lot of gear with them on their camping trips. Nevertheless, for some riders, living in their trailer provides serenity and tranquility.
While ATC toy haulers offer numerous benefits. They can also experience certain problems. ATC Toy Haulers require regular cleaning, maintenance checks, tire maintenance, sealing and caulking, fluid and tank maintenance, and storage considerations.
Read more of our articles here.
FAQs
What is an ATC Toy Hauler?
An ATC Toy Hauler is a type of recreational vehicle (RV). For hauling and transporting motorized toys, such as motorcycles, ATVs, or dirt bikes.
What makes ATC Toy Haulers different from other RVs?
ATC Toy Haulers for their durable construction, lightweight design, and customizable features. Built with all-aluminum frames, they are lighter and more resistant to corrosion than traditional RVs.
What are some potential electrical issues with ATC Toy Haulers?
Electrical problems can occur in ATC Toy Haulers. Faulty wiring connections, blown fuses, or malfunctioning appliances for instance. It’s important to check the electrical system daily and address any issues.
Do ATC Toy Haulers have structural or frame-related problems?
While their sturdy construction is well-known, ATC Toy Haulers are. Some owners have reported issues with frame welds, floor delamination, or corrosion.
What are some reported problems with the interior features of ATC Toy Haulers?
Common interior issues in ATC Toy Haulers can include malfunctioning appliances, furniture defects, or issues with cabinetry.
Are there issues related to the trailer’s exterior components?
Exterior problems in ATC Toy Haulers can rage from faulty door latches. Problems with awnings or windows, or issues with exterior lighting.
A throttle valve deletion is a diesel engine adjustment that may be performed to increase performance and fuel economy. It is crucial to remember, however, that changing the engine’s intake system, especially removing the throttle valve, can have both advantages and disadvantages.
The throttle valve is a butterfly valve that regulates how much air goes into the engine. When the throttle valve is removed, the engine allows air to circulate more freely, resulting in higher horsepower and torque.
Furthermore, the throttle valve can produce agitation in the intake manifold, resulting in poor fuel economy. On the contrary, this turbulence may be minimized by removing the throttle valve, which can contribute to greater fuel economy.
So now let’s have a look at throttle Valve delete Pros and Cons from this article.
What is a Throttle Valve?
A throttle valve is a component of a vehicle’s powertrain. This valve directly controls the gasoline flow and, by extension, the engine’s output of power. On a carburetor-equipped engine, the throttle valve is also known as the butterfly.
As the accelerator is depressed, the intake or butterfly lever opens and allows more air and gasoline to enter the combustion chamber, thereby increasing the engine’s power. In a fuel pump system, this valve modulates the passage of air while the onboard computer manages the flow of oil.
What are The Function of Throttle Valve?
The throttle valve controls the supply of air or mixture to the combustion engine. This fulfills many functions based on the engine design.
In the case of gasoline engines, acceleration, and power output are controlled by ventilation or mixture dose.
In general, diesel engines do not require a throttle valve. Throttling the quantity of intake air in current diesel automobiles, on the other hand, allows for more precise control of exhaust gas recirculation and prevents the engine from trembling when the key is turned off.
The throttle valve is located in the combustion engine’s intake air system. The angle at which the valve opens influences the amount of fresh air or air/fuel combination that enters the cylinders (in carburetor engines, for example). The throttle valve in earlier engines is directly attached to the acceleration pedal and is actuated physically through a cable. There are several operating principles for contemporary vehicles.
Throttle Valve Delete Pros and Cons: Explained
Throttle Valve Delete Pros and Cons involves various factors. Lets dive deeper to learn more about it.
Pros of Throttle Valve Delete
Increased Airflow
By eliminating the throttle valve, you may enhance engine airflow by decreasing constraints in the air intake system. Hence, this can boost the engine’s power production, particularly at higher RPMs.
Increased Horsepower and Torque
When the throttle valve is removed, the engine allows air to circulate more freely, resulting in higher horsepower and torque. This is due to the engine’s ability to ingest extra air and fuel, which may then be ignited to generate greater power.
Improved Fuel Economy
It is also possible to enhance fuel economy by removing the throttle valve. When the engine is not confined by the throttle valve, it can operate faster. Furthermore, lower emissions may lead to greater fuel efficiency.
Reduced Emissions
In addition, removing the throttle valve can reduce emissions. This is because when the throttle valve is removed, the engine becomes capable to consume fuel more quickly. In addition, lower emissions can contribute to enhanced fuel economy.
Smoother Engine Operation
Eliminating the throttle valve can also improve engine performance. Because the engine can operate more efficiently when the throttle valve is not constrained. This can be advantageous for efficiency and enjoyment.
Improved Throttle Response
By removing a throttle valve, the engine may react to varying throttle inputs more rapidly. Because of enhanced gearshift response and a more direct link between driver input and engine output.
Simplified Intake System
Eliminating the throttle valve removes a part from the combustion system, resulting in a potentially simplified and lighter design. Some performance aficionados seeking to decrease weight or streamline the engine compartment may find this desirable.
Cons of Throttle Valve Delete
Loss of Low-End Torque
The purpose of throttle valves is to modulate ventilation and optimize torque delivery across the RPM range of the engine. Eliminating the throttle valve can reduce low-end torque, making the engine less responsive at low RPMs or during initial acceleration.
Compromised Idle Control
By regulating ventilation under idling conditions, throttle valves perform an important part in keeping a constant idle speed. Eliminating the throttle valve may make it more difficult to keep a consistent idle, leading to erratic idling or halting.
Increased Noise
Removing the vehicle’s throttle valve may additionally result in a boost in vehicle noise. This occurs because the engine can take in more oxygen and fuel, which can lead to increased noise. If you have concerns about pollution levels, you should test-drive a vehicle with a throttle valve delete before making a decision.
Potential Legality Issues
In certain regions, eliminating or altering exhaust control parts, including the throttle valve, may contravene emissions regulations and lead to legal consequences or problems passing emissions tests.
Reduced Fuel Efficiency
Changing the engine’s intake framework, especially deleting the throttle valve, might cause the proper air-fuel combination to be disrupted. This may result in a reduction in fuel economy, especially under regular driving conditions.
Compatibility and Drivability Concerns
Throttle valve removal adjustments might not be suitable for the engine’s control system or other parts. If not done correctly, this might cause compatibility or drivability issues, such as soaring, poor idle quality, or even engine failure.
Voided Warranty
The removal of the throttle valve may violate your vehicle’s warranty. This is because the alteration is deemed an aftermarket modification. If your car is still under warranty, you should check with your dealer to determine if the throttle valve removal would void your warranty.
Do You Need to Delete Throttle Valve?
In most circumstances, removing the throttle valve is unnecessary. The throttle valve is an essential component of the engine’s intake system, controlling airflow and maximizing engine efficiency under a variety of operating circumstances. The throttle valve controls how much air enters the engine, which influences torque delivery, fuel consumption, and drivability.
While removing the throttle valve can provide benefits such as greater airflow and better throttle action, it also has downsides and potential problems, as previously stated.
The engine management system in most current cars is intended to function in tandem with the throttle valve, and deleting it may interfere with engine function, ultimately resulting in drivability concerns and other issues.
Factors to Consider Before Throttle Valve Removal
- The flawless performance of the throttle valve is crucial to the vehicle’s best power growth in critical conditions. As a result, throttle valves play an important role in improving road safety.
- There are some factors to consider if you want to eliminate your throttle valve.
- To begin, ensure that your engine is suitable for the upgrade.
- Second, following the change, you might have to get your engine adjusted.
- Finally, performing the change yourself could revoke your warranty.
Conclusion: Throttle Valve Delete Pros and Cons
Now you might have a clear knowledge of Throttle Valve Delete Pros and Cons. Overall, removing the throttle valve is a straightforward alteration that can improve performance and fuel efficiency. A throttle valve deletion is an excellent choice to consider if you want to boost the efficiency of your diesel engine.
When choosing a throttle valve deletion, it is critical to thoroughly balance the risks and advantages. If you are unsure whether a throttle valve deletion is correct for you, contact with a skilled mechanic.
FAQs
What exactly is a throttle valve deletion?
The modification of removing the throttle valve or throttle body from an internal combustion engine is referred to as a throttle valve deletion. It is usually done as part of performance tweaking or modification.
What are the benefits of deleting the throttle valve?
Increased airflow, quicker throttle response, and a streamlined intake system are some of the possible benefits of deleting the throttle valve.
How does removing the throttle valve boost airflow?
The removal of the throttle valve reduces constraints in the intake system, allowing for higher airflow into the engine. This has the potential to boost power production, particularly at higher RPMs.
What is throttle responsiveness, and how does removing the throttle valve enhance it?
Throttle reaction refers to the engine’s capacity to react to alterations in throttle input rapidly and directly. Throttle valve deletion may enhance throttle response by removing a component that might cause lag or delay in engine response.
What does it mean to have a simple intake system?
A simple intake system is one in which the total amount of elements in the intake route is reduced. By removing the throttle valve, one such component is removed, possibly resulting in a simpler and lighter configuration.
Maintaining the appearance of your vehicle is a point of pride for car enthusiasts. Cleaning your vehicle with cleaner wax can help keep it in top condition. But it is not the end of the process. Knowing what to use after cleaner wax will help you maintain your vehicle’s shine.
After cleaning your car with cleaner wax, what can you do to maintain its luster? Trim detailers or dressings can be used for moldings and trim. Hard, shiny plastic can benefit from wax. Touch-up paint may be necessary for scratches that are intense. The best option is to repaint if the paint is incorrect.
Discover the best options for achieving a long-lasting, glossy appearance that will make your car stand out. Let’s know, what to use after cleaner wax?
What is Cleaner Wax?
A cleaner wax also polishes your vehicle as a one-step process. Cleaner wax removes all other debris (which car wash soap couldn’t reach). It is a one-step process that cleans and shines at the same time.
Cleaner waxes serve a dual purpose: offering protection and effectively eliminating minor surface defects. The best cleaner wax for cars;
- Meguiar’s G7016 Gold Class Carnauba Plus Premium Liquid Wax: Best Overall Wax.
- Mothers California Gold Pure Brazilian Carnauba Liquid Wax: Best Carnauba Liquid Wax.
- Turtle Wax Hybrid Solutions Pro Graphene Spray Wax: Best Spray Wax.
- Chemical Guys Butter Wet Wax: Best Soft Wax.
What’s The Difference Between Cleaner Wax And Normal Wax?
Cleaner wax is basically a normal finishing wax with abrasives and cleaning agents added to polish away surface defects and remove paint defects.
Unlike typical polishes, it leaves a protective paint sealant behind after polishing and removing contaminants.
When Should You Use a Cleaner Wax?
It is only necessary to use cleaner waxes when light contamination or light scratches on the clear coat need to be removed. Using a cleaner wax is pointless if your vehicle doesn’t have many defects and the finish is glassy smooth.
Wax cleaners remove a thin layer of paint from the surface. When you make paint thinner unnecessarily, you reduce the amount you can polish it later when you may need the extra thickness.
Is Cleaner Wax the Same as Polish?
Cleaner waxes are similar to polish, but not quite the same. A cleaner wax contains a polishing abrasives and chemical cleaners in addition to a finishing wax or sealant.
The cleaner wax will leave behind a layer of protection after polishing your car or truck, eliminating the need to apply a wax or paint sealant afterward.
How Do You Use Cleaner Wax?
- With a dual action polisher or by hand, cleaner wax can be applied. A bit of liquid product is applied to the polishing pad, then dabbed around the area you’re polishing.
- When polishing by hand, use circular motions.
- When using a DA polisher, work in sections of 2 feet by 2 feet and move the polisher horizontally. Be sure to overlap with the previous path to ensure that no area is missed in the opposite direction.
- Repeat the process vertically after polishing the horizontal area.
- Once you are done, you can buff away any remaining cleaner wax, and you should now have a high-gloss finish once again.
How Often Can You Use Cleaner Wax?
There is generally no problem with polishing a car or truck 4 to 5 times over its factory paint’s useful life. It is possible to compromise the integrity of the clear coat by applying more than this because the clear coat contains UV inhibitors that protect the paint from fading and oxidation.
Although you may have enough paint thickness to polish several times, you may have purchased your vehicle second-hand and do not know how many times it has been polished. You can use a paint thickness gauge to determine if you need to polish again if you’re concerned that you have less paint than is acceptable.
What To Use After Cleaner Wax?
Yes, if time and budget aren’t an issue, you can apply another layer of wax after the Cleaner Wax. However, it is essential to ensure that this wax does not contain any cleaning agents or polishing oils.
For some time, a debate has been raging on the internet about whether you should use after-cleaner wax. People have been taking both sides of the argument, so let’s take a look at a few of the reasons why it might be beneficial.
What are the Enhancers to Apply After Cleaner Wax?
Applying a cleaner wax to your car is a great way to keep it looking shiny and new. However, for an even deeper shine. You can apply many methods of enhancers after the cleaner wax.
Remove Contaminants Using a Clay Bar
Apply a lubricant to the car’s paint and rub the clay bar over it. By sliding over the paint, the clay bar will begin to pick up contaminants. Clean the car with a microfiber cloth after removing all the contaminants.
Benefits of Clay Bar Application
Clay bars are useful for removing contaminants left behind by cleaner waxes. Surface contaminants like rust or tar can be grabbed and removed by clay bars.
Furthermore, applying wax or sealant to the surface afterward provides an added layer of protection, safeguarding the paint from the elements.
Refine The Finish With a Polishing Compound
Using a microfiber cloth, apply a small amount of polishing compound. In order to achieve the desired polished finish, repeat this process a few times.
To achieve a glossy finish, buff off the polishing compound after it has been applied. As a result of buffing, the paint becomes smoother.
Benefits of Polishing Compound
The polishing compound not only helps to shine the paint but also seals and protects it from future harm. This helps to ensure that your car retains its beautiful appearance for longer.
It helps to remove any remaining surface imperfections. Also, helps to protect against further damage.
A Shinier Finish With Carnauba Wax
Before applying carnauba wax to your car, prepare the surface properly. Wash your vehicle with soap and water, then dry it with a clean microfiber cloth.
Once the car is completely dry. Apply a small amount of the wax with a foam applicator pad or cloth. Spread it over the surface in a circular motion. Allow the resin to cure for several minutes.
Benefits of Carnauba Wax
When applied after a cleaner wax, Carnauba wax can give a vehicle’s finish an extra shine. It also helps to protect the paint from the sun’s UV rays. It protects against smudges, streaks, and other environmental contaminants.
Regular car washes can help preserve the car’s paint and keep it looking attractive.
So, carnauba wax is a great way to enhance the shine of a finish. The car can look stunning and show-worthy with the proper application and care.
Apply quality Sealant
Apply a quality sealant onto the car’s exterior surfaces. Apply the cleaner wax with a soft foam applicator after washing the vehicle. The sealant provides a protective layer between the car’s exterior and the outside elements.
It helps prevent the paint’s fading and decay and makes cleaning and maintenance easier.
Benefits of Sealant
The sealant helps protect the paint from contaminants such as road salt. It can make removing dirt, grime, and road film easier. It further helps to give the color a glossy and vibrant finish, making it look better for longer.
And so, the glossy finish can be achieved with no issues.
Apply Synthetic Wax
To apply the wax, use a foam applicator pad and a microfiber cloth. First, apply the wax in a thin, even layer on the entire vehicle, covering every surface. Once the wax is dry, buff it out with a microfiber towel.
This will help to work the wax into the paint and create a glossy shine. With the right approach, you can achieve a clean car or complete detail with a thorough wash.
Benefits of Synthetic Wax
Synthetic wax is a superior protective layer to cleaner wax. As it is more durable and offers a longer-lasting shine and protection for the paint.
By using a combination of cleaner wax and synthetic wax, your vehicle’s paint stays protected. This is for a more extended period and is more resilient against dirt, debris, and harsh weather conditions.
To properly wax your car, start by washing the surface with soap and water and drying it with a clean cloth. Then apply a light coat of cleaner wax, spread it, and let it dry to a haze. Repeat this step with synthetic resin. Finally, buff the car’s surface with a clean cloth to shine.
What To Use After Cleaner Wax: Importance of Using Enhancers
Using an enhancer after a cleaner wax helps to add an extra layer of protection and gloss to your car’s finish. Enhancer works in various ways, such as:
Restoring shine: Enhancers help restore shine by adding depth and clarity to the paintwork. They provide a glossy finish that enhances the overall appearance of the car.
Masking minor imperfections: Even after using a cleaner wax, some minor scratches, and swirl marks may be visible on the paint. Enhancers contain fillers and polishing agents. That can help mask these imperfections.
Protection against environmental factors: Enhancers often include protective ingredients like polymers, waxes, or sealants. The protective layer helps prevent further damage or fading.
Prolonging the lifespan of the cleaner wax: Enhancers can extend the durability and longevity of the cleaner wax applied previously. By adding a layer of protection and enhancing the shine, they help preserve the results achieved from the cleaner wax.
5 Reasons Why You Can Apply Another Layer Of Wax
Your car will look better and be protected more if you apply a second layer of wax after the initial cleaner wax. Paint blemishes, scratches, and swirls should not be concealed by cleaner wax.
Neither will it give you a glossy look, nor will it provide lasting protection. A number of scenarios need to be considered here, and the application would depend on the reasons.
Reason 1: For The Moldings And Trim
In areas such as the dashboard and door panels, textured plastic is commonly used on the exterior of cars. This plastic should be treated with a trim detailer or dressing to keep it looking new and prevent discoloration.
This can be accomplished with Meguiar’s Ultimate Black Plastic Restorer. Besides protecting plastic from UV rays, this product gives it a glossy finish. A longer-lasting shine is also achieved with the product because it helps repel dust and dirt.
Reason 2: For Preserving The Paint Job
The finish of a car takes on a glossy and hard appearance after applying a cleaner wax. To help preserve the paint job of a car, you can also use shiny plastic wax.
To treat the entire car, begin by using Swirlx, a mild-abrasive compound. It is important to seal your car’s finish with a sealant in order to prevent dust, dirt, and UV rays from damaging the finish. In addition, it can improve your car’s appearance by reducing the appearance of minor scratches and blemishes.
Reason 3: For Removing Visible Scratches And Swirls
Meguiar’s ScratchX can be used on smaller areas if scratches remain visible. You can then move on to Ultimate Compound if this doesn’t work.
The Scratch X and ultimate compounds are great for removing visible scratches on the exterior of your car. You can then buff out the scratch with a clean cloth after you rub the product on the scratch.
You should also avoid using purple power paint on autos due to a few drawbacks.
When used on automotive surfaces, purple power paint may result in decreased visibility, sunlight fading, and chipping or peeling. Therefore, if you are advised to use this approach, be careful!
Reason 4: For Removing The Deeper Scratches
It may be necessary to purchase some good quality touch-up paint and use a fine-tip paint brush to repair deep scratches. It should be invisible and last for many years without rusting if the repair is done correctly.
A touch-up paint job can be a great way to repair your car’s paintwork. Cleaning and removing dirt or debris must be done before starting the repair process.
It is best to use a mild car soap or scratch remover for this. Once the area has been prepped, apply the touch-up paint with a small brush. You may need to add an additional layer if needed after letting the first one dry completely.
Applied properly, the repair should be seamless and protect the exterior from rust and other problems.
Reason 5: For Safeguarding Damages From Severe Scratches
In cases where the scratch is too severe, it is best to respray. As a result of the job, the scratch must be removed by sanding down the area. In order to give it a fresh new appearance, primer, a base coat, and a clear coat are applied.
Before repainting, the area must be thoroughly cleaned and all dirt, oils, and other contaminants must be removed. It is then necessary to apply a primer so that the paint has a consistent and even base, followed by a base coat to restore the color.
It is essential to apply a clear coat to protect the paint, and as mentioned previously, such outlining gives a glossy finish.
Tips & Tricks for Using Enhancers After Cleaner Wax
To prevent scratches, use a microfiber cloth and gentle car wash soap. UV damage and other environmental factors can be prevented by doing this.
Apply a sealant or clear coat to your car. Apply a quality sealant or clear coat designed for automotive use.
Scratches and chips can ruin the look of your car’s paint job. Wash and wax your car carefully to avoid scratching the paint.
Keep your car looking great by maintaining a durable paint finish. A long-lasting paint job requires proper cleaning, waxing, protection, and avoiding scratches.
What are the Disadvantages of Cleaner Wax?
Is the phrase “Jack of all trades, master of none” familiar to you? The same can be said of most products that attempt to do several things at once. Cleaning waxes aren’t the best waxes or polishers, neither will they give you the best results. A big job can be cut in half with this method.
80% of the outcome results from 20% of the input, according to the 80-20 rule. This is an example where focusing on 20% of the results can yield 80% of the results.
Purchasing two separate products to shine and protect your vehicle will give you an extra 20% of results, but most people will be happy with the outcome of a good cleaner wax.
Is cleaner wax bad for your car?
Using cleaner waxes on a regular basis isn’t recommended, but they aren’t harmful. Designed to remove paint contaminants and imperfections from your car’s clear coat, it’s formulated with powerful cleaning chemicals and harsh abrasives.
Over time, minor surface defects and environmental contaminants will accumulate on your daily driver. A cleaner wax removes a thin layer from the surface of clear coats. It also removes bonded microscopic road grime and environmental fallout that normal car care and washing can’t remove, such as light swirls and scratches.
By removing these defects and surface contaminants periodically, you can restore a high gloss to your paint and leave a layer of protection on the surface.
Conclusion: What To Use After Cleaner Wax
When you are wondering what to use after cleaner wax. Ensure maximum shine and protection by using a finishing wax. By sealing the cleaner wax and adding a finishing wax, you can achieve a long-lasting glow.
Cleaner wax provides some level of protection for the vehicle’s paint. But, it is less durable and long-lasting than synthetic waxes. Using an additional product after cleaner wax can enhance and extend the protection of the vehicle’s paintwork.
Frequently Asked Questions
Why is it necessary to use something after cleaner wax?
Cleaner wax provides some level of protection for the vehicle’s paint. But, it is less durable and long-lasting than synthetic waxes. Therefore, use an additional product after cleaner wax to enhance and extend the protection of the vehicle’s paintwork.
When should you use a cleaner wax?
When the paint is heavily oxidized or needs a deep cleaning use cleaner waxes. This removes contaminants from the surface.
How often should I apply these products?
The frequency of application depends on various factors such as the product used, driving conditions, and climate. Ceramic coatings provide long-term protection, lasting two to five years. Refer to the manufacturer’s recommendations for the specific product you choose.
What is the difference between cleaner wax and polish?
Wax that is cleaner is not the same as wax that is polished. Cleaner wax combines wax and cleaner and is best used to protect and clean the paint. While the polish is best used to remove defects and restore shine.
How often should I use cleaner wax?
You should use cleaner wax on your vehicle’s paint every 3-4 months. This will help eliminate any contamination or buildup accumulated on the color. Cleaner wax will provide extra protection if done.
Dirt bike spark plugs are essential to a motorcycle’s performance, and depending on whether you ride a two-stroke or four-stroke, how much attention you should pay to them will vary.
When you go off-roading, a spark plug ignites your fire, burning it bright. The spark plug on 2-stroke and 4-stroke dirt bikes is required, but since most owners tend to pop it in and forget it, it often gets fouled, sooty, or burnt up.
In most cases, this occurs at the gate drop or on trails far from camp. It’s easy to transport a dirt bike spark plus, and whether you ride the track or trails, you should always carry a spare or two.
So, here we’ll cover the ins and outs of dirt bike spark plugs in this ultimate guide!
What is a spark plug?
Essentially, a spark plug ignites the fire that starts your dirt bike engine, delivering a continuous spark that fires once per full revolution on a two-stroke, and once every other full revolution on a four-stroke.
It can be difficult to understand spark plugs and their technical aspects, and the more you dig into them, the more questions you’ll have. This guide will, however, keep things simple.
Dirt Bike Spark Plug & When to Change?!
In dirt bike engines, spark plugs ignite the fire, producing a continuous spark once per full rotation on a two-stroke machine and once every other cycle on a four-stroke engine.
It can be challenging to dig deep into spark plugs and their technical aspects, and the more you explore, the more questions you’ll have. But as we keep things simple, you’ll go through an easy process.
Changing the spark plug on a 2-stroke
A 2-stroke dirt bike’s spark plug can foul out faster due to oil mixed in with the gasoline than a 4-stroke’s. Of course, this also depends on carb tuning.
It is common for riders to tune their carburetor on the rich side, which may adversely affect their spark plug. That’s why you must always have at least one spare spark plug in your toolbox. Remember to inspect it before riding routinely! Also, elevation plays a significant role when it comes to spark plugs on 2-strokes as well because of tuning issues.
Unfortunately, you can’t flip a switch and adjust for different elevations like with non-fuel injected 2-strokes; therefore, many riders stick with what worked last time or best overall. But remember that if you ride at different heights without adjusting the carb accordingly first, the spark plug will foul much faster!
On a positive note, though—fuel-injected 2-strokes do self-calibrate for height. That helps prevent plug fouling, so they’re worth considering too!
But if you’re riding a non-fuel-injected bike, be prepared for extra maintenance!
Changing the spark plug on a 4-stroke
If you’re a 4-stroke dirt bike enthusiast, you know that maintaining maintenance is crucial to get the most out of your ride. The owner’s manual will provide the recommended service interval or how often you should change it.
However, if you need help finding your manual or prefer to avoid looking for it, replacing your 4-stroke dirt bike spark plug at least once a year is an excellent rule of thumb. It ensures optimal performance and fuel efficiency and also minimizes the risk of engine issues down the road.
Additionally, when planning an engine rebuild – regularly keeping up with routine maintenance like replacing your 4-stroke dirt bike spark plug, you’ll help extend its lifespan—also improving its overall functionality on and off-road.
How To Change A Dirt Bike Spark Plug?
Step 1:
The first thing you need to do is remove the spark plug. With a socket wrench or spark plug wrench, remove the spark plug cap and loosen the spark plug itself.
Step 2:
The new spark plug can be inserted once you’ve removed the old one.
Step 3:
Be careful not to overtighten the spark plus as this will strip the thread in the cylinder head, resulting in a costly and difficult repair. You should also be aware of snapping the spark plug inside the cylinder, which can also occur if you overtighten it.
Step 4:
The spark plug cap should be reinstalled after the spark plug is tightened appropriately.
Dirt Bike Spark Plug Gap
So many dirt bikes are available, and so is the spark plug. Whether it’s Apollo 125 spark plug gap or SSR 125 spark plug gap, all have the same role.
The spark plug gap ensures your bike runs smoothly and efficiently. It’s the space between your spark plug’s center and side electrodes. If this gap is too big or small, there can be serious consequences for your engine, such as missed firing or higher temperatures than necessary.
On the other hand, if you get it right – with optimal fuel burn per stroke—everything will run like clockwork. So how do you determine the proper gap?
Grab a spark plug gap tool and consult your owner’s manual. Based on your bike’s make, model, and year, the manual will tell you what size of 0.5 mm, 0.6 mm, or 0.7 mm (etc.) to use. Using the tool allows you to adjust accordingly depending on its current state.
What are the Key Measurements of a Spark Plug?
Diameter
Having the wrong spark plug diameter could result in the plug not fitting into the combustion chamber, the plug being damaged, or the internal parts of the bike being damaged.
Reach
This is determined by the plug’s reach into the cylinder. There must be a correct distance between them. Insufficient length will result in non-effectiveness; too much length will result in pre-ignition, jamming, or even damage the valve.
Heat range
According to the distance from the tip of the insulator to the ceiling ring, the plug’s heat range is stamped on its side. Shorter distances indicate colder plugs; longer distances indicate hotter plugs. Too hot spark plugs can cause pre-ignition. In contrast, a cold plug can wear out more rapidly.
Spark plug gap
Gaps between center electrodes and grounded electrodes are what define spark plugs. A larger gap produces a bigger spark. The spark, however, is more likely to occur at a greater distance due to the higher voltage required. As a result of a shorter distance, a smaller spark will occur, and the air-fuel mixture may not burn completely. For each motorcycle manufacturer, the gap distance between the spark plugs will be specified.
Dirt Bike Spark Plug Number: What Does It Mean?
When choosing a spark plug for your dirt bike, the “spark plug number” is essential. It’s not just about grabbing any old spark plug off the shelf and hoping for the best. Consult the owner’s manual of your dirt bike to ensure that the spark plugs you pick are compatible with the MMY.
Once you’ve done that, pay attention to the numerical number in the type or model of spark plug you’re considering. The number can range from “5” to “10.” The higher this number, the cooler your plug will be. If you’re running a lower-numbered spark plug in springtime, swap it out for a higher one during summer.
Your engine may suffer serious damage if you do not take action. Your owner’s manual will suggest which spark plugs work best based on the time of year and geographical location. Other letters or numbers in your chosen model will refer to things like electrode type and thread size—factors that can impact fuel burn efficiency, amongst other benefits!
How To Remove a Spark Plug?
Suppose you’re wondering how to remove a spark plug from your dirt bike. Start by pulling off the cap of the spark plug wire to expose the spark plug. You’ll find it sitting inside the cylinder head. You can easily remove it from the outside with a socket wrench that fits snugly over its electrode and fitting.
A spark plug wrench works best because it provides enough depth to fit over these parts and loosen them up for removal. If you have a 2-stroke dirt bike, removing the spark plug should take less than a minute. But if you own a 4-stroke model, you may need to remove your gas tank before accessing the spark plug.
Once removed, replace with new one, carefully aligning threads before tightening in place using either torque or feel (though be careful not to overtighten). It’s important not to strip threads inside your cylinder head as this will require replacing it entirely. Also, beware of overtightening, which can break off plugs rendering them difficult to retrieve!
Note: A torque wrench can help seat everything properly, but most people go by feel instead of risking damage or overtightening issues.
How to Check the Performance of Your Spark Plug?
You can determine how your engine is performing by looking at the spark plugs. This can be done as part of routine maintenance on your car, boat, lawnmower, ATV, or lawnmower.
Getting Started
Firstly, you need to remove the spark plug you want to examine. The following instructions will guide you through the process of removing a spark plug. Begin by looking for signs of damage on the spark plug. The spark plug that was in the cylinder should be examined from the end. The following conditions are likely to occur.
Normal spark plug
On a normal spark plug, the side electrode will have deposits that are brown or grayish-tan in color. Your spark plug is just fine; you can reinstall it.
Carbon fouled
An electrode with black, dry soot and an insulator tip that is carbon-foulled indicates that the plug has been fouled with carbon. You may experience this problem if you have a dirty air filter, drive at low speeds excessively, mix too much fuel with air in your vehicle, or idle the vehicle for too long. If your spark plug is damaged, your mechanic can suggest a replacement, but you may want to consider switching to a “hotter” spark plug (the higher the number, the hotter the plug).
Oil deposits
An oil-foulled plug is identified by black deposits on the electrodes and insulator tip. The oil could be getting into the cylinders through worn pistons or worn valve guides. Seek the advice of a mechanic if you are having trouble finding the leak’s source. After addressing the problem, you can replace the spark plug.
Wet
Wet spark plugs can be caused by flooding in the engine. An engine flood occurs when it does not fire up after several attempts. Spark plugs can either be cleaned or allowed to dry.
Burned
White deposits on the electrodes, blisters on the tip of the insulator, or melted electrodes indicate a burnt spark plug. The engine may overheat, spark plugs may have an incorrect heat range, they may be loose, the ignition timing may be incorrect, or the fuel/air mixture may be too lean. Changing the spark plug is a good idea.
Worn electrodes
An electrode that is worn and eroded is a sign that the spark plug has reached the end of its life. There is a problem with the plug in the engine, and it needs to be replaced.
Broken electrodes
There is a good chance that the spark plugs are installed incorrectly if the electrodes are broken or flattened. In addition to causing extensive damage to your engine, a long spark plug can also cause poor gas mileage and spark plug fouling. Ensure that you have the correct spark plug for your vehicle by checking your owner’s manual.
How To Tell If Your Spark Plug Is Broken/Not Functioning?
Testers for spark plugs can be purchased online for a few pounds. The high tension lead needs to be removed from the plug. The tester’s boot should be attached to the spark plug and the rigid end should be attached to the bike’s high tension lead boot. If the spark plug boot receives current, the tester bulb will flash.
A screwdriver can also be inserted into the spark plug hole and held close to the engine metal section, then the engine can be started. There should be a spark between the screwdriver and the bike if this is the case.
These tests show that current is reaching the spark plug boot, but not whether it is flowing. There is a possibility that the plug isn’t firing inside the combustion chamber – perhaps because it is dirty or wet.
Check your spark plug is working properly
Keep the other end of the spark plug connected to the bike while removing the spark plug from the chamber. Spark plugs should be laid against an exposed metal part of a bike, such as a motor head. You can check if the engine is working by turning it over and seeing if there is a spark. It is preferable to have strong, blue sparks rather than intermittent or orange ones.
Battery issues
Sometimes a plug won’t work because the battery doesn’t produce enough current. You should make sure that your battery outputs at least 12.6V. It is possible to test this with an inexpensive altimeter online. The long-term benefits of such an investment are obvious.
Spark plugs require a good connection between the battery and spark plug connectors to function properly.
What are the Ways to Clean a Motorcycle Spark Plug?
Several methods can be used to clean a spark plug.
A wire brush and a carburettor cleaner
With a wire brush, motorcycle owners usually remove dirt and debris from their spark plug heads after applying carburettor cleaner.
Sand blaster
Other users purchase a sandblaster unit to clean the connectors. However, the black media used in such machines may sometimes remain in the spark plug and may well enter the engine. Sandblasting may also result in the ceramic insulator glazing over.
Blow torch
A blow torch is sometimes used by mechanics to burn away debris from electrodes. Reinstalling the spark plug after cleaning may require re-gapping, no matter what method is used.
Final Thought: Dirt Bike Spark Plug
The dirt bike spark plug is a crucial component that plays a vital role in getting your engine up and running. It ignites the fire that starts the combustion process, providing continuous sparks.
The spark plug is crucial in keeping your machine running smoothly. A dirty or worn-out spark plug can result in reduced engine performance, poor fuel economy, and even damage to other parts of the bike. That’s why it’s essential to regularly inspect and replace your dirt bike spark plug as needed.
Using basic tools, this task can be done at home fairly easily. Otherwise, ask for help from your trustable motorcycle mechanic. Being on top of this little detail is the key to a small but powerful component. Each detail counts regarding getting the most out of your ride!
FAQs
What size is a dirt bike spark plug?
Threads. Currently, three spark plug thread diameters and pitch sizes are used on motorcycles and ATVs: 10 mm x 1.0, 12 mm x 1.25, and 14 mm x 1.25. Currently, two thread reaches (lengths) are used: 1/2 inch and 3/4 inch.
Which spark plug type is most commonly used in dirt bikes?
Spark plugs with copper tips are the most popular and standard kind.
How fast can you get with the strongest spark plug?
Platinum spark plugs are more cost-effective than iridium spark plugs while still providing superior performance and fuel economy compared to copper plugs. Platinum spark plugs, like iridium plugs, can withstand cooler temperatures than their copper counterparts.
Which spark plugs are ideal for my dirt bike?
Since copper is an excellent electrical conductor and runs somewhat cooler, it is the ideal spark plug. The expensive expense of an iridium spark plug is offset by its superior performance compared to platinum.
Which brand of spark plugs is recommended?
Because copper is a superior electrical conductor and operates at a slightly lower temperature, copper spark plugs provide the finest performance. Iridium spark plugs work better than platinum ones but are very expensive.
When it comes to automotive performance, the question of how much boosts can a K24 handle is a common one. A boost increase air pressure within the intake manifold of an engine.
Boost plays a pivotal role in automotive performance. It increases power output, torque, and engine efficiency. It offers improved throttle response, enhanced engine response, and significant tuning potential,
In this article, you will know the capabilities of a K24 engine. Also, the factors that determine its boost capacity. If you’re a passionate Honda or Acura enthusiast. You might want to know how much boosts can a K24 Handle. Let’s discover the secrets to maximizing performance.
What is a K24 engine?
The K24 engine is a four-cylinder internal combustion engine by Honda. It is from the Honda K-series family of engines. It is popular for its combination of performance, reliability, and efficiency.
The K24 engine has a displacement of 2.4 liters. It can produce power between 160 to 205 horsepower (hp). That depends on the application and variant. The K24 engine torque output ranges from around 160 to 220 lb-ft (pound-feet). That’s providing strong low-end and mid-range performance.
The K24 engine has found widespread use in Honda and Acura vehicles, as an OEM (original equipment manufacturer) engine.
The K24 engines handle boost pressures of around 10-15 psi (pounds per square inch).
Various models, including the Honda Accord, CR-V, Element, and Odyssey, have employed it. The engine’s versatility and broad powerband make it suitable for both daily driving and performance-oriented applications.
K24 Engine Specifications
Since there are so many engines within the K24 family. Let’s have a quick rundown of their specifications. This will help you choose the best K-Series engine. Whether it is for a drift car, a show car, or an autocross champ.
K24A1
The K24A1 was the first engine that Honda released within the K24 range. This has CR-V and came with 160 hp and 162 lb/ft torque.
It has a 9.6:1 compression ratio while having great performance. The 2.0-liter K20’s replacement, the K24. It has superior counter-weighted crankshafts and more robust connecting rods.
K24A2
The K24A2 stands out as the most outstanding K24 engine upon leaving the factory. If you’re not scared to play with tuning, other variants are more attractive due to their increasing cost.
They also used stronger connecting rods, forged crankshafts, twin balancing shafts, lightweight pistons, lightweight piston rings, and better cams.
The result was the K24A2’s highest performance, producing 205 horsepower at 7,000 rpm and 164 lb/ft of torque.
Despite the fact that the new enhancements increased power from 197 to 205 hp, torque actually decreased, from 171 to 164 lb/ft.
K24A8
The K24A8 engine made its debut in 2006 and powered the Honda Elemand, Accord, and Odessey. This version was of particular interest for these family vehicles because of its improved fuel efficiency.
The RTB manifold and an electronic throttle body were the only rather minor modifications made to the previous engine.
166 horsepower and 161 lb/ft of torque are now possible thanks to this small adjustment.
K24Z1
The K24Z1 replaced the K24A1 when it was introduced for the Honda CR-V in 2007. The main objective of the K24Z series was to continue building on the success of the K24A. While still aiming to meet the ever-increasing emissions rules.
With a redline of 6,500 rpm, it maintains the 9.7:1 compression ratio. And produces 166 horsepower and 161 lb/ft of torque.
Internal modifications for this variant include a forged-steel crankshaft and an internal balancer unit. As well as the relocation of the oil filter.
Along with an electronic drive-by-wire throttle body, they continued to employ the subsequent 1-stage RTB intake manifold.
The K24Z family offers great platform tweaking and engine swaps. Despite its emphasis on emissions and little change from its forerunners.
K24Z4/K24Z5/K24Z6
Honda had to adapt the K24Z1 yet again to adhere to increased pollution rules. Which required using a 9.7:1 compression ratio, this time with 161 horsepower and 161 lb/ft torque.
The K24Z5 and K24Z6 are slightly different from the K24Z2. The K24Z5 was only available in China. But the K24Z6 was later available on Honda CR-V versions marketed in the United States.
The K24 Tuning
“Affordable” and “performance” are two adjectives that characterize the Honda K24 engine, according to us here at Drifted.com.
When it comes to tuning the K24 engine, you have a lot of options. If you’re willing to spend the time and money on it, you can achieve some great power figures.
Not only that, but you’ll probably need to include some blood, sweat, and tears, as well as lots of swearing!
We already know that the K24A2 can produce 205 hp and 164 ft/lb torque when paired with an Acura TSX.
What is the Difference Between K20 vs k24?
There is no replacement for displacement in these engines, so the K24 wins. A K20 head can be upgraded to a K24 head to provide a better flowing head and more desirable camshaft profile.
K20 heads have stronger valves and can endure longer periods of high rpm driving than K24 heads, but the engines share many features and are very similar.
If you were looking to do an engine swap, you could use either of these engines as a starting point for your project. The gearboxes and transmission on the K20 are typically better. Our team would probably use a stroker kit and low compression pistons if we were adding a turbo to the K20 and lowering the compression ratio slightly.
How Much boosts can a K24 Handle?
There are several methods of boosting the K24 engine to increase its power output and performance. Here are the different methods used:
Turbocharging
The engine makes use of turbocharger exhaust gases to power a turbine. This raises the air density, allowing more fuel to be burned and thereby increasing power production. Turbo charging provides excellent power potential and responsiveness, particularly at higher RPMs.
Supercharging
A supercharger is used in this type of forced induction. That is a belt-driven compressor. It compresses the intake air and sends it to the engine at a higher pressure.
Because supercharging provides fast power delivery and increased low-end torque, it is appropriate for applications that value low-end and mid-range performance.
Nitrous Oxide (NOS)
The intake system feeds nitrous oxide into the combustion chamber, thereby increasing the oxygen level. This allows the use of more fuel, resulting in a transient rise in power output.
Nitrous oxide systems are popular because of their ease of installation and tunable power improvements. But To avoid engine damage, it is necessary to tune and monitor them carefully.
Best Engine Mods for Your K24
- Engine Tunes:
In terms of cost savings, engine tuning and remapping provide the greatest advantage, followed by aftermarket ECUs and piggyback ECUs (Hondata or Apexi).
- To cut in the VTEC, reduce the RPM trigger:
For this to work, you will need an aftermarket ECU. It is the same as fitting a fast road cam to your engine and will give better low-end power. - Exhaust and intake:
Most of these mods will NOT ADD POWER on their own, but they can help enhance power after other mods by removing restrictions. - The turbocharger and supercharger:
For the K24, forced induction allows you to burn more fuel and make more power by increasing air supply. Although it is one of the most expensive upgrades, it provides the best gains. - Head work:
A ported and flowed engine head allows air to flow into the engine while removing flow restrictions and turbulence. This becomes more important as your K24 becomes more tuned.
K24 Tuning Stages
Typical stage 1 mods include: remapped/piggyback ECU (Hondata or Apexi), airbox drilled and smoothed, panel air filters, fast road camshaft, exhaust header/manifold, and sports exhaust header/manifold.
There are several common stage 2 modifications, including: fuel pump upgrades, sports catalysts and performance exhausts, ported and polished heads, fast road cams, induction kits, and high flow fuel injectors.
An engine balancing or blueprinting, a crank and piston upgrade to alter compression, a forced induction system (turbo/supercharger), an internal engine upgrade (head flowing porting/larger valves), a twin charging conversion, or a competition cam are common stage 3 modifications. Mods and tuning parts are plentiful for K24 engines, which make them great to work on.
K24 Turbo Upgrades
The more fuel an engine can burn, the more power it can produce, and upgrading the induction system with a turbocharger upgrade makes power gains of 200-350 horsepower. In order to help you weigh the pros and cons of adding a turbo to your NA (naturally aspirated) engine, we have a separate guide. The K24 is generally thought to be a pretty good car and can handle low boost upgrades admirably well. For larger gains, the compression ratio should be lowered and in most cases a fuel injector and fuel pump upgrade should be performed. The weak spots in every engine will reveal themselves when tuned, however.
Identify these restrictions and install stronger pistons, cranks, and engine components to maximize power.
The K24 turbocharger rarely fails catastrophically on its first excursion after being fitted with improvements, even when individuals have spent a substantial amount of money on it.
In general, large turbos have low-end lag, while smaller turbos spool up faster but don’t have the same peak-end torque improvement.
It is fortunately that the turbocharger market is constantly evolving, resulting in variable vane turbo chargers, whose angle changes according to speed, reducing latency and boosting top end power and torque.
Using twin scroll turbochargers, exhaust flows are divided into two channels and directed to vanes that are angled in different directions. If you have an aftermarket ECU that works well with the K24 engine, they also improve scavenging abilities.
What are the Weak Spots Issues & Problem Areas On The K24?
The K24 engines are generally reliable and solid, as long as you follow the manufacturer’s maintenance schedules and use high-quality oil. If they are regularly serviced and maintained, you should not face many problems. Carbon build up in the head, particularly around the valves, will sap power or create flat spots. This is a bigger issue on direct injection engines, but should be looked out for on all engines.
Learn how to remove carbon buildup from your car. Our members have reported experiencing flat spots or glitches after applying mods and upgrades or tuning, and this is usually not related to the engine’s design or inherent issues, so you may want to read our article on diagnosing flat spots or problems after tuning. It is crucial to change the oil regularly on the K24, especially when the engine is tuned, in order to extend its life and make it more reliable.
We encourage you to join our friendly forum where K24 owners can discuss tuning options in more detail and get friendly advice on tuning your Honda engine. You should also read our unbiased Honda tuning articles to gain a thorough understanding of each modification’s advantages and disadvantages.
If you have any feedback, please leave it in the comments box below so that we can make these tips better. What our visitors have done and what tuning parts work best on their cars is what we love to hear about. Which
Keeps our guides and tips up-to-date to assist others with their modified car projects. The feedback and comments you provide help us keep this page up to date, as well as improve the accuracy of these articles, which are updated frequently. It helps us keep going if you share this page on your favorite forums or social media profiles if you enjoyed it.
Can the K24 be Remapped?
If you’ve fitted a lot of modifications to your K24, mapping helps you maximize its potential, but can the K24 be tuned or remapped? In the same way that Honda ECUs cannot easily be mapped, they can be bench flashed in some areas (depending on the ECU used) or replaced with chips, however you will need to either use an aftermarket ECU or a Hondata module to provide the features you need. If you get one of these set up correctly and with knock protection, it will perform better than a factory ECU.
As a general rule, pre-facelift K24s were difficult to tune/remap, but now there are some solutions that allow red line limits to be raised, VTEC settings to be adjusted, and timing adjustments to be made.
A performance cam can be installed to get the VTEC to kick in earlier, and you can get a solid power boost by raising the redline with an aftermarket ECU.
Your mileage will depend on what modifications you’ve made to your vehicle and the condition of the engine, but it usually gives you 30% more power on turbocharged vehicles and 15% more power on NA (naturally aspirated) engines.
An engine performance tuning task’s main objective is to feed more fuel and air into each of the engine’s cylinders. The intake manifold sends air from the intake filter into the cylinders and feeds it with fuel for the squish phase. A K24’s intake manifold can make a noticeable difference in fuel engine efficiency if it is shaped and sized correctly
Some Local Laws And Regulations Boost A K24 Engine
When modifying and boosting a K24 engine, it is essential to be aware of and comply with local laws and regulations. Here are some key considerations:
Emissions Regulations: Vehicle emissions are controlled in most areas. Engine modifications when raising boost, might have an effect on emissions levels. Some regions mandate emissions testing or certification for modified automobiles.
Vehicle Safety Standards: While engine modifications may not directly affect vehicle safety. Ensure that any other modifications conform to local safety standards. Improperly installed or non-compliant safety equipment might pose safety risks as well as legal ramifications.
Registration and Insurance: Modifying and boosting a K24 engine may necessitate renewing the vehicle’s registration and insurance policies. Modified vehicles must undergo inspection, provide proof of modifications, or obtain special licenses in some areas. Noncompliance with registration and insurance requirements can result in fines. Also, can loss of insurance coverage.
Do We Think Performance Cams Are A Good Option On The K24?
A faster road cam profile can be achieved by just using the VTEC and getting it to kick in sooner,
With the exception of the aftermarket ECU, there is very little outlay to be made.
VTEC and Lift control were available on the K24. An ECU lift control adjustment is usually required when dropping in a different cam profile.
The K24 engine can be modified with cam swaps, and we’ve seen some K20 heads installed on K24s to maximize flow.
In addition to increasing the high-end power range of the engine, motorsport camshafts usually reduce the low-end power.
Your engine’s power should be matched to the volume of use your vehicle sees on a daily basis. Motorsport and race camshafts are not enjoyable to live with when on the daily commute, because lumpy idle makes the vehicle prone to stalling and smooth driving at low rpm is not possible. Track cars are always in the high end of their RPM range anyway, and that is where you want the power to be.
Depending on your engine, you may need to use more or less aggressive camshaft durations.
You will also gain torque depending on the fuel pump and injectors, as well as the ECU mapping.
Although most cams and tuners use matched pairs of intake and exhaust durations, the exhaust and intake durations don’t have to match on most engines. Extending exhaust or intake durations can alter the torque band in some ways.
Conclusion: How Much boosts can a K24 Handle
How Much boosts can a K24 Handle? Well now you have an idea of it. Honda’s K-series engines are without a doubt among the best value-for-money options available right now. Boost increases the power output, torque, and engine efficiency of the K24.
The K24 engines handle boost pressures of around 10-15 psi (pounds per square inch). However, pushing a stock K24 engine to its maximum boost limit can increase stress on the engine components. The engine’s versatility and broad powerband make it suitable for both daily driving and performance-oriented applications.
FAQs
What is the strongest K24?
The best K24 engine right out of the box is the K24A2.
Can a K24 engine handle a turbocharger?
Yes. A K24 engine can handle a turbocharger. The specific power levels and boost pressures will depend on the engine’s internals, the quality of the turbocharger, and the supporting modifications.
Are there any limitations to consider when adding a boost to a K24 engine?
The engine’s internal components, such as pistons, connecting rods, and the engine block, may have specific strength limits.
What other modifications do experts recommend when adding a boost to a K24 engine?
When adding a boost to a K24 engine, support modifications such as upgrading the fuel injectors, fuel pump, intercooler, intake system, exhaust system, and engine management system. These modifications help ensure proper fueling, cooling, and overall engine performance.
Can a K24 engine handle high levels of boost without modifications?
A stock K24 engine is not designed to handle high levels of boost. Running high boost pressures without proper modifications can lead to engine damage or failure.
Is it necessary to retune the engine after adding a boost?
Yes. It is essential to retune the engine after adding a boost. The engine management system needs to accommodate the increased airflow.
Are there any risks in pushing the limits of a K24 engine with an added boost?
Pushing the limits of a K24 engine with added boost carries inherent risks. Increased stress on the engine components can lead to failures. Like piston ring lands breaking, bent connecting rods, or even catastrophic engine failure. Balance performance goals with the engine’s capabilities and prioritize reliability.

The Coleman 550 UTV is a large side-by-side that takes you to your destination with power and assurance. It is a workhorse, a rugged companion, and a vehicle for all weather conditions. And, many customers have provided excellent Coleman 550 UTV Reviews regarding its value for money.
The Coleman 550 UTV is a robust vehicle capable of tackling complex tasks. Moreover, it has wheels made of aluminum, a canopy, and a 3,500-pound electronic hoist. Hence, this machine is ideal for use on wooded trails, snow peaks, hunting grounds, and agricultural land.
It is a great alternative to more pricey manufacturers like Can-Am, Polaris, and Honda. But the Coleman 550 is aimed at consumers seeking a vehicle with a standard selection of accessories at a reduced price.
The Coleman 550 UTV is equipped with a hard top, a 3,500-pound winch, a two-piece windshield, side spotlights, nitrogen-assisted efficiency shocks, turn signals, an extensive digital and analog display, and more. The average price range for utility vehicles with these accessories is between $13,000 and $16,000, but the Coleman costs only $10,000. So, what else is there to say about the Coleman 550 UTV?
Coleman 550 UTV Specs and Features!
Key Specifications at a Glance
| Product Height | 78 in |
| Product Length | 117.32 in |
| Product Weight | 1407 lb |
| Product Width | 62 in |
| Fuel Capacity | 7.3 gal |
| Ground Clearance | 12.2 in |
| Horsepower | 35 HP |
| Maximum Speed | 45 MPH |
| Maximum Weight Capacity | 1700 Lb |
| Occupant Capacity | 2 |
| Towing Capacity | 2500 Lb |
Significant Features of the Coleman 550 UTV
Engine Power
Chongqing Huasong liquid-cooled single-cylinder SOHC engine powers the Coleman 550 UTV. The engine has a capacity of 546 cubic centimeters (33.3 cubic inches) and a compression ratio of 9.6:1. The maximal power output is 30.17 kW (22.5 horsepower).
Transmission System
The Coleman is controlled by an automatic CV Tech CVT gearbox with two speeds. It has a 2WD or 4WD system selectable from the back. With electronic power steering, you may choose between forward, neutral, and reverse gears in the high-low range.
Suspension
Nitrogen-filled The front and rear suspensions are both MacPherson independent dual A-arms. With a turning radius of 14.11 feet (169.32 inches), handling at incredible speeds is more stable. The 4WD system features limited-slip and complete differential lock configurations that can be accessed with the press of a button.
Ignition
The ignition system consists of an electric initiator and an electronic power switch. Additionally, a 12V, 300-CCA Coleman 550 UTV battery is required.
Tires
The front aluminum wheels have AT26 X 9-14 tires, while the back wheels have AT26 X 11-14 tires. The wheelbase of the vehicle is 76.8 inches.
Brakes
The front brakes are damp disc brakes, and the rear brakes are pedal-operated axis brakes. Dual front and rear ventilated hydraulic disc brakes are standard on automobiles of a lesser class.
Cargo Options
The UTV has multiple cargo stowage options, including a 350-pound capacity dump bin. It is optimal for transporting large loads because the bed can be readily tipped to unload cargo.
Additionally, numerous tie-down points are on the platform and around the vehicle for fastening cargo. The UTV has a stowage area in the front and a rack in the back.
Coleman 550 UTV Cab Enclosure
A cab enclosure for the Coleman 550 UTV is a standard attachment that may offer weather protection and improve comfort while operating.
Ventilation System
The Coleman 550 UTV has a ventilation system rather than a temperature control system, allowing sufficient airflow in hot weather. The UTV’s design permits enough air circulation, which helps keep occupants comfortable.
Payload Capacity
The Coleman 550 UTV can accommodate up to four people and some baggage thanks to its 500-pound payload capacity.
Coleman 550 UTV Accessories
The Coleman 550 UTV is an admired multipurpose vehicle that can be enhanced with several extras to improve its efficiency and usability. Since there are over 8,000 service centers in North America, parts and services are easily accessible.
Off-road and On-road Performance Coleman 550 UTV
The 550 UTV can pass over rocks, logs, and other obstacles thanks to its 10.2-inch high ground clearance. It has off-road tires that offer superb grip in mud, gravel, and dirt. The Coleman 550 UTV performs excellently on roads. Its peak speed, which is about 45 mph, is enough for most recreational users. The steering and brakes of the UTV are quick, giving it outstanding handling and stopping capability.
Pros and cons of Coleman 550 UTV
Pros of Coleman 550 UTV
The significant advantages of Coleman 550 UTV include:
- Versatility: The Coleman 550 UTV is adaptable and may be utilized for various jobs, including farming, hunting, and leisure. Additionally, it may be used for off-road travel.
- Durability: The Coleman 550 UTV is made to last and can handle challenging terrain and bad weather. It is built of premium materials and has a strong structure.
- Power and performance: The Coleman 550 UTV has a potent engine capable of traveling at incredible speeds. It also handles well and can quickly go across rocky terrain.
- Comfort: Up to two persons can comfortably fit within the cabin of the Coleman 550 UTV. It is perfect for lengthy travels since it provides enough headroom and legroom.
- Warranty: Similar to Kawasaki, each Coleman model is backed by a one-year manufacturing guarantee (and, in some instances, a two-year warranty, depending on the distributor).
Cons of Coleman 550 UTV
Some of the Coleman 550 UTV’s drawbacks are:
- Price: Because of its high cost, not everyone can purchase the Coleman 550 UTV.
- Noise: The Coleman 550 UTV is known to be rather noisy, especially when traveling quickly. Some people may find this to be bothersome.
- Fuel consumption: The Coleman 550 UTV may be expensive to operate because of its poor fuel economy.
- Maintenance: Regular maintenance on the Coleman 550 UTV is necessary to keep it in excellent shape, but it may be laborious and costly.
Learn About Coleman 550 Utility Vehicle
Coleman makes a full-size side-by-side vehicle, the 550 UTV, but it’s made in China. It first appeared in 1988, but only in 2011 did it become widely available in the United States and Canada. This UTV is a reliable and efficient workhorse with respectable mid-range performance.
In comparison to more pricey manufacturers like Can-Am, Polaris, and Honda, this one is a steal. The Coleman 550 is aimed at those who want a car equipped with the basics at a reasonable price.
The hard-top roof, 3500 lb winch, two-piece windscreen, rearview mirrors, nitrogen-assisted performance to unexpected events, turn signals, full analogue and digital display, and more are just some standard features on the Coleman 550 and 750 UTVs.
The automatic power steering on these UTVs is second to none and is available on big-name brands. They also meet EPA and CARB standards. The average price for a utility vehicle equipped with such features is $13,000 to $16,000, while the Coleman comes in at just under $10,000.
Final Thought: A Balanced UTV!
The vehicle has both advantages and disadvantages. It is a robust, well-built automobile with ample cargo space. However, because of its suspension setup and potential engine performance difficulties, it could not perform as well in rocky terrain.
Moreover, in many Coleman 550 UTV Reviews, customers have voiced complaints about Coleman’s customer service. Ultimately, the Coleman 550 UTV could be a good option for those who need a reasonably priced utility vehicle. Still, it might not be the best option for people who need a high-performance, dependable vehicle for complex jobs.
FAQs
What types of terrain does the Coleman 550 UTV accommodate?
The Coleman 550 UTV is suitable for a variety of off-road terrains, including muck, soil, sand, and gravel. Its independent suspension and four-wheel drive system allow it to traverse difficult terrain with ease.
What safety features is the Coleman 550 UTV equipped with?
A roll cage, seatbelts, and a parking brake are included on the Coleman 550 UTV. Always wear the appropriate safety equipment and operate the UTV safely.
What sort of upkeep is necessary for the Coleman 550 UTV?
Regular maintenance is required for the Coleman 550 UTV, including oil changes, air filter replacements, and brake inspections. Follow the owner’s manual for optimal performance and safety.
Where can I locate Coleman 550 UTV replacement parts?
Coleman 550 UTV replacement parts are available at authorised dealerships and online stores specialising in UTV parts and accoutrements.
What type of warranty comes with the Coleman 550 UTV?
The Coleman 550 UTV’s warranty varies depending on the manufacturer and dealer. Before making a purchase, it is essential to evaluate the warranty information to ensure that you comprehend the terms and conditions.
Related: Bennche Utv Problems And Reviews

As an avid off-road enthusiast, you know the importance of having a reliable and versatile vehicle for conquering any terrain. The Kawasaki Mule 4010 is such a utility vehicle that handles tough jobs and challenging terrain. It is a go-to choice for farmers, hunters, and outdoor adventurers. Moreover, the Kawasaki Mule 4010 Accessories can take your ride to the next level.
Accessories are additional items that complement or enhance the functionality or appearance of a particular product. The vehicle can function without them. But they can provide additional features or convenience.
Kawasaki Mule 4010 accessories make the vehicle more capable and comfortable. In this article, you can read what accessories for the Kawasaki Mule 4010 help you upgrade your ride.
Kawasaki Mule 4010 trans 4×4 Overview
Power, durability, and flexibility combine in the Kawasaki Mule 4010 Trans 4×4. It offers ample torque and power for demanding tasks due to its 617cc V-twin engine.
The unique Trans Cab system allows it to transform from a three-person to a six-person capacity. With selectable four-wheel drive, it provides excellent traction on various terrains. Moreover, it is equipped with safety features and comfortable suspension.
The vehicle is a reliable workhorse that excels in work and recreational environments. Moreover, the Kawasaki Mule 4010 top speed is around 25 mph. The Kawasaki Mule 4010 oil capacity is 2.2 to 2.6 liters (or approximately 2.3 to 2.7 US quarts). Thus, it is popular for those seeking versatility and reliability in a utility vehicle.
Common Kawasaki Mule 4010 Accessories for Upgrade
Now, let’s get into the must-have Kawasaki Mule 4010 accessories. Popular accessories for the Kawasaki Mule 4010 include roof covers, windshields, winches, cargo racks, LED light bars, bumpers, and audio systems.
Heavy-duty winch and Bumper
If you plan on using your Kawasaki Mule 4010 for any off-road work or recovery, a heavy-duty winch and bumper are must-haves. A winch can help you escape sticky situations, while a bumper can protect your vehicle from damage.
A winch for Kawasaki Mule 4010 has a reliable remote control and is incredible. The bumper is made from sturdy materials like steel and designed to fit your specific vehicle model.
Kawasaki Mule 4010 Windshield and Roof
If you’re tired of getting pelted with rain, dirt, and debris while on the trails, a windshield, and roof can make a big difference. Not only will they help protect you from the elements, but they can also reduce wind noise and make your ride more comfortable.
A roof can be a bit more flexible in terms of materials, but you’ll want to ensure it’s sturdy enough to withstand bumps and jolts.
Kawasaki Mule 4010 Cargo Box
Whether you’re hauling tools, supplies, or hunting gear, a cargo box can make your life a lot easier. These boxes attach to the back of your Kawasaki Mule 4010 and provide extra storage space for all your essentials.
Drivers use the Kawasaki Mule 4010 cargo box for convenient material transport. It saves time and effort.
Kawasaki Mule 4010 Lift Kit
If you’re looking to tackle more challenging terrain, a suspension lift kit can be a game-changer. These kits raise your vehicle’s ground clearance. The lift kit gives you more room to navigate rocks, logs, and other obstacles.
This increased ground clearance reduces the risk of damage. It enables the Mule to navigate challenging off-road conditions more effectively.
Kawasaki Mule 4010 Skid Plate
Another way to protect your Kawasaki Mule 4010 from damage is by adding a skid plate. These plates attach to the bottom of your vehicle. It helps prevent rocks, debris, and other hazards from damaging your undercarriage.
The skid plate serves as a protective barrier against impacts and debris. It shields crucial components from potential damage. Encountering rocks, branches, and other obstacles during off-road adventures causes it.
Kawasaki Mule 4010 Parts for Upgrade
Kawasaki Mule 4010 Wheels and Tires
The Kawasaki Mule 4010 is equipped with sturdy wheels and reliable tires. The wheels feature durable materials like steel or aluminum to withstand impacts and provide long-lasting performance.
The tires are engineered with aggressive tread patterns and robust construction. They can deliver traction and stability on various surfaces, including mud, gravel, and uneven terrain. These wheels and tires enhance the Mule 4010’s off-road capabilities.
Kawasaki Mule 4010 Battery
Battery-powered vehicles are essential because they provide electrical power to start. Kawasaki Mule 4010 has a sealed lead-acid (SLA) battery. The battery is designed to deliver reliable performance and withstand the demands of off-road use.
Replacing the battery when it becomes weak or worn is important. To avoid starting issues and electrical system malfunctions.
Kawasaki Mule 4010 Seat covers
Seat covers for the Kawasaki Mule 4010 are designed to protect and enhance the appearance of the vehicle’s seats.
Seat covers come in various styles, colors, and patterns, allowing owners to customize the look of their Kawasaki Mule 4010.
Some seat covers are designed with additional features like cushioning or padding for added comfort during long rides. They may also include pockets or storage compartments for convenience.
Kawasaki Mule 4010 Oil Filter
The oil filter plays a crucial role in the engine’s lubrication system by removing contaminants and impurities from the engine oil.
The specific oil filter for the Kawasaki Mule 4010 will depend on the engine model and year of manufacture. However, Kawasaki recommends using genuine OEM (Original Equipment Manufacturer) oil filters.
Benefits of Upgrading Kawasaki Mule 4010 Accessories
Here are some reasons why you should upgrade your Kawasaki Mule 4010.
Increased functionality
Adding accessories can make your Kawasaki Mule 4010 more versatile and capable. This means you’ll be able to tackle a broader range of tasks and activities with ease.
Enhanced comfort
Off-roading can be rough on both you and your vehicle. Adding accessories like a roof or windshield can help protect you from the elements. Also, make your ride more comfortable.
Improved safety
Accessories like a rearview mirror or LED light bar can help you see more clearly. Trails are a great place to stay safe. Plus, having a winch or skid plate can help prevent accidents and damage to your vehicle.
Conclusion
Upgrading your Kawasaki Mule 4010 with the right accessories can help you get more out of your off-road adventures. From heavy-duty winches and bumpers to comfortable roofs and sound systems, there are plenty of great options to choose from. With the right upgrades, you can enjoy your off-road adventures to the fullest.
So what are you waiting for? Start shopping for your Kawasaki Mule 4010 accessories today and take your ride to the next level!
Read More The Kawasaki Mule Sx Common Problems
FAQ
Can we speed up the Kawasaki Mule 4010?
Inflating the tires of the Kawasaki Mule 4010 is the best way to increase its speed. In order to reach fast, it is better to keep an eye on the tires; flat tires slow down the vehicle’s speed.
Does Kawasaki Mule 4010 have a belt?
HP belts fit best in Kawasaki Mule 4010. HP and ATV belts enable riders to drive smoothly and dependably.
What is the heat generation rate of Kawasaki Mule vehicles?
A Kawasaki Mule vehicle generates heat by exhaling coolant. The person may find it uncomfortable to bear this heat at times.
Are there accessories to increase storage capacity on the Kawasaki Mule 4010?
You can find a range of accessories like storage boxes, cargo bed extenders, and tool holders to maximize the storage capacity of your Kawasaki Mule 4010.
Can I install a winch on my Kawasaki Mule 4010?
Yes, winch kits are available for the Kawasaki Mule 4010, allowing you to add a winch for recovery purposes or for pulling heavy loads.