Crankshaft and camshaft position sensors make the rotation of a vehicle’s engine possible. When a sensor malfunctions, a car won’t start; it would make noise, but won’t move. The engine may lose power, misfire, or not spark while starting. Cars can be driven with faulty sensors in many cases, but they shouldn’t as it leads to more danger. Without treatment, you will have to pay for expensive repairs, and your engine may suffer permanent damage. So, How to Test Camshaft Position Sensor?
The camshaft position sensor (CMP) can be checked for functionality and correct operation by checking its functions. The symptoms of malfunction show a total failure of the sensor or its unstable operation, and a multimeter or diagnostic scanner is needed for an accurate diagnosis. It is rare for the sensor itself to fail, but its wiring and plug require attention. In this article, we’ll briefly learn about everything about Camshaft Position Sensor including, How to Test Camshaft Position Sensor.
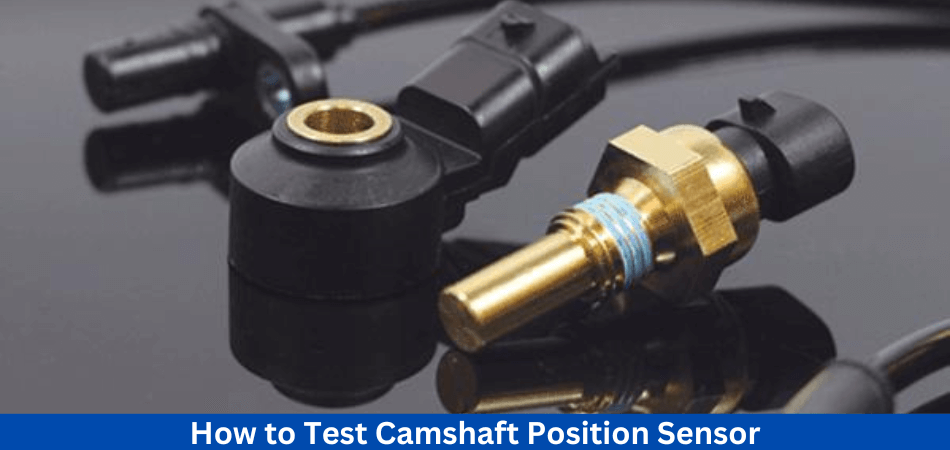
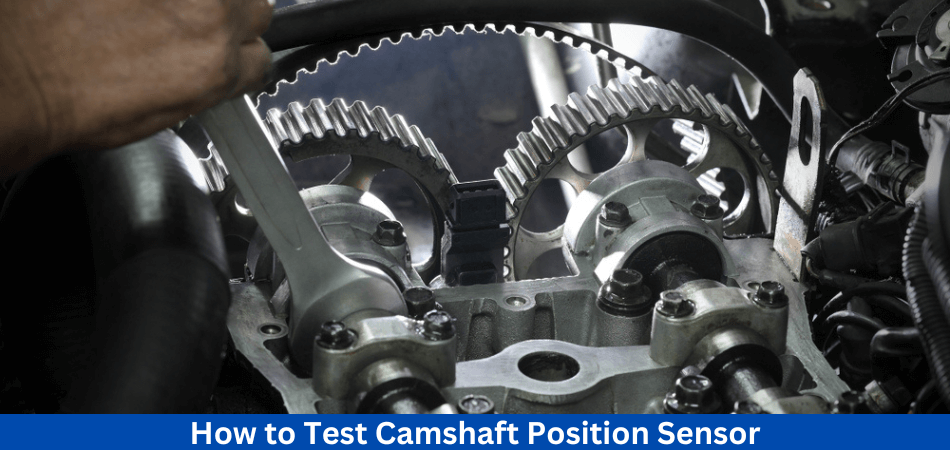
What Is a Camshaft Position Sensor?
Camshaft position sensors (CMPs) track and send information to vehicle ECMs/PCMs about the actual position of an engine’s camshaft. As a result, this information becomes crucial in determining the positions. Because intake and exhaust valves are throughout both engine banks, since lifters/pushrods correlate with cam/valve timing.
The timing of an engine’s ignition system and fuel injectors is dependent on its camshaft timing. It would be impossible to regulate injector pulse timing or spark advance without such feedback. Additionally, implementing such technology as variable valve timing between banks 1 and 2 would be a pipe dream. A tone ring positioned at one end of the camshaft position sensor captures the signal from the camshaft position sensor, which operates on magnetism.
An engine’s management software receives feedback via a waveform signal generated by the teeth of the tone ring as the camshaft spins. Learn more here.
What are the Types of Camshaft Sensors?
Generally, camshaft position sensors come in two types:
1. Magnetic type or variable reluctance: There are two wires on this type of sensor, which makes it easy to identify. There is an alternating current (AC) sine wave signal produced by the magnetic type.
2. Hall effect type: In this type, there are three wires: one for the reference signal or power, one for the ground, and one for the signal voltage.
Identify the type of sensor you have in your system. There may be a third shielded wire on some magnetic types that helps cancel noise. Consult your vehicle’s service manual if necessary.
What are The Functions of the Camshaft Position Sensor?
In order to better understand how the camshaft position sensor works, let’s look at an example. The camshaft opens the engine valves when an internal combustion engine is started.
As a result, air and fuel directed into the combustion chamber by the engine control module. Then, the valves closed so the piston could begin compressing the air and fuel.
Power produced when the engine control module ignites the combustion process to drive the piston down. Then it reaches its highest point. By opening the exhaust valves, the camshaft permits the piston to return to its original position. After that it release exhaust gases from the exhaust manifold.
The camshaft position sensor and other components also contribute to combustion in an engine.
Where Is the Camshaft Position Sensor Located?
The exact position of an engine’s camshaft position sensor varies from vehicle to vehicle. Depending on the engine, the sensor may be mounted directly within the unit’s front timing cover. In some vehicles, this sensor is mounted on the valve cover or cylinder head.
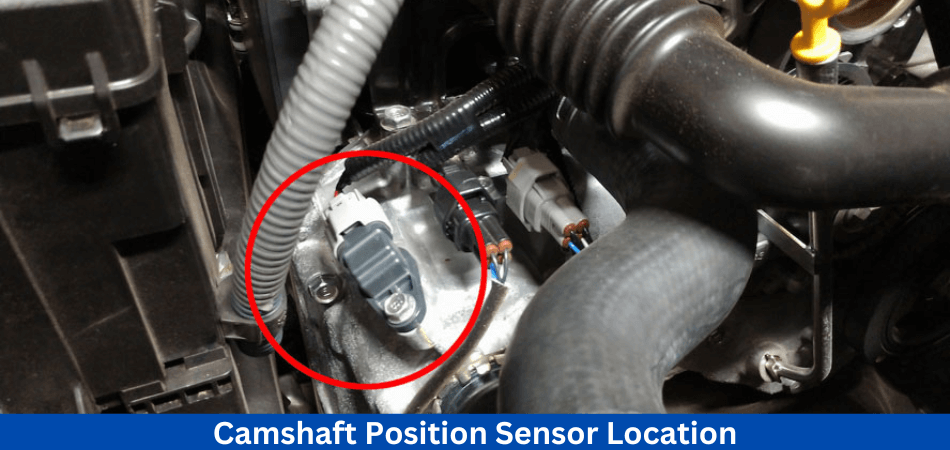
If you are unsure about the exact location of your vehicle’s camshaft position sensor. Then consult your factory-specific service and repair manual.
What are the Symptoms of a Faulty Camshaft Position Sensor?
There are a variety of secondary symptoms associated with a faulty Camshaft Position Sensor, some of which can be quite troubling. When diagnosing an issue of this type, recognizing these symptoms can be invaluable.
There are several common issues associated with a faulty or failing camshaft position sensor.
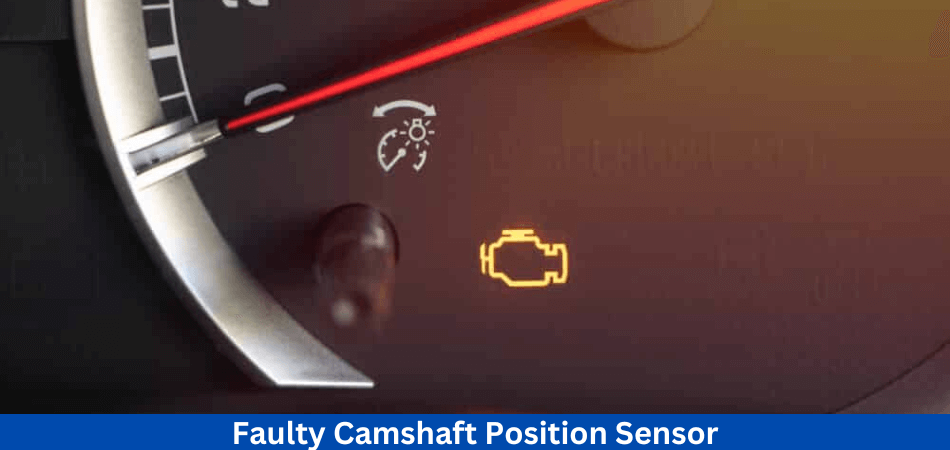
1. Illuminated Check Engine Light
Most of the time, a faulty camshaft position sensor will illuminate the check engine light on a vehicle. When a vehicle’s PCM logs one or more timing-related diagnostic trouble codes, this occurs.
2. Starting Difficulties
A vehicle won’t start without a valid timing signal from the camshaft position sensor. Vehicles may only start intermittently or fail to start altogether when this happens.
3. Stalling
For some vehicles, an accurate camshaft position sensor signal required to continue operating. The engine will likely stall if this signal is lost, even for a moment.
4. Erratic Idle
A vehicle’s camshaft position sensor may begin to malfunction when the engine idles at first. Any signal data presented to the vehicle’s ECM/PCM is relatively inaccurate.
5. Hesitation/Loss Of Power
An engine with a failing camshaft position sensor might also appear low on power, hesitate under load, or lurch or jerk when accelerating. The ECM/PCM of an engine receives inaccurate or inadequate feedback.
6. Reduced Fuel Economy
To facilitate efficient fuel delivery and spark timing, internal combustion engines require accurate camshaft position sensors. When the sensor fails, fuel is often consumed excessively, resulting in reduced fuel economy and increased exhaust odor.
7. Failed Emissions Test
A malfunctioning camshaft position sensor can cause state-mandated emissions tests. Even short periods of overfeeding can result in overly rich exhaust emissions.
What Causes the Camshaft Position Sensor to Fail?
There are a number of reasons why a vehicle’s camshaft position sensor can fail. Exposure to prolonged periods of extreme heat is one of these causes. Camshaft position sensors often fail following instances of engine overheating. Which explains the higher-than-normal frequency of such failures.
Premature fatigue and failure can also caused by contamination from oil, coolant, or other chemicals. Sensor wiring receptacles or other wiring can contaminated by this contamination. As a result, the insulation material that protects the wiring of the circuit can break down.
It is also possible for this sensor to damaged by road debris when it is hit by an impact. If not protected by a suitable undercover, debris can strike timing cover-mounted camshaft position sensors.
Can You Drive With a Bad Camshaft Position Sensor?
In most cases, it is not recommended to drive with a bad camshaft position sensor, unless it is absolutely necessary to reach a safe destination for repairs. Such failures are often accompanied by a variety of drivability-related symptoms.
If one drives in this manner, one may end up stranded on the side of the road with little recourse.
It is always advisable to replace a faulty sensor at the earliest opportunity. Since the camshaft sensor in question continues to deteriorate, this prevents further hardship. A trusted service center should contacted as soon as possible if you do not feel comfortable doing the repairs yourself.
Why Should You Check Crank Sensors Regularly?
Crankshaft sensors convert mechanical energy into electrical signals that power ignition and fuel injection systems in engines. Multimeter testing ensures that the crankshaft sensor is functioning and sending accurate information to the vehicle’s computer.
Misfires, poor power, stalling, hard starting in cold weather, and reduced acceleration can caused by faulty crank sensors. It may be possible to identify problems with a crank sensor that might otherwise be difficult to diagnose without testing it. By checking your crankshaft sensor, you can extend the lifespan of your vehicle. Read more to learn about How to Test Camshaft Position Sensor.
What You Need To Know Before Testing Camshaft Position Sensor?
It is essential to ensure that all safety protocols have followed before using a multimeter to test the crankshaft position sensor. Be sure the vehicle parked safely, level, and that the negative battery cable disconnected before beginning any tests. Digital multimeters should also used with extreme caution. Since incorrect readings can damage electrical components or even short-circuit them.
Also, it’s important to know where the crankshaft sensor located within the engine and how it works. On either inline or V engines, these sensors are generally mounted near the flywheel, so some engine disassembly required to reach them. The type of crankshaft position sensor installed in your vehicle is also crucial. Many modern cars use either hall effect or variable reluctance sensors.
Then, using a multimeter, you can test the crankshaft position sensor once all safety precautions have been taken.
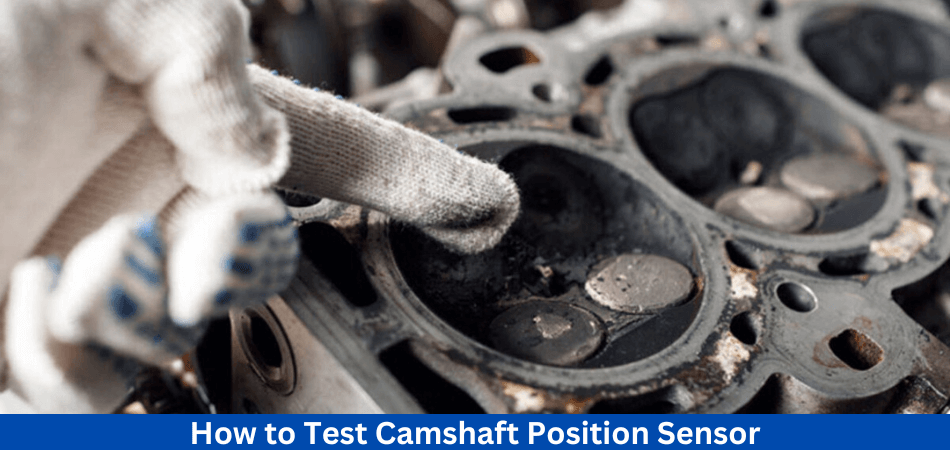
How to Test Camshaft Position Sensor?
Now let’s learn the steps of How to Test Camshaft Position Sensor.
1. Testing a Magnetic type CMP Sensor
The magnetic-type CMP sensors produce their own AC (sine wave) signal. If you want to test AC (alternating current) voltage, you will need a digital multimeter (DMM).
To prevent the engine from starting, disable the ignition system or fuel system. A jumping wire can used to ground the ignition coil and high tension wire from the distributor cap. Metal brackets or bolts can used on the engine for this purpose. You can also prevent the engine from starting by removing the fuel pump fuse. Refer to your vehicle’s manual if necessary.
- If you have a manual transmission, set it to Neutral or Park.
- Be sure to engage the emergency brakes.
- Make sure the CMP sensor unplugged.
- DC voltage should be set on your multimeter.
- If the ignition is on but the engine is off, check for voltage at the harness connector. The terminal may have around 1.5 volts depending on your particular model. You should consult the owner’s manual of your vehicle.
- You can now read AC voltage with your DMM meter.
- Make sure your DMM leads connected to the pins on the sensor terminals.
- For a few seconds, have an assistant crank the engine.
- You can check your multimeter’s voltage by reading it.
- Your results should compared to the specifications in your repair manual.
2. Testing a Hall Effect Type CMP Sensor
A Hall effect sensor produces a squared, digital signal representing the highest and lowest voltages.
- Park (automatic) or Neutral (manual) your transmission.
- Be sure to engage the emergency brakes.
- Stop the engine from starting by removing the fuel pump fuse. You may need to consult the owner’s manual of your vehicle if necessary.
- Make sure your DMM is set to DC volts.
- Connect your DMM’s ground lead (black) to battery negative, the post with the negative (-) sign. And back probe the power wire on the harness connector with the DMM’s red lead.
- For a few seconds, have an assistant crank the engine.
- A DMM reading of about 5 volts should be obtained.
- Back probe the harness connector’s ground wire with the red lead of your DMM. Connect the ground (black) lead of your DMM to the negative lead of the battery.
- Crank the engine for a few seconds with an assistant.
- A voltage reading of about 0.1 or 0.2 volts is normal.
- You can now back probe the signal wire on the harness connector with the red lead of your DMM. Make sure the ground (black) lead of your DMM connected to the negative terminal of your battery.
- Start the engine briefly with the assistance of an assistant.
- In the range of 0 to 5 volts you should get a fluctuating voltage reading.
- There are some errors with your signal values, but the power and ground values are fine, so replace the CMP sensor. If necessary, consult the electrical value specifications in your vehicle repair manual.
How Much Voltage Should a Crank Sensor Have?
Earlier you have learnt about How to Test Camshaft Position Sensor. Now lets move to the voltage section. It depends on the type and make of the vehicle and what voltage the crank sensor should have. A multimeter generally measures between 0.1 volts and 5 volts when testing crankshaft sensors. Crankshaft sensors operate on analog signals that fluctuate with engine speed. You’ll need to adjust your multimeter settings accordingly in order to accurately measure this signal.
If you’re not sure which setting to use, consult your vehicle’s repair manual or ask an experienced mechanic. You should check the voltage reading at idle speed after you’ve set up your multimeter correctly. You should see a reading between 0-2.5 volts, depending on your vehicle’s make and model. A crankshaft sensor that reads above or below this range should be replaced.
While the engine is running at higher speeds, you should also check the voltage. If the reading is outside of this range, the crank sensor needs to be replaced. The reading should usually be between two and five volts. Besides, if your vehicle has other electrical issues, such as a malfunctioning alternator or spark plugs,. Then the readings may not be accurate, and further diagnostics may required.
Can You Test a Crank Sensor With Oscilloscope?
Using an oscilloscope, you can test the crankshaft sensor. An oscilloscope measures electric signals over time.
With the crankshaft sensor connected, it displays voltage changes as the engine runs and the crankshaft rotates in real time. Using this information to diagnose or tune the sensor can provide valuable insight into its performance.
An oscilloscope can used to test your crankshaft sensor. Connect one probe from the oscilloscope to your engine’s ground point (the battery negative post is ideal), and the second probe to the crank sensor’s terminals. Observe the oscilloscope waveform after starting your engine. Voltage spikes and drops should not occur intermittently on the sensor’s waveform. You may need to conduct a further investigation if you notice any irregularities.
If you plan to use an oscilloscope to test your car’s crankshaft sensor. Not only should you check your car’s service manual, but also your vehicle’s manual may contain specific information about how to do so. Moreover, if you are unfamiliar with oscilloscopes, it is best to leave this task to a qualified mechanic with experience reading waveforms.
What If My Crankshaft Sensor Passes the Test?
You may not be experiencing a malfunction due to the crankshaft sensor if you pass the test. The problem may also be caused by other sensors, spark plugs, or wiring around the area. A professional diagnostic might be a good idea if you can’t find anything wrong with those components either. In some cases, a technician can diagnose the problem and fix it.
In some cases, crankshaft sensors that pass the test but still have problems with your vehicle’s performance are faulty or malfunctioning. It may be necessary to replace the component with a new one in this case.
No There’s no denying that crankshaft sensors are vital components of a vehicle. Maintain it in good working condition by testing it regularly and replacing it as needed to ensure optimal performance. By following these steps, you can avoid costly repairs in the future.
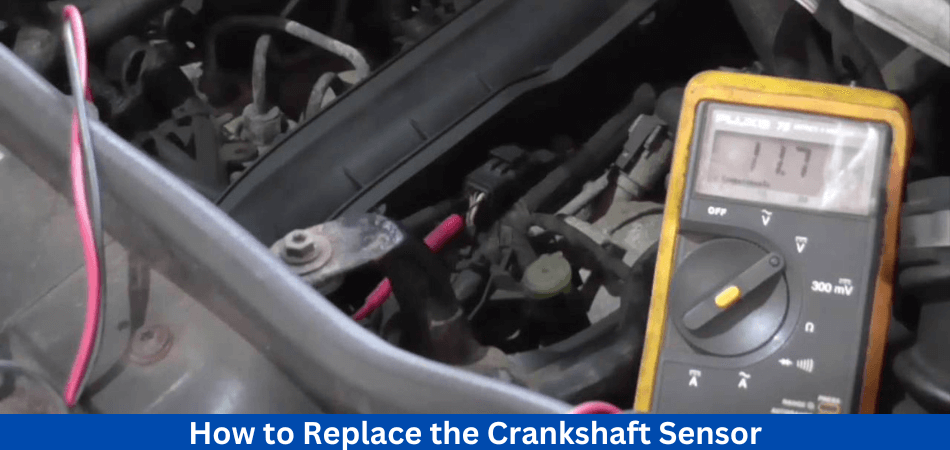
How to Replace the Crankshaft Sensor?
Once the crankshaft sensor has been tested and determined to be faulty, it needs to be replaced. There may be several steps involved in this process, depending on your vehicle. A crankshaft sensor is usually accessible by removing components and disconnecting wiring harnesses.
Disconnect any associated wiring after you have located the component and unbolted it from its mounting bracket. After removing the old crankshaft sensor, install the new one in reverse order, ensuring all connections secured.
Test that everything is working as expected by starting the car. After checking everything out, reinstall any removed components and reconnect any disconnected wiring harnesses. Now that your crankshaft sensor has replaced, it should work properly.
If you are replacing the crankshaft sensor, follow all safety instructions properly. By doing so, you will ensure you drive safely and your car runs optimally.
What is the Replacement Cost of a Camshaft Position Sensor?
Depending on the make and model of the vehicle, camshaft position sensor replacement can cost varying amounts. As a result, the costs of parts, labor, and labor hours required to complete such repairs differ significantly.
In spite of this, the cost of such repairs tends to be predictable. Typically, replacing the camshaft position sensor on a vehicle costs between $100 and $250. Purchasing a replacement sensor itself will cost around $30-$120. while installation-related labor will cost another $70-$130. A shop supply charge may incurred in certain cases.
Additional Tips and Advice
It is important to remember that crankshaft position sensors are delicate when testing them with a multimeter. When you handle them incorrectly, you risk damaging the sensor and causing bigger problems. You should follow the following advice to ensure that your tests are accurate and to avoid damaging the sensor:
Make sure to use a Current Limiting Resistor (CLR) when connecting the crankshaft position sensor to power sources. It prevents the sensor from being overloaded with voltage or current that could damage it.
Before performing any tests on the crankshaft position sensor, make sure all connections are secure. Sensors can be permanently damaged by loose connections leading to inaccurate readings.
When testing the crankshaft position sensor, make sure your multimeter is set to the appropriate range. It is important to adjust the settings and ranges of multimeters carefully to get accurate readings.
Make sure you have experience with electrical work before attempting to repair or replace a crankshaft position sensor. It is important to handle these sensors with care in order to avoid any potential damage.
Conclusion: How to Test Camshaft Position Sensor
Now you have a clear idea of How to Test Camshaft Position Sensor. In conclusion, testing a crankshaft sensor with a multimeter is a relatively easy process. Following these steps will help you determine if the sensor is functioning properly quickly and accurately. Keep yourself safe when working with electrical components by taking safety precautions. Regularly testing your crankshaft sensor will enable you to identify potential problems. For many years to come, this will help preserve the performance of your vehicle.
Read more of our articles here.
FAQs
What is the appropriate ohm value for a crank sensor?
Different models and makes of crankshaft position sensors have different resistances. A resistance of 500-1500 ohms is generally recommended. If you want to be sure, consult the service manual for your vehicle.
How does a faulty crankshaft sensor affect the engine?
Several engine problems can caused by a faulty sensor, including misfires, stalling. Also, it can cause fault codes to appear in your engine control module, resulting in an illuminated check engine light.
How safe is it to use a multimeter to test a crankshaft sensor?
You should always take the necessary safety precautions. Ehen testing your crankshaft position sensor with a multimeter. It is also important to read and follow the instructions for the multimeter you are using, as improper use could result in electric shock. For help using a multimeter safely, contact a qualified mechanic.
How can I determine if my crankshaft sensor is working correctly?
You should test your crankshaft position sensor with a multimeter to the instructions. A qualified mechanic can assist you if you’re not sure how to do this. A malfunctioning sensor can also be visually checked for signs of wear or damage.
When should I test my crankshaft position sensor?
You should perform regular maintenance checks on your vehicle’s crankshaft position sensor. To ensure optimal engine performance and reliability. Once a year or every 10,000 miles, test it with a multimeter according to the manufacturer’s instructions. The sensor should replaced as soon as possible if any issues found during the test.