Honda is known for producing high-quality automobiles, and its extensive lineup of side-by-side vehicles is no different. The Honda Pioneer 700 is a well-known off-road vehicle with exceptional towing capacity. However, customers have frequently reported Honda Pioneer 700 Transmission Problems.
The most frequent complaint is that the transmission slides or hesitates during speed shifts. As a result, the vehicle may lose power while traveling, which can be catastrophic.
Other complaints consist of the transmission being excessively raucous or grating. Some Pioneer 700 owners experienced a complete loss of power while traveling, which can result in a fatal crash.
If you have a Honda Pioneer 700, you’ve likely encountered transmission issues. These issues may vary from transmission sliding or failing to engage to transmission failure. In most instances, these issues are simple to resolve.
Read the complete article to learn more about the Honda Pioneer 700 transmission problems and how to solve them.
Overview of Honda Pioneer 700
As a capable rec/utility side-by-side that strikes the right balance between scale and capability, the Pioneer 700 is just right. Featuring a single-cylinder, 675cc four-stroke engine, it’s highly versatile and available in two- and four-seat configurations, as well as standard and Deluxe models. With painted plastic and aluminum wheels, Electric Power Steering (EPS) and color-matched suspension springs, the latter has a mix of eye-catching and performance-enhancing features.
ENGINE / DRIVETRAIN
- An overhead-valve liquid-cooled single-cylinder four-stroke engine powered by Honda’s proven fuel-injected 700-class technology.
- Three forward gears and a reverse gear in this automotive-style automatic transmission.
- Using the steering column-mounted paddle shifters, the automatic mode can also be overridden on-the-fly. Deluxe models come with a transmission that can switch between manual electric-shift mode and fully automatic mode.
CHASSIS / SUSPENSION
- Deluxe versions have aluminum wheels.
- The Deluxe version comes with Electric Power Steering.
- In Deluxe versions, plastic is painted for a striking look and a durable finish.
- QuickFlip seating offers versatility and adjustability for two, three, or four people on four-seat versions. This folding, stowaway rear-seat design allows the seating arrangement to be quickly and easily changed, while offering full bed space for two people.
- These Pioneer 700-4 models maintain a high level of maneuverability while still being able to seat up to four people with their two-person design.
- With a 7.9-inch front suspension and a 9.1-inch rear suspension, the ride is plush.
- Styles that are rugged, aggressive, and exciting.
- Towing capacity is 1,500 pounds and hauling capacity is 1,000 pounds.
- The design incorporates proven Honda technology for legendary Honda reliability.
CARGO and UTILITY:
Utility is one of the Pioneer 700’s strongest points. It is typically equipped with a rear cargo bed for hauling tools, supplies, and equipment. Manually tilting the bed makes unloading cargo easy. In addition, Pioneer 700s often have a towing capacity, making them suitable for towing trailers or equipment.
SAFETY and CONVENIENCE:
To enhance the safety of drivers and passengers, safety features can include seatbelts, roll cages, and side nets. Several models feature power steering, adjustable driver’s seats, and digital instrumentation to improve convenience and comfort.
Honda Pioneer 700 Transmission Types
There are two transmission options available for the Honda Pioneer 700: automatic and manual.
- Automatic Transmission:
In the Honda Pioneer 700, the automatic transmission is called the “Fully Automatic Dual Clutch Transmission”. In addition to its smooth operation, this transmission is also known for its efficiency. Two clutches work in tandem to handle odd-numbered gears (1st, 3rd, 5th, and reverse) and even-numbered gears (2nd, 4th, 6th).
By providing seamless and quick gear changes, the DCT system enhances the driving experience. Furthermore, automatic shifting allows the driver to concentrate on the terrain without constantly shifting. As well as adjusting power and torque delivery based on throttle input and load, the DCT can adapt to different riding conditions. - Manual Transmission:
By using a traditional foot-operated clutch and gear lever, drivers can change gears manually on the Honda Pioneer 700. Off-road or work situations in which precise control is required may benefit from this option, since it provides more direct control over gear selection. - Shift Modes:
Pioneer 700s equipped with DCT typically offer two shift modes: automatic and manual. As soon as the throttle is pressed and load is applied, the transmission shifts gears automatically. Gear shifts can be controlled manually through the steering wheel paddle shifters in Manual mode. In situations where the driver needs to select specific gears to ensure optimum performance, such as steep climbs and descents, this mode is useful. - Differential Lock:
A selectable differential lock is also available on the Honda Pioneer 700. By activating this feature, the rear wheels can be locked, providing increased traction when tackling challenging terrain or hauling heavy loads.
Transmission Design and Components of Honda Pioneer 700
The Honda Pioneer 700 features a robust transmission system designed to deliver reliable and smooth power transfer. Here are some key aspects to explore when discussing the transmission design and components of the Honda Pioneer 700:
Continuously Variable Transmission (CVT):
The Honda Pioneer 700 is equipped with a Continuously Variable Transmission (CVT). Unlike traditional manual or automatic transmissions, a CVT utilizes a belt and pulley system to provide a seamless range of gear ratios without distinct gear shifts.
Pulleys and Drive Belt:
The CVT system in the Pioneer 700 consists of two primary components: pulleys and a drive belt. The primary pulley connected to the engine and the secondary pulley connected to the drivetrain adjust their diameters to vary the effective gear ratio.
Clutch System:
The Pioneer 700 incorporates a centrifugal clutch system. The centrifugal clutch engages and disengages automatically based on engine speed. When the engine speed reaches a certain threshold, the clutch engages and transfers power to the CVT system, allowing the UTV to move forward.
Torque Converter:
The Pioneer 700’s transmission system may include a torque converter. A torque converter is a fluid coupling device that allows the engine to idle while the UTV is stationary, transmitting torque to the CVT without the need for manual clutch operation.
Oil Pump and Cooling System:
To maintain optimal operating conditions, the transmission system incorporates an oil pump and cooling system. The oil pump ensures proper lubrication and cooling of the transmission components, reducing friction and preventing overheating.
Shift Control Mechanism:
Although the Pioneer 700’s CVT system operates without traditional gear shifts, it may feature a shift control mechanism that allows the operator to select different drive modes or engage additional features like reverse or parking.
Filter and Fluid:
The transmission system of the Pioneer 700 incorporates a filter to remove contaminants from the transmission fluid, ensuring clean and efficient operation. Regular fluid changes and filter replacements are crucial to maintain the performance and longevity of the transmission system.
What are the Honda Pioneer 700 Transmission Problems?
The primary Honda Pioneer 700 Transmission Problems are-
Bad shifting:
For instance, the vehicle might shift into second gear too quickly, resulting in a loss of acceleration. Or it may refuse to shift at all into the third gear. Refill the oil and observe if this helps. But perhaps the transmission system is at fault.
Clutch problems:
Honda pioneer 700 clutch adjustment system is automatic and you may find no trouble with it. However, you may also observe the engine is powering up, but the vehicle is not accelerating quickly. This indicates that the clutch system is about to fail and the clutch must be replaced.
Switching Problems:
By pressing a specific button, you can quickly switch to 4WD mode, if necessary, with this transmission. But sometimes this electronic switch just glitches and doesn’t function properly. The Honda Pioneer 700 electrical problems may cause the 2WD-4WD system to fail.
AT/MT Mode Problems:
You will be able to choose between automated and manual modes with a Deluxe model. Through paddle shifters, the manual mode is accessible. But regrettably, owners frequently complain about issues with these paddle shifters and the way they function.
Transmission slip:
This issue arises frequently as a result of poor maintenance. Never use anything other than Honda-branded items to maintain your transmission. Other types of oil cannot provide a long transmission life.
Causes & Solution of Honda Pioneer 700 Transmission Problems
Let’s take a look at the most common causes and solutions to the transmission problem.
Worn-out clutch: Your transmission’s clutch is what connects and disconnects the gears. It may become worn out and lose its ability to grasp the gears firmly over time. The transmission may slide as a result of this or cease to engage altogether. Simply changing the clutch will fix the issue.
Low fluid level: Low transmission fluid levels can result in the clutches slipping and failing to engage properly. So, regularly check the fluid level.
Dirty fluid: Transmission fluid tends to get foul over time. The clutches may slip or fail to engage correctly as a result of this dirt accumulating on them.
Faulty solenoids: The solenoids are in charge of managing the fluid flow in the transmission. If they’re broken, they might not let enough fluid through, which would make the clutches slip or fail to engage. Therefore, replace them if needed.
Fortunately, you can swiftly fix the transmission even after serious malfunctions. The parts are the only issue. They are pricey, and there aren’t going to be any aftermarket alternatives to help you save any cash. These transmissions are relatively uncommon and aren’t employed in other forms of transportation.
How Long Will the Honda Pioneer 700 Transmission Last?
A transmission like this shouldn’t have a very short lifespan since it’s an automotive type. In a vehicle like this, 60,000 miles is actually a lot for a transmission. Basically, it will last you 12 years if you don’t drive more than 5,000 miles a year.
The lifespan of your Honda transmission depends on how you use it, both off-road or on the farm, for instance. When you use it for off-roading or towing trailers, for example, it can last for fifteen thousand miles or twenty thousand miles.
What are the Maintenance and Troubleshooting Tips for Honda Pioneer UTV?
- Use the 2WD mode at all times and only engage 4WD with differential locking when necessary.
- Manual driving can do the most damage to your Honda gearbox over its lifetime.
- Avoid wheel slippage because it can cause damage to the transmission’s clutch, which is a vulnerable component.
- Avoid speeding – it is not the vehicle’s intended use and its top speed is not an ideal technique to operate it. Generally, the Honda Pioneer 500 top speed is around 40-45 mph (64-72 km/h).
- When off-roading, inspect the undercarriage of your vehicle every time you strike a berm;
- Be cautious with your oil selection – you will be compelled to save money by purchasing aftermarket options, but it is best to purchase genuine Honda oil;
- If you are aware that the vehicle’s gearbox is malfunctioning, do not continue driving it because you may make the problem much worse.
How to Upgrade the Honda Pioneer 700 Transmission?
With its versatile capabilities, Honda’s Pioneer 700 can tackle a variety of terrain. However, it lacks low-end power, which can be fixed with the Honda Pioneer 700 Transmission Upgrade.
In tough conditions, this simple mod will give your Pioneer 700 extra power. It involves replacing the stock transmission with a higher gear ratio one from another Honda UTV. With this, the Pioneer 700 has lower gear ratios, making crawling and climbing easier.
If you’re looking to increase the power of your Pioneer 700, this transmission upgrade is definitely worth considering. It is relatively inexpensive and easy to do yourself.
Is there Any Kit to Rebuild the Honda Pioneer 700 Transmission?
There is a good chance that you will need to rebuild the transmission on your Honda Pioneer 700 sooner or later. When you need a transmission rebuild kit for this model, you’ll be glad to know you have one available. This kit comes with all the parts and gaskets you need to complete the project, and it is available from several suppliers.
The rebuild kit will save you money over buying a new transmission, whether you do the job yourself or have it done by a mechanic. It’s a good idea to rebuild your Pioneer 700’s transmission if you’re thinking about doing so.
How to Change the Transmission Fluid of Honda Pioneer 700
Fluid changes are an essential part of maintaining the Pioneer 700 (or any vehicle with a similar transmission). How often the vehicle is driven and what type of driving it undergoes will determine how often it needs to be serviced.
It’s not difficult to change the transmission fluid in the Pioneer 700, but there are a few things to keep in mind.
The first thing you need to do is make sure the fluid you use is the right kind.
Secondly, while draining the old fluid, it’s important to catch as much as possible to prevent any spills from getting into crevices or causing damage down the line. A drip pan will greatly aid in this process.
Thirdly, when you refill with new fluid, take care not to overfill; too much or too little oil can cause problems!
Are Honda Pioneer 700 Transmission Problems a Serious Issue?
Honda Pioneer 700 is an off-road vehicle that offers a high level of performance, a striking design, and a solid build quality. In spite of this, it may occasionally experience problems, just like any mechanical device.
It is common for Honda Pioneer 700 owners to experience engine and performance problems, as well as hard starting problems. There are a number of reasons why these problems may occur, including low oil levels, clogged oil passages, worn oil pumps, dirty or malfunctioning throttle bodies, and weak batteries. Fortunately, these problems are minor and do not have a significant impact on business.
When diagnosing and fixing Honda Pioneer 700 problems, consult the manual and follow the manufacturer’s instructions. By performing routine maintenance and inspections, the Honda Pioneer 700 can be maintained to maintain its performance and reliability.
Conclusion: Honda Pioneer 700 Transmission Problems
The Honda Pioneer 700 is the finest machine for farm labor, and it can also be used as a family ride. It provides a satisfactory driving experience and an advantageous fuel economy.
difficulties with the Honda Pioneer 700 include power loss, erratic oil readings, performance issues, a non-starting engine, and gearbox difficulties. These issues usually can be fixed at home. If you are unable to repair it, you can seek assistance from a Honda dealer. They will direct you and improve your problem resolution.
FAQs
What are a few typical gearbox issues with the Honda Pioneer 700?
While the Honda Pioneer 700 is generally a reliable vehicle, a few gearbox issues have been reported. Common issues include shifting difficulty, grinding or popping sounds during shifting, and sliding or jerky motions while driving.
What makes shifting cogs difficult?
Several factors can contribute to gearbox shifting issues. It may be due to a worn or damaged clutch, inappropriate clutch cable adjustment, insufficient gearbox fluid levels, or a malfunctioning shift fork or gear.
Why do I hear grinding or cracking sounds during gear shifts?
Grinding or cracking sounds during shifting may indicate problems with the synchronizers or gears of the gearbox. It may be the result of deteriorated synchronizer rings, broken gear teeth, or improper gear engagement. These issues may necessitate inspection and repair by a trained professional.
What can lead to skidding and shaking while driving?
Several distinct factors can contribute to slipping or jarring motions while driving. Low transmission fluid levels, a deteriorated or damaged clutch, a dysfunctional torque converter, and a defective shift solenoid can all contribute to this issue. It is advisable to have a professional inspect and diagnose the gearbox system to determine the precise cause.
How do I avoid gearbox issues with my Honda Pioneer 700?
Transmission problems can be avoided with appropriate maintenance and operation. It is essential to adhere to the manufacturer’s prescribed service intervals for gearbox fluid and filter replacement. In addition, avoid driving aggressively, particularly when transferring gears, and check the clutch’s adjustment to prevent unnecessary wear.
Auto technicians worldwide know a fundamental truth: the oxygen sensor is significant to your vehicle’s exhaust system. Often underestimated and relatively affordable to replace. This compact sensor is vital to maintaining your engine’s seamless operation. It is also free from harmful emissions. But often, people ask, “What happens if I unplug my O2 sensor?”
We know the oxygen (O2) sensor plays a crucial role in the car’s emissions control system. Its primary function is to measure the oxygen content in the vehicle’s exhaust, transmitting this information to the engine control unit (ECU). Subsequently, the ECU adjusts the air/fuel ratio to achieve optimal stoichiometry. This process leads to reduced emissions and improved fuel efficiency.
Now back to your question: what will happen if you unplug it? The answer is that without the O2 sensor, the ECU loses access to data regarding oxygen levels in the exhaust. Consequently, the ECU may enter “limp mode,” where it defaults to a rich air/fuel mixture not optimized for fuel economy or emissions. That can result in increased emissions, diminished engine performance, and heightened fuel consumption.
Want to learn more? Then keep scrolling.
What Is O2 Sensor Exactly?
The O2 sensor, also known as the oxygen sensor, it’s an essential component of a vehicle’s exhaust system. Its primary function is to gauge the oxygen level in the discharge gases. This valuable data then transmitted to the engine control module (ECM) for analysis.
With this information, the ECM can effectively regulate the fuel-to-air ratio during ignition, striving to achieve an optimal balance. The engine’s performance optimized by fine-tuning this ratio while minimizing harmful discharge gases’ release.
How Does Your Car Use Oxygen?
Your car engine generates power by igniting fuel and generating combustion. As a result of this combustion, oxygen absorbed. A bigger combustion requires more oxygen, which required for more power. By the car’s air intake, atmospheric air sucked into the combustion chamber, whereas fuel is injected into it.
Through the exhaust system, toxic exhaust gases will exit the car after combustion. During combustion, carbon monoxide, hydrocarbons, and oxygen released as exhaust gases.
What’s The Function Of O2 Sensor?
Fuel and oxygen must delivered to the combustion chamber in an optimal amount. The combustion process and the performance of your car are limited by insufficient fuel. Unburned fuel discharged into the exhaust system when too much fuel is burned, resulting in waste and pollution.
A sensor that measures oxygen (O2) plays a key role in this process. Measurement of Oxygen in exhaust gases performed by an O2 sensor. Using this data, the car’s computer will determine how much fuel to inject next by sending it to the ECU (electronic control unit).
An excess of oxygen in the combustion chamber indicates that there is not enough fuel. A combustion chamber with too much fuel has too little oxygen left over, while a chamber with too much oxygen has too little fuel left over. Other factors are also used by the ECU to determine how much fuel needs to be injected, but the O2 sensor is the most important.
The oxygen sensor should be located right before the catalytic converter in the exhaust system of a car. In a car, at least one oxygen sensor is usually present – especially in vehicles with larger engines. On the exhaust manifold, there are additional sensors. Oxygen sensors are located in each cylinder.
What Happens If I Unplug My O2 Sensor?
If you unplug the O2 sensor, the check engine light may come on, and the vehicle’s internal diagnostics system may also notice that the sensor is broken. Running your car with an O2 sensor that isn’t plugged in could also hurt your catalytic converter, which cleans your exhaust of harmful pollutants.
O2 sensors are an essential component of your car’s emission control system. But if a gauge isn’t working well, it can affect how well your car runs. It might even make you fail a pollution test.
What Are The Symptoms Of A Bad O2 Sensor?
The O2 sensor is what determines whether your car injects too much or too little fuel. If the sensor fails, your car won’t know if it should inject more fuel or less fuel. Many different things can happen as a result of this.
Check Engine Light Turned On
A malfunctioning O2 sensor will be detected by your ECU. As a result, the check engine light will come on. An O2 sensor does not always have to be bad for this to occur. There are many other reasons why the check engine light can come on – so bring your car to a mechanic if you don’t know why it’s on.
Reduced Performance
O2 sensors can also malfunction suddenly, resulting in a reduction in performance. Your car would keep driving with a restricted fuel supply without an O2 sensor, resulting in a lack of fuel injection in your engine.
Bad Fuel Economy
This point is the exact opposite of the one above. ECUs are unable to detect that they are injecting too much fuel if they do not have an O2 sensor – resulting in your car continuously wasting fuel. Alternatively, you might be able to tell by looking at your exhaust fumes – they might appear darker. Through the exhaust system, unburned fuel leaves the car.
Failed Emission Test
Your exhaust gas should be mainly water vapor and carbon dioxide if you have a working O2 sensor and a Catalytic Converter. The exhaust may fail the emission test now that you have wasted fuel leaving your vehicle. Also state may require you to perform regular emission tests, so it’s especially important to do this.
Contaminant
It is possible for O2 sensors to go bad if they are exposed to too many contaminates in the air. In this case, contaminants enter the engine through a dirty air filter or a performance air filter that’s too open. As a result of these contaminants, O2 sensors become less sensitive due to wear and tear damage or simply accumulate on them. I have an article about performance air filters – the pros and cons, if you’re interested.
Wear And Tear
A component like an oxygen sensor wears out over time. It is recommended that they be replaced every 90,000 miles. Due to the exhaust gases, the O2 sensors are subjected to high temperatures and pressures, causing wear and tear. You’ll need to replace your O2 sensors after 90,000 miles because they’ll no longer be as sensitive.
How to Fix a Malfunctioning O2 Sensor?
Start by using a heat gun or torch to warm the threads on the base of your sensor. It will become more pliable as a result, making removal easier.
After that, press down firmly on the button connecting the sensor’s cord to the plug using a flathead screwdriver. This makes disconnecting and reconnecting this cable to the sensor easier.
Third, lubricate the threads and base of the sensor with an impermeable oil. It should allow it to become more flexible so that you can remove it.
Additionally, exercise caution while you remove the oxygen sensor. Wear protective gear and steer clear of lifting or bending the car excessively.
Can I drive with the O2 sensor unplugged? What Happens If I Unplug My O2 Sensor?
Disconnecting the O2 sensor won’t make a car run any better. However, this O2 sensor is vital to the car’s emissions system, analyzing exhaust gas oxygen levels and sending the data to the car’s computer.
The computer uses this information to adjust the fuel-to-air ratio for maximum effectiveness and efficiency.
There are some drawbacks you can face while unplugging your O2 sensor, discussed below:
Higher emissions
Higher emissions result from the engine control unit’s (ECU) inability to accurately adjust the air/fuel ratio without a functioning O2 sensor. It might make your car fail emissions tests and hurt the environment.
Fuel efficiency reduction
If the O2 sensor is not connected, the engine control unit (ECU) will use an air/fuel ratio that is not optimal for fuel economy. As a result of the incorrect ignition timing, your engine will operate inefficiently and consume more fuel than necessary.
Misfires, engine stalling, and reduced performance are problems that can come from a vibrant air/fuel ratio.
Defective catalytic converter
The harmful particles removed from the exhaust by the catalytic converter, thanks to the ineffective air/fuel combination, may cause damage.
Check-engine indicator
Disconnecting an O2 sensor while moving may illuminate the check engine light. It indicates that there is a problem with the emissions control system.
How to delete O2 sensors from ECM?
Remove an O2 sensor from the engine control module (ECM) by modifying the vehicle’s engine management software. You require specialist tuning hardware or software to do this. That can alter the sensor parameters by accessing the ECM’s programming.
It’s crucial to remember that changing the engine management software can impair your car’s performance and emissions. In addition to increased emissions and poorer fuel efficiency, removing the O2 sensor may trigger the check engine light or other diagnostic fault codes.
How long can I drive without an oxygen sensor? What Happens If I Unplug My O2 Sensor?
Though it’s not good to drive with a faulty O2 sensor, you can use a defective oxygen sensor if your engine starts, and you can go. Please don’t leave it unattended for more than a few days since this could risk vehicle safety and damage other parts.
A disconnected O2 sensor makes emissions testing unlikely. A vehicle’s emission control system relies on the O2 sensor to measure exhaust gas oxygen. The engine’s ECU uses this data to fine-tune the air/fuel mixture for maximum efficiency in combustion and minimal exhaust fumes.
The ECU may only get reliable values if the O2 sensor is plugged in or fixed. Discharge gas testing may fail due to the ECU storing a fault code, lighting the check engine light, or both. Unplugging the O2 sensor can enrich the engine, reducing fuel economy, performance, and gas emissions.
So fix it if it malfunctions over time.
What Happens If I Unplug My O2 Sensor which is Downstream?
What Happens If I Unplug My O2 Sensor? Well Various things can happen. After installing the catalytic converter, vehicles need a downstream oxygen (O2) sensor to check exhaust gases. The exhaust oxygen sensor shows how successfully the catalytic converter reduces polluting emissions. Your vehicle’s performance, efficiency, and emissions may suffer if you remove your downstream O2 sensor.
Read more to learn what will happen if you remove the downstream O2 sensor.
Using more fuel
The O2 sensor downstream informs the engine control module (ECM) of the exhaust gas air-fuel ratio. The ECM optimizes engine performance and emissions by adjusting ignition and fuel injection timing.
Disconnecting the downstream O2 sensor may cause the ECM to default to a fuel-rich mixture. A rich fuel mixture can increase fuel consumption since the engine uses more fuel to maintain power output.
Low Engine Efficiency
Its downstream O2 sensor can detect catalytic converter and emissions control system faults. When the O2 sensor detects a problem, it lights the dashboard “Check Engine” light and stores a DTC in the ECM.
If you remove the downstream O2 sensor, the ECM cannot test the catalytic converter and may assume everything is fine. It could reduce engine power, acceleration, and response time.
Emissions Failure
Many states require annual emissions testing for cars. The emissions test examines CO, HC, and NOx in exhaust gases.
If you remove your downstream O2 sensor, your car may exhaust more pollutants than the law allows. It could cause your vehicle to fail the emissions test, necessitating costly repairs.
How Do I Fix an Unplugged Downstream Oxygen Sensor?
You already know what will happen if you unplug the downstream oxygen sensor. Now it’s time to learn the possible solutions.
Find the O2 sensor.
O2 sensors are generally on the exhaust pipe near the engine. You may find it in the owner’s manual or service instructions.
Connector check
Inspect the O2 sensor connector for damage or corrosion. You may need to repair the connector if you see damage or deterioration.
O2 sensor reconnect.
Reconnect the sensor if the connector is suitable. Make sure the connection is in the right place and is tight.
Fix errors
The ECM might store a trouble code if the O2 sensor was unplugged for a long time. It is possible to clear trouble codes using OBD-II scanners.
Drive the car around.
Test the O2 sensor by driving the car. Replace the O2 sensor if the check engine light returns or the vehicle fails discharge gas testing.
How To Fix Broken O2 Sensor?
Usually, people who are serious about improving their car’s performance remove the oxygen sensor. It is common for O2 sensors to detect too many pollutants and leftover fuel after installing performance parts like exhaust headers or nitrous oxide. The readings could cause the ECU to inject less fuel, inhibiting performance gains. As a result, the check engine light will also illuminate when the O2 sensor malfunctions.
It’s good to hear that the performance went well. Nevertheless, O2 sensors are included for an optimal ride for average people – good performance, good fuel economy, and low emissions. A car’s ECU can no longer calculate fuel injection amounts when the O2 sensor is removed. As a result, the ECU will fallback to its default value and inject the same amount of fuel every time. There is a possibility of either low performance or horrible fuel economy as a result.
When You May Need To Unplug The O2 Sensor?
Testing the O2 sensor
Test the voltage and resistance of your O2 sensor with a digital multimeter if you suspect it is malfunctioning. This type of work should only be performed by qualified mechanics with the appropriate equipment and expertise.
Welding near the exhaust system
To avoid damage to the O2 sensor from heat or sparks when welding near the exhaust system of your vehicle, disconnect the sensor before welding.
Engine tuning
When tuning the engine for maximum performance, the O2 sensor may need to be temporarily disconnected. Tuners who are experienced in manual air-fuel mixture adjustment should only do this.
What are the Precautions When Unplugging O2 Sensor?
Unplugging the oxygen (O2) sensor on your vehicle can damage the sensor, other components, or you. To keep in mind, keep the following in mind:
To prevent burns from hot exhaust components, ensure the engine is turned off and cooled down.
Work on your vehicle’s exhaust system while wearing appropriate protective gear, such as heat-resistant gloves and eye protection.
The most common O2 sensors have a threaded connector that can be removed with a wrench or socket. Ensure that the connector and sensor are not damaged.
Keep the wiring and connector in good condition: Do not damage them. There is often a fragility to the wiring and it can be easily damaged.
Store the O2 sensor safely once you have unplugged it: Make sure the O2 sensor is stored in a location where it will not be damaged or lost. We ask that you keep it clean and free of dirt, dust, and other contaminants.
Make sure the sensor is properly connected: When it’s time to reconnect the oxygen sensor, ensure it’s done correctly so that the wiring and the sensor are not damaged. Ensure that you use the correct torque specifications and thread sealant if necessary.
Can You Just Unplug My O2 Sensor?
The oxygen sensor can be unplugged, but it is not recommended.
Fuel economy can be decreased, emissions can increase, engine damage can occur, and performance can be affected if the O2 sensor is unplugged.
It is possible to trigger an engine control module (ECM) fault code by unplugging the O2, which will turn on your dashboard’s “check engine” light. Depending on your location, you may not be able to pass emissions testing if your vehicle has a problem.
Can You Pass Emissions with an Unplugged Oxygen Sensor?
When the O2 sensor is disconnected, a vehicle is unlikely to pass emissions testing. Oxygen in exhaust gases is measured by an oxygen sensor, which is an essential part of an emission control system in a vehicle. In order to maintain optimum combustion and reduce discharge gases, the engine control unit uses this information to adjust the fuel-to-air ratio.
It is possible for the ECU to receive inaccurate readings if the O2 sensor is disconnected or malfunctioning. When this happens, a fault code is set and the check light is activated, and the vehicle may fail discharge gas testing. Unplugged O2 sensors may also cause the engine to run rich, resulting in poor fuel economy, reduced performance, and more nitrogen oxide and hydrocarbon emissions.
The key to passing discharge gas testing is ensuring that all components of the vehicle’s discharge gas control system function properly. Before attempting to pass discharge gas testing, the lambda sensor should be replaced or repaired if it is disconnected or malfunctioning.
Final Thought: What Happens If I Unplug My O2 Sensor!
Finally, you know all the ins and out of the question, “What happens if I unplug my O2 sensor?” Taking out your car’s O2 sensor could significantly affect its performance, economy, emissions, etc. Disconnecting or turning off any part of your car’s pollution control system is not a good idea, as it could do more harm than good.
But if your O2 sensor is broken or has a problem, you should have it checked out and fixed by a trained mechanic. & ensure the car runs well and doesn’t break any rules about pollution.
Do you love driving down the road, shifting gears like a pro? If so, have you ever experienced the frustration of not knowing what gear you’re in & What Fuse Controls The Gear Shift Light? Well, it’s a common problem that many drivers face.
It is possible, however, that the driver may not know which gear they are in if the gear shift indicator light does not work, leaving them gloaming.
One of the most common reasons for the gear shift indicator light not working is a problem with the fuses. Specifically, fuses 26 and 31—located in the fuse box on the driver’s side dashboard—control the gear shift light. So if either of these fuses has blown, it could result in your indicator light ceasing to operate altogether.
But the gear shift indicator light may not be working for various reasons. In this article, we’ll discuss some potential causes of the problem.
What Is a Gear Shift Light?
Even if it’s a minor device, it makes driving and shifting gears much easier. Essentially, the shift light is an indicator to let you know when it’s time to change gears without taking your eyes off the road.
Drivers can use shift lights to determine when to change gears without glancing at the tachometer. Instead of constantly glancing down at the tachometer to see if you’re in the right RPM range for a gear change, you can watch for the shift light to come on.
It might not seem like much, but every second counts when you push your car to its limits! It makes driving more convenient and safer since your focus remains on the track or road ahead.
How Gear Shift Light Work?
There is a fuse that controls the gear shift light on your vehicle. The light is activated when the key is turned to the ON position and power flows through the fuse. After turning off the ignition or putting the car in reverse, the light will remain illuminated. As a result, the driver is able to remember what gear he or she is in at all times. Additionally, it prevents the transmission from being damaged by accidental gear shifts.
Replace a blown fuse by replacing it with an identical one of equal amperage rating under your dashboard. To ensure that fuses work correctly, all electrical connections must be properly connected before they are replaced. In addition, you should always check the fuse before taking your car to the shop if you notice a problem with the shifter light.
In the event that a fuse does not appear to be the problem, then there may be an issue with the wiring somewhere along the line. A qualified mechanic should be consulted in this situation to inspect and diagnose any potential electrical issues your vehicle may have. In addition to helping ensure that your gear shift light works properly, these precautions can help prevent expensive repairs in the future.
By replacing a blown fuse and making sure all electrical connections are secure, you can ensure that your gear shift light continues to function correctly. Using incompatible items when replacing fuses could further damage your vehicle. Follow manufacturer’s instructions when replacing fuses. A professional mechanic can assist you in replacing the fuse if you are not sure how to do it.
Why Is the Gear Shift Light Important?
Maybe you’re thinking, What’s the use of a simple little gear light? & you know which gear you’re in by feel!
Well, it’s common knowledge that safety should always be a top priority while driving. And one of the most important aspects of staying safe on the road is ensuring you’re in complete control of your vehicle at all times. That’s where the gear shift light comes into play.
It may be necessary to rely on your instincts sometimes. Sometimes, it can be hard to tell which gear you’re in, especially if you’re driving a vehicle you’re not used to.
It’s a quick and easy way to double-check which gear you’re in, no matter the conditions. Not only does it help you avoid potentially dangerous situations, but it also makes driving more comfortable and less stressful.
Why Shift Indicator Light Stays On?
It is possible that a faulty switch is the cause of the shift indicator light staying on. Over time, the switch that controls the shift indicator light may become damaged or worn, causing it to malfunction. It would be necessary to replace the switch in this case in order for the indicator light to function correctly.
Perhaps there is a problem with the electrical system. There may be a problem with the wiring or electrical system that controls the shift indicator light, which may remain on even when the vehicle is in the correct gear.
If you are experiencing this problem, you should have your electrical system inspected by a qualified mechanic.
There is a possibility that the shift indicator light will stay on if the transmission malfunctions. A malfunctioning transmission or other issues may prevent the transmission from communicating the correct gear information to the shift indicator light. This issue would require repairing or replacing the transmission.
What are the reasons the Gear Shift Light Stop Working?
The gear shift light can sometimes stop working properly. Knowing what could be causing this problem can help you figure out what’s wrong and fix it.
Here are some of the most common reasons why the gear shift light may not work.
- Electronic Control Unit Issues
- Wiring problems
- Disengaged Connection
- Misalignment
- Malfunctioning shift indicator module
Electronic Control Unit Issues
The ECU, also known as the engine control unit, is an essential component of a car’s electrical system that oversees various functions, such as fuel injection and ignition timing. A malfunction or programming error in the ECU can result in an array of problems, including issues with the gear shift light.
When this happens, it’s important to get professional help from specialized diagnostic tools to figure out what’s wrong with the ECU and fix it. If you don’t take care of these things, it could lead to bigger problems.
Wiring problems
Wiring problems or bad connections are another common reason the gear shift warning light might not work.
Over time, the wiring that ties the light to the car’s electrical system may get broken or loose, causing the light to stop working.
It stops the power from going to the gear shift light so it won’t light up.
Also, the shift indicator bulbs in the panel may burn out, which can also stop the light from working.
Disengaged Connection
If the gear shift warning light works when the headlights are on, then the light is probably working correctly.
But if the light still doesn’t work, the shift indicator wire or the light may be broken due to a disengaged connection.
If the wire isn’t connected to the light well, the light might not work. It can stop the flow of electricity to the light, making it stop working.
Also, worn or broken wires can cause a short circuit, making the light stop working.
Misalignment
When the gear shift warning light isn’t working right, it may be because something isn’t lined up right.
Misalignment of the gear can make the gear indicator show the wrong or no gear. Most of the time, a mechanic can fix this problem by adjusting the indicator’s position and ensuring it works properly.
Malfunctioning shift indicator module
The gear shift light problem may sometimes be attributed to a malfunctioning shift indicator module because the shift indicator module controls the gear shift light and displays the correct gear position.
If the module develops a fault, it may fail to send the necessary signals to illuminate the gear shift light.
Diagnosing, repairing, or replacing the faulty shift indicator module may be required to restore the gear shift light’s functionality.
What are the Indicator of Gear Shift Light Not Working?
Check Engine Light Comes On
The first thing you should do if you notice a problem with your gear shift light is to check the fuse that controls it. A blown fuse will prevent the light from working. There may be another problem underlying the fuse if the light isn’t turning on even when the fuse is still in good condition. During the course of time, the wiring between the switch and bulb could have corroded or damaged.
Wrong Gear Reading
There is also the possibility that the car is not reading the right gear when there is a malfunctioning gear shift light. In automatic transmissions, the gear shift light will need to be manually calibrated in order to work properly. In the event that you recently installed a new transmission, then there may have been a problem during installation and the light is still on.
Shift Indicator Does Not Move
It’s possible that something is wrong with the linkage between the gear shifter and transmission if your gear shift indicator does not move when you shift gears. Keeping your gear shift light off could also be a result of this problem.
Once you’ve ruled out all of these causes, it’s recommended that you have your car looked at by a professional mechanic. In this case, your mechanic can diagnose the issue and recommend a course of action to restore your gear shift light to working order.
What Can You Do to Fix Your Gear Shift Light?
The gear shift light is an essential component of your vehicle that indicates the current gear selection. It can be frustrating and potentially unsafe when it malfunctions and fails to illuminate well.
Follow the steps to troubleshoot and fix the issue with your gear shift light. Here are some effective methods to consider:
- Start by checking the fuse related to the gear shift light and replacing it if it’s blown.
- Inspect the bulb for any signs of damage and replace it if necessary.
- Examine the wiring harness for loose connections or damage.
- If these steps don’t fix the problem, it’s best to call a professional mechanic who can figure out what’s wrong and fix it.
What are the Changing Process Of A Gearbox Light?
Vehicles’ gear shift lights alert the driver when it’s time to change gears by indicating when it’s time to shift. The system must, however, be connected to an appropriate fuse if it is to function properly. In other words, it determines how bright or dim the gear shift light should be based on the power flow from the battery or another source of electricity. The gear shift light fuse needs to be located and identified in order to be replaced or repaired.
Your car’s make and model can affect the process for finding and replacing a fuse related to its gear shift light. When it comes to identifying your light’s fuse, there are two general approaches. To find the correct fuse, you should first consult the owner’s manual, which should contain diagrams and schematics. You can also consult with a trusted mechanic or car technician, who will be able to identify and replace the fuse if needed.
Final Thought: What Fuse Controls The Gear Shift Light?
We know that fuses 26 and 31 control the gear shift light in the driver’s side dashboard fuse box. However, in most cases, this fuse is located within the interior fuse box and labeled as an “instrument panel” or “cluster.” It’s important to note that if this fuse blows out, your gear shift light will cease functioning correctly, and other dashboard lights may also be affected.
FAQs
What’s the process of a gear shift indicator?
The gear shift sign on the driver’s display tells you what gear you are in and when you should change to the next gear to get the best gas mileage. When changing gears manually, you need the right tools to switch gears for eco-driving sensibly.
What is a sign of shifting?
The shift or gearshift sign is a display that tells you what gear your transmission is in.
How do automated cars’ gear shift indicators work?
The gear shift sign tells the driver when to switch to the next higher or lower gear to use the minor gas. It is essential to drive in the right gear and change gears early enough to drive in a good way for the environment.
How does one operate the gear shifter?
A gear shift control system that feeds a microcomputer to transmission output speed and gear position signals.
How can I understand if my shift monitor isn’t working?
When you can’t get your car out of neutral or park, it’s a clear sign of a significant problem with the shifting system. If the transmission position sensor is broken, it might not send the Powertrain Control Module (PCM) the right signals.
A blown radiator hose can be an annoying and inconvenient issue for car owners. Therefore, you might be wondering what causes radiator hose to pop off.
The radiator hose, however, may occasionally keep blowing off for various reasons. Overheating and possible engine damage result from this issue for the car.
It’s rather typical and, in some circumstances, could have been prevented! So let’s have a look at the most common reasons and solutions that might answer the question of what causes the radiator hose to pop off!
What are Radiator Hoses?
Radiator hoses convey engine coolant to and from the radiator. The upper hose carries hot coolant from the engine to the radiator. The lower hose carries the cooled fluid back to the water pump and then back into the engine. The water pump circulates this coolant continuously while the engine is running.
These hoses designed to remain flexible across a temperature range from about -30 degrees to 250 degrees F. High-performance hoses can provide an even broader temperature capability for racing applications.
Hose construction typically includes a layer of aramid, polyester, or Nomex fibers to help the hose endure pressure. Hoses on today’s cars can last well over 100,000 miles, sometimes exceeding twice that value.
What Happens When a Radiator Hose Blows?
The radiator hose, which transports coolants from the radiator to the engine, is a crucial component of the radiator. The coolant flow from the radiator to the engine is interrupted when the radiator hose bursts. If the issue not thoroughly investigated, it may cause damage to various engine components and ultimately result in engine failure.
Moreover, leakage is another sign of a blown hose. A coolant leakage on the ground will be visible, which prevents coolants from reaching the engine, causing heat to build up.
Checking Your Radiator Hoses
The condition of your radiator hoses checked every time you change your oil. This can only be done after the engine has been turned off and cooled. When the engine is running, do not inspect the hoses with your hands; this poses a severe injury risk.
What Causes Radiator Hose to Pop Off:
what causes radiator hose to pop off? 8 Common Reasons!
Broken Coolant Hose Clamp
Hose clamps rarely become loose for no apparent reason. If they are loose, the hose will pop off when hot water starts flowing through it and pressure builds up in the cooling system.
Head Gasket Malfunction
The head gasket is a part that fits within the engine block and the cylinder head and seals the combustion chambers to prevent coolant, oil, and exhaust gases from combining with one another. A failed head gasket causes the radiator hose to rupture.
Damaged radiator cap
The cap sends coolant and additional pressure back to the reservoir when the internal cooling system pressure exceeds its threshold. A radiator hose could pop off if the cap doesn’t work properly because of higher pressure levels.
Damaged Coolant Hose
If the hose material deteriorates, it loses its capacity to retain its shape and elasticity or splits and degrades over time; as a result, the hose is unable to maintain a tight seal and may pop off.
Expansion Tank Hose Blockage
When there is a blockage, the air cannot return to the expansion tank, creating a vacuum similar to what happens when the radiator pressure cap breaks. This vacuum can lead to a hose collapsing or even popping off when the pressure builds up too high.
Radiator Blocked Problem
Pressure builds up within the cooling system as a result of the restricted coolant flow that results from blocked radiators. The radiator hose may pop off its fittings and become disconnected from them if the pressure is too much for it to handle.
Excess Fluid
Due to pressure buildup, overfilling the cooling system may result in a damaged radiator hose. Leaks that let air into the system and poorly controlled coolant levels can both cause this.
Water pump Malfunction
The coolant pumped by the water pump via the radiator and around the engine. The cooling system may experience isolated areas of high pressure due to insufficient coolant flow, which may result in a radiator hose rupturing.
What Are The Symptoms of A Radiator Hose Blowing Off
The following signs of a blowing radiator hose may point to its causes:
- Any obvious hose leaks, tears, or cracks.
- The radiator’s or coolant reservoir’s coolant levels have dropped.
- Higher than usual readings on the engine temperature gauge.
- From the engine area, a burning stench is coming.
- Spilling or leaking coolant.
- In the coolant is rust or particles.
- The hose connections are faulty or leaky.
- Poorly positioned or aligned hoses.
- Stalling or lowered engine performance.
- The engine compartment issues steam or smoke.
- Uncommon engine noises.
- Higher than usual readings on the engine temperature gauge.
- Stalling or a reduction in engine power.
Can a Collapsed Radiator Hose Cause Overheating?
There is a possibility that an overheated hose may collapsed. The flow of coolant will be restricted if a hose goes flat while you are driving. The instrument panel will display an overheating warning light and/or an elevated temperature indication.
The engine must shut off as soon as possible by pulling over to the side of the road. When an engine is overheated, it can suffer severe damage if it is driven.
Apart from a collapsed hose, several other causes can contribute to engine overheating problems.
8 Simple Steps to Repair Your Blown-Off Radiator Hose
Before you can drive your car again, your radiator hose needs to be fixed or replaced if it has blown off. The following are the procedures to fix a blown-off radiator hose:
- Please shut off the vehicle and allow it to cool. You won’t risk burning yourself on any hot components if you do this.
- Find the radiator hose that was blown off. Usually, it will be close to the engine and radiator.
- Look for any splits, cracks, or other damage in the hose. The hose must be changed if it is damaged. Use a rubber patch kit to temporarily repair the hose if the damage is small.
- To get rid of any dirt or debris, wipe the area around the hose with a towel. This will guarantee effective adhesion of the replacement hose or patch.
- Put the hose or patch back on. If the hose has to be replaced, slide it onto the fittings and tighten the clamps. Apply the rubber patch to the damaged section of the hose and secure it with hose clamps if you’re patching it.
- Add coolant to the radiator once more. For information on the right kind of coolant to use and how much to add, consult your owner’s manual.
- Run the engine for a few minutes after starting it. Examine the area around the repaired hose for any leaks. As long as there are no water leaks, everything should be fine. If there are leaks, the clamps might need to be tightened or the hose could need to be changed.
- An urgent solution is needed for a blown-off radiator hose because it is a serious issue. The engine could suffer catastrophic failure if you keep going while the hose is blown off. If you aren’t confident fixing the hose yourself, you should have a qualified expert do it.
Should Both Radiator Hoses Be Hot? What causes radiator hose to pop off!
When the upper hose is carrying coolant directly from the engine, it will become quite hot after just five miles of driving. The bottom hose, which conveys coolant back to the engine, will be warm to the touch if the radiator is functioning.
If, after the engine has warmed up, the lower hose is cold to the touch, you most likely have a problem.
How often should you change your radiator hose?
In order for the radiator to transfer coolant to these components while allowing the engine to run optimally, the radiator hose connecting the radiator to the thermostat housing and from the radiator to the water pump is usually made of soft rubber. These hoses will eventually wear out due to elements found in the engine bay, antifreeze chemicals, and exposure to cooling and heating cycles.
It is usually not specified when to change these hoses by auto manufacturers. By visual inspection, you can tell when they need to be replaced. It is possible to do this by squeezing the hoses. In order for the hose to spring back when depressed, it should be firm. Whenever the hose springs back slowly or feels spongy, it indicates that it needs to be replaced. The hoses should also inspected for cracks and fraying on both ends. Check the clamps holding the hose for swelling and cracks.
How To Replace A Radiator Hose?
The replacement of a radiator hose can completed in just a few hours. You need to follow these steps:
- Be sure to set the parking brake and park in a safe place.
- Remove the hood from your car and locate the radiator.
- Use a crescent wrench to loosen the clamp on the radiator hose that needs to be replaced.
- Dispose of the old radiator hose carefully.
- Seal the new radiator hose with radiator sealant.
- Carefully insert the new radiator hose into the clamp and tighten it with the crescent wrench.
- Allow the radiator sealant to dry by closing your car’s hood and starting it up.
- Make sure the new radiator hose is properly seated by driving your car a few miles.
Be sure to follow these steps carefully when replacing a radiator hose. The radiator hose can be easily replaced if you follow the instructions carefully.
What is the Replacement Cost of Radiator Hose?
It is better to be safe than sorry when it comes to replacing radiator hoses. You should replace your hoses immediately if you experience any problems. You will be able to maintain the safety and efficiency of your vehicle by doing this.
Around $250 is the average cost of replacing a radiator hose. You can expect this price to vary depending on the type of hoses you need and the model of your vehicle.
The cost of this repair can be affected by a few factors, such as the amount of labor required and the availability of parts. Whenever you need a radiator hose replaced, consult a trusted mechanic for an estimate.
Should a radiator hose be hard when hot?
It is important to have a firm radiator hose when running a hot engine (not too hard). Because of the engine block’s high pressure, hot water flows through the radiator hoses. The radiator cap spring releases the high pressure at this point, allowing the hot water to return to the reservoir tank. When the engine is hot, you will get scalded if you open the radiator. When the engine is hot, avoid opening the radiator cap.
Should You be Able to Squeeze the Radiator Hoses?
Yes, you should be able to squeeze the hoses once the engine has been turned off and cooled down. It is important that hoses are flexible, but they should not feel squishy or spongy when pressed with your finger. Brittle and hard hoses will age.
It is important that both hoses have a uniform diameter without bulges or cracks that can be observed. Replace brittle, bulging, or cracked hoses immediately if they are squishy, brittle, or brittle.
Warning:
Old hoses exhibiting the above symptoms may spontaneously rupture. When examining a hot engine with the engine off, hose failure can cause severe burns or blinding if coolant sprays onto you.
Quick Fixes You Can Do for the Blown Radiator Hose
If you are not comfortable repairing your car or are looking for a quick fix before replacing the hose, you might find this article useful. If you need a temporary fix, try insulating tape instead.
An auto repair shop or gas station can provide you with insulating tape. You will be good to go once you wrap the tape tightly around the leak.
As an alternative, you can use duct tape if you have it.
Your mechanic will need to replace the hose in either case as soon as possible, as it won’t last that long.
Can You Drive with A Blown Radiator Hose?
There is no reason for you to do so. You have already heard that your vehicle’s cooling system is primarily composed of a radiator. Driving a car with a coolant leak due to a blown radiator hose will only allow you to do so for a short period of time.
The water pump will start sucking air once the coolant has been drained completely. Your engine will overheat quickly and internal parts of your car will suffer extensive damage as a result.
6 Effective Tips: what causes radiator hose to pop off!
Here are six preventive measures to avoid the radiator hose blowing off:
- Regular Maintenance: As part of the scheduled preventive maintenance for your car, check and replace the radiator hoses.
- Replace Worn-Out Hoses: Any hoses that are old or worn out should be replaced before they become a potential source of trouble
- Check Coolant Levels: Regularly check the coolant level and, if necessary, add more.
- Use The Right Type Of Coolant: Always use the particular type of coolant that the manufacturer recommends
- Check For Physical Damage: Check the hose frequently for any indications of physical wear and tear, such as cracks or rips, and replace it if necessary.
- Avoid Overheating: Avoiding driving your automobile while the interior temperature is too high would be beneficial as doing so could injure the hoses and other parts.
Conclusion: what causes radiator hose to pop off!
You might now got an idea of what causes radiator hose to pop off. In conclusion, blown radiator hoses are a serious problem for car owners. The main causes of blown radiator hoses include old or worn-out hoses, overheating, excessive fluid, contaminated coolant, faulty installation, physical damage, defective radiator caps, clogged radiators, and broken thermostats.
Radiator hose blowouts are avoided with regular cooling system maintenance and inspection. Problems can be avoided by checking the coolant level, cleaning the radiator, and replacing the hoses. Quickly address overheating issues to prevent damage to the cooling system and engine.
FAQs
My radiator hose popped off; why?
An enormous buildup of pressure within the cooling system is the most frequent reason for a radiator hose to suddenly pop off. This can happen for a number of different causes, such as a broken radiator cap, a clogged or constrained radiator, a broken thermostat, or a blown head gasket.
Can an old radiator hose come loose?
Yes, radiator hoses can weaken and degrade with time, which increases the likelihood that they will rupture. The hose material may degrade, split, or become brittle with age, increasing the likelihood that it will rupture under pressure.
What part does coolant play in the failure of radiator hoses?
Antifreeze, sometimes referred to as coolant, is an essential component of the cooling system. Coolant contamination, aging, or insufficiency can cause overheating, which puts an excessive amount of strain on the radiator hose.
Can radiator hoses come off due to incorrect installation?
Yes, radiator hoses can pop off due to incorrect installation. A weak connection that could rupture under pressure can be made if the hose clamps are not tightly fastened or the hose is not positioned correctly in relation to the connection locations.
Do radiator hose pop-offs have a way to be prevented?
You can take a number of preventative actions, yes. Check the condition of your radiator hoses on a regular basis for wear, cracks, or leaks. Make sure the quality and level of the coolant are suitable for your car.

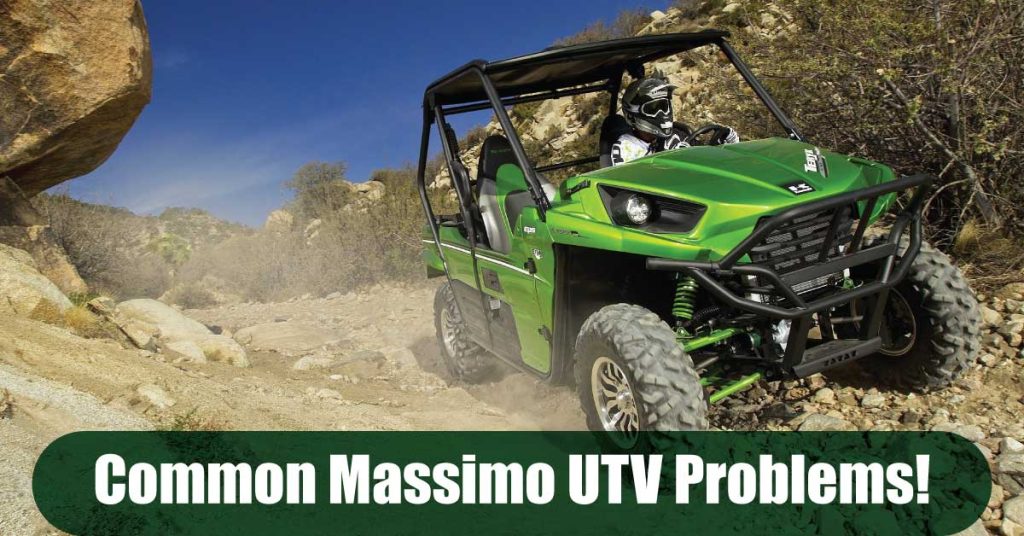
Since the early 2000s, Massimo has gained a reputation as one of the most reliable and durable UTV manufacturers. The UTV can handle rough terrain better than large trucks, whose size prevents them from working correctly. With a sophisticated interior and a spacious cargo area, this vehicle is perfect for hauling a farm.
While the vehicle is relatively efficient and high-quality. Some owners have encountered vehicle issues that could have been avoided if identified and addressed quickly. Off-road enthusiasts know that there cannot be a UTV without problems.
There is a connection between off-roading and common problems. Such as brakes, acceleration, wiring, and gear systems.
The Common Massimo UTV Problems Include:
- Starting Problem
- A failed cooling system
- 4-Wheel Drive Issue
- Wiring Problems
- Malfunctioning in Injector
- Problems in the Braking System
- The problem with Gears
- Poor Acceleration System
- The Internal Problems with the Engine
We’ll explore The common Massimo UTV Problems and provide quick fixes to get you back on the road.
Starting Problem
Massimo UTVs tend to show issues when they are started. Various factors cause the car to not start and the engine to make a clicking noise. A worn-out battery and worn-out wires are among the reasons. You may also experience starting problems with your Massimo UTV if you have a or an ineffective idle air control valve.
To fix starting problems in your Massimo UTV, follow these steps:
- You should check the battery in your vehicle. Cleaning the battery terminals if you notice carbon has settled on them. Checking the functionality of the battery with a voltmeter is a good idea. A defective or damaged battery causes the vehicle to have trouble starting.
- If the battery is correctly connected, you can check the associated parts, such as the fuse box, for a spark.
- If the injector has a problem, fix it immediately to avoid inconvenience.
A failed cooling system
A failed cooling system or insufficient coolant is usually the cause of an overheating engine. Maintaining the coolant level in your Massimo’s engine and checking for leaks will ensure it runs smoothly. A faulty thermostat can sometimes contribute to an overheating engine. It might be necessary to replace the thermostat if it is not functioning properly.
Check the dilution of antifreeze in the engine if there is a problem with the coolant. Maintain a ratio of 1:1 or greater. It is better to have a mechanic repair the radiator sensor and fan motor if coolant issues arise.
To fix the failed cooling system Issues with Massimo UTV follow;
- Make sure the radiator fan is working. In high temperatures, the fan must be turned on.
- Check the temperature sensor on the radiator if the fan isn’t turning on.
- Put the jumper lead on the sensor, and make sure the fan is running. You need to check the fan if it does not turn on.
4-Wheel Drive Issue
Getting to your destination can be significantly frustrating if you have a 4WD issue with your Massimo. It’s not just an annoyance when the 2WD to 4WD button doesn’t work, but also a safety issue. A vehicle that doesn’t shift into 4WD when necessary is never a good situation. The transfer case is likely to cause vehicle sluggishness in 4×4. Fluid could be low in the transfer case, or the transfer case could be worn out.
Check the relays as the first point of diagnosis when diagnosing the 4WD issue.
- Next to the battery, it’s under the front hood.
- Get to know the relays. Your 4WD relay is the fourth relay.
- Disconnect the relay
- Change it with a 4WD relay.
- Next, the 4WD servo motor should be checked if the relays are working correctly.
Massimo UTV’s 4WD problem can be fixed by replacing the servo motor module when an issue is found with the servo motor.
Malfunctioning in Injector
An injector malfunction can cause serious Massimo UTV problems. Dirty or clogged injectors can cause serious problems when fueling an engine. The most common symptoms of a bad injector include misfiring, increased noise, and frequent engine stuttering. Symptoms of a faulty injector include poor performance and high fuel consumption. Defective injectors can, however, lead to your engine stopping working altogether due to their severe nature.
You may experience a seizure and vibrations throughout the body of your UTV when this happens.
Fixing a multifunction injector in a Massimo UTV typically involves the following steps:
Clean the injector: If the injector is clogged or dirty, it may not be functioning properly. To clean the injector, use a fuel injector cleaner and follow the manufacturer’s instructions.
Replace the injector: If the injector is damaged or worn, it may need to be replaced. To do this, you will need to purchase a new injector that is compatible with your Massimo UTV and follow the manufacturer’s instructions for installation.
Check the fuel system: In some cases, the problem may not be with the injector itself, but rather with the fuel system. Check for any leaks, blockages, or other issues that could be affecting fuel delivery.
The problem with Gears
Gear systems on Massimo UTVs can become stuck, preventing the vehicle from moving. Poor gear oil quality and poor gear linkage adjustment are among the causes of this issue. Not properly adjusted gears cause the vehicle to fail to shift properly.
Problems in the Braking System
A hydraulic disc brake is used at the rear, which is also operated by the same pedal. Apart from periodic checking of the pads for wear, these brakes also self-adjust. There is a known problem with the braking system on Massimo UTVs: they stop more slowly than other vehicles. Despite your best efforts, you may run into obstacles if you need to come to an emergency stop with a Massimo UTV.
This can be extremely dangerous and can lead to severe accidents. The braking issue is so critical that Massimo UTV owners should be extra cautious while driving and aware of it.
It depends on what kind of driving you’re doing and how to fix it. During highway and motorway driving, you can constantly brake and accelerate, which can eventually damage your brake pads and discs. Change the pads at 3/64′′ (1mm) of friction material wear. Keeping your brakes in good working order will ensure a high level of safety and stopping power.
Also, inspect the brake pad and disc wear surfaces for excessive wear. To pass this phase, you can try the emergency braking system if the braking system fails to respond while driving the Massimo UTV. It is better to have the brakes replaced by a mechanic if the brakes are insufficient or damaged.
Poor Acceleration System
Massimo UTVs tend to have issues with acceleration when the accelerator pedal is pressed. In general, owners do not consider the acceleration problem a big problem, but it can cause problems on highways or near fields. There are a few factors that contribute to Massimo UTV acceleration problems.
- First of all, there might be a problem with the engine and transmission.
- Engine and transmission working together may be necessary to accelerate the UTV.
- A malfunctioning ignition system or spark plug may also result in less power output.
- Poor acceleration in Massimo UTVs is often caused by dirty or old gas tanks, faulty transfer pump screens, and low fuel pressure.
To fix this problem, follow these.
Check and replace the transfer pump screen if there is a fault. The gas tank can be cleaned if it is dirty, as dust and other particles can clog the acceleration system. A mechanic is recommended if you need to replace the gas tank.
The Internal Problems with the Engine
A common problem with Massimo UTV is engine failure, which can have a variety of causes. As a result, the engine lifespan is reduced as a result of overheating. Some issues can arise in the engine as a result of problems with the ejector. As a result of dust and dirt clogging the ejector, the engine’s performance can be adversely affected.
Common Advantages And Disadvantages Of The Massimo UTV
Even though many drivers encounter these issues, Massimo UTVs are fantastic machines offering distinct benefits.
Users have praised Massimo UTVs for several reasons; here, we’ll examine the brand’s strengths and shortcomings.
Advantages
- Unbelievable power output from the engines
- Excellent for use on any rough terrain
- Superb damping mechanism
- Two people can comfortably fit.
- A pleasant and tastefully decorated interior
- Huge receptacles for storing things towards the rear
Drawbacks
- Poor stopping ability
- Inadequate prompting system
- has frequent leaks
How Do You Fix Issues With A Massimo UTV?
Troubleshooting issues regarding your Massimo UTV immediately is of the utmost importance. You can check the owner’s handbook or a specialist to determine the solution.
Look for disconnected cables or dangling fasteners while diagnosing a UTV. Check for rust or damage to the spark plugs. Check for rust or damage to the spark plugs. All of these should be checked before attempting more involved fixes.
If you’ve eliminated these possibilities and you’re still having problems, it’s probably because of a more intricate issue in your engine or the transmission. In some circumstances, your UTV may need to be brought in for additional diagnostics and repairs. If you need help fixing this, you should call a professional mechanic.
Finally, always adopt proper safety procedures when fixing your Massimo UTV. Maintaining your vehicle requires safety gear, including gloves and eye protection.
In addition, before performing any repairs, read the owner’s manual carefully to familiarize yourself with the manufacturer’s specified procedures. Following these guidelines, you should be able to reliably and safely identify and fix problems in your Massimo UTV.
How to Prevent Your Massimo UTV Problems
Fixing a Massimo UTV once it breaks down is expensive and frustrating.
Take Special Care To Preserve Your UTV
Maintaining a vehicle properly means regularly inspecting its oil, brakes, tires, and drive belts to ensure they operate well. In addition, it’s important to repair worn-out components or fluids promptly.
Carry out Regular Maintenance
It is recommended that you get your Massimo UTV serviced once a year. During this maintenance period, you should change out any worn parts, such as spark plugs or air filters, and inspect the quality and level of any fluids.
Perform Frequent Battery Tests
To keep your Massimo UTV running smoothly and efficiently for a long time, you must thoroughly inspect it at regular intervals. Ensure double-check the device’s charging ports, battery life, and condition.
Make Frequent Oil Changes
Since oil is essential to the proper functioning of your Massimo UTV, it should be changed frequently as recommended by the manufacturer or if you notice a drop in performance.
Inspect the Filtration System
You should regularly inspect the UTV’s air filter system for dirt buildup or obstructions that could reduce airflow and engine performance.
Put Away Correctly
Even more so in the winter, when cold temperatures might cause engine difficulties, it’s best to keep your Massimo UTV stored in a dry, cool spot when it’s not in use. If a Massimo is stored outside, the owner should protect it with a cover.
These precautions will lessen the likelihood of any issues developing with your Massimo UTV and prolong the machine’s useful life. Massimo UTVs are great for leisure and commercial use because of their amazing ride quality and onboard technology. Take care of your machine with Lion Parts, and it will continue to care for you!
Final Thought: Massimo UTV Problems
Despite some potential Massimo UTV problems, it’s still worth considering if you want a robust, reliable, and spacious side-by-side. Although Massimo owners typically enjoy their vehicles, potential customers should conduct thorough research before purchasing. For those seeking an adventure-ready UTV, Massimo UTVs can be an excellent choice.
FAQs: Massimo UTV Problems!
A Massimo UTV is what it sounds like.
Using a Massimo UTV, also called a side-by-side, you can perform utility tasks. Work, recreation, and hunting are among the common uses of UTVs.
Which Massimo UTV models are available?
Its UTV models include the MSU-400, MSU-500, MSU-700, MSU-850, and MSU-1000.
Massimo UTVs come in what price range?
There are a variety of models and features available for Massimo UTVs. In general, they cost between $6,000 and $14,000.
Massimo UTVs come with a warranty, right?
One-year limited warranties are usually provided with Massimo UTVs. It is also possible to purchase an extended warranty.
Learn about to Bennche UTVs problems and issues check it out Bennche Utv Problems And Reviews

Bennche UTVs are a popular choice for those in need of a reliable utility vehicle for work or recreation. Yet there are numerous Bennche UTV Problems reported by consumers.
Bennche UTV is a line of utility vehicles designed for work and recreational use. Utility Terrain Vehicles are off-road vehicles designed for a variety of terrains and tasks. They are called UTVs because they have a large turning radius. Bennche is a brand that specializes in manufacturing affordable UTVs that can be used for a variety of purposes, such as hunting, farming, or recreational off-roading. In need of a reliable utility vehicle, Bennche UTVs are a popular choice due to their durability, versatility, and affordability.
It is important for owners to be aware, however, that Bennche UTVs are susceptible to problems and issues as well as any vehicle. In this article, we’ll explore some common Bennche UTV problems and provide reviews of some popular models.
Bennche UTV Features
The features of the Bennche UTV are discussed in this part of the review.
General Features:
- Liquid-cooled four-stroke, V-twin engine with a displacement of 976cc.
- The engine has a horsepower of 85.
- There is a 12.7 gallon fuel capacity.
- 43-45 mph is the maximum speed.
- There is a dry weight of 1,750 pounds.
- 3000 pounds of towing capacity.
- There is a 500-pound capacity on the bed.
- A 16-inch ground clearance is required.
Suspension
- There are independent dual A-arm suspensions in the front and rear of the Bennche.
Dimensions
- The dimensions are 118 inches long by 66 inches wide
- A height of 83 inches,
- Clearance of 16 inches from the ground,
- Front Tire: 29 x 8-15,
- Rear Tire: 29 x10-15,
- Wheelbase 90 inches,
- Dry Weight, 1,750 lbs
- Bed capacity of 1000 lbs,
- Towing capacity of 3000 pounds.
Engine
- Four-stroke with liquid cooling,
Cylinders with V-twins, - A horsepower of 85,
- This engine has a displacement of 976cc,
- With a fuel tank capacity of 12.7 gallons,
- Transmission Type: LHNRP,
- Two-wheel drive or four-wheel drive locking differential shaft.
Brakes
- The front and rear brakes have dual ventilated hydraulic discs.
What are the Pros and Cons of Bennche UTV?
We will discuss the pros and cons of using this vehicle as part of the Bennche UTV Reviews.
Pros of Bennche UTV
- The material is very strong and durable.
- The price is very reasonable.
- Engine with good power.
- This vehicle has exceptional ground clearance.
- The device is equipped with additional safety features.
- Capacity for towing is excellent.
Cons of Bennche UTV
- It is possible for the battery to lose power occasionally.
- There is a possibility that the gear shift will be difficult to operate.
- There is not much in the way of bed capacity.
What are the Common Bennche UTV Problems?
1. Startup and Power Problem
If there is enough fuel in the tank and power in the battery, but your ATV still fails to start, the issue could be electrical or the spark plug may need cleaning and re-gapping, which typically takes about 5 minutes.
To begin with, conduct a visual examination of your spark plugs. Look for any signs of rust or dirt, and ensure that there is a slight gap in the spark gap. Damaged plugs should be replaced. An alternative to a multimeter is to check for a spark on the plug using a multimeter.
Although significantly less common, other components of the ignition system, such as the ignition coil and capacitor discharge ignition (CDI), can also fail.
2. Battery Issues
If your Bennche Bighorn 700 won’t start or only attempts to start when the ignition is turned on. The good news is that battery issues are usually easy to fix. To check the battery, use a voltmeter (available at any auto parts store) to look for a 12V output. If the value is lower, it’s time to charge your battery. While waiting for the battery to charge, you can make yourself a sandwich by connecting the terminals to a battery booster via alligator clips on the charging lines. If the battery fails to charge or frequently loses power, it may be time to replace it.
3. Engine Problems
Due to the numerous mechanical components involved in its operation, diagnosing issues within the engine system can be challenging. Issues such as a clogged air filter or exhaust, or more complex problems such as blocked fuel lines or over-fueling causing carburetors to flood, can result in starts and stalls or a complete lack of engine movement.
Some people may choose to seek the assistance of a technician. Those who are comfortable performing their repairs can search for faults within the engine system, while others may prefer to hire a professional. Regardless of whether you choose to handle the most common issues on your own or hire a professional, it’s always helpful to have an owner’s manual and a basic understanding of how your machine works.
4. Electrical Issues
Electrical problems with a Bennche UTV can be frustrating and cause many issues. Below are some of the most common electrical problems Bennche UTV owners may experience:
- If your battery does not charge properly, it may be a sign that your alternator is faulty. In the event that the alternator fails, the battery won’t charge, which can result in a variety of electrical problems.
- Wiring Issues: Electrical wiring issues are another common problem with UTVs. Loose, corroded, or damaged wiring can cause intermittent or complete electrical failures.
- Faulty Starter Motor: A faulty starter motor can cause the UTV to fail to start, or the engine may turn over slowly. It might be a sign of a faulty starter motor if you hear a clicking sound when starting the UTV.
- Blown Fuses: Blown fuses can cause a range of electrical problems in a Bennche UTV. If you are experiencing intermittent electrical problems, it may be due to a blown fuse.
There can be a lot of time and effort involved in troubleshooting electrical problems. Electrical damage to the UTV should be avoided by ensuring the issue is resolved correctly.
5. Steering Issues
Steering issues are common in Bennche UTVs and can include loose steering, hard steering, uneven steering, noisy steering, and steering wheel vibration. Wear or damage to steering components can cause loose steering, which can cause the UTV to wander while driving. In contrast, hard steering may indicate a problem with the power steering system. A misaligned wheel or damaged steering component can result in uneven steering on a UTV. There are many reasons why the steering wheel makes noise and vibrates, including wear and tear components or tires. Promptly addressing any steering issues and conducting regular maintenance and inspections can ensure the safe operation of your Bennche UTV.
6. Suspension Problems
Bennche UTVs may experience a range of suspension problems. Like rough rides caused by damaged shock absorbers, struts, or springs. Worn suspension components or an alignment issue can result in an uneven ride height. When the UTV bottoms out over bumps or dips. It may be due to worn or damaged shock absorbers or springs or overloading the vehicle. Suspicious noises such as creaking, popping, or clunking from the suspension. They may be an indication of worn or damaged suspension parts or bushings. To guarantee safe operation, it’s essential to promptly address suspension issues and conduct routine maintenance and inspections.
How To Prevent Bennche UTV Problems?
Performing preventive and proactive maintenance on your Bennche UTV is one of the best ways to avoid Bennche UTV problems. You should regularly change the oil, check the fluids, and inspect the brakes, tires, belts, and hoses on your vehicle. As well, keep an eye out for any signs of wear or damage regularly so you can catch any issues before they become worse. Do not push the UTV beyond its capabilities, as this can cause unnecessary wear and tear. Shift gears gently and do not push the UTV beyond its capabilities.
Whenever you make repairs or replacements to your Bennche UTV, make sure you use quality parts. Using quality parts ensures that your Bennche will operate at its peak performance level without any incompatibilities.
Furthermore, if you encounter any problems while operating your Bennche UTV, it is best to have it serviced as soon as possible. Regardless of whether the issue seems minor, a qualified technician can ensure there are no underlying issues and get your vehicle back on the road as soon as possible.
What are the Parts & Accessories Available for Bennche UTV?
We will discuss some parts and accessories of this UTV in this part of the Bennche UTV Reviews.
- The System 3 XTR370 is an 8-ply radial tire for tough terrain.
- The Seizmik Windshield Wiper & Washer Kit is designed for hard-coated polycarbonate windshields.
- The KFI Stealth Winch has a capacity of 4500 pounds.
On seat gun holder, there is a Seizmik ICOS. - Panoramic 9-inch bolt-on rearview mirror from Axia Alloys.
- A 32-inch dual-row LED light bar from Dragonfire Extreme.
- Full soft cabin enclosure for the Falcon Ridge.
- A heater designed for the Inferno Cab.
- Various Quad Boss 2 inch lift kits are available.
- This UTV front rack is made by Great Day Inc.
- Audio system with an amplified 40-inch headphone jack by Boss.
Bennche UTV: Owner’s Thoughts
Some UTV owners have complained about the vehicle. This vehicle performed quite well overall, according to them. It has been reported, however, that the Bennche UTV has typical issues.
Complicated situations arise from a number of factors. There is a possibility of rectifying these with less labor costs. There are some issues that are larger in size than others. There is a need for professional assistance in these cases. It is believed by some users that Bennche UTVs are similar to Yamaha Rhino UTVs.
There are different variants of the UTV available on the market. Electrical faults were also reported as a major issue. If you want to buy a Bennche UTV, you need to know about these problems.
We recommend talking with nearby Bennche owners for your benefit. Take the time to listen to what they have to say about this model. Then you can narrow down the attributes of this UTV for yourself.
Bennche UTV Reviews
Bennche Bighorn 500
The Bennche Bighorn 500 is a utility task vehicle (UTV) designed for off-road use. It features a 471cc liquid-cooled four-stroke engine with electronic fuel injection. That provides ample power and smooth acceleration. Comes with selectable four-wheel drive and a continuously variable transmission (CVT) system. A dumping cargo bed, which can carry up to 400 pounds, and a towing capacity of 1200 pounds. The UTV also includes adjustable seats and tilt steering, hydraulic disc brakes, a rollover protective structure (ROPS), and seat belts.
Bennche Cowboy 700
The Bennche Cowboy 700 is a sporty, versatile, side-by-side vehicle (SSV) designed for off-road use. It features a powerful 686cc liquid-cooled four-stroke engine with electronic fuel injection. Other features include a durable steel frame, an adjustable driver’s seat, and a locking front differential for improved control. The Cowboy 700 has a towing capacity of up to 1,200 pounds. The UTV also features a sleek and aggressive design with a digital instrument panel, LED headlights, and aluminum wheels.
Bennche T-Boss 410
The Bennche T-Boss 410 is a compact and versatile utility task vehicle (UTV) designed for off-road use. It features a reliable 352cc liquid-cooled four-stroke engine with electronic fuel injection. It also features adjustable seats and tilt steering, making it comfortable for long rides. The UTV has a durable steel frame, and its compact size makes it ideal for navigating tight spaces and rough terrain. T-Boss 410 is a reliable and versatile UTV suitable for a variety of outdoor tasks and activities.
Bennche Warrior 800
The Bennche Warrior 800 is a powerful utility task vehicle (UTV) designed for off-road use. It features an 800cc V-twin liquid-cooled engine, providing a top speed of up to 60 miles per hour and plenty of power for towing and hauling. The UTV also comes with a dual-range transmission, allowing for excellent traction and easy shifting. A digital dashboard display, showing speed, odometer, trip meter, fuel level, and more. Also has a 2-inch receiver hitch and comes with a standard. That makes it ideal for a variety of outdoor tasks and activities. Overall, the Bennche Warrior 800 is a powerful and versatile UTV suitable for demanding outdoor work and play.
Positive reviews from Bennche UTV owners:
Despite the common problems reported with Bennche UTVs, many owners are happy with their purchase. Here are some of :
Affordable: Many owners have reported that the Bennche UTVs are affordable compared to other brands. That makes it a great value for the money.
Versatile: Bennche UTVs are versatile vehicles that can be used for work and play. Additionally, Bennche UTVs are utilized for hunting, farming, and recreational activities.
Reliable: Despite some reported problems, many owners have reported that their Bennche UTVs are reliable and have held up well over time.
Customer service: Owners have reported that Bennche has great customer service and is responsive to their needs.
What Are Some Tips For Driving A Bennche UTV Safely And Efficiently?
You can keep your Bennche UTV safe and efficient by following these tips:
Be sure to wear a helmet, gloves, and goggles whenever possible. Accidents and collisions are less likely to cause serious injuries if you take this precaution. Driving should also be made easier by having easy access to gear shift paddles.
Check the terrain before beginning your ride to make sure it’s suitable for your UTV. Do not drive on steep hillsides, deep mud, or rough terrain that could compromise safety or damage the vehicle.
Be aware of the conditions around you and the maneuverability of your vehicle when driving. It is important to understand how your UTV works in order to be able to anticipate potential hazards and obstacles as soon as possible.
Be aware of other vehicles on your path and communicate with other drivers using proper hand signals.
Your UTV model has a maximum occupancy limit. Do not exceed it. It will be slower and less maneuverable when there is more weight or people on board.
Conclusion
For those in search of reliable and affordable off-road vehicles. Bennche UTVs are a popular choice among enthusiasts and farmers alike. Despite the occasional issues reported by some owners. Also, many attest to their versatility, reliability, and overall value for money. Before making a purchase decision, prospective buyers conduct thorough research. It is important to read reviews from other owners before purchasing a Bennche UTV.
FAQs
What makes Bennche UTVs different from other brands?
Bennche UTVs are known for their affordability and value for money compared to other brands. They offer a wide range of features, including electronic fuel injection, on-demand 4-wheel drive, and hydraulic disc brakes. Furthermore, these features make Bennche UTVs a reliable and powerful choice for any task.
Are Bennche UTVs reliable?
While some owners have reported problems with their Bennche UTVs, many owners have reported that their vehicles are reliable and have held up well over time.
Where can I purchase a Bennche UTV?
Although Bennche UTVs are available at authorized dealerships and retailers, customers can visit the Bennche website to find a dealer near them.
What is the warranty on a Bennche UTV?
Bennche UTVs come with a one-year limited factory warranty that covers parts and labor for any defects in material or workmanship. Moreover, customers can purchase an extended warranty for additional coverage.
Learn more Hisun 700 UTV Problem.
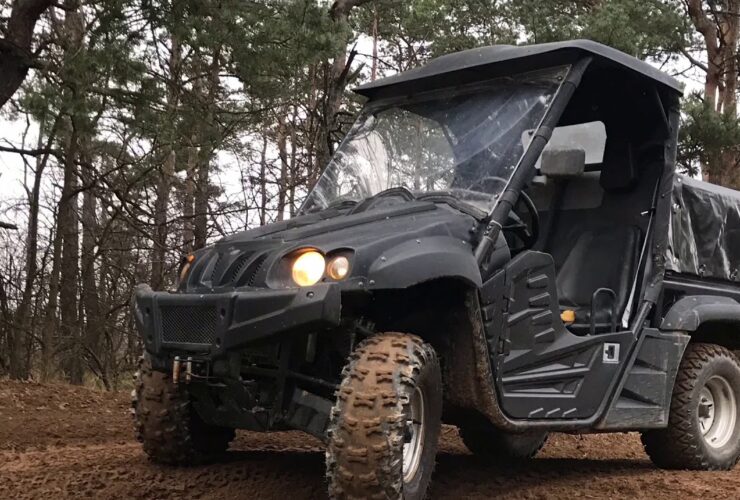

The Hisun 700 UTV is one of the most reliable utility vehicles you can find. It’s a powerful and feature-packed off-roader. Although it has a high-quality engine for optimal performance and an adjustable suspension system for maximum comfort. But whenever riding, riders may encounter a variety of Hisun 700 UTV problems.
Alternatively, the Hisun 500 UTV is a great option for those who want a smaller, more affordable vehicle with the same prominent features. It’s not only easy to operate but also has a great range of motion. As well as it is ideal for outdoor exploration.
The Hisun 700 UTV offers quality, performance, and affordability. Here, with their remarkable performance, moreover they have received praise.
But there are some common troubleshooting issues that Hisun UTV 700 owners have encountered. Like, Battery sparks, failing fuel pump, Engine overheating, Difficulty starting or Engine stalls, etc.
In this article, here we’ll address the most common Hisun 700 UTV Problems and the necessary solution you can do later!
Features of Hisun 700 UTV
Engine Type: A 4-Stroke Single Cylinder OHC engine powers the Hisun 700 UTV. After all this engine is powerful enough to meet any challenge.
Cylinders Displacement: Moreover, it features a displacement of 454cc. Even A four-cylinder engine powers the Hisun 700 UTV.
Tires and Wheels: Furthermore, there will always be two tires with progressive braking performance. Also, two 27 x 9-12 tires in the front and two 27 x 11-12 tires in the rear. Also, the Hisun 700 has aluminum wheels indeed.
Suspension: Having a better suspension system indeed contributes to a better riding experience here. More, Hisun 700 UTVs use inverted cartridge suspensions not only in the front but also in the rear. However, in this way, it is possible to adjust as much as possible the compression damping.
Fuel Systems: In addition, the Hisun 700 UTV also has Electronic fuel injector systems.
Hisun 700 UTV Problems
Riders sometimes encounter a variety of problems. While off-roading with the Hisun UTV. Battery sparks, failing fuel pump, Engine overheating, Difficulty starting or Engine stalls, for instance. However, The best way to resolve these issues on a first-priority basis is to get some general information about them indeed.
Misfires while Revved in Hisun 700 UTV:
It is common for owners of Hisun 700 UTVs to experience misfires during revving indeed. There, a weak battery connection usually causes this. And resulting in the engine stopping otherwise stuttering after running for a while.
Moreover, this can be very inconvenient, especially while you are on an important mission with your vehicle indeed. Additionally, you may also notice that the flicker and occasional reverse lights will turn on and off.
Solutions for Misfires while Revved in Hisun 700 UTV:
- Make sure the battery is connected well and that all connections are secure and tight.
- Then, check the spark plug for any signs of damage otherwise wear and replace them accordingly.
- Next, clean the carburetor and then replace any worn-out parts.
- After that, check your oil level and then ensure it is at the optimal level for proper engine performance.
Rack and Pinion Slipping in Hisun 700 :
One of the most Hisun 700 UTv problems is rack and pinion slipping. The Hisun 700 UTV is a powerful vehicle that requires well-functioning parts to work optimally.
Here, One of the most important parts of these vehicles is the rack and pinion system. Moreover, This regulates the engine’s rotational motion indeed.
However, these parts can start to slip and then dry over time. For this reason dehydration otherwise lack of lubrication or leading. While the engine not only lose its usual power and but also the performance.
While you notice that your vehicle is having power and acceleration issues. And furthermore, it is likely that your rack and pinion system has become dry.
Solution for Rack and Pinion Slipping:
- Here, Lubricate the system with suitable oil.
- It will help restore your engine’s power and performance. Later it ensure your UTV runs smoothly again indeed.
Engine Overheating Problem in Hisun 700 UTV:
Overheating is a problem with the Hisun 700 UTV. After running for 10 miles at a stretch, the engine becomes uncomfortably hot. So far, many users and testers have experienced this. Moreover, this is particularly more pronounced while the temperature of the environment remains more warm indeed.
The most common cause of an engine overheating is not only an overloaded engine but also a low coolant level. Overheating can also occur for this reason blown-out fuses otherwise electric issues with the motor-driven fan indeed.
Otherwise, there could be rubbish in your radiator and grille screen. Even, this can block airflow and here can cause overheating of the engine.
Solution for Hisun 700 engine overheating:
- At first, install dual fans and then wrap the exhaust pipe to reduce the risk of Hisun 700 UTV engine overheating indeed.
- Moreover, if there’s any dirt then clean it out and next adjust the radiator and front cooler.
- There is a most important thing you need to do this time. That is, give your Hisun 700 UTV some breaks in between rides sometimes so that here the engine can cool down indeed.
- Next, check the oil level on a daily basis and top it up while necessary. Always a low oil level can also cause excessive engine heat.
- Next, set the voltage regular rectifier here in order to reduce overheat.
Hisun UTV Engine Issues:
UTV users often report engine problems while using Hisun UTVs. Nevertheless, these engine problems can be addressed with a variety of solutions.
Below are some examples:
| The problems | The Solutions |
| Low temperature | Due to the low temperature of the outside environment, engines have difficulty starting quickly. It will be difficult to start a vehicle or engine if it is placed at minus 18. The battery voltage drops as the temperature drops in the cold, so you can check it in a warm place. |
| Noise problem | Check the joint connection between the engine and the exhaust pipe if you hear a popping noise inside the vehicle. Mufflers, admission lines, or air cleaners may also leak. It is also possible to have noise problems when you use gasoline of low grade in your car. |
| Issues with the coolant boil | Antifreeze and coolant boil dilution levels can cause engine problems with Hisun UTVs. Ratios of 1:1 and greater are recommended. In order to avoid engine issues in the vehicle, check the fan motor and radiator sensor. |
| Problems with starting the engine | Sometimes, the engine becomes difficult to start when it faces problems. Make sure the coolant is draining properly, the battery is charged. That the ignition system is working, and that the spark plugs and coolant are in good condition. Air cleaner or exhaust system blockages are also problematic. |
Hisun 700 UTV Idling Issue:
Another Hisun 700 UTV problems is the idling issue. Your throttle body is usually gummed up when your engine stalls out otherwise sputters while idle. Here, a throttle body can become clogged with dirt, soot, and grime over time. That is causing it to perform poorly indeed.
Even, there can be a decrease in power, rough idling, and stalling when this happens.
Solution for Hisun 700 Idling Issue
The following steps will help you clean the throttle body while the idling problems happen:
- The first thing you need to do is remove it from your UTV. Then, unscrew the throttle body’s bolts after disconnecting the electrical connections.
- Remove the throttle body and spray it with WD-40 carb/throttle body cleaner. Immedately, you will be able to remove any grime or dirt if you do this.
- Then scrub it well with a toothbrush otherwise scrub pad after you have sprayed it down.
A slight opening of the throttle blade should indicate here that everything is working. Next ensure all the parts function if it doesn’t, and then check even if it doesn’t.
You can adjust the idle speed of the Hisun UTV by watching the video below;
Fuel Pump Malfunctioning in Hisun 700 UTV:
The malfunction of the fuel pump of Hisun 700 UTV problem. That can lead to engine failure. The malfunctioning will show its symptoms after regular usage and can damage the flow of your car.
In such cases, this cannot be regulated for this reason external factors like dirt otherwise other objects that can cause damage.
Solutions for Fuel Pump Malfunctioning in Hisun 700 UTV:
- Here, Look for an authorized dealer otherwise service center to get the whole pump replaced. While they are well-equipped and experienced in dealing with such problems. However, Before getting the replacement done, be sure to check your UTV’s warranty.
- Now, make sure the fuel pump is clean to ensure it’s even clogged with dirt, which can cause malfunctioning indeed.
- Next,use a quality fuel filter and then clean it regularly.
- Here, don’t need to fill up the tank this time, otherwise this can also lead to the fuel pump malfunctioning indeed.
- Now, check the wiring of the fuel pump here. Make sure that all the wires are connected and also not frayed or damaged in any way to prevent the malfunctioning of the fuel pump.
- Make sure to use high-quality fuel for vehicles. Otherwise, low-quality fuel can cause more malfunctioning of the fuel pump sometime.
- Finally, ensure the regular maintenance on your Hisun 700 UTV.
Hisun 700 UTV problems with improper airflow:
The improper airflow problem in the Hisun 700 UTV can be an actual issue for drivers. This Hisun 700 UTV problem is really troublesome for a driver. Here, Poor airflow affects not only the engine performance but also the power.
This even resulted in poor engine efficiency. Furthermore, this increased fuel consumption, and even reduced overall vehicle performance sometimes.
Solutions for improper airflow:
It’s important to check the air filter here of your vehicle to make sure it isn’t clogged or damaged. When dirt builds up in the filter, even it restricts airflow and also affects while perform.
Poor Engine Power in Hisun 700 UTV:
Hisun’s 700cc engine always produces not only great power but also torque. But sometimes some users have experienced a drop in performance over time.
Solution when Hisun 700 has Poor Engine Power :
- Check the fuel pressure and then fuel level to ensure they are adequate.
- Next, here replace the fuel tank and then injector.
- Then, inspect all the electrical components here and batteries to see while any of them are faulty.
- After all, check the engine harnesses for any problems later otherwise they can cause the engine to stall otherwise suddenly stop here.
By following these steps now, you should be able to pinpoint and then fix the problem with your Hisun 700 UTV engine stall otherwise sudden stop issue indeed.
The Failure of Carburetor in Hisun 700 UTV
Last but not the least Hisun 700 UTV problems are the carburetor failure. In order to deliver fuel to the engine, a carburetor is essential. By mixing fuel and air, it helps the engine run correctly.
Carburetors fail when fuel cannot be ignited, resulting in engine failure. Most carburetors fail due to a worn-out diaphragm. As a result of friction and heat, the diaphragm can wear out over time.
Diaphragm punctures can also cause fuel leaks, which are even more serious. An insufficient seal will also prevent the fuel and air mixture. From staying in the carburetor if the diaphragm is punctured.
Solution for Carburetor in Hisun 700:
Your Hisun UTVs carburetor may be worn if you’re experiencing power loss. Diaphragm wear or punctures can cause this.
You should replace the diaphragm if it is worn out. A punctured diaphragm requires a complete replacement of the carburetor.
What Are The Pros of Hisun 700 UTV?
Hisun 700 UTV has a number of benefits that make it one of the best on the market indeed. Other utility vehicles cannot compare to its features. In contrast power, comfort, and capability make it here well-suited to a wide range of situations.
It’s a great investment for those looking for the best return there. Here are the main advantages of Hisun 700 UTVs.
- It boasts a powerful engine here that is capable of tackling any terrain indeed. And carries with it a variety of features that also make it an easy and enjoyable ride indeed.
- It even has a smooth transmission that also provides power to the four-wheel drivetrain. Furthermore it also allows for maximum traction control in any terrain.
- Moreover, with its digital cluster display, riders can also quickly check engine performance and even adjust settings on the go even.
- Even the Roof and windshield provide extra protection, as well as a full-sized bed. However, any outdoor enthusiast will love it for storing cargo during rides indeed.
- In addition, it also has adjustable seats and tilt-adjustable steering, there it allows for a comfortable ride even over long distances.
The Hisun 700 UTV is an all-around great machine that won’t let you down in any situation, making it one of the best UTVs on the market today indeed.
What Are The Cons of Hisun 700 UTV?
- It’s vulnerable to engine heating.
- Driving for extended periods of time can cause the parts inside to generate friction and damage. Since there isn’t enough fuel in the tank to keep the engine hydrated. and making it difficult to maintain your vehicle over long distances, also potentially leading to costly repairs indeed.
- Brakes are quite sensitive and may require frequent attention to keep them in working order.
- The suspension system can also be prone to wear and tear. So it’s important to inspect it on a daily basis for signs of damage to otherwise malfunctioning components.
- Additionally, the plastic body panels on some models aren’t the highest quality. While they may require extra care to keep them looking pristine indeed.
What are the Hisun 500 UTV problems?
The Hisun 500 UTV (utility terrain vehicle) is a popular off-road vehicle that has many uses. Unfortunately, as with any mechanical device, it is prone to problems and can even break down from time to time.
Battery sparks: The hisun 500 UTV is known to have problems with its battery, spark plugs, and electrical system. While, the most common hisun 500 UTV problem is a dead battery indeed.
Solution:Just, clean the terminals and then check for any corrosion or build-up in the connectors. While that does not work, otherwise replace the battery necessary indeed.
Worn-out spark Plug wires: Another hisun 500 UTV problem is a lack of spark from the spark plugs. This can be caused by several different factors, such as worn-out spark plug wires otherwise sometime there is a dirty spark plugs.
Solution: Replace the spark plug wires and next clean the spark plugs. This will usually solve the issue.
Electric Issues: The hisun 500 UTV’s electrical system can also be prone to problems. The most common hisun 500 UTV related to the electrical system is a blown fuse.
Solution: Just locate the blown fuse and there replace it with an appropriate one.
In contrast, hisun 500 UTVs are great vehicles but they do come with their share of problems. However, knowing the hisun 500 UTV problems and solutions can help you keep your vehicle always running smoothly indeed. Also, always avoid costly repairs down the line. Moreover, with some basic knowledge and regular maintenance. You can always ensure that your hisun 500 UTV runs like new for years to come indeed.
Maintenance Tips for Hisun UTVs Owners:
Those looking for an affordable, reliable UTV should consider Hisun once. However, like any other machine, they require maintenance to stay in top shape. To keep your Hisun UTV run in smooth, here are some maintenance tips for Hisun UTV owners:
1. Check and change your oil daily basis: The engine oil should be changed every 3,000 miles or after 50 hours of use, whichever comes first.
2. Check the air filter often: At least once a month, check the air filter. Moreover to make sure they do not clog it not only with debris but also the dirt.
3. Clean and adjust the brakes brakes daily basis: Here, a well-functioning brake system is essential for your Hisun UTV. Replace the pads even if they wore out and then check out and adjust the hydraulic fluid while necessary.
4. Check all hoses and belts for signs of wear or damage: Next, Replace any worn or damaged hoses, and then adjust the belts. In order to ensure even that they are not too tight or loose.
5. Change your spark plugs every 6,000 miles or 100 hours of use: This will also help keep your Hisun UTV engine running efficiently always.
However, following these maintenance tips for Hisun UTV owners. Moreover, you can ensure that your vehicle is always running smoothly indeed.
Conclusion
Whether you need a powerful off-roader otherwise an economical option, Hisun UTVs always have something for everyone. However, by keeping an eye on these common Hisun 700 UTV problems. Furthermore, Hisun 700 owners can be able to enjoy more their rides without any major issues.
However, if any of these problems do arise, it’s important to address them as soon as possible. In order to keep the Hisun 700 always running at its optimal performance.
In contrast, these vehicles have advanced features and high-quality engineering. Now, make your next adventure even more memorable with a Hisun 700 or 500.
FAQs
Who is the manufacturer of HISUN UTV?
Further, Hisun Motors Corporation is a subsidiary of HISUN Motors (Chongqing Huansong Industrial (Group) Co., Ltd.). Moreover, the company is located in Chongqing, China, that always manufactures all HISUN products.
How fast can HISUN UTV go?
The Strike 250 boasts a liquid-cooled and fuel-injected 229cc engine. Even, it also has an adjustable throttle limiter. However, when unrestricted it can even reach a top speed of nearly 50 mph (80.47 km/h) indeed.
Is it possible to customize the Hisun 700 UTV?
Yes, customizing in the Hisun 700 UTV is often possible. Vehicle owners can customize their vehicles with aftermarket accessories such as windshields, roofs, winches, LED light bars, and also storage options.
Is there a warranty on the Hisun 700 UTV?
For Hisun 700 UTVs, Hisun Motors typically provides a limited warranty. However, for accurate information about warranty coverage, please contact the manufacturer or dealer.
How fast does a HISUN 700 go?
The acceleration from a start is always smooth. But whenever climbing a grade otherwise navigating soft terrain. However, it can even reach speeds of upto 30 mph (48.28 km/h) sometimes. However, the vehicle can go faster, neverthless requires not only more flat terrain but also space to-do so indeed.
Is HISUN 700 a good UTV?
The vehicle offers ample space and handles well here. Also, the bed is functional, and we could comfortably transport all of our equipment always. Although, it may not be the quickest side-by-side, but it is not only smooth but also dependable.
What kind of engine does HISUN UTV have?
HISUN Motors also started there manufacturing 4-Stroke Liquid-Cooled Single Cylinder Engines in 1996. But, now the growing market demand for horsepower prompted HISUN in order to launch howerver its first 4-Stroke Liquid-Cooled V-Twin Engine in 2008.