
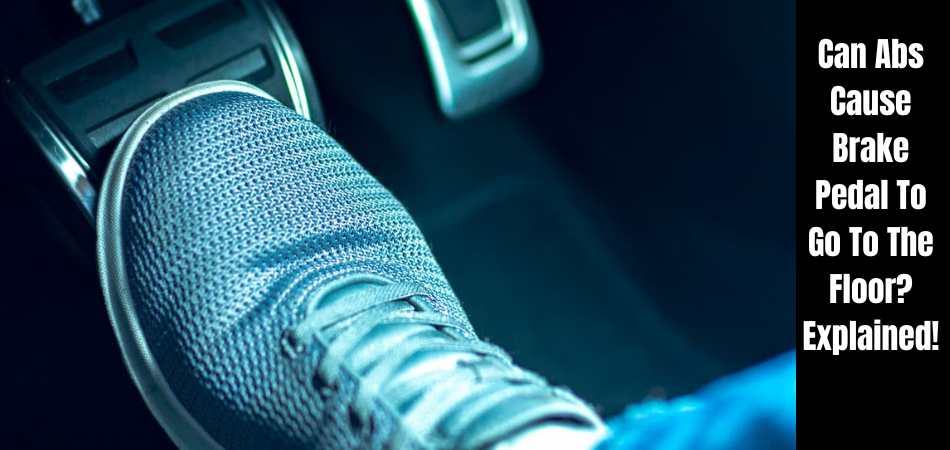
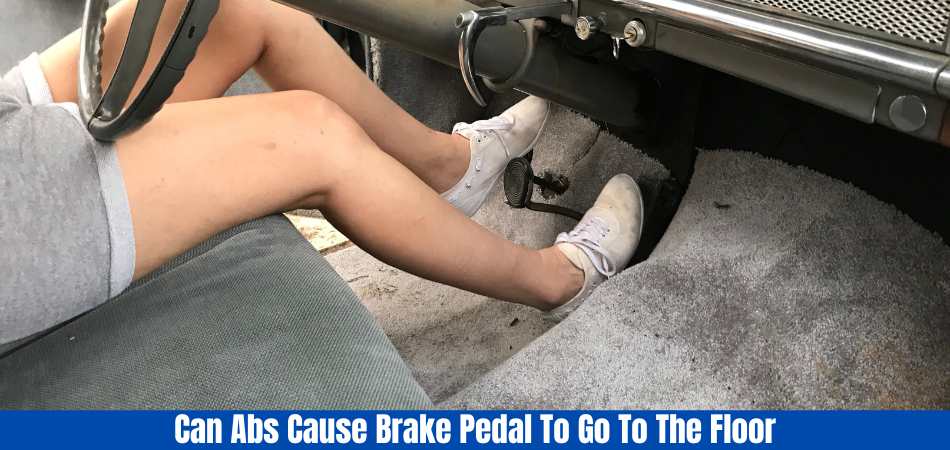
Your car’s brakes should respond quickly and effectively when you press the brake pedal to stop or slow down. If your car has an Anti-Lock Braking System (ABS), you may sometimes notice that the brake pedal goes to the floor or feels mushy. Having difficulty controlling the vehicle can be alarming and dangerous, as it can make it harder for you to avoid collisions. But Can Abs Cause Brake Pedal To Go To The Floor?
A sinking brake pedal is an extra cause for concern, considering the potential consequences of any brake problem. It is imperative to dive in and solve the issue before continuing to drive with brakes you are unsure of.
In this article, you’ll learn the four most common reasons why your brake pedal goes to the floor, along with some helpful tips. Further, we will also discuss Can Abs Cause Brake Pedal To Go To The Floor?
It’s time to get started, so let’s begin.
How Do Brakes Work?
You can prevent brake failure by understanding how your brakes work:
- By pressing on the brake pedal, you create a mechanical force that is amplified by the brake booster.
- In this case, the hydraulic pressure is converted from mechanical force to hydraulic pressure by the master cylinder.
- Your master brake cylinder then presses hydraulic brake fluid into your brake lines and hoses, which carry it to the wheels.
- As the brake fluid pressure increases, the caliper piston presses the brake pads against the brake rotors.
- In drum brake vehicles (usually the rear brake), the brake shoes, rather than pads, are pressed against the brake drum by a wheel cylinder.
What is ABS?
An Your car’s anti-lock brake system (ABS) prevents the wheels from locking up when you brake. The result can be a loss of steering control and a longer stopping distance.
Using sensors that monitor wheel speed and other factors, ABS modulates brake pressure independently for each wheel. There are valves, an electric control unit, a pump, and wheel speed sensors in this unit. Learn more at here.
How Does ABS Work?
A car without ABS experiences friction when the brake pads squeeze against the rotors, slowing down the wheels. Overbraking or braking on a slippery surface can lock up the wheels, which means they stop rotating.
As a result, the car may skid and lose control, potentially resulting in an accident. By using a computer-controlled hydraulic system to adjust the brake pressure for each wheel, ABS prevents wheels from locking up.
When a wheel slows down too rapidly, ABS reduces the brake pressure on that wheel. Skidding is reduced because the wheel continues to rotate, allowing steering control to be maintained.
What are the Benefits of ABS?
Among the benefits of ABS in braking systems and vehicles are:
1. Performance Improvements in Braking
With ABS, the driver is able to stop the vehicle more quickly and safely, reducing the stopping distance.
2. Stability enhancements for vehicles
When driving on wet or slippery roads, ABS helps the driver maintain control of the vehicle.
3. Confidence increased among drivers
The driver gains more confidence and reduces the risk of an accident with ABS, as it provides a more predictable and stable braking experience.
4. Wear and tear on tires reduced
The tires may last longer because ABS prevents the wheels from locking up and reduces skidding and sliding.
5. Improved steering control
ABS allows the driver to maintain steering control of the vehicle during hard braking, essential for avoiding obstacles.
6. An overall improvement in safety
Having ABS on your vehicle can help prevent accidents and reduce the severity of injuries in the event of a collision. Most countries now require ABS on all new vehicles.
What are the Symptoms of Brake Pedal Going to the Floor?
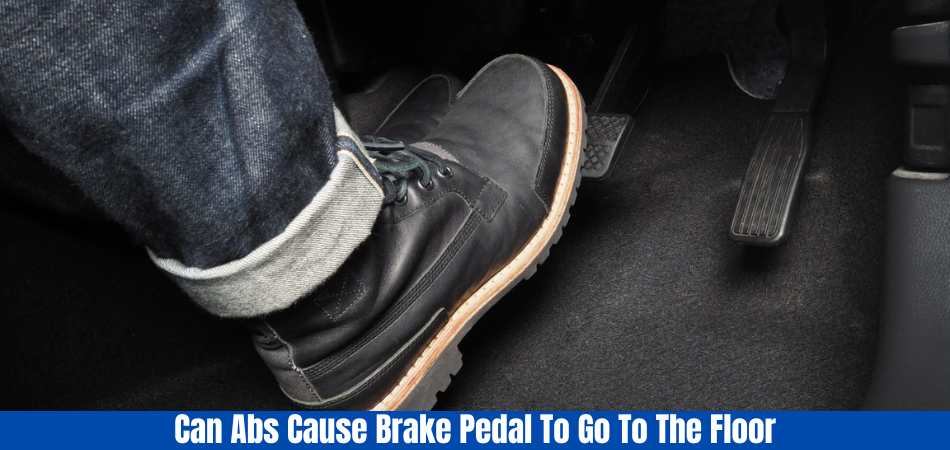
The following symptoms can occur when the brake pedal pressed to the floor:
1. A spongy or soft brake pedal:
Air in the brake lines can cause the brake pedal to feel soft or spongy when you press down on it. It can also be a leaking brake fluid or worn brake pads.
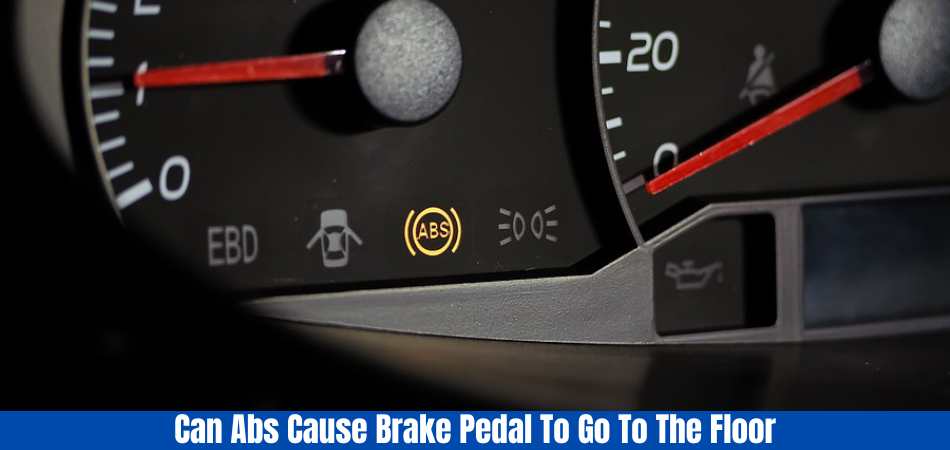
2. Light on the brakes:
In the event that you see a brake warning light on your dashboard, this may indicate that there is a problem with your brakes.
3. The brakes are not responding:
Whenever you press down on the brake pedal, your car does not slow down or stop as expected, this is a very dangerous situation. Your brakes may be having a serious problem if this happens.
Other Signs of Brake Trouble
Besides these problems, you may also notice other signs of brake problems that require immediate attention. A car with brake problems is never a good idea to drive. Any problem with your brake system could prevent you from stopping your vehicle. There are also other signs of brake trouble, such as-
- An ABS or brake warning light on the dashboard
- Noises such as grinding, scraping, or squealing
- A burning chemical smell or a smell coming from the carpet
- Whenever you brake, you pull to one side
- If you brake, you may feel a vibration or wobble
- The brakes are emitting smoke
When your brakes squeal, they’re overheating and on the verge of failure. You should pull over your vehicle immediately if you suspect your brakes are too hot.
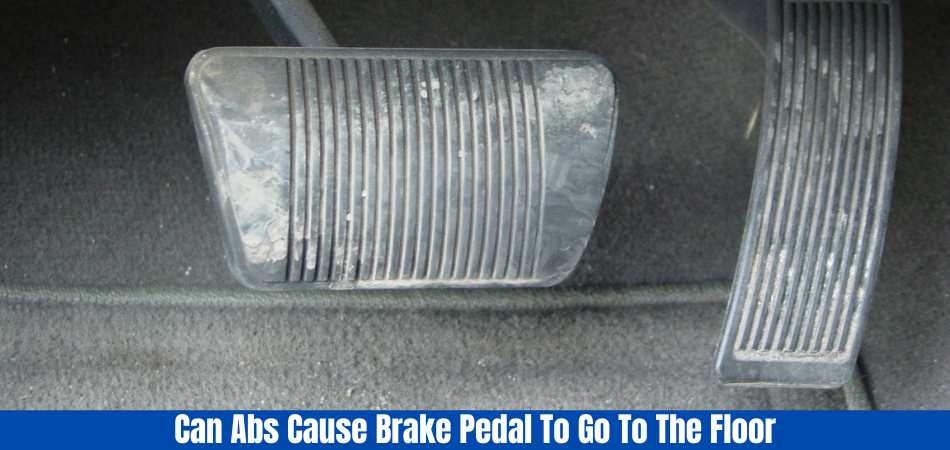
Can Abs Cause Brake Pedal To Go To The Floor?
Can Abs Cause Brake Pedal To Go To The Floor? ABS does not directly affect how far your brake pedal goes to the ground. It prevents the brake pedal from going to the floor instead. Further, it releases brake pressure when it detects a wheel is about to lock up, which prevents the pedal from going to the floor.
There is, however, a possibility that a malfunction in the ABS can cause the brake pedal to go down. Having a malfunctioning ABS module or hydraulic control unit can result in your brake pedal feeling spongy or soft or even going all the way down.
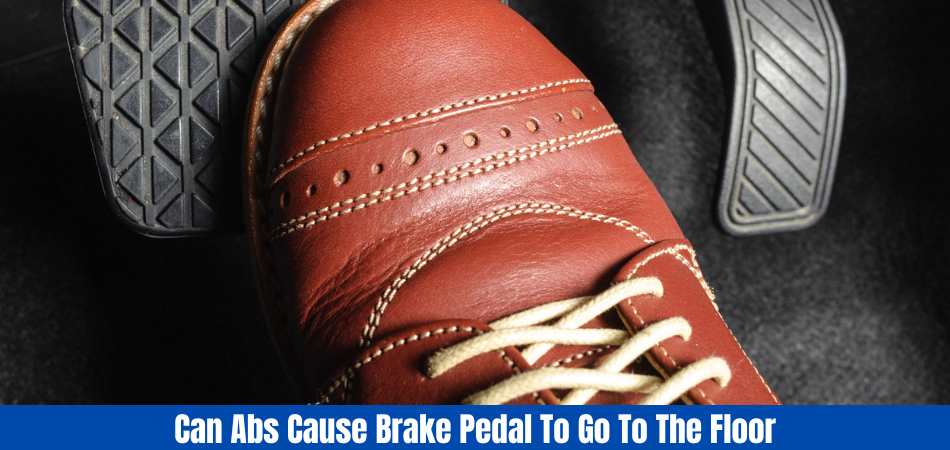
What Causes the Brake Pedal Going to the Floor?
In most cases, a brake pedal that goes to the floor caused by a leak in the brake system, either externally or internally. Besides the master cylinder, brake calipers, and brake lines, external leaks can occur anywhere in the system. There is likely a problem with the master cylinder if there is an internal leak. Can Abs Cause Brake Pedal To Go To The Floor? Yes, it can.
In addition to these reasons, there are other possible causes as well. Here is a comprehensive list that includes a few tips on solutions as well. The brake pedal can go to the floor for several reasons. Here are some solutions to these problems.
1. The brake lines contain air
Brake pedal force transferred to brake calipers by hydraulic pressure in your car. Having air in the brake lines can prevent the hydraulic pressure from building up, causing the brake pedal to go all the way down.
Solutions
Breathing your brakes will remove any air that may be present in the lines.
2. Leak in brake fluid
Leaking brake fluid is another potential cause of a brake pedal going to the ground. Whenever there is a leak in the brake lines or any of the brake components, you lose a lot of brake fluid and your brake pedal will feel spongy.
Solutions
- The first step is to locate the leak’s source. The brake line may damaged, the caliper or wheel cylinder may be leaking, or the brake hose might torn.
- Secondly, replace the damaged component or repair the leak, and then bleed the brakes to remove any air.
3. Damaged brake pads
It is possible for your car’s brake pads to wear down, resulting in a spongy or soft brake pedal. As a result of worn brake pads, the brake pedal may go right to the floor if there is not enough friction.
Solutions
- Step 1. If the brake pads are worn, replace them.
- Step 2. Check the brake calipers to ensure they are working properly.
4. A defective master cylinder
In the brake system, the master cylinder is responsible for generating the hydraulic pressure that is needed to stop the car. Having a faulty master cylinder or a worn one can result in the brake pedal going down to the floor.
Solutions
- Ensure that the master cylinder replaced with a new one. The 788 inch bore master cylinder is our pick.
- Below is a video that will show you how to fix a sinking brake pedal.
How Can ABS Affect Brake Pedal Feel and Performance?
It is true that ABS can enhance braking performance in many situations. But it can also introduce some challenges that affect the feel and performance of the brake pedal. When air trapped in the brake lines or when the ABS module malfunctions, the brake pedal can feel spongy or low. A spongy brake pedal indicates that there is a delay in building up pressure in the brake system, resulting in reduced stopping power and driver confidence.
When the ABS module fails to activate or modulate the brake pressure properly, a long stopping distance or increased pedal travel may result. Many factors can contribute to this, including a faulty wheel speed sensor, damaged brake lines, worn brake pads or rotors, or a malfunctioning ABS pump or solenoid. A problem with the ABS system may indicated by the ABS warning light on the dashboard.
When Should You take Your Car in for Repair?
It’s always a good idea to have your car repaired as soon as possible if your brake pedal goes all the way down.
As your foot presses your foot onto the brake pedal, the brake fluid transfers the pressure from the pedal to the calipers, which squeeze the brakes.
In order to ensure the safety of yourself, your passengers, and other road users, you should investigate the problem right away. Basically, putting off this task until it’s too late is not a good idea!
Nevertheless, you can do it yourself if you wish. However, someone unfamiliar with brakes should not attempt this, as incorrect work can worsen the situation. You should seek professional assistance if you feel uncomfortable doing this yourself.
Can You Drive When the Brake Pedal Goes to the Floor?
You should never drive a vehicle that has a brake pedal that sinks to the floor or has difficulty achieving pressure. There is a serious brake problem here that needs to addressed and repaired as soon as possible. It would be highly dangerous to neglect doing so and pose severe safety risks.
What Should You Do If Your Brake Pedal Goes to the Floor While Driving?
Pull over as soon as possible and stop applying gas. When you are in an emergency situation, do not simply yank on the brakes.
You should downshift to use engine braking and apply your emergency brake only after you have completely stopped. You should then contact a towing company or mobile mechanic to inspect and repair your vehicle.
The risk of injury to yourself and others is too high if you continue driving if you are experiencing brake problems. Moreover, you probably won’t be able to get insurance coverage if you are negligent.
Let’s examine how your brake system works in more detail since we briefly discussed brakes.
How Much Will this Cost to Get It Fixed?
In general, a broken brake pedal can cost anywhere from $100 to $600, depending on the extent of the damage and the type of car. It is recommended, however, that you have a qualified mechanic evaluate the problem for an accurate estimate.
Therefore, it’s difficult to determine which cause would cost the most to fix. You’re probably looking at about $200 to £300 if there is brake fluid leakage from the caliper, rubber lines, or rusted brake lines.
The brake master cylinder needs to replaced, and you don’t want to go with the cheapest one. As a result, you can expect to spend about $100 to $150 for labor and $150 to $250 for the part itself.
In this case, you would only have to pay for the work of aligning the brake shoes, which could cost up to $150. The cost could quickly rise to a few hundred dollars if the brakes damaged.
Keeping in mind that these are only estimates, and the final cost can vary depending on many factors, such as location, quality of parts, and who performs the work.
What are the best ways to take care of the ABS in your car?
Keeping your anti-lock braking system (ABS) in good working order is essential for safe and efficient braking. The following tips and steps will help you maintain your ABS:
1. Performing regular inspections:
Keep an eye on the ABS warning light on your dashboard periodically. The system may be malfunctioning if it remains illuminated. You should have it checked by a professional.
2. Fluid for brakes:
Your car’s brake fluid should be at the recommended level and in good condition. It is common for brake fluid to absorb moisture over time, which can affect the performance of the ABS system. Your car’s owner’s manual should tell you how to replace the brake fluid.
3. Maintenance of tires:
Ensure that your tires are properly inflated and that their tread depth is adequate by keeping them at the recommended pressure. To function correctly, ABS relies on wheel speed sensors, so tire condition is vital.
4. Maintain clean sensors:
It is essential that the ABS system has wheel speed sensors. Make sure they are clean and free of debris and corrosion. If necessary, gently clean them with a soft brush or cloth.
5. Inspection of brake pads and rotors:
Keep your brake pads and rotors in good condition by inspecting them regularly. It is possible for worn brake components to affect ABS performance. Brake pads and rotors should replaced as needed.
6. Diagnostic scans for ABS:
When your ABS warning light comes on, have it checked by a qualified mechanic who has diagnostic equipment. To pinpoint the problem, they can retrieve error codes from the ABS control module.
7. Brake softly:
If possible, avoid slamming on the brakes. It designed to prevent wheel lockup during hard braking, but excessive use can damage the system.
8. Be cautious when driving:
To avoid activating the ABS, drive safely and maintain a safe following distance.
Final Thoughts: Can Abs Cause Brake Pedal To Go To The Floor
Now you have some idea on Can Abs Cause Brake Pedal To Go To The Floor. It’s a nightmare to find your brakes without hydraulic pressure. When this happens, you will usually be able to figure out the cause if you know the most common causes. Despite the fact that you might need a professional to fix it, it isn’t a major repair. The cost shouldn’t be anything more than a necessary expense considering the consequences.
Read more of our articles here.
FAQs
How does ABS work in a vehicle?
ABS is an acronym for Anti-lock Braking System. During hard braking, this safety feature prevents wheel lock-up. While braking, ABS modulates brake pressure to each wheel independently to maintain steering control.
Is it possible for ABS to cause the brake pedal to go to the floor?
ABS does not cause the brake pedal to go to the floor on its own. It helps maintain control during hard braking by preventing the wheels from locking up. Other brake system problems usually cause the brake pedal to go to the floor.
How can a malfunctioning ABS sensor affect the brake pedal?
There is a possibility that a malfunctioning ABS sensor can cause a brake pedal problem. The ABS system may forced to activate unnecessarily if an ABS sensor fails. This may affect brake pedal feel. It is not the primary cause of a brake pedal going to the floor, however.
If my brake pedal goes to the floor, what should I do?
For safety reasons, it is crucial to address the issue immediately if the brake pedal goes to the floor. Immediately stop driving the vehicle and take it to a qualified mechanic or repair shop for an inspection and repair. Driving with a brake issue can be extremely dangerous.
Is regular maintenance able to prevent brake pedal issues, including ABS issues?
Brake fluid flushes, brake pad inspections, and proper care of ABS sensors can help prevent brake pedal problems, including ABS problems. Your brake system can operate correctly with routine maintenance.

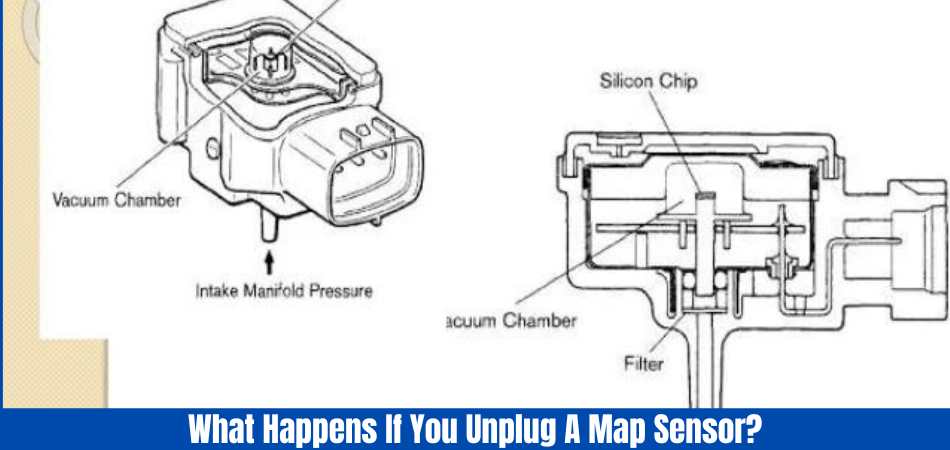
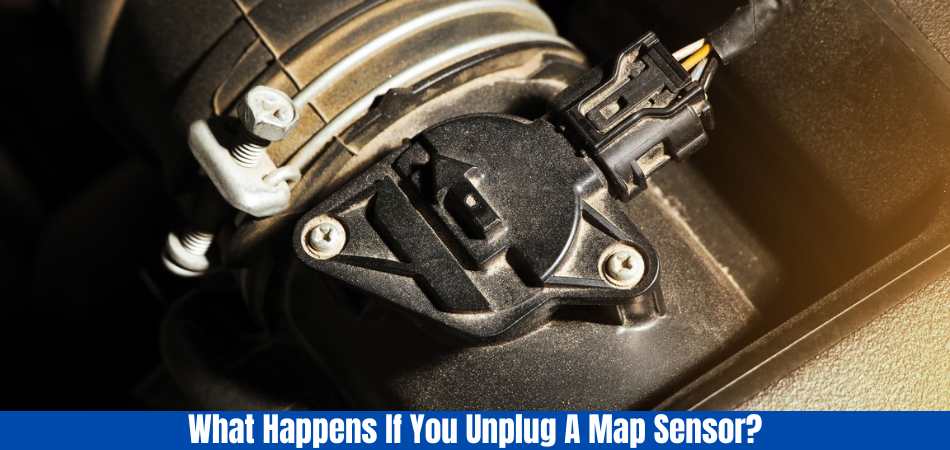
MAP sensors are essential to the electronic control system of fuel-injected engines. By providing information about the pressure inside the intake manifold it aids the ECU in calculating the best air/fuel ratio. Many people, however, are tempted to unplug the MAP sensor due to various reasons. But What Happens If You Unplug A Map Sensor?
Unplugging the sensor is often the answer since it may make the car run smoother. Some cars don’t have a MAP sensor; instead, you’ll find an MAF (Mass Air Flow) sensor. Before unplugging your MAP sensor, you should know what will happen.
So read the article to learn- “What Happens If You Unplug A Map Sensor?”
What Does the MAP Sensor Do?
In fuel-injected engines, the Manifold Absolute Pressure sensor, also known as MAP, plays a crucial role. An ECU receives information about the pressure inside the intake manifold. Based on that data, the ECU calculates the optimal air/fuel ratio for the engine and adjusts fuel delivery accordingly.
MAP sensors work with other engine sensors to provide information about engine load at different RPMs, along with providing information about the pressure in the intake manifold. By adjusting the fuel injection system, the ECU ensures that the engine is running smoothly and efficiently and emitting minimal emissions.
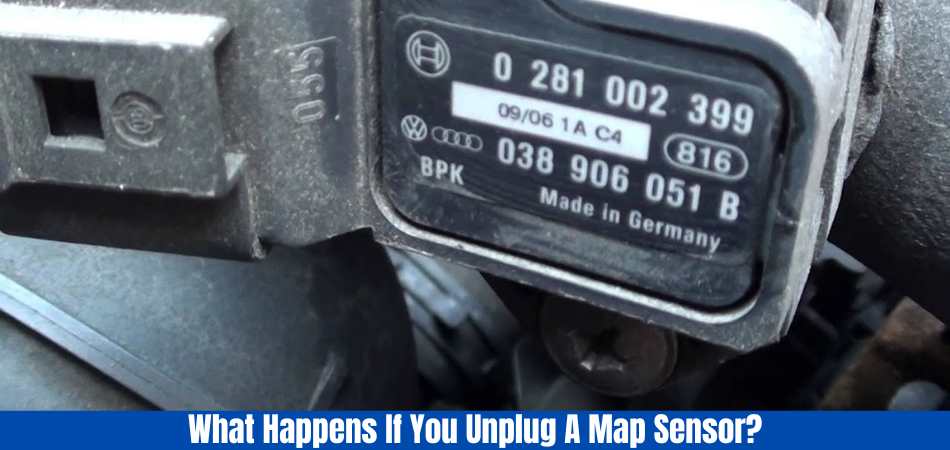
What Happens If You Unplug A MAP Sensor?
There is a tendency for people to confuse the MAP sensor as a non-essential component. So, What Happens If You Unplug A Map Sensor? The system will provide excessive fluid even if it is unnecessary if the MAP sensor is unplugged. The concentration of fluid will change dramatically.
Furthermore, the combusted gas cannot escape and increases internal heat. The results are similar to those of a bad MAP sensor or a failure of the MAP sensor. The story doesn’t end there.
By measuring the manifold pressure, the MAP sensor assists in balancing the air and fuel ratios. What Happens If You Unplug A Map Sensor. If it is disconnected, the ECU will receive inaccurate information about the air-fuel ratio. The fuel will then be converted to lean or rich. As a result, the following issues will arise:
Problem 1: The fuel and air mixture is incorrect
A MAP sensor calculates fuel pressure and allows the engine to serve more fuel if necessary. Unplugged manifold absolute pressure sensors cannot count the pressure or fuel condition.
Furthermore, an incorrect mixture of air and fuel will result in uneven combustion and polluted air.
Problem 2: Mismonitoring of manifold pressure
By reading the manifold pressure, the MAP sensor supplies fuel as needed. The ECU will provide more fuel if the reading goes low. In addition, if the pressure is correct, the ECU will not allow extra fuel to be supplied.
The ECU will not get any or the wrong information if the sensor is not working or unplugged. When this happens, the ECU may supply more oil or stop supplying oil, which can result in severe engine damage or engine failure.
Problem 3: Overdelivery of fuel
The valves may have more carbon deposition as a result of excessive combustion. The engine can lose power and produce less power. The engine can also lose power due to damaged or malfunctioning spark plugs (our pick).
Problem 4: Check the engine light
An unplugged MAP sensor can be annoying and cause the check engine light to illuminate, although this is not a common fact. Even after plugging in the sensor, it may still be on. In that case
- Ensure that the engine is off.
- Make sure the sensor is clean by cleaning it
- Reset the car’s computer system
- Turn the engine on
- Start the engine after a few minutes.
This is a quick way to turn off the light. However, if the problem is not with other sensors, it could be with MAP sensors. To fix it, go to an auto repair shop.
Problem 5: Lack of fuel and clogged fuel filter
Even though the engine gets enough fluid and pressure, it will sound like there isn’t enough oil in the system or reservoir. If that is the case, you can add more oil. Due to faulty combustion, all the consequences will result in dirty oil.
In the end, these conditions will result in a damaged fuel pump and a clogged fuel filter (our recommendation). Having clogged fuel filters and a damaged power pump will result in less power and dirty oil that cannot be used.
Problem 6: Starting Problems
Starting will be difficult if the fuel is lean or rich, as it cannot lubricate properly and inhibits more power production. Oil that is too lean or too rich also performs poorly. This will result in a rough start for the engine.
Problem 7: Poor running of the car
The engine’s performance will be affected by an unplugged MAP sensor. When you unplug the MAP sensor from your vehicle, you will not be able to drive smoothly. A fluid imbalance will occur in the system, resulting in improper lubrication. As a result, the car runs rough.
Problem 8: Poor engine performance
An engine-related mismanagement directly affects the engine. A manifold with incorrect oil and air ratios will not perform well without proper pressure. In addition, dirty oil can clog the pathway.
All these problems prevent the engine from working at its maximum capacity.
Problem 9: Damage to the engine and exhaust system
By removing harmful gases from the engine, the exhaust system aids combustion. Additionally, it improves the performance of the engine. Unplugging the MAP sensor will prevent the exhaust system from removing harmful gases.
Furthermore, the fuel will not be able to eliminate the gases due to the lack of evaporation. Parts can last longer if they are fuelled with fresh fuel. Unplugged MAP sensors result in fuel and combust harmful gases, damaging the engine and exhaust system.
Furthermore, the gas that has been combusted does not go out. Consequently, it damages the entire system by mixing with the oil.
The problems listed above are all linked. The majority of problems will appear if you unplug the MAP sensor.
All of these problems can be resolved by adequately plugging the MAP sensor and replacing it if it isn’t working. Contact an automobile repair expert immediately if you continue to receive incorrect information after replacement.
Why Would a Vehicle Run Better After Unplugging the MAP Sensor?
Unplugging your MAP sensor might improve the performance of your car now that you know what it does. Your car will run poorly or have reduced power and fuel economy if there is a problem with the MAP sensor. Nevertheless, unplugging the sensor can sometimes “reset” the ECU and improve its performance. This may occur for several reasons:
1. Malfunctioning Sensor
When the MAP sensor malfunctions, it can send incorrect signals to the ECU, causing a variety of problems. It is possible to eliminate the incorrect signals by unplugging the sensor, thereby improving the efficiency of the ECU.
2. Sensor calibrated incorrectly
If the MAP sensor is not calibrated correctly, the ECU may inject too much or too little fuel, resulting in poor performance. By unplugging the sensor, the ECU can sometimes re-calibrate the sensor correctly after it has been reset.
3. Dirty or clogged sensor
In the event that the MAP sensor becomes clogged or dirty, it will send incorrect signals to the ECU, which can result in a variety of problems. A clogged or dirty sensor can be compensated for by unplugging the sensor, allowing the ECU to operate more efficiently.
4. Problems with the engine or fuel system
Unplugging the MAP sensor can mask other engine or fuel system issues that cause poor performance. It is essential to address the underlying problem as soon as possible since this is not a permanent fix.
Is it Possible to Drive with the MAP sensor unplugged?
If the MAP sensor is faulty, you can drive with it unplugged, and the car may run better as a result. The problem with that is that it can do more harm than good. With the MAP sensor unplugged, a vehicle will run too lean or too rich, which will cause the combustion area to run much hotter, causing damage to the block, pistons, catalytic converter, etc.
It would be best if you only considered running without the MAP sensor if it is so faulty that you cannot drive without it. If the sensor is unplugged, you can drive the car, but I would advise replacing it as soon as possible.
Why Does the MAP Sensor Fail?
MAP sensors are susceptible to contamination, as are most electric sensors. A map sensor that uses a hose can become clogged or leak, making it impossible to read pressure changes.
Extreme vibrations cause some cases of external damage during driving. Due to the proximity of the engine, electrical connectors can also melt or crack from overheating. It will be necessary to replace the MAP sensor in either of these scenarios.
What are the Symptoms of a Bad Map Sensor?
An engine’s air-fuel ratio will be affected by a faulty MAP sensor. An incorrect ratio will result in the engine’s ignition occurring at the wrong time in its combustion cycle. A prolonged period of severe pre-detonation will damage the internal engine parts (such as pistons, rods, and rod bearings) and eventually cause catastrophic failure. Here are some warning signs to look out for:
1. Poor Fuel Economy.
When the ECM detects low or no vacuum, it assumes the engine is under high load, so it dumps in more fuel and advances spark timing. Detonation may occur as a result of excessive fuel consumption, poor fuel economy, and poor fuel economy.
2. Power deficiency.
If When the ECM detects a high vacuum, it assumes the engine load is low, so it cuts fuel injection and retards spark timing. A decrease in fuel consumption is a good thing on the surface. In contrast, if the engine consumes too little fuel, it may be unable to accelerate and pass.
3. Inspection of emissions failed.
A broken MAP sensor increases harmful emissions because fuel injection does not correspond to engine load. Insufficient fuel may lead to higher nitrogen oxide (NOx) emissions, while excessive fuel causes higher hydrocarbon (HC) and carbon monoxide (CO) emissions.

4. Rough Idle.
An insufficient fuel injection system leads to rough idling and perhaps even random cylinder misfiring.
5. Hard Starting.
Similarly, an excessively rich or lean mixture causes the engine to have difficulty starting. You may have a problem with the MAP sensor if you can only start the engine when your foot is on the accelerator.
6. Stalling or hesitating.
A faulty MAP sensor may cause an ECM to give you a lean mixture when you are starting from a stop or attempting a passing maneuver.
7. Check Engine Light.
MAP sensor diagnostic trouble codes (DTCs) can range from simple circuit, sensor, or correlation faults to range or correlation faults, depending on your vehicle’s age. The ECM may receive false data from a failing MAP sensor, such as low engine vacuum, when the throttle position sensor (TPS) and crankshaft position sensor (CKP) both show idle.
How to Diagnose a Bad MAP Sensor?
The easiest way to confirm a faulty MAP sensor is to plug the car into an OBDII diagnostic machine and check for faults. If the check engine light is illuminated and the MAP sensor is the cause, it will be stored in the car’s fault memory. If there is no stored fault, then diagnosing a faulty MAP sensor is slightly more involved.
Here’s my method of inspecting a faulty MAP sensor:
1. Look for warning signs.
Check engine lights may indicate a faulty MAP sensor. To confirm a defective sensor, plug the car into a code reader. In some cases, there may be more than one similar fault code stored, so you may need to clear the fault codes and see which comes back on.
2. Vacuum hose for MAP sensor should be checked.
Ensure the vacuum hose connected to the MAP sensor is free of cracks, leaks, or damage. A damaged hose can cause a vacuum leak, affecting the MAP sensor’s readings. The car will usually idle rough if the vacuum hose is split.
3. Connect the MAP sensor electrically.
Connect the MAP sensor and make sure there are no damaged pins. Poor connections can cause the MAP sensor to malfunction, causing the check engine light not to illuminate or to flash erratically. Make sure the wires coming from the sensor are not damaged or disconnected.
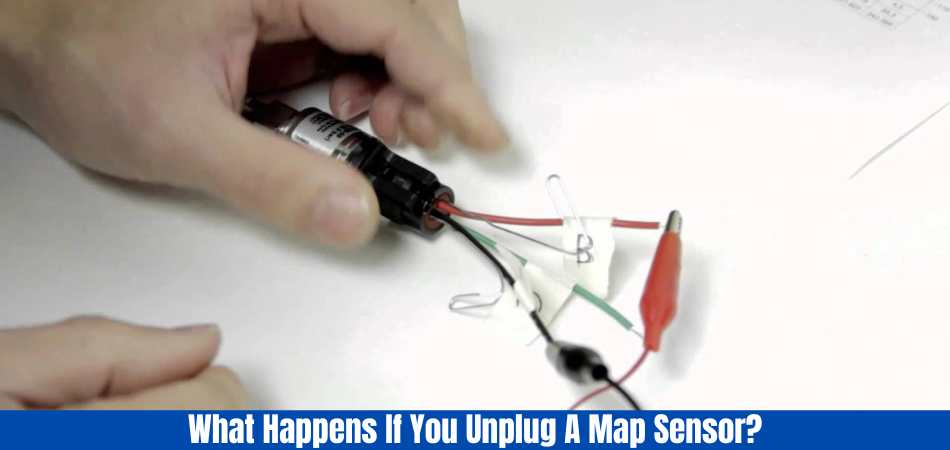
4. MAP sensor test
The voltage output of the MAP sensor should be tested with a multimeter. Variations in voltage output should be caused by changes in engine load, e.g., revving the engine. When a vacuum is applied to a MAP sensor, you can look for a drop in voltage at specific vacuum pressures using a vacuum gauge and a multimeter.
When your engine is running rough, you can take an educated guess by simply unplugging the MAP sensor if you do not have access to a diagnostic machine. It is possible to assume the MAP sensor is the problem if the car runs smoothly without it plugged in. However, this is not a guarantee.
How To Replace A Faulty MAP Sensor?
Replacement of a failed sensor varies from vehicle to vehicle. You can use these notes below as a reference for the next replacement project, as some basic procedures are nearly identical.
If you lack experience with self-projects, consult and ask a professional about any details to ensure a smooth process.
- MAP sensors should be located on the intake manifold, either near or on top of the throttle body or on the intake manifold itself.
- Sensor screws and nuts should be removed.
- Make sure the electrical connection is disconnected. You should avoid using force to remove the connector, as it may contain a locking tab that must be removed before it can be unlatched.
- Ensure that the vacuum hose is disconnected from the sensor if necessary. Replace the suction pipe with a new one.
- Analyze the differences between the old and new sensors.
- Suction hoses may need to be reconnected if necessary.
- Connect the electrical connection to the sensor again.
- Replace any screws or nuts holding the sensor in place.
- Make sure all connections are stable before proceeding.
Conclusion: What Happens If You Unplug A Map Sensor
Now you might have some idea of What Happens If You Unplug A Map Sensor. It is essential to understand the risks and consequences of unplugging the MAP sensor, even though it might seem like a quick fix for poor performance. A malfunctioning MAP sensor can reduce fuel economy and increase emissions in your car’s engine management system.
In order to ensure your car runs smoothly and efficiently, it’s essential to diagnose and address MAP sensor problems promptly. Knowing how the MAP sensor works and the possible reasons behind poor engine performance can help you make informed decisions about maintaining and repairing your car.
Read more of our articles here.
Read Also: Unplugging your MAP sensor: What you need to know!
FAQs
What Happens If You Unplug A Map Sensor?
It disrupts the communication between a MAP sensor and an ECM when the sensor is unplugged. As a result, the engine’s performance may be affected.
If I unplug the MAP sensor, will the engine still run?
Engines may run in some cases, but they will likely operate in a default or limp mode. As a result, fuel efficiency and performance may be reduced due to pre-programmed settings.
What is the effect of unplugging the MAP sensor on fuel efficiency?
When the MAP sensor fails to provide accurate pressure data, the ECM may have difficulty adjusting the air-fuel mixture. A decrease in fuel efficiency can result from inefficient combustion.
Are there any warning lights on the dashboard if the MAP sensor is unplugged?
Most modern vehicles will display a check engine light (CEL) if the MAP sensor is unplugged. When the MAP sensor does not provide data, the ECM signals a malfunction.
Is it possible to drive temporarily without the MAP sensor plugged in?
Leaving the MAP sensor unplugged for an extended period of time is not recommended. Engines can run, but they may not perform optimally, resulting in reduced performance and increased emissions.

Duralast offers a variety of automotive parts and accessories, including brakes, batteries, and engine parts. The brand is owned by AutoZone, a leading retailer of automotive parts and accessories in the United States. For many makes and models, Duralast products meet or exceed the quality of original equipment manufacturer (OEM) parts. Duralast sells replacement parts and accessories for non-warranty vehicles in the automotive aftermarket. But the question is Is Duralast a Good Brand?
Duralast products are known for their high quality and affordability. There are, however, those who criticize it and those who support it. Duralast products may be reliable to some people, but they may be inferior to others who have had negative experiences with the brand. To provide a balanced view of the pros and cons of using Duralast products, this blog post examines the various factors that may influence Duralast’s reputation as a good brand.
An Overview Of Duralast’s History
AutoZone, a leading retailer of automotive parts and accessories in the United States, founded Duralast. In 1979, AutoZone was founded by J.R. “Pitt” Hyde III in Forrest City, Arkansas. As a single store, the company quickly expanded to multiple locations across the country selling automotive parts and accessories. During the 1990s, AutoZone started selling private-label Duralast products. In addition to meeting or exceeding OEM quality standards, these products were available at a lower price point than many OEM parts.
Duralast has evolved and expanded its product portfolio over time. In addition to brakes, batteries, engine parts, and more, the brand offers a variety of automotive parts and accessories. A popular choice among DIY mechanics and professional technicians alike, the brand focuses on quality and affordability.
The Duralast Gold line of products was launched in 2002, marking an important milestone in the brand’s history. With a limited lifetime warranty, these products are designed to offer the highest level of quality and reliability. Through the Duralast Gold line, the brand established itself as a reliable source of automotive parts and accessories.
In Due to changing consumer preferences and market trends, Duralast has undergone some changes and updates in recent years. A range of products are now available for purchase on the brand’s website and in its retail stores, for example. As well, Duralast has introduced numerous new product lines and categories, including Duralast Elite, which features high-performance parts for racing. While maintaining its focus on quality and affordability, Duralast has evolved and adapted to the changing needs of its customers.
Where Are Duralast Parts Made?
With parts manufactured all over the world, including Mexico, India, and beyond, Duralast offers a wide selection of automotive parts. We have everything you need, whether you’re looking for a reliable replacement part or something to keep your car running smoothly. Their reputation can attributed to the following factors:
- They offer affordable parts that are ideal for budget-conscious consumers.
- The materials they use are of high quality and can withstand wear and tear for a long time.
- It has been operating since the 1920s and is a trusted shop for all types of automotive repairs.
When shopping for new or replacement parts for your vehicle, Duralast is an ideal choice because they offer quality parts at competitive prices. One of the most popular names in automotive repair and maintenance today is because of their wide selection and easy-to-find locations.
With Duralast, consumers can rest assured that they’ll get dependable parts from a reputable source no matter what their budget is. It’s clear why so many people choose Duralast when considering which brand to buy for auto repairs or replacements based on this information.
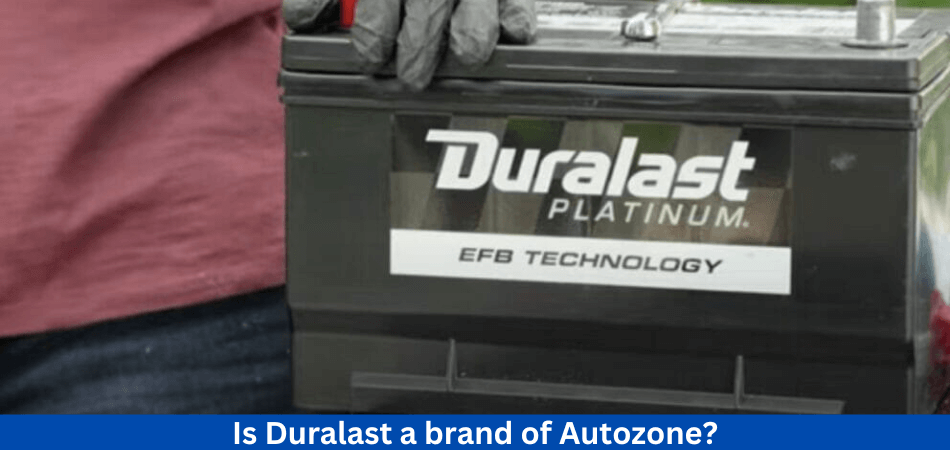
Is Duralast a brand of Autozone?
AutoZone’s Duralast brand offers reliable parts at affordable prices that meet or exceed OE specifications. Private label parts feature a lifetime warranty and an internal regulator to ensure they work in hot and cold temperatures.
Furthermore, Duralast’s competitive prices allow customers to shop around and find the best deal for their buck on its wide variety of auto parts. A Duralast part manual isn’t always necessary when buying one, but it can provide additional peace of mind as it contains detailed instructions on how to properly install and use it.
Duralast parts have proven to stand the test of time when tested under real-world conditions. A trusted name in automotive retailing, this AutoZone brand consistently delivers quality products from batteries to brakes and alternators. Thus, it is an excellent choice for those seeking quality and durable aftermarket auto parts at great prices.
What are the Products Offered By Duralast?
Duralast offers an extensive selection of automotive parts and accessories, such as brakes, batteries, engine parts, and more. Duralast products offer the following benefits and features:
Quality: Quality products are designed to meet or exceed the quality of OEM parts and are tested to ensure they meet the highest performance and reliability standards.
Affordability: For those looking to save money on automotive repairs and maintenance, Duralast products are often more affordable than OEM parts.
Wide range of products: There is a wide range of Duralast products available for vehicles of all makes and models, including domestic and imported ones.
Limited lifetime warranty: A limited lifetime warranty is included with many Duralast products, offering customers additional peace of mind and protection.
Duralast Gold line: In addition to offering the best quality and reliability, Duralast Gold products also come with a limited lifetime warranty.
Duralast Elite line: In addition to racing brakes and suspension components, Duralast Elite products designed for high-performance applications.
Automotive aftermarket products manufactured by Duralast for vehicles that are no longer covered by a manufacturer’s warranty. Its products are popular with DIY mechanics and professionals alike and are suitable for use in a variety of industries and markets, including automotive repair and maintenance, racing, and performance.
What is the Quality of Duralast parts?
Known for their superior quality and exceptional performance, Duralast parts are tough and reliable. Its quality control protocols, rigorous materials, and industry-leading manufacturers make Duralast a good brand for affordable automotive products that perform as well or better than original equipment.
It has been reported that Duralast products last longer than other brands, rebuild better than expected, and come with a lifetime warranty. Ford parts have been my go-to brand for years without any issues and I’m confident they’re not junk. When combined with AutoZone’s excellent customer service, Duralast offers customers a great value proposition when it comes to automotive repairs.
With our products, customers are assured they are getting top-quality parts that won’t break the bank. Although there are some negative reviews about Duralast out there, overall the consensus is that it is a great option for car owners seeking high-quality parts at a reasonable price.
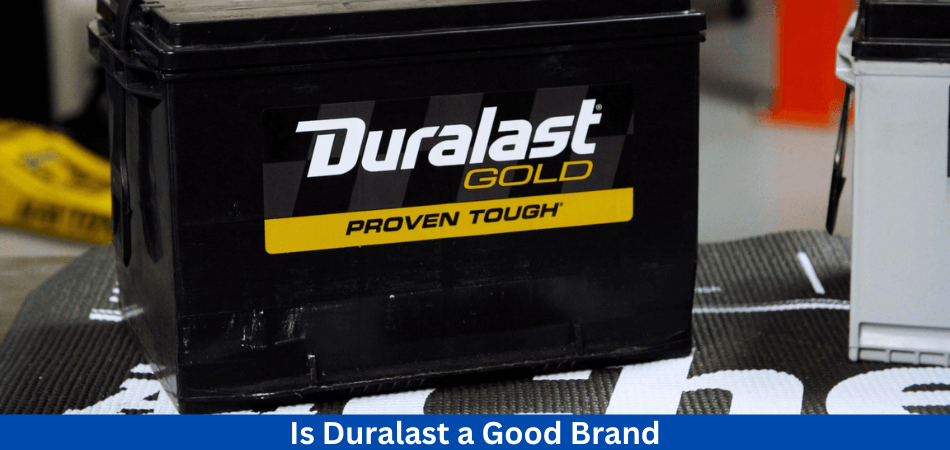
Is Duralast A Good Brand?
Is Duralast a Good Brand? Duralast is undoubtedly one of the most reliable and reputable brands on the market, making it a good brand. In the continental United States and some international markets, Duralast manufactures and distributes everything from engines to tie-rods.
Both consumers and large professional institutions respect Duralast in the auto parts market. You should definitely consider Duralast if you’re looking for a brand backed by professionals. You can consider them a safe choice for your auto parts needs because of their respectable business practices and fair and equitable warranty agreements.
Is Duralast A Good Brand Cost-Wise?
Duralast is pretty middle of the park in terms of their actual cost breakdown, even though their overview painted them as an optimal choice. Parts provided by them are generally durable and good quality. So cost-wise Is Duralast a Good Brand?
Most people, however, find them too expensive. This is especially true when comparing alternative manufacturers or alternative marketplaces. The quality-to-cost ratio that Duralast uses may only fit a small window of people whose budget matches it.
Many people tend to either choose something cheaper that is somewhat poorer in quality or something a little more expensive that is quite a bit better in quality. Towards the end of the article, we’ll discuss which manufacturers or marketplaces are a little pricey but quite good.
Is Duralast A Good Brand Reliability-Wise?
Whenever you choose Duralast, you can assured that you are getting a part that will stand the test of time if you find that what they have to offer meets your needs. While they offer a decent warranty on some of their parts, they are vastly inferior to other sellers like AutoZone. So Is Duralast A Good Brand Reliability-Wise?
For example, AutoZone (for example) offers a lifetime warranty on axles, which Duralast might give you a multi-year warranty on. What are your thoughts on Duralast parts 10 years from now, even if you felt inclined to believe they were slightly better? Duralast axles that are 10 years old will they still perform as well as a brand new free replacement axle? It might be possible, who knows? Probably not, though.
Is Duralast Ignition Coils a Good Product?
Duralast ignition coils provide reliable, durable performance, allowing you to hit the road with ease and peace of mind. A brand like Duralast offers high-quality auto parts at an affordable price. Their ignition coils guaranteed for a lifetime and meet or exceed OE standards.
Duralast products have received positive reviews from many users, suggesting they’re worth considering for certain vehicles. Some users, however, have reported negative experiences, suggesting OEM parts may be better suited to certain applications.
It depends on the specific product and vehicle application whether Duralast ignition coils work well. Before making a purchase decision, do your research and speak with a professional mechanic to ensure that you’re getting the best possible product.
You should compare both brands before choosing one before choosing one. Napa also offers similar products at competitive prices.
How Good Are Duralast Suspension Parts?
Are you looking for durable suspension parts? Duralast suspension parts are like sturdy anchors, ensuring smooth and comfortable rides for years to come. With heavy-gauge steel and resilient components, they meet or exceed OE performance standards.
Duralast manufactures durable parts with high-quality materials, making them accessible to the market. There are a range of positive and negative reviews for this product, suggesting it may be a better option for certain vehicles than OEM parts or other aftermarket brands like Moog. Purchasing a product, however, requires research.
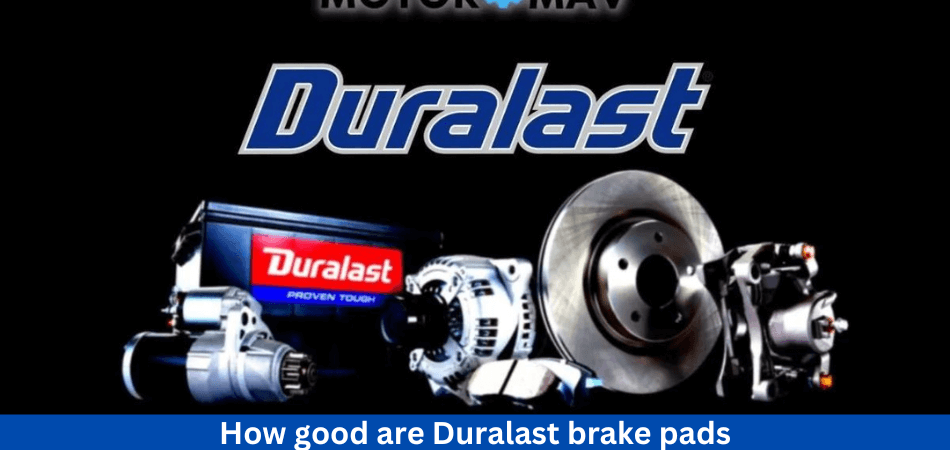
How Good are Duralast Brake Pads?
The Duralast brake pads are a great choice if you concerned about your safety. There are several options available from the brand, such as Duralast Gold brake pads and standard brake pads. AutoZone offers lifetime warranties on both items. For reliable braking power at an affordable price, our products meet or exceed OE quality, performance, and durability standards.
Besides being compatible with most vehicles, their high-quality products provide excellent stability as well. According to users, Duralast’s brake pads produce less dust and have a five-year lifespan.
Is Duralast a Good Car Battery?
Duralast known for its long-lasting power and reliable performance when it comes to car batteries. AutoZone’s website has an average rating of 4.7 out of 5 stars from customers. Also, Consumer Reports rated the 51R-DLG model as a recommended battery with excellent cold cranking and life ratings. There are several models offered by the company, such as the Gold and Platinum series, which provide optimal performance in all types of vehicles. In addition to offering a lifetime warranty, Duralast also offers a wide range of car battery options. Is Duralast A Good Brand Reliability-Wise?
In light of all these factors, Duralast is clearly a good brand of car batteries. You can replace or exchange your battery if something goes wrong with it, even if you’ve been using it for years. Having an AutoZone nearby can be a great idea in an emergency. With Duralast’s lifetime warranty, even if your battery dies after a while, you’ll protected.
Can Duralast Wheel Bearings be trusted?
You can count on Duralast to provide a reliable wheel bearing at a reasonable price! Wheel bearings offered by AutoZone under the Duralast brand as well as the Duralast Gold brand. Durability and reliability are excellent features of the Gold option for those seeking superior performance.
Besides being factory-sealed and lubricated for life, their products come with lifetime warranties. Wheel bearings from Duralast tend to receive positive reviews from users. While some have found them to be an affordable alternative to more expensive OEM parts, others have experienced excellent quality and performance. Nevertheless, some say Timken may be a better choice for certain vehicles than other brands.
Take all of this information into consideration when deciding whether Duralast is the right brand for you. You can get the most bang for your buck without compromising safety or quality by researching FAQs and similar posts from other consumers before making a decision.
What is the lifespan of Duralast rotors?
Rotor life expectancy for Duralast rotors will range from 25,000 to 85,000 miles. A number of factors can affect the lifespan of automotive parts. Rotor longevity can affected by your driving habits, your vehicle’s condition, and how well you maintain it.
In general, rotors designed to last a long time, but eventually, they will wear down and need replacing. As a result of their quality and their usage, rotors can wear down at different rates. A well-maintained and high-quality rotor may last longer than a poorly maintained or lower-quality rotor.
Rotors should maintained according to the manufacturer’s recommendations and replaced when worn. It is important to check the condition of your rotors on a regular basis and to replace them when necessary to ensure the safety and performance of your vehicle.
What is Duralast’s warranty period?
Specific Duralast warranty terms will vary based on the product that you have purchased. To find out more about the warranty for a specific Duralast product, you can refer to the product documentation or contact AutoZone directly. Most Duralast products covered by a limited lifetime warranty at AutoZone, which means that they are covered for as long as you own them. Please read the warranty carefully and understand its terms and conditions, as some exclusions and limitations may apply.
Is Duralast a good brand compared to Autopartswarehouse and Autozone?
As these three marketplaces are highly comparable, they tend to appear in the same conversations. It should noted that each of them offers different benefits and is quite different from the others. As an example, Duralast built to last, whereas Autozone built to be decent, but also reasonably inexpensive to replace. Is Duralast A Good Brand?
In comparison to Duralast, Auto Parts Warehouse offers a nice blend between the two, though they don’t always have as many items in stock. It likely depends on what part you are looking to replace and what offers the three brands have if you are in a competition between them.
Unless it is a super niche part that they don’t carry or manufacture, it is always a good idea to browse all three of them. Here is what you should probably consider as your best option in the next section. It’s even better than Duralast.
How Do Duralast Parts Compare To OEM Parts?
No, not really. Duralast is not a bad brand by any means. Duralast’s problem is that their prices are so close to OEM parts that you might as well go with OEM parts since they’re more likely to be better and you already KNOW they’re compatible.
As your mechanic already knows the parts they are working with quite well, they can sometimes fix or replace parts more easily and solve problems more quickly. It’s true that Duralast offers a few % off of the price, but for the sake of (usually) a few bucks, you may as well go with the original manufacturer’s parts.
If you want to purchase parts, a good flowchart would be to buy from OEM unless they don’t carry the part you want for some reason or Duralast is more than 10% cheaper.
Duralast Vs Carquest
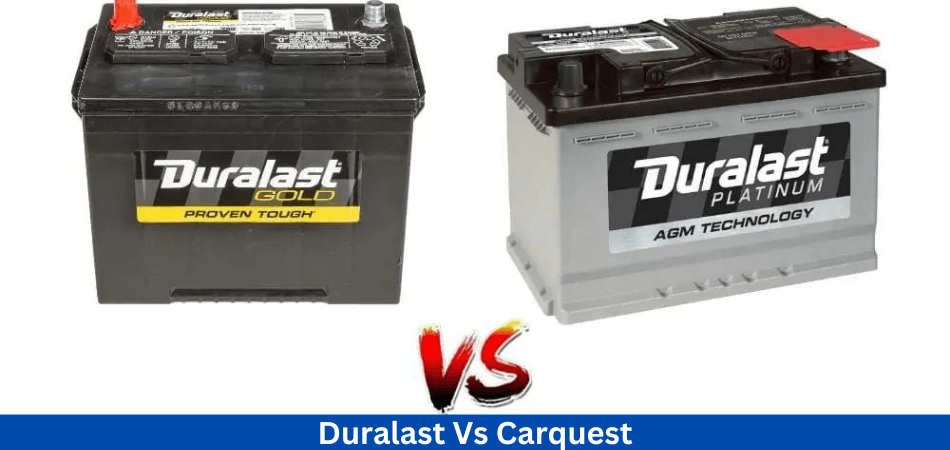
Both Duralast and Carquest have their advantages and disadvantages – so which is best for you? With over 60 years of experience in the industry, Duralast is a great choice for affordability and reliability.
When comparing the two, keep these points in mind:
- There are two types of brake pads offered by Duralast: Gold and standard. Both options praised for being stable when braking, producing less dust, and having a long service life.
- The alternators from both brands have received mixed reviews, with no clear winner.
- The quality of a product may vary depending on the type of vehicle and its application. It is important to research thoroughly before making a decision.
After considering all the factors, you should choose an auto part that meets your specific needs as well as your budget. Before investing in either Duralast or Carquest, make sure you read reviews and compare products carefully.
The next step is to compare Duralast Gold with standard Duralast products.
Duralast Vs Duralast Gold
Selecting automotive parts requires considering the differences between Duralast and Duralast Gold – they offer different levels of quality and performance.
Compared to standard Duralast parts, Duralast Gold components engineered to meet or exceed OE quality, ensuring better performance and durability.
Standard Duralast brake pads provide similar performance in normal driving conditions, but Duralast Gold brake pads provide higher quality control and a refined production process. As a result, Duralast Gold batteries offer greater vibration resistance and power, making them ideal for heavy vehicles with high demands, such as those with heated seats or infotainment systems.
In order to ensure you get the best quality and performance for your specific vehicle needs, you should research and compare products from both lines. All of these factors will help you make an informed buying decision that meets your needs.
Duralast Vs Diehard
As both Diehard and Duralast automotive batteries come with their own advantages and disadvantages, comparing them can be tricky. It well known that Duralast batteries are affordable, made with high-quality materials, and have reliable performance. Conversely, Diehard batteries’ cold-cranking amps (CCA) range from 550A to 900A, making them renowned for their exceptional longevity.
There are similar reserve capacity ratings between both brands, but Diehard provides a longer warranty of three years compared to Duralast’s two years. In the end, the right choice depends on your specific needs and what kind of vehicle you are looking for.
To ensure you get the best quality and performance for your car or truck, it is imperative to research and compare both brands’ products before making a purchase decision It is also important to consider factors such as cost, CCA ratings, reserve capacity ratings, and warranties offered by each brand when choosing between Duralast and ACDelco batteries.
Learn more at here.
Duralast Vs Acdelco
Both Duralast and ACDelco automotive parts offer unique benefits and drawbacks, making it tricky to choose between them. Duralast offers great options with its Gold and Platinum battery lines, which highly regarded. Known for their affordability and reliability, they provide reliable performance.
As well as having a good reputation, ACDelco batteries offer a variety of CCA ratings. The Duralast models have reported to last longer by some users. There are viable options for both brands when it comes to brake pads. There limited information available about ACDelco’s offerings in comparison to Duralast’s, but Duralast’s Gold and standard brakes offer solid performance.
Overall, you should research both brands’ specifications and how they fit your vehicle needs before choosing between them. To ensure your car or truck has the best quality and performance, you should consider all aspects before buying. It’s important to compare before making a decision – what works best depends on individual requirements.
Duralast Vs Valucraft
There are two brands that offer different levels of quality and performance when it comes to automotive parts: Duralast and Valucraft. Because Duralast parts made of high-quality materials, they provide reliable performance while remaining affordable.
In contrast, Valucraft parts are cheaper, but they may not perform as well. Valucraft brake pads and rotors may not perform as well or last as long as Duralast brake pads and rotors. A Duralast part also comes with a longer warranty than a Valucraft part.
Duralast Vs Wagner Brake Pads
Choose between Duralast and Wagner brake pads, two brands with different levels of performance and quality. Duralast’s reliability and affordability make it a popular product. Duralast Gold and Standard brake pads are affordable options that made with high-quality materials and known for their reliable performance.
Conversely, Wagner offers ThermoQuiet brake pads, known for their excellent stopping power and quiet operation. It has reported that they provide better wear and service life than other brands. Prior to making a purchase decision, you should research the best option for your vehicle’s needs, as both Duralast and Wagner brake pads offer good quality and performance. There are a number of benefits to each option, so you can find the one that suits your needs best.
Duralast Vs Everstart
A comparison of Duralast and uralast and Everstart automotive batteries? Considering the pros and cons of each will help you decide which is best for you. In addition to its affordability and quality materials, Duralast known for its reliable performance. Performance and reliability are highly regarded when it comes to their gold and platinum options.
Conversely, Everstart batteries also considered durable and reliable, with a lifespan of 2- 5 years. They’re sold at Walmart made by a company that produces some of the more premium brands too, offering up to 800 CCA ratings for better cold-cranking performance in some cases.
Despite the fact that both brands offer good quality, you should research each product carefully to ensure that it meets your specific vehicle needs. Depending on your situation, either could be the right choice. Therefore, weigh both equally before choosing which is best for you. Be sure to keep these considerations in mind as you research Duralast vs. OEM.
Do Duralast products have any common issues or complaints?
Customers have reported a range of problems with Duralast products. There are serious quality concerns for some drivers, from wiper blade fitment issues to defective parts such as radiators and battery chargers within a short time period of use.
A remanufactured part, such as an alternator, may not meet the same standards as a new one due to the rebuilding process. Wheel bearings and suspension parts can differ in terms of performance between different vehicles, causing some users to choose other brands such as Moog or Timken.
It is important to do your research and compare products before making a purchase in order to get the best value for your vehicle needs, even if these complaints don’t reflect the brand’s overall quality. If Duralast is right for you, you can make an informed decision. In the coming weeks, we’ll examine Duralast’s quality and reliability in comparison with other automotive brands.
Conclusion: Is Duralast A Good Brand?
Now that you know more about Duralast, you should have a better idea of whether the company is right for you. The brand provides high-quality products that built to last and are certainly reputable. It is clear that Duralast is on par with its closest competitors Autozone and Auto Parts Warehouse. However, Duralast isn’t competitive with most OEM options. You might as well invest a little more in OEM parts.
Read more of our articles here.
FAQs
Is Duralast a reputable brand?
Automotive professionals generally consider Duralast to be a reputable brand. Several auto parts stores and retailers carry their products, and they have been in business for many years.
What is the reliability of Duralast products?
The Duralast brand is known for its reliability. Batteries and brake parts are essential auto parts that many consumers trust for their durability and performance.
What kind of warranty does Duralast offer?
Warranty coverage varies from product to product with Duralast products. If you purchase an item, you should read the warranty details to understand how it is covered.
Compared to other automotive brands, how does Duralast fare?
A number of well-known automotive brands compete with Duralast. Individual preferences and product categories may influence the comparison. Make an informed decision by researching and reading reviews.
Can you tell me where I can buy Duralast products?
Duralast products are available at auto parts stores, online retailers, and even some large general merchandise stores. To find the closest location, check the Duralast website or contact a local retailer.

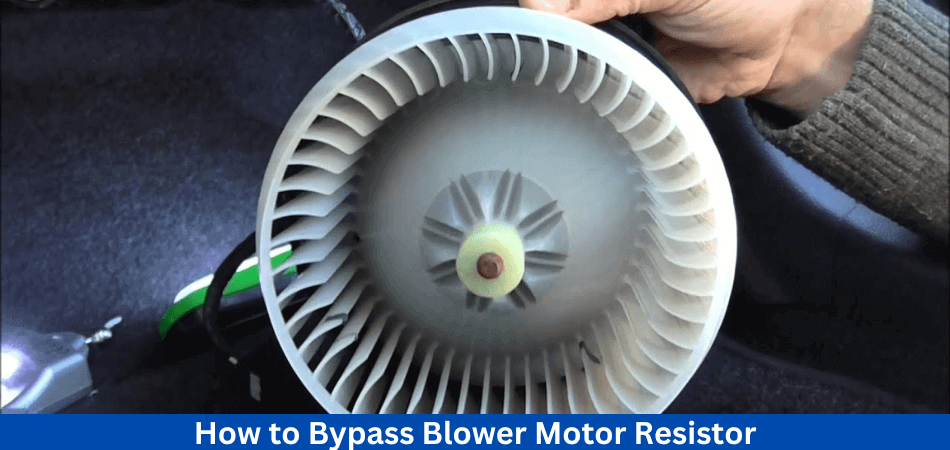
Have you been having problems with the blower motor on your car? You may need to bypass the blower motor resistor if this is the case. Our goal in this article is to provide step-by-step instructions on how to bypass blower motor resistor in order to get it working again.
The wiring harness needs to be unplugged from the blower motor resistor in order to bypass a blower motor resistor. In this way, the fan motor will be able to run at full power without being constrained by the resistor. You can learn more about the process on how to bypass blower motor resistor and what you need to do to ensure a successful bypass by reading on.
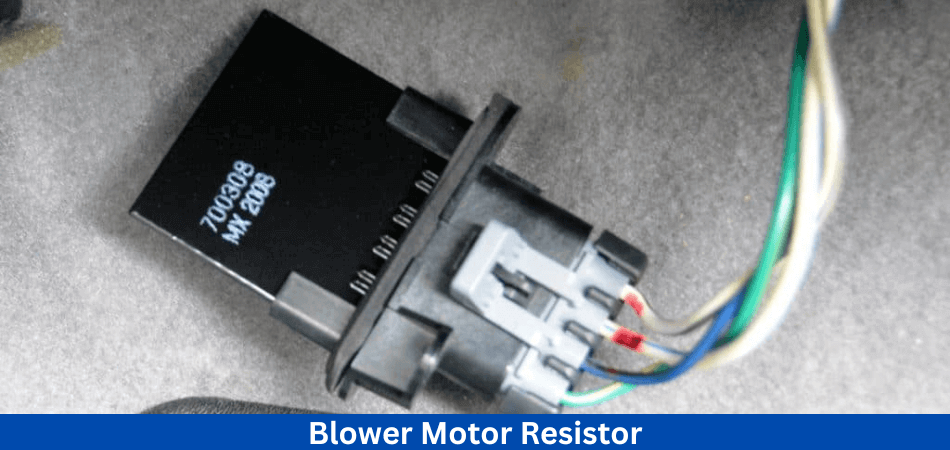
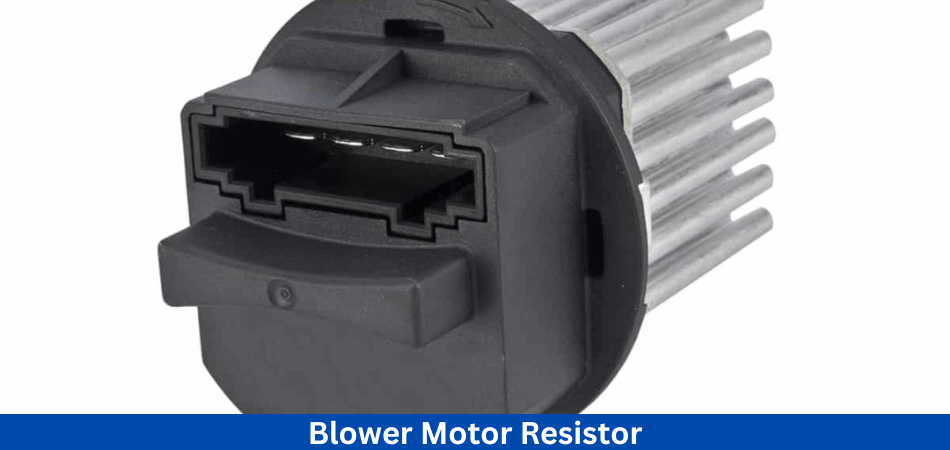
What Is a Blower Motor Resistor?
An actual blower motor switch is the switch or button on the dash that you use to boost or decrease the blower motor’s speed. A fan is the only one that powers the blower motor. Rather than simply stopping and restarting, the blower motor can operate at a variety of speeds thanks to the resistor. The blower motor cannot regulate the fan speed when a resistor fails in the blower motor. In this case, the fan will only operate at its maximum speed, and it will not allow the air to escape.
Blower motor problems can indicated by fluctuating fan speed or running out blower motor resistors. An HVAC system uses a blower motor resistor to control the speed of the blower motor and prevent overheating. Replacing the resistor is not necessary if you know the problem is not due to the resistor. It is best to replace the resistor if you notice any of the above symptoms.
What Does The Blower Motor Resistor Connect To?
It is traditional to ground and wire the resistor in series with the blower motor assembly when using blower motors. Controlled by a resistor that differs in resistance from blower motor to blower motor. This controls the current flowing through the blower motor.
Resistors located close to the air cabin filter are easy to replace because they are simple to replace. If the resistor is faulty, the blower will only run at one speed with the HVAC controls and not at any other speed. There is a blower motor resistor behind the glove compartment or at the bottom of the HVAC housing. It may be necessary to use tools to remove the glove box on some vehicles, but it may not be necessary in others.
To remove the resistor, the wiring harness must disconnected and the screws removed. The garage is a good place to store your blower motor if it is not functioning in the middle of summer. If you don’t want to invest in new equipment, here are some easy steps to replace a blower motor. By using the FIXD Sensor and app, you can monitor the health of your car at all times.
It may caused by corrosion or overheating when your blower motor resistor fails. Motor current controlled by the resistor, which is a mechanical device. Overheating and failure of the resistor may result if the resistor is overrun. During certain conditions, the fuse on the resistor board may blow, resulting in a reduction in blower speed. In the event that the resistor fuse blows, your car will continue to run at high speeds, but it will need to replaced.
Where Is The Resistor Located In Blower Motor?
Usually, the heater blower motor resistor located underneath the dashboard. Within the compartments of the heater and air conditioner, it can found. An air conditioning system device controls the blower motor fan.
An electrical component resistor (also called a blower motor resistor) can prevent current flow into the blower fan. Fans can sped up or slowed down using this feature. Slower rotation of the fan causes less air to circulate throughout the cabin, which reduces resistance. A faulty blower motor resistor will result in heat loss and air loss in your automotive HVAC system. To replace a good one, here are some suggestions.
In the open circuit, the Ohmmeter registers infinity, which indicates the blower resistor needs to be replaced. In this way, the system will remain more uniform, and a cause may even be discovered.
Can You Bypass A Blower Motor Resistor?
An electronic blower motor resistor regulates the motor’s speed through an electronic control system. As well as the blower motor and the control switch, the resistor connected in series with them. Control switches control the voltage applied to blower motors. By changing the resistance in the circuit, the blower motor resistor controls the speed of the blower motor. In most cases, the resistor locates near the blower motor in the air duct.
So how to bypass blower motor resistor? Actually it won’t be difficult to bypass the blower motor resistor. There are a few steps involved in replacing the resistor, in addition to finding and disconnecting it. It is important to have a resistor in the cooling system. The amount of current flowing through the motor can control its speed. An automobile’s climate control system includes a blower motor resistor. A blower motor’s speed is controlled by this device by controlling the flow of current through it. Additionally to regulating the air temperature in the vehicle, it determines the speed at which it circulates.
What are the Signs of a Bad Blower Motor Resistor?
Although they are pretty darn reliable, blower motor resistors can go bad without much warning. The good news is that a blower motor resistor can diagnosed fairly easily.
A bad blower motor resistor can identified by some of the following signs:
- Inability to control HVAC fans (all or certain speeds)
- Only the highest speed setting works on the fan
- There is no air coming from the vents
- A fan that runs intermittently or inconsistently
According to our story above, you’ll likely first notice the problem when the passenger cabin in your vehicle doesn’t cool down or heat up as it normally would-which brings us to an important point. In addition to affecting your HVAC system’s ability to heat up and cool down, a bad blower motor resistor directly affects airflow.
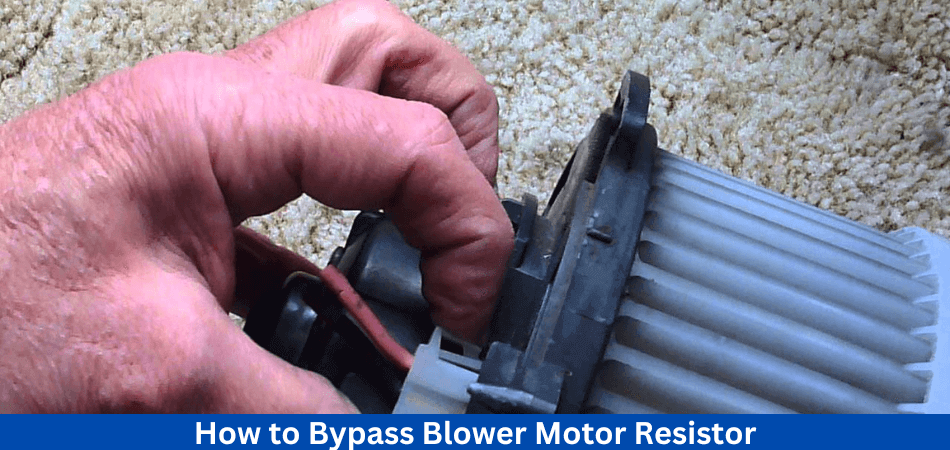
How to Bypass Blower Motor Resistor?
Resistors on blower motors can fail and need to replaced in some cases. The blower motor can become noisy and cause reduced air flow. It is necessary to bypass the blower motor resistor in order to solve this problem. So how to bypass blower motor resistor?
Finding the blower motor resistor is the first step in bypassing it. The rectangular shape of this component can identified on the firewall of a vehicle. The rectangular shape of this component can identified on the firewall of a vehicle.
After installing the bypass wire, the next step is to connect it to the power supply. The positive terminal of this wire should be connected to the positive terminal of the blower motor, and the negative terminal should connected to the negative terminal. When this done, the blower motor will be able to operate at its full speed since the resistor will bypassed. Lets learn all the method on how to bypass blower motor resistor.
Method 1: Direct Wiring
Bypassing the blower motor resistor, direct wiring connects the blower motor directly to the power source. Manually adjusting the power supply to the motor allows you to control the fan speed.
Step-by-step guide
Follow these steps to bypass the blower motor resistor using direct wiring:
- Remove the wiring harness: Carefully remove what found near the blower motor itself or in the HVAC system’s ductwork.
- Disconnect the wiring harness: Disconnect the wires connecting the blower motor to the resistor.
- Power and ground wires: Locate the power and ground wires connected to the blower motor. If necessary, refer to the wiring diagram for your vehicle.
- Cutting and stripping the wires: Use wire cutters/strippers to cut the wires leading to the blower motor resistor. To expose the wire conductors, remove a small portion of insulation from the cut ends.
- Connect the power and ground wires: Connect a 12V power source directly to the blower motor’s power wire, such as the battery’s positive terminal. A suitable ground point, such as the vehicle chassis, should connected to the ground wire.
- Insulate the connections: Cover each wire connection with electrical tape as a short-circuit protection measure.
Pros and cons of the direct wiring method
The advantages and limitations of direct wiring are as follows:
Pros:
- Bypass method that is simple
- Directly controls the speed of the blower motor
- Resistor replacement is a cost-effective alternative
Cons:
- For desired fan speed, the power supply may need to be manually adjusted
- If operated at high speeds for extended periods, it can strain the blower motor
- It does not provide the original functionality of the blower motor resistor, such as automatic speed adjustment based on temperature
Method 2: Using a Bypass Harness
Using a bypass harness, the blower motor is directly connected to the power source, bypassing the blower motor resistor. As a result, the bypass process has simplified, and the connection has been made more organized and secure.
Installation process
You can bypass the blower motor resistor by installing a bypass harness as follows:
- Make sure you purchase a bypass harness that is compatible with the make and model of your vehicle.
- To prevent any electrical mishaps during installation, disconnect the vehicle’s battery.
- Identify the blower motor resistor. The blower motor resistor is usually located near the blower motor or inside the ductwork of the HVAC system.
- Carefully disconnect the wiring harness that connects the blower motor resistor to the vehicle’s electrical system.
- Through the wiring harness previously attached to the resistor, connect the bypass harness to the blower motor.
- Make sure all connections are secure and properly seated. Any additional steps or recommendations should followed according to the manufacturer’s instructions.
- To restore power to the vehicle’s electrical system, reconnect the vehicle’s battery once the bypass harness has installed.
Pros and cons of using a bypass harness
There are several benefits and considerations to using a bypass harness:
Pros:
- Provides a plug-and-play bypass solution that simplifies the bypass process
- Minimizes the risk of electrical problems by ensuring secure and reliable connections
- Makes it easier to remove and reinstall if necessary
- Ensures that the electrical system of the vehicle maintains its original integrity
Cons:
- For your specific vehicle, you will need to purchase a compatible bypass harness
- Compared to other bypass methods, this may be a more expensive solution
- Specific vehicle models may not have harnesses readily available
Method 3: Installing a Resistor Pack
You can also bypass the blower motor resistor by installing a resistor pack. A new group of resistors substituted for the faulty one, providing a fixed resistance value. By using the resistor pack, the speed of the blower motor can be properly regulated.
Locate the resistor in the blower motor of the HVAC system to begin. Identify the faulty resistor and disconnect the wiring harness. Removing the resistor from its mounting location and noting its original location is the first step.
The new resistor pack should now aligned correctly in the mounting location. Make sure the connections on the pack match those on the wiring harness. Be careful not to damage any surrounding components when installing the resistor pack.
Connect the wiring harness to the resistor pack once the resistor pack has been securely installed. Make sure the blower motor is working as it should. With the new resistor pack installed, the blower motor speed should be effectively controlled.
There are pros and cons to using a Resistor Pack to bypass a faulty blower motor resistor. Let’s examine them in more detail:
Pros and Cons of Installing a Resistor Pack
Pros:
- The resistor pack ensures adequate regulation of the blower motor speed by providing a fixed resistance value. In this way, the cabin airflow can maintained.
- Specific vehicle models are compatible with resistor packs, which ensure a seamless fit and electrical compatibility. As a result, compatibility issues during installation reduced.
- Compared to more complex methods such as modifying the wiring harness, installing a resistor pack is relatively straightforward. Many vehicle owners can do this project themselves with basic automotive knowledge and the right instructions.
- By removing the resistor pack and reinstalling the original resistor, you can return to the original blower motor resistor configuration. By doing this, flexibility provided as well as the ability to switch back if necessary.
Cons:
- Specific vehicle models may require different resistor packs, so they may not be universally applicable. To avoid compatibility issues, make sure the resistor packs you purchase are compatible with your vehicle’s make and model.
- In spite of the fact that a resistor pack regulates blower motor speed, it does not entirely bypass the resistor. There is still some resistance in the circuit due to the pack acting as a resistor. It may affect the blower motor’s overall functionality in some cases.
- A resistor pack costs more than a jumper wire, which is a more straightforward method. There can be a wide range of prices for resistor packs based on their brand and quality, as they are typically aftermarket components.
- If a resistor pack installed on the vehicle, the warranty provided by the manufacturer may voided. Check the warranty terms and conditions before proceeding with this method to avoid potential problems.
Method 4: Installing a Variable Speed Controller
A Variable speed controllers allow you to adjust and control the speed of the blower motor. The fan speed can be precisely controlled by installing a variable speed controller instead of bypassing the blower motor resistor.
Step-by-step instructions
Here are the steps to bypass the blower motor resistor with a variable speed controller:
- Your vehicle’s blower motor and electrical system should fitted with the appropriate variable speed controller. Take into account factors like compatibility, installation ease, and features available.
- Before installing the battery, disconnect it as a precautionary measure to avoid electrical accidents.
- You can find the blower motor resistor inside the HVAC system’s ductwork or near the motor.
- Carefully disconnect the wiring harness that connects the blower motor resistor to the vehicle’s electrical system.
- The variable speed controller must connected according to the manufacturer’s instructions. In most cases, the controller connected to the blower motor via the wiring harness that was previously attached to the resistor.
- Make sure all connections are properly seated and secured. Make sure to check the manufacturer’s instructions for any additional steps or recommendations.
- Connect the vehicle’s battery after installing the variable speed controller to restore power to the electrical system.
Pros and Cons
There are several benefits and considerations to using a variable speed controller:
Pros:
- It allows you to adjust the fan speed precisely according to your comfort needs
- Maintains the original wiring integrity of the vehicle’s electrical system
- Reduces blower motor strain by allowing gradual speed adjustments
- Provides automatic fan speed adjustment based on temperature settings, if supported by the controller
Cons:
- This requires the purchase of a variable speed controller compatible with the blower motor on your vehicle
- A controller’s features and specifications may require additional wiring and adjustments during installation
- Variable speed control adds functionality to this bypass method, making it more expensive than other bypass methods
When you understand the precautions, methods, and considerations involved with bypassing the blower motor resistor, you will be confident in using these techniques to regain control over your vehicle’s HVAC system. Always prioritize safety, follow the manufacturer’s instructions, and seek professional assistance if you have any questions. Bypassing the blower motor resistor will provide you with a comfortable and efficient ventilation experience.
How to Troubleshoot a Blower Motor Resistor Bypass?
Several steps can be taken in order to troubleshoot the bypass if it does not seem to work correctly. Check the connections to make sure they are all properly connected. As soon as the connections made, the fuse should checked. For the blower motor to work again, the fuse must replaced if it has blown.
What are the Benefits of Bypassing the Blower Motor Resistor?
- There are several advantages to bypassing the blower motor resistor. It allows you to regain control over the fan speed, ensuring optimal comfort inside your vehicle.
- In addition, it eliminates the need for a potentially expensive resistor replacement.
- Furthermore, bypassing the resistor can provide a temporary fix if a replacement part is unavailable.
Replacing the Blower Motor Resistor
In the event that the bypass is not successful, the blower motor resistor may need to replaced. A new resistor can installed in place of the old one after the old one has removed. Ensure that the new resistor is the same type and size as the old one so that it will fit correctly.
How Do You Replace Your Blower Motor Resistor?
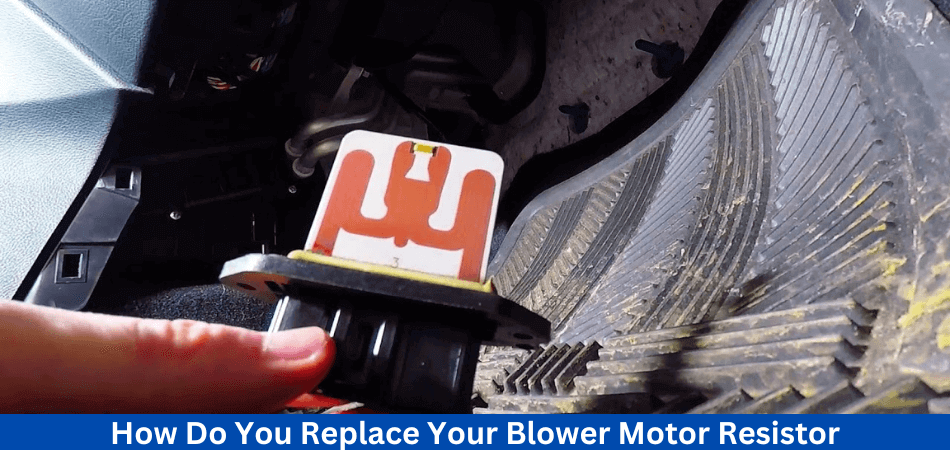
This guide outlines how to replace a faulty blower motor resistor.
- Identify the blower motor resistor
Find out where the resistor for the blower motor is located. The battery is usually found beneath the dash or in the engine compartment on the passenger side. The blower motor is close to it.
- Remove the motor resistor from the blower
Make sure the AC pigtail and cooling duct are disconnected from the components surrounding the blower motor resistor. The blower motor resistor can removed by ratcheting loose the bolts holding it in place. Removing the blower motor resistor is as easy as removing the bolts.
- Remove all wires from the device
The wires attached to the blower motor resistor should cut once the resistor has been removed. Wire strippers or scissors can used to cut the wires.
- Remove the old blower motor resistor and install the new one
Before continuing installation, apply dielectric grease to the housing of the blower motor resistor. By doing this, you will keep water out, a problem that is common when driving off-road. To protect the component, apply a coating to the plastic.
Put the blower motor resistor back where it belongs. Finish the job by tightening the screws and connecting the pigtail.
A pigtail may also worn out if it has already used for some time. If this is the case, proceed to the next step.
- Attach the pigtail to the wire
Reconnect the new wires after disconnecting the worn-out ones. This should be relatively straightforward since most cables are color-coded. The new wires should connected to the connections. You have completed the task by returning the pigtail to its original position.
Preventing Further Damage
Following the replacement or bypass of the blower motor resistor, steps must taken to prevent further damage. It is possible to do this by checking the air filter and replacing it if necessary. Moreover, the wiring may need to checked for damage or corrosion and repaired or replaced if necessary.
Conclusion: How to bypass blower motor resistor?
Now you have some idea on how to bypass blower motor resistor. A viable solution to restoring HVAC system functionality is to bypass the blower motor resistor. The long-term effects on the blower motor’s performance should be considered when weighing the benefits and limitations of each method. It is crucial that installation be done properly, safety precautions are adhered to, and legal regulations are followed.
Read more of our articles here.
FAQs
How safe is it to bypass the blower motor resistor?
Bypassing the resistor can provide a temporary solution, but long-term use is not recommended. When left unchecked, this can lead to overheating or damage to the blower motor.
Is it possible to bypass the blower motor resistor?
By bypassing the resistor, the power source is usually directly connected to the blower motor. Wires can be connected or a resistor bypass harness can be used if available.
Do I need any tools or materials to bypass the resistor?
There may be a need for wire cutters, wire strippers, electrical tape, and a jumper wire as a power source. It depends on the make and model of your vehicle what tools you will need.
If the resistor fails, can I replace it with a higher-rated resistor?
The use of a resistor with a higher rating isn’t recommended since it may affect your HVAC system’s performance and cause overheating.
Is it safe to drive with a bypassed blower motor resistor?
Until the faulty resistor can be replaced, bypassing the resistor should only be considered as a temporary solution. It is not recommended to use the bypass for an extended period of time as it can lead to other issues.

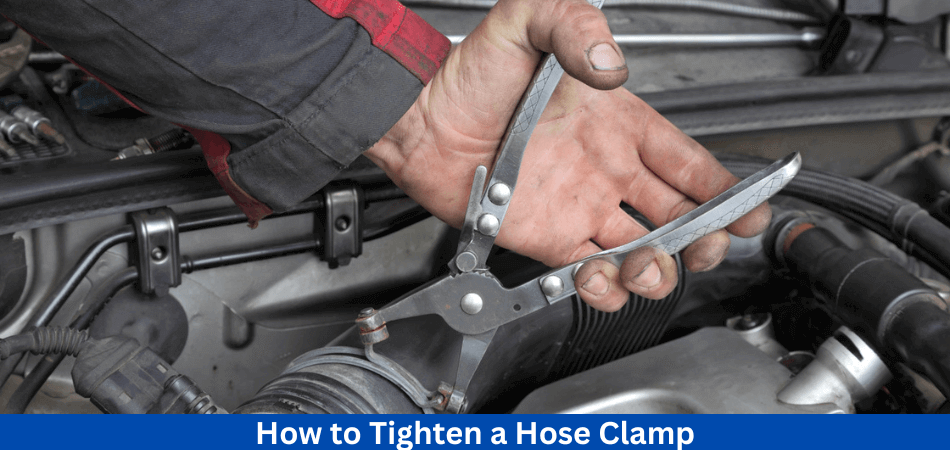
A hose clamp is used to clamp a hose to a fitting, preventing the fluid in the hose from from leaking at the connection. There are a variety of attachments available, from car engines to bathroom fixtures. In spite of this, hose clamps are used across a wide range of industries in order to secure the transportation of products, liquids, gases, and chemicals. Hose clamps fall under four broad categories: screw/band, spring, wire, and ear. Different types of clamps are used for different kinds of hoses depending on their end attachments. There are many questions surrounding the use of hose clamps, one of the most frequently asked question is how to tighten a hose clamp?
In this guide, we will explain the different types of hose clamps, their uses, and how to care for them. A discussion of the different industries in which hose clamps are utilized will also be covered, providing you with answers to all your questions about hose clamps!
Furthermore, we will focus on, especially the guide on how to tighten a hose clamp. So let’s get started.
How Do Hose Clamps Work?
- The first step in attaching a hose clamp is to attach it to the edge of the hose.
- Next, the hose edge is placed around an object.
- As the clamp is tightened, the hose is secured in place and nothing from inside can escape.
In general, screw/band hose clamps are not commonly used for ultra high pressure scenarios, but rather in lower pressure environments as well as for quick fixes, especially in the home. The automotive, agricultural, and marine industries, among others, use them. Learn more about hose clamp here.
How To Use A Hose Clamp?
It is possible to use a hose clamp to keep your hose from kinking or to keep it organized while in storage if your hose tends to kink. Hose clamps fit most hose sizes, and they clamp the hose to keep it in place by compressing it. You must first determine the size of clamp you need before using a hose clamp. Make sure the screw of the clamp faces upward when you place it around the hose. Tighten the screw until the hose is securely attached. Overtightening the screw can damage the hose, so be careful not to do so.
In order to prevent fluid from leaking, hose clamps secure a hose to a fitting. In the automotive and plumbing industries, they are commonly used. T-bolts, worm-drives, and plastic hose clamps are the three main types of hose clamps. Whenever there is a high-pressure hose or a high-vibration application, T-bolts can be used as clamps. Screwdrivers and wire cutters are also acceptable tools for installing hose clamps, but TorqueWover is the best choice. Manufacturers describe torque standards for clamps in inches. Heavy-duty applications are best served by steel. The use of plastics is a cost-effective alternative to metals in a variety of applications, but their specific uses necessitate their use.
What are the Common Types of Hose Clamps?
Clamps are often used to attach fluid-filled hoses to machinery. Coolant hoses connected to the radiator and motor of a typical car or truck using clamps. The clamps prevent the coolant hoses from leaking as well as holding them in place. If the clamp is tight enough, the coolant won’t leak even as it heats up inside the hose. There are three types of hose clamps that are most commonly used.
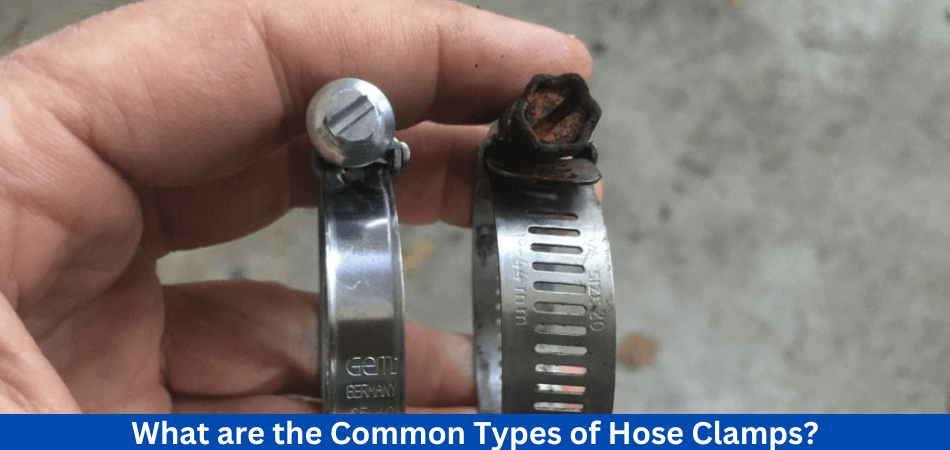
1. Screw Clamps
Screw clamps are clamps that have an integrated screw, also called worm gear clamps. This is a strip of metal with a thread pattern, usually made of stainless steel or galvanized steel. The thread pattern on screw clamps connected to a screw that used to tighten or loosen them. The screw clamps will tighten when the screw turned right, whereas the screw clamps will loosen when the screw is turned left.
2. Constant-Tension Clamps
Constant tension clamps are another type of hose clamp. Hoses are continuously tensioned with constant-tension clamps. There are no screws on them. The constant-tension clamp made from a coil of spring steel. The ring-shaped clamps resemble screw clamps, with both types resembling rings. A constant-tension clamp, however, does not have any screws.
The installation of constant-tension clamps requires a different method than that of screws. The ends can pressed together to install them. Tabs fixed at the end of constant-tension clamps. By pressing together, these tabs will force the constant-tension clamps to open. The constant-tension clamp can placed around a hose and then released so that the hose clamped.
3. Wire Clamps
Wire clamps are also available. As their name implies, wire clamps are made up of a single wire. A U-shaped wire formed by pressing and manipulating it. There is a captive nut and a captive screw on the opening of this U-shaped design. By removing the screw, you can place a wire clamp over a hose. With a screwdriver, tighten the screw after adding the screw. The captive nut can used to secure the wire clamp once it has ben tightened sufficiently.
A wire clamp is less common than a screw clamp or a constant-tension clamp. Nevertheless, some hoses still use them. Easy to tighten and loosen, they have a simple design. Wire clamps have the disadvantage of not lasting as long as other types of clamps.
Which Hose Clamps Should You Choose?
Different automotive systems require different types of hose clamps, depending on the size and type of hose, the pressure and temperature requirements, and where the hose located. In general, the following hose clamp types recommended for different automotive systems:
1. Cooling System
An ear clamp or spring clamp is commonly used in the cooling system. An ear clamp provides a tamper-proof seal while worm gear clamps are easy to install and adjust.
2. Fuel System
Fuel system hose clamps are commonly used because they provide a secure grip and are easy to install and adjust.
3. Vacuum System
Worm gear hoses and spring clamps provide constant pressure on the hose and are easy to install and remove in vacuum systems.
4. Exhaust System
These clamps provide strong, secure connections and can withstand high temperatures in the exhaust system.
5. Air Intake System
The air intake system usually uses worm gear hose clamps or T-bolt clamps for their secure connection and heat resistance.
What are the Advantages of Automotive Hose Clamps?
There are many reasons why automotive hose clamps are widely used in the automotive industry, including:
- Secure Hose Connections: Using hose clamps in automotive systems ensures that fluids flow properly and prevents leaks.
- Easy to Install and Remove: Changing hoses or performing maintenance on automotive systems is easy with hose clamps.
- Adjustable: Worm gear clamps, for example, are adjustable, allowing the clamp to tightened around the hose with ease and precision.
- Durable: The metal used in automotive hose clamps makes them solid and durable, able to withstand high temperatures and pressures.
- Versatile: Hose clamps come in a variety of sizes and types, making them suitable for a wide variety of automotive applications.
- Cost-effective: In automotive systems, hose clamps are a cost-effective way to secure hoses because they are relatively inexpensive.
A hose clamp provides a secure and reliable connection between hoses and ensures that fluids flow properly in an automotive system. They are ideal for use in the automotive industry because of their ease of use, adaptability, durability, versatility, and low cost.
How to Tighten a Hose Clamp?
A hose clamp tightens a hose over a fitting usually made of stainless steel. It is commonly used for car engines, bathrooms, and other plumbing applications, providing a secure and tight connection to prevent leaks. But, how to tighten a hose clamp?
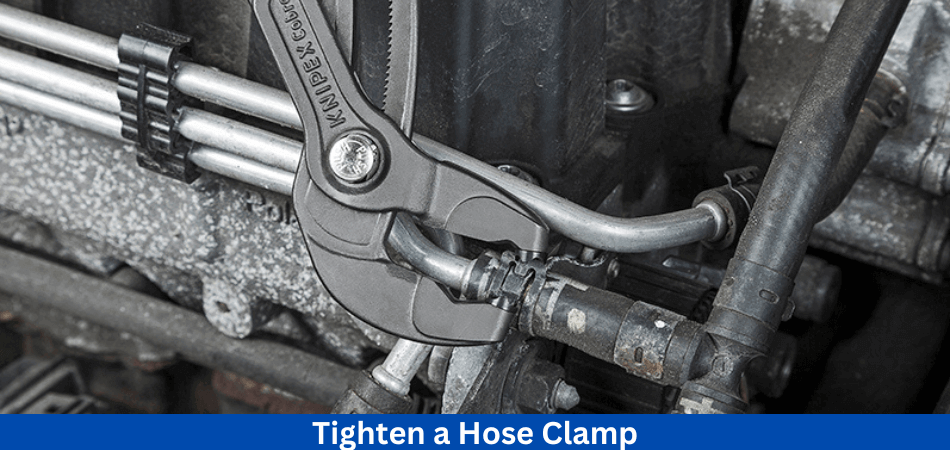
Tighten the hose clamp by turning it anticlockwise with a flat-head screwdriver and hex wrench. Once the clamp separated, continue rotating it. The clamp should positioned over the fitting after being carefully slipped onto the hose. Make sure you have your screwdriver handy again. Ensure that the connection is tight by turning the bolt clockwise.
The purpose of this article is to examine the tools needed for tightening hose clamps in detail. Our guide will also show you how to tighten a hose clamps step by step. Now let’s get started!
Things you will need:
- Flathead screwdriver
- Hex wrench (alternative to a flat-head screwdriver)
Check out these quick tips for tightening hose clamps yourself!
Step 1: Unscrew the Clamp
You will need a flathead screwdriver (or a hex wrench) and a hose clamp. Rotate the screw anticlockwise with the tool. Rotate the clamp until the hose separated while you open it.
Step 2: Position it On the Hose
Make sure the clamp is properly attached to the hose by sliding it on carefully. Attach the hose to the fitting and hold it firmly in place. The clamp needs to positioned in such a way that it will not slide off of the joint with the help of your other hand.
Step 3: Switch the Direction of The Clamp
Make sure the clamp is facing you when you turn it over. By doing this, you will be able to access the screw more easily.
Step 4: Put the Screw Back into Its Sleeve
Reinstall the screw in its sleeve the other, slide the screw into the sleeve that held it before it separated.
Step 5: Tighten the Clamp
The driver should rotated clockwise using a wrench or screwdriver. Once the driver engages, tighten the clamp until the clamp contracts, securing the hose in place.
How To Tighten Metal Hose Clamp?
Things you will need:
- Hose clamp tightening torque
Step 1: Choose the Right Clamp
Metal hose clamps come in a variety of types. A solid metal hose band with buckles is the most common type. This type of connector is ideal when tight connections required.
Step 2: Carefully Position the Metal Clamp onto The Hose
Make sure the clamp is properly attached to the hose by sliding it on carefully. Attach the hose to the fitting and hold it firmly in place. By using your other hand, position the clamp so that it does not slip off the joint.
Step 3: Slide the Driver Back into Its Original Sleeve
Slide the screw into the sleeve that initially held the clamp while contracting it.
Step 4: Tighten the Clamp
The driver should rotated clockwise. Tighten the clamp until the screw and nut engage and the clamp contracts, holding the hose firmly in place.
How To Tighten Radiator Hose Clamp?
Things you will need:
- Screwdriver
- 5/16” nut driver
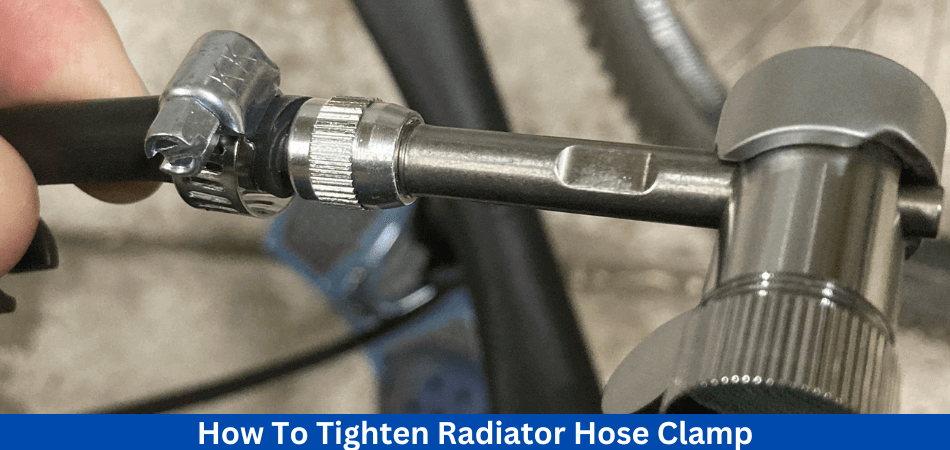
Step 1: Pick an Appropriate Size
A radiator hose clamp’s size is the most important factor to consider. The clamp should sized and typed according to the hose’s diameter.
Step 2: Unscrew the Radiator Hose Clamp
The radiator hose clamp can opened by turning the screw counterclockwise. The best tool for this job is a screwdriver or a 5/16″ nut driver. The slotted band must separated from the screw threads using a screwdriver/nut driver.
Step 3: Fit the Band Around the Hose
Clamp the hose by opening the band completely and sliding it over it. To make it easier to access and use the tools, make sure the screw head faces the right direction.
Step 4: Tighten the Clamp
The screw should inserted into the screw-housing that held the screw before you separated it. Make sure the driver rotated in a clockwise direction. The clamp should tightened until it is securely attached to the hose.
How To Tighten Coolant Hose Clamps?
Things you will need:
- 1/4” rachet
- Philips head screwdriver
Step 1: Locate the Clamps
Radiator clamps are usually located in odd places which makes tightening them difficult. Use different tools to target each clamp if you need to improvise. As a result, it is crucial to know where radiator clamps located.
Step 2: Find the Right Tools
Choosing the right tools is the second steppending on the location of your clamps. Clamps for coolant hoses work well with a 1/4″ ratchet. For the clamps located in the upper areas, you could use a shorter rachet and a regular-sized rachet.
Clamps that are easy to reach can even reached with a Phillips head screwdriver.
Step 3: Tighten the Clamps
The third step is to tighten the clamps, you can push certain pipes out of the way, ensuring you don’t move them out of place too much.
Using the tools you have at hand, position the clamp so that it is easier to tighten. Position the screw back into the sleeve that held the clamp before it separated to contract it. Once the clamp is securely attached to the pipe, continue rotating the driver clockwise.
Why Should You Avoid Overtightening Hose Clamp?
As You have learned how to tighten a hose clamp, you might heard a myth that, the tighter the hose clamp, the better. As a result, overtightening can damage both rubber hoses and clamps, as well as increase leakage chances.
For clamp fastening, most OEM parts have constants (Nm) for safety factors of hose and clamp. Depending on the size and usage, these constants will vary.
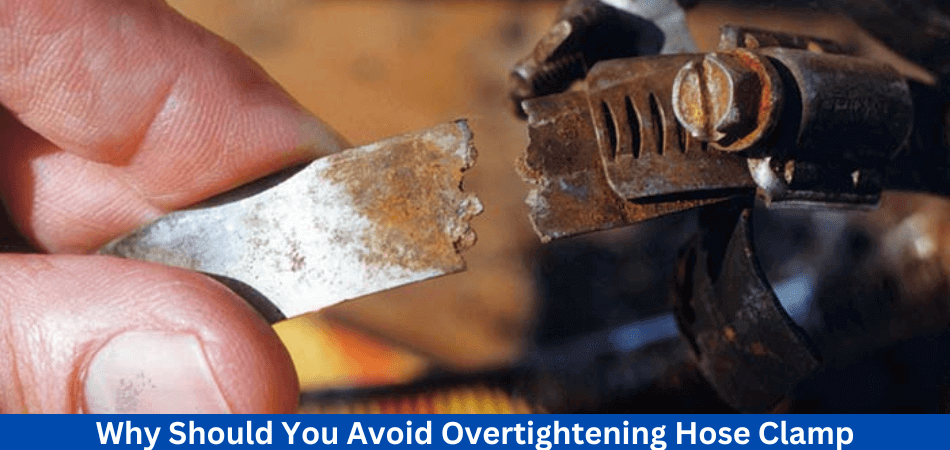
In a situation where a plastic pipe connected to rubber hose, a user contacted us with the complaint of leakage. According to our investigation, the clamp had been overtightened, resulting in a misshapen plastic pipe. The user forced to replace the entire unit, incurring unnecessary additional costs.
A clamp’s tightness and torque are normally directly related, so that as we tighten it, it becomes tighter. At some point, this direct relationship between input (torque) and output (tightness) stops. As overtightening violates the safety factor of the clamp, excess torque would damage the clamp, hose, or pipe instead.
To ensure clamp torque meets the guideline given for each clamp, a torque meter is commonly used when installing clamps. However, the following technique can used without a torque meter. The clamp is to be screwed only until the hose is slightly below the clamp. After the surface has smoothed, stop screwing. So, AVOID OVERTIGHTENING!
Why It’s Important to Install Your Hose Clamps Properly?
Hose clamps might not be the first thing you think of when considering potential health and safety hazards for vehicles. In certain situations, a hose clamp that has not been installed properly can be extremely dangerous.
In addition to highlighting some of the worst-case scenarios, we also emphasize the importance of proper installation wherever your hose clamps used.
FIRE CAN OCCUR IF HOSE CLAMPS ARE NOT INSTALLED PROPERLY
Excessive tightening of a hose clamp can result in a serious vehicle fire. Overtightened clamps squeeze the hose, causing rubber to extrude and bending the fuel tube itself.
In turn, this can lead to fuel leaks, which are the last thing you want to happen to your car. In the event that this leaking fuel catches alight, the entire vehicle could destroyed.
When hose clamps are improperly installed, most people assume that they are not tightened sufficiently. However, these examples demonstrate that overtightening a hose clamp can also be fatal.
It’s more than just a problem for large vehicles, such as cars or trucks. The excessive tightness of a hose clamp can also cause other smaller vehicles to catch fire. Go-karts and golf carts can found at your local golf course. A seaborne vessel, such as a yacht, could even affected.
Since these vehicles are less likely to undergo regular MOT checks, they can present an even greater safety risk. Likewise, a hose clamp that’s too tight can wear through the material, resulting in a hole in the fuel tank.
How to Properly Remove a Hose Clamp?
You may have to remove a hose clamp in many situations. Any type of pipe can connected with hose clamps, whether it’s in plumbing, on a vehicle, or on piping of any kind. If the clamp has been on for a long time, it may be difficult to remove. When it comes to removing hose clamps, here are some options to consider.
1. First Identify the Type of Clamp
When it comes to removing an adjustable hose clamp, there are a number of tools that you can use. To remove a hose clamp, you can either use pliers and your hands or a hose clamp removal tool. You may be able to remove the clamp more easily with a hammer and screwdriver if it is too tight or badly corroded. Identifying the type of clamp you are dealing with is the first step in removing a hose clamp. A pinch clamp and a worm-driven clamp are two types of clamps. By using pliers, simply reverse the direction of the arrow on the clamp head to remove the latter. By doing so, it will be easier to remove the clamp from the hose. Pinch clamps must removed with hose clamp pliers, a special type of pliers.
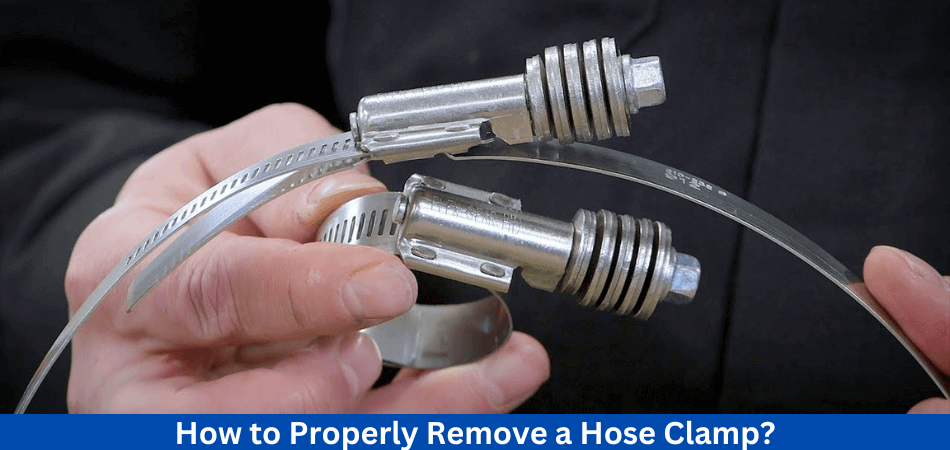
2. Use a tool to remove the hose clamp
It is fortunately possible to remove hose clamps using a specific tool. If you have worked on a car before, you have probably encountered one. Removing hose clamps is one of the most common tasks when working on a car. You can make the entire process easier by using a hose clamp removal tool. You can easily remove the clamp with this tool by slipping it over the hose clamp. This type of tool is available in several forms. Alternatively, you can find ones that adjust to fit any hose clamp size. A locking pliers should used with the tool to secure the clamp during removal.
Can You Remove a Hose Clamp Without Tools?
Yes, in a nutshell. Adjustable hose clamps can removed with your hands only. The hose clamp only needs to twisted in opposite directions by placing your hands around it. You should be able to remove it from the hose once it loosens, then clamps enough to allow you to remove it. It’s also possible that the clamp is too tight. You may not be able to do the job alone with the strength of your hands in such situations. It may be easier to use pliers if that is the case.
Removing an adjustable hose clamp becomes easier if you use the right tools and identify the clamp type. Get in touch with us today if you would like more information.
How to Care for Your Hose Clamp?
- If you overtighten your clamps, you may experience pressure problems in the future.
- Make sure the hose clamps you choose aren’t too large. Even though too-large clamps may still do the job, they can be aesthetically unappealing as well as hazardous.
- If you want to ensure durability, don’t scrimp on the quality of your hose clamps and their installation.
Final Thought: How to tighten a hose clamp?
Now, you might have leaned how to tighten a hose clamp? For anyone who works on plumbing, automobiles, or household repairs, learning how to tighten hose clamps is a valuable skill. This guide will show you how to secure and leak-proof your hose connections by following the steps outlined and using the appropriate tools. Keeping hose clamps in good working order is essential for preventing costly leaks and damage. A mastery of tightening hose clamps will save you time, money, and frustration in the long run, regardless of whether you are a DIY enthusiast or a professional. Remember, with a little practice and the right knowledge, you can tighten hose clamps with confidence.
Read more of our articles here.
FAQs
How often should I tighten hose clamps?
It is a good idea to tighten a hose clamp when you notice a leak around the hose connection or if the hose feels loose on the fitting. A regular maintenance check can also prevent unexpected problems.
How do I tighten a hose clamp?
For most hose clamps, you will need a screwdriver or a nut driver. Using hose clamp pliers is one of the easiest ways to tighten some hose clamps.
Is there a way to identify the type of hose clamp I have?
In addition to worm gear clamps and spring clamps, T-bolt clamps are also available. You can identify the type by looking at the design and tightening method. If you’re unsure, consult the manufacturer’s instructions.
How should a hose clamp be tightened?
The first step is to locate the hose clamp on the hose. Turn the clamp’s screw or bolt clockwise using the appropriate tool. Be careful not to over-tighten the hose or fitting, and continue to tighten until it is securely attached.
What is the recommended tightness of the hose clamp?
Depending on your application and the type of hose material, the ideal tightness varies. A snug, leak-free connection should be created without causing damage to the hose or fitting.

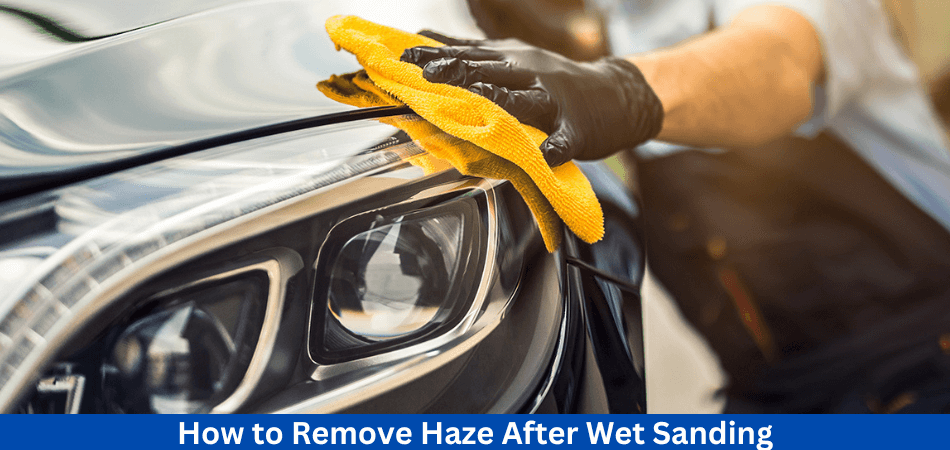
You might be wondering how to remove haze after Wet sanding. Regular cleaning, buffing, and shining are essential for keeping your car’s paint job looking glossy. It’s inevitable that even the most meticulous car owners will find little scratches or scuffs caused by bushes, trees, or even the weather.
Although finding these imperfections on your car’s surface can be disheartening, it does not necessarily require a full paint job.
If a car paint job has lost its natural luster, how can it be restored without a complete repaint? The following article explains the wet sanding process when to use it, and what to do when it doesn’t work. Moreover, it also covers, How to remove haze after Wet sanding.
What is Wet Sanding?
Wet sanding – What is the process intended to smooth out and remove small, surface-level scratches from car paint? Using high-quality wet sanding techniques can create a smooth, like-new finish. The orange peel effect, where car paint becomes uneven and pebbled, resembling orange skin, can also be removed using it.
During wet sanding, dampened sandpaper is used to create an even surface, allowing the existing paint to bleed into any gaps. In some cases, however, it can be difficult to apply the correct pressure and avoid removing any deeper layers of paint.
What are The Common Applications of Wet Sanding?
1. Wet sanding wood
In order to reshape wood surfaces, remove splinters, or straighten uneven wood, people have adopted dry sanding over the years. To give woodwork in homes a glassy and clear appearance, wet sand them. This can be done on cupboards, chairs, tables, or worktops.
The wet sanding of some wood products, such as violins, should be avoided. When wood absorbs water, it becomes swollen or wrapped. Spraying enough water and wiping it off after sanding is the best method.
2. Wet sanding metal
It is the process of wet sanding a metal that gives it a perfect finish. The metal is polished to remove minor defects while improving its shine. It is possible to revive a dull metal by wet sanding it properly after it has lost its luster.
A desirable result is achieved by frequently applying water to the metal surface and the sandpaper while wet sanding.
3. Wet sanding drywall
Drywall sanding with wet sandpapering for different purposes. A room can be prepared either for repairing a small portion or for painting the whole thing. The difference between wet and dry sandpaper can seen despite the longer sanding time. When sanding with a wet sponge, dust can remove during the process, and the wall feels better afterward.
For wet sanding, there are abrasive sponges available, but you can also use a regular sponge.
4. Wet sanding a car
Sanding a car while wett sanding a car is commonly used in auto body shops. A minor defect or deep scratch on a car can repaired with this tool. Wet sanding is useful when painting a car because it removes dust specks and particles.
Wet sanding can also used to fix other imperfections. When sanding a car, quality detergent, fine-grit sandpaper, and water recommended.
What are the Differences Between Wet Sanding vs. Dry Sanding?
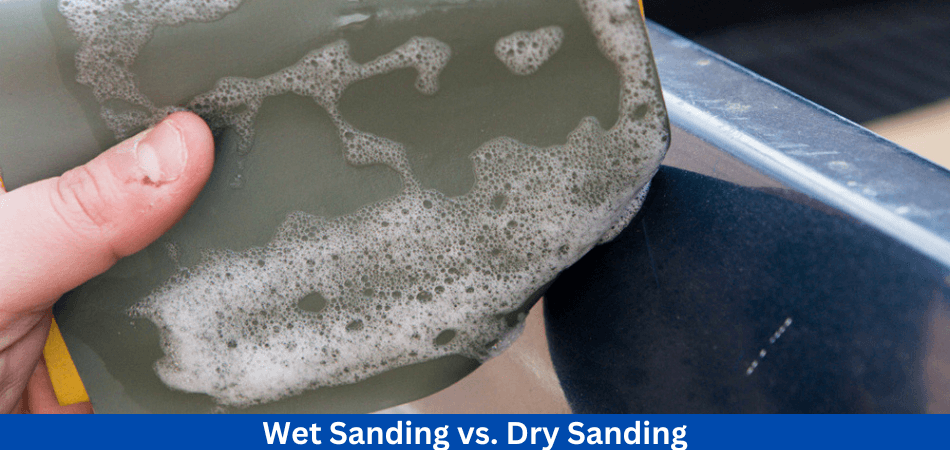
As the names suggest, wet sanding and dry sanding are very different. Let’s examine each process in more detail to understand the differences between them. Dry sanding adds just two elements to the mix for a smooth, lasting finish, while wet sanding just adds another.
Dry Sanding
Sanding without waterooking for a more aggressive approach, dry sanding allows you to take off more material in a quick fashion. Low-grit sandpaper is a great method for roughing in your project’s shape. Most often, small circles will used to remove material and minimize deep scratches when dry sanding by hand or with power tools.
All the dust and debris that fly off the surface during dry sanding can create a huge mess. Except for elbow grease, there is no lubricant needed. When dry sanding, you may need to begin with a lower grit of sandpaper and then finish with a higher grit when wet sanding.
Wet Sanding
Most projects finished with wet sanding. It may take some time to refine the surface with a light touch. Smoothing out details and achieving a more desirable finish are often achieved through wet sanding.
Sandpaper designed for wet sanding isn’t just lubricated with water during wet sanding. If you’re sanding bare metal, you can also use WD-40. To help reduce water tension on your sanding surface, you may even want to add a bit of detergent. Using this method can prevent deep scratches from caused by sandpaper catching.
Sandpaper used for wet sanding usually comes with a backing pad. When water soaks into the pores of the sandpaper, it becomes flimsy and easily folds back on itself. As well as preventing this from happening, the backing pad can also help create a smoother finish than simply using your hands. When wet sanding, your fingers’ ridges and valleys can easily translated to the surface, but not when using a sanding block.
Sanding blocks can also purchased for wet sanding. Sanding drywall is the most common application of this technique. In order to achieve a uniform finish when wet sanding, use linear movements. Every time you pass, you’ll alternate directions. Learn more about wet sanding here.
What are the Equipments Required for Wet Sanding?
Wet sanding requires several tools and equipment. These are as follows:
- Sandpaper
- Sandpaper squeegee/handle
- Bucket and water
- Car cleaning solution
- Sponge
- Microfibre cloths
- Car wax
- Polishing compound
- A buffer
- Cloth tape
Using the in-depth steps below, you can wet sand any scratches or scuffs in your car’s paintwork with the right equipment.
What are the Safety Equipments Required for Wet Sanding?
When wet sanding, dust, and debris are likely to created, so it’s important to take the necessary safety precautions. In addition to safety equipment, here are some things you’ll need:
- Goggles
- Respirator mask
- Gloves
A respirator mask protects your lungs from inhaling harmful particles while goggles protect your eyes from dust and debris. Sandpaper and chemicals used in the process will scratch your hands if you don’t wear gloves.
Before you begin wet sanding, make sure you wear all safety equipment. Priority should always given to safety.
How To Choose Sandpaper for Wet Sanding?
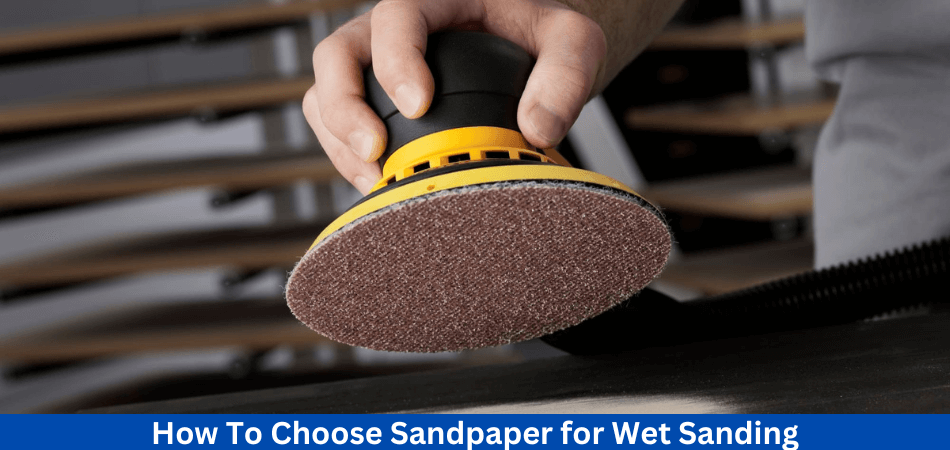
Selecting the right sandpaper is the first step in wet sanding a car. That’s why it’s so important. Therefore, you should pay more attention to the sandpaper you choose.
It is important to choose the right sandpaper for your car from the many types available in the market. As a result, you will damage the paint rather than create a great paint layer. The first thing you should do is check the problem with your car. Sandpaper with a 400-grit rating is a good place to start if you have a rough primer on your car. Using 400-grit sandpaper will remove any bumps on the surface. Sand the car with 600 grits of sandpaper after that.
In another case, 400 grits sandpaper works well when you wet sand a finished paint job. Sandpaper of 800 grits or 1000 grits level would be better in this case. Make sure you choose the right sandpaper for your car. Make sure you choose the right sandpaper when doing this job since a mistake could result in serious car damage. Next, let’s talk about wet sanding a car.
How to Wet Sand a Car: Step-by-step Guide
Step 1: Set up the wet sanding location and car
To wet sand car paint, it is important to find a good location. If you rinse the car, you should choose a place where the water won’t stain the floor and won’t remove some paint. If you are going to wet sand a part, you should clean it with water or soap first. This will give you a clear view of the car part so you can easily get in. Due to the fact that you will be using sandpaper. Sand and dust should not allowed to get stuck in the sandpaper as this will cause more scratches on the paint.
Step 2: Get the sandpaper and cleaning liquid ready
Cut the sandpaper into small pieces after removing it from the package. Depending on the part of the car you are wet sanding, it may be necessary to wet sand it. Meanwhile, prepare a bucket of water. Avoid using automotive soap that also acts as a wax or polish. Dish soap can substituted for automotive soap if you don’t have any. It is necessary to use a lubricant when wet sanding to prevent the sandpaper from burning the paint.
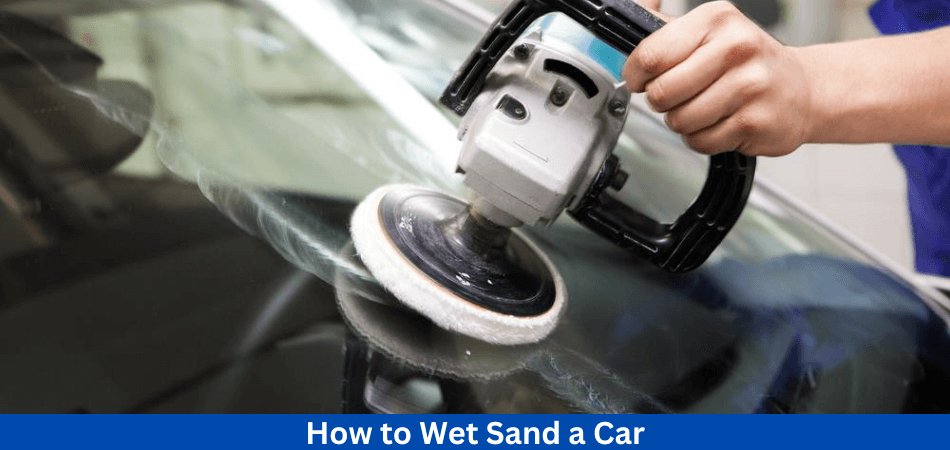
Step 3: Soak each sandpaper sheet for five minutes
Sandpaper must soaked for 5 minutes after being wet sanded for the third step. Place the sandpaper sheets along the edge of the bucket so half of each sheet soaked in soapy water. While the halves that are soaking in water should be completely submerged in soapy water, the dry part will help you secure the sandpaper.
Step 4: Start wet sanding
It is not a good idea to wet sand your car by hand. If you want to sand, you should use a squeegee or pad. It will prevent an inconsistent finish if the sandpaper placed on the sand pad. You can now start sanding gently in circular motions with a light amount of pressure. The paint surface should checked again after a few circles. It may be necessary to apply a little more pressure if the sanding does not seem to affect the clear coat. You will scratch your car if you put too much pressure on it. You will expend less energy if you sand your car gently to reduce blemishes.
Step 5: Use multiple directions to move the sandpaper
So The sandpaper needs to moved around now. To catch different angles, it’s a good idea to switch the direction of your circular motions periodically. As a result, the paint surface is even throughout. Sandpaper should not applied with different pressures in this step. You can check if you are applying the right pressure. The color of the paint should bleed into the water and tint it a little. The water will turn darker if you sand too hard. If you want to sand a larger area, you can add more water.
Caution:
- Your tools’ edges should handled with care.
- Take frequent breaks
- You should avoid scratching the paint with the handle of the tool or one of the edges of the sandpaper.
Step 6: Repeat The Process
So The car paint has already sanded. To ensure that the paint is evenly applied, repeat the process with a higher grit sandpaper. After the first stage of wet sanding, this will help remove any shallow scratches or abrasions.
In addition to sanding the car, this step also gives you the opportunity to repair any damage you have caused. There is, however, a limit to how much damage can fixed. During the sanding process, try to minimize mistakes.
Step 7: Clean the sand area
Your car should rinsed after sanding and resanding. Any soap or debris left on the vehicle should rinsed off with a hose. You will need to apply a glaze or wax once it dries, so be sure to rinse it thoroughly.
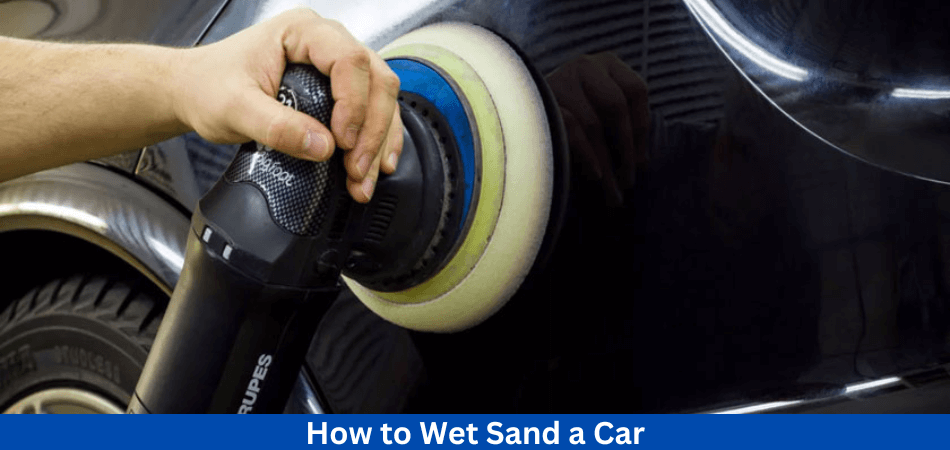
Step 8: Time for Buffer and Rubbing Compound To Polish
So The next step is to apply some rubbing compound to a buffer pad and then polish the area with a power tool. When buffing the rubbing compound into the paint, turn on the rubber, use a medium speed, and apply light pressure.
Do it gently, strong pressure on the paint can burn it, so start lightly and add more pressure only when necessary.
Step 9: Apply The Wax
As a final step in wet sanding a car, wax should applied to the paint layer. When you apply wax to the paint, it looks like the finished product even after buffing. You can think of it as a paint protection. Be sure to use high-quality automotive wax when sanding. Adding a wax layer can also help prevent the buffed area from fading at a different rate than the rest of the paint.
How To Know When To Stop Wet Sanding?
It’s important to be attentive when wet sanding; otherwise, your base coat can damaged. To cover the damage you have caused, your car will need to repainted.
Water can sprayed on the surface area to check your progress, and then a microfiber cloth can used to dry it. By doing this, you’ll be able to see how much more work you need to do.
The bucket water should also turn somewhat milky when the clear coat removed. There should be no color change in the water if there is no clear coat.
In both cases, color fragments in the water damage the car paint, which needs to repainted.
Tips for Achieving the Best Results During Wet Sanding
Are you looking to improve your wet sanding skills? We’ll explain how to achieve a high-quality finish in the following sections.
- Slow motion close-up of tattooing hands preparing the hood of a deep blue sports car for polishing
- Protect adjacent panels with cloth tape: Wet sanding can concentrate on specific panels, so using cloth tape can ensure that the non-damaged panels remain intact.
- Sanding machines might seem time-saving, but they can leave swirls in the paint and provide much less control than hand-sanding.
- When starting to sand, apply gentle pressure: You don’t want to damage your car’s paint by sanding too deep.
- If the sandpaper rubbed in back-and-forth motions using the same pressure levels, you can achieve an evenly sanded surface much more quickly.
How to Remove Haze After Wet Sanding? Guide Explained!
The rubbing of compound, wax, and grime on the surface of the car can cause hazing over time. Paint can become unattractive as a result. So How to remove haze after Wet sanding.
Well, you can remove hazing from your car’s paint with several products available on the market.
In order to remove the haze, you will need the following:
- Sandpaper (1500 and 2000 grits)
- Dupont compound
- Water
- Microfiber towel
- Dupont 7 polish
- Turtle wax
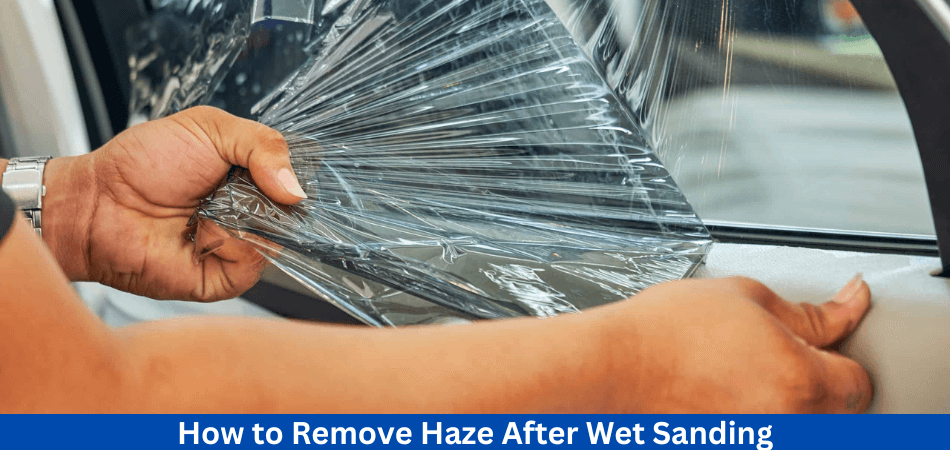
After wet drying, you need to remove the haze as follows:
- You won’t get a good finish if you use 1200-grit sandpaper. Sandpapers with 1500 and 2000 grit should be used. If you use 1200-grit sandpaper, you will need a compound that is aggressive to remove a lot of paint just to remove deep scratches. Quality paper, such as Meguiar’s Nikken 2000 grit, makes haze removal easy and fast.
- The Dupont compound should be used alongside a new 1-inch wool wheel on a Sioux buffer. When you sand, you will be able to remove cuts and scratches more easily.
- The compound residue can removed with a 50/50 solution containing isopropyl and water.
- Dry the surface with a microfiber towel and run your fingers through it to make sure the haze has removed. It might be necessary to repeat the process if the haze is still present or the surface is not smooth.
- To bring out the beauty, use a 2-inch wool thickness wheel, along with Dupont 7 polish. As a result, compounded wheels will no longer leave marks on the surface.
- To further remove hazing, use a high-grade wax such as turtle wax. Immediately after waxing, wash your car and thoroughly dry it.
- It is going to be an amazing result in the end. There should be a deep shine on it as if it polished glass. This is how to remove haze after Wet sanding.
Note: Keep your car out of direct sunlight when waxing. It is possible to scratch the paint easily when it heated by the sun.
What are the Benefits of Wet Sanding A Car?
1. Remove Deep Scratches
As a first step, it can help remove deep scratches. You can benefit from wet sanding your vehicle in this way. In addition, it can remove any debris that may have fallen on the freshly painted surface. Also, orange peel can removed by wet sanding.
2. Even Out new Paint
In some cases, new paint requires a few touch-ups, and wet sanding is an effective method to achieve an even finish. It is often used by professional automotive detailers to ensure that your car appears in pristine condition.
3. Level Touch-Ups for Easy Polishing
You can also use wet-sanding to level touch-ups on your vehicle, which makes polishing much easier. Wet sanding should always handled by a professional who specializes in the process. If you attempt to do this on your own, you run the risk of permanently damaging your vehicle’s paint.
What are the Potential Risks of Wet Sanding?
Wet sanding: What are the risks small scratches can be a great way to restore the paint job and achieve a smooth, glossy finish without having to take it to a professional. You should, however, be aware of the potential risks associated with this process.
- You can further damage the paint job of the car if you use the wrong materials or tools.
- If the paint sanded or buffed incorrectly, it may become uneven or discolored.
- Paint can become scratched or dull if not applied correctly.
Can You Do Wet Sanding with Soap?
While wet sanding your car, you should use soap instead of water. When you add soap to the wet sanding process, you can gain several benefits.
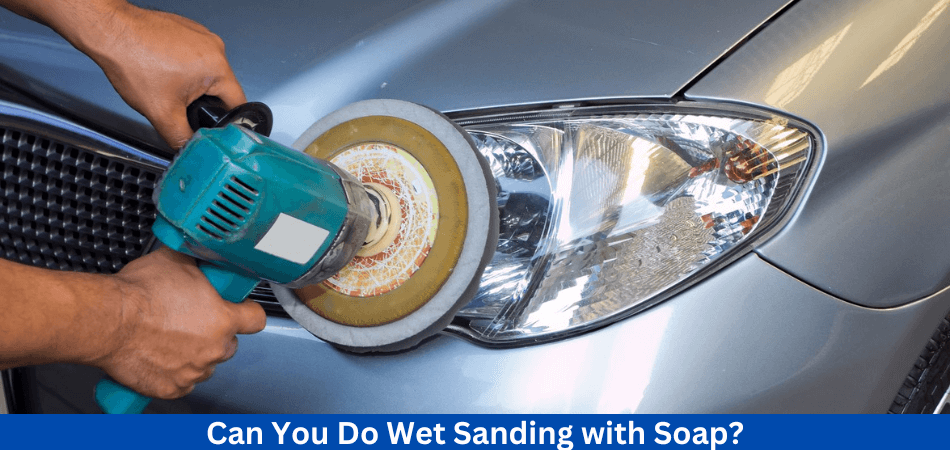
Reason 1: Lubrication
By lubricating the sandpaper, soap can reduce the amount of heat and friction generated during sanding. By adding soap, you make it easier to work on the surface, which reduces the risk of damage to the paint and body of the car.
Reason 2: Improved Finish
The second reason is that the finish has improved to produce a smoother, better finish on a surface. When it comes to car paint, this is especially true.
Reason 3: Reduced Dust
It is possible to reduce the amount of dust that generated during the sanding process by wet sanding with soap. The surface can seen and worked on more clearly as a result.
How to Know If Wet Sanding is Right for You?
Paint scratches and imperfections can’t all fixed by wet sanding. It can be difficult to repair scratches deep enough to expose the metal layer, for example. The use of wet sanding alone would not suffice for these cases.
In general, this method can used to restore scratches or imperfections in the clear coat or upper layers of paint.
When You Should Not Wet Sand Your Car?
By wet sanding your car, you will be able to save the paint layer. In some cases, you should not sand your car. When your car paint scratched too deeply, it’s time to fix it. Thus, sanding your car is more likely to cause harm than good if you insist on doing so. You should not do it if your car has a deep scratch.
Conclusion: How to remove haze after Wet sanding
Now you have some idea of How to remove haze after Wet sanding. To avoid regrets, wet sanding or removing haze after wet sanding should be done properly. Care must be taken to follow the processes meticulously.
After wet sanding, it can be disappointing to experience haze. When the steps are not followed properly, removing it can also be stressful. It is important to take your time when working on the car paint and to avoid damaging it.
Wet sanding your car or removing the haze after wet sanding will not be difficult if you follow the process. To remove the haze or wet sand in your driveway, you can always hire a professional. You will spend some money, but if you are an amateur, you will not have to deal with the stress and damage to the vehicle’s exterior. Read more of our articles here, like “How to Remove Haze After Wet Sanding”
FAQs
What causes the haze to form after wet sanding?
It formed when fine sanding particles and debris mixed with water during wet sanding and then dry on the surface, resulting in a cloudy or hazy appearance.
How can I prevent haze from forming during wet sanding?
Sandpaper should always be clean, the surface should be rinsed frequently during the process, and haze should minimized. It is also possible to prevent excessive haze by using the right sandpaper grit and technique.
How do I remove haze after wet sanding?
A buffer or polishing machine (optional) may also needed along with clean water and clean, soft cloths or microfiber towels.
What is the first step in removing haze?
Remove any loose particles from the sanded surface by thoroughly cleaning it. On a clean cloth, apply a small amount of polish or compound.
To remove haze, what type of polish should I use?
Make sure you choose a polish or compound that is specifically designed for the material you are working on. For example, automotive clear coats require different products than wood finishes.
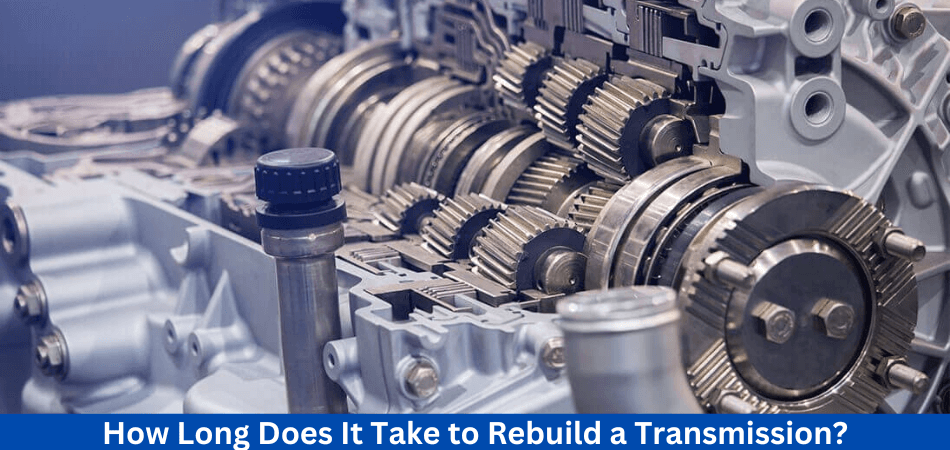
There is nothing that lasts forever, and your transmission is no exception – especially if it is automatic. A transmission in a car will last up to 200,000 miles on average. Therefore you might need to rebuild it. But How long does it take to rebuild a transmission?
When your car has reached 200,000 miles, or if you are considering having it rebuilt, you might wonder how much it will cost and how long it will take. This article will cover How long does it take to rebuild a transmission, including it’s pros and cons. Lastly, we’ll discuss if the transmission rebuild is worth the money.
What is a Transmission Rebuild?
A transmission rebuild involves inspecting and replacing faulty transmission components with new ones. Yet, it’s not as easy as it sounds since it’s one of the most demanding automotive repair procedures.
You won’t be able to handle this on your own, and picking the right mechanic is important. When it comes to automatic cars, the transmission contains a lot of moving parts. In order for the rebuilt system to work, these sensitive parts must replaced.
Learn more at here.
How to Tell That Your Transmission Needs Repairs?
There is no light on the transmission of a vehicle, despite it being a vital component.
But, you can detect transmission issues before you become stranded with a car that won’t move. You can find them here:
1. The check engine light:
There are many problems that can indicated by this light, such as transmission problems. This light should never ignored, and you should visit a mechanic as soon as possible. A vehicle’s warning light is only illuminated when something serious is likely to happen. If you think there is a problem, you must have it checked as soon as possible.
2. Fluid Leaks:
You can drive either an automatic or a manual. Transmission fluids must lubricated, and leaks can cause a problem. You should check your transmission if you see brown spots on your parking space or if your transmission fluid is low.
3. Sluggish acceleration:
Generally, expert drivers can tell if their cars are malfunctioning. It’s likely that you have a transmission issue if you feel like your car is not accelerating. Check it out to save money on repairs.
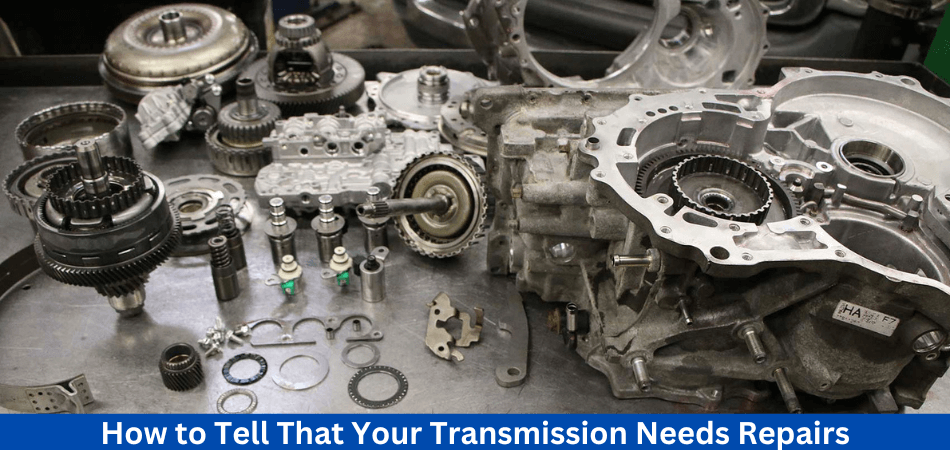
4. Sounds:
The transmission may be malfunctioning if you hear unusual sounds, especially during shifting.
If you hear clunking, squealing, rattling, or slight humming, your transmission is faulty. The sooner you get things under control, the lower your costs will be.
What You Should Know Before a Transmission Rebuild
You may need to consider a transmission rebuild if your vehicle’s transmission shows signs of wear or injury. During transmission rebuilding, the transmission disassembled, inspected, and any damaged or worn parts replaced. If you decide to rebuild your transmission, here are some things you need to consider:
Cost:
Rebuilding a transmission can be costly. Often costing several hundred to several thousand dollars. A lot depends on how your vehicle was built and model, where the transmission was damaged, and the cost of replacement parts.
Time:
In some cases, transmission rebuilds can take up to a week or more to complete. This depends on the difficulty of the rebuild and availability of replacement parts.
Quality of Parts:
The quality of replacement parts is crucial when it comes to transmission rebuilds. Rebuilding a transmission requires high-quality parts to ensure long-term durability. The mechanic may use low-cost parts in an attempt to save money. But this can result in future problems and potentially more expensive repairs.
Warranty:
Any transmission rebuild work performed by a reputable mechanic will be covered by a warranty. Before accepting the work, ask about the warranty.
Maintenance:
To ensure the longevity of a rebuilt transmission, proper maintenance is essential. If you need to change transmission fluid or perform other maintenance, follow the manufacturer’s recommendations.
Experience:
The transmission rebuild should be performed by an experienced, qualified mechanic. Choose a mechanic who has experience rebuilding transmissions for your vehicle’s make and model and who has a track record of success.
While transmission rebuilding is a time-consuming and costly process, it is crucial for ensuring your vehicle’s longevity and performance. It is important to choose a reputable mechanic and use high-quality parts, as well as maintain the rebuilt transmission properly to ensure its longevity.
What are the Processes to Rebuild Manual Transmission?
- Make sure your problem is not limited to your clutch, and rebuild the transmission if necessary.
- Remove the transmission from the vehicle.
- Check the clutch disc, pressure plate, flywheel, and other connected components.
- To restore clutch function, replace any cracked elements.
- Reinstalling the transmission is time-consuming. If necessary, top up the transmission fluid.
- Make sure the clutch installed and adjusted by performing a lift check.
- It will be ready to drive several miles after being street-tested to confirm optimal transmission and clutch operation.
What are the Factors Affecting How Long a Transmission Rebuild Will Take?
A Busy mechanic shop – It’s said that a busy mechanic shop is a good one. And often this can be true. The mechanics will be in high demand, so it may be difficult to get a fast turnaround if they are good.
There is also the possibility of the opposite happening. Due to the mechanics’ poor skills, anything they do takes a long time. Whatever you do, don’t expect to get your car back the next day if you have the transmission rebuilt.
Parts availability –
Most part suppliers will carry the most common transmission parts if you drive a popular type of vehicle. It’s likely that you’ll only need to make a phone call to get things like a master transmission rebuild kit, solenoids, and gaskets. A gear or pump can found from a salvage yard if a hard part needs to replaced. The parts required to rebuild your transmission may take longer to get if your vehicle is a bit more unusual.
Installing and removing the transmission –
On some vehicles, removing the transmission takes only a couple of hours. Besides, it can take as long as 4-6 hours to remove the old transmission from more complicated vehicles. After the transmission has been rebuilt, it must be reinstalled.
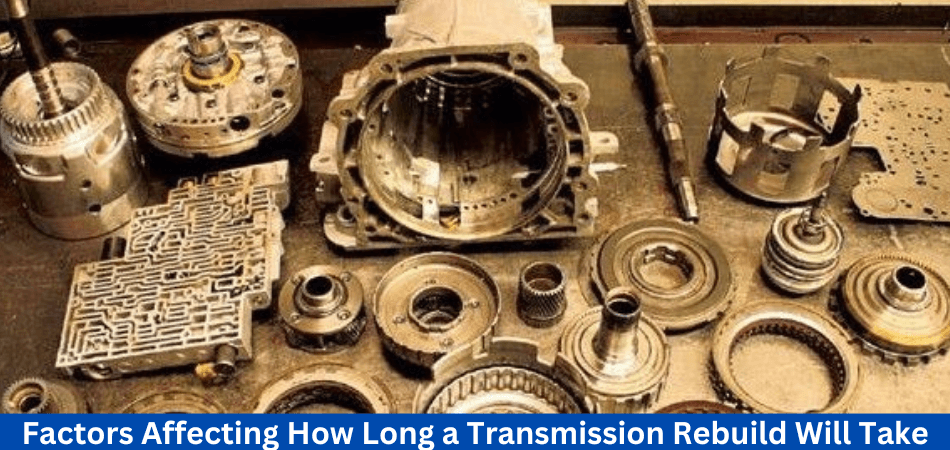
Rebuilding the transmission –
Transmissions can dismantled, diagnosed, and rebuilt in 3-4 hours by an experienced transmission rebuilder. It can be time-consuming and distracting for them to jump from one job to another in a busy shop. Additionally, some automatic transmissions are more complex than others. , which takes more time.
As soon as the rebuilt transmission has reinstalled, the vehicle needs to tested to ensure that it is working . It may be necessary to remove and disassemble the transmission if it doesn’t work . Even more time will required for this.
Rebuilding a transmission takes time. , it’s not a good idea to be without your vehicle too long. In the same vein, you don’t win a mechanic by rushing the job and not doing it right.
How Long Does It Take To Rebuild a Transmission?
So the question is How long does it take to rebuild a transmission? A qualified shop can rebuild a car transmission in 1-2 days, and a truck transmission in 2-3 days.
There are many factors that determine how long it will take to rebuild your transmission:
- Transmission complexity
- Parts and tools are available
- Difficulty in removing and reinstalling
- Mechanic’s level of experience
The rebuilding of most passenger vehicle automatic transmissions will take up to two days 9 times out of 10. There is a good chance that your manual transmission will be rebuilt within the same day if your car built before 2010.
How Much Does It Cost to Rebuild a Transmission?
Okay, so we’ve discussed how long it will take a transmission to be rebuilt, but what about the cost?
It depends on the type of transmission and the year, make, and model of your vehicle and what it will cost to rebuild a transmission. A transmission in an older car is generally much cheaper to rebuild than one in a new car with complicated internals.
In general, rebuilding a car transmission costs between $1,500 and $4,000, and rebuilding a truck transmission costs between $2,500 and $6,000. It depends on the specific transmission, the number of parts that need to replaced, and how much labor needed.
Major transmission damage (broken teeth on many gears, etc.) will be more expensive to rebuild than minor damage (like blown seals).

By transmission type, here’s how much it costs to rebuild a transmission:
- Manual Transmission – $1,500 to $2,500
- Automatic Transmission – $2,500 to $4,000
- CVT Transmission – $3,000 to $5,000
- Diesel Transmission – $3,500 to $6,000
The average cost of rebuilding an automatic transmission is higher than that of rebuilding a manual transmission.
Different Expenses to Rebuild a Transmission
There are several factors that can affect the specific costs associated with replacing or rebuilding a transmission. Among the most important expenses are:
For transmission repairs or rebuilds, labor costs can be a significant part of the cost. Labor costs affected by many factors, including the expertise and experience of the mechanic performing the repair.
The cost of replacement parts can vary significantly depending on the type of transmission and the amount of repair needed. Some components are very expensive, while others are quite affordable.
- The repair may must additional expenses for fluids and supplies as well as replacement parts.
- For diagnosing specific transmission issues, it may be necessary to charge a diagnostic fee.
- There may be additional costs associated with towing a car to the shop for repairs if it can’t be driven.
- According to the regional and local laws, taxes, and fees may increase the cost of the repair.
Before agreeing to any transmission work, ask the repair shop for a detailed estimate. This can help you comprehend the exact costs involved and help you decide whether to proceed with the repair or consider other options. If you’re looking for a repair shop, it’s important to choose one that has a good reputation and consider factors such as warranties and guarantees.
What are the Time Differences Between Manual vs. Automatic Transmission Rebuilding?
How long does it take to rebuild a transmission? Because it requires the removal and of the transmission, replacement, or repair of worn or damaged parts. And assembly and installation of the transmission. Although the rebuild process is similar for manual and automatic transmissions. There are some key differences that may affect the rebuilding time.
A manual transmission has fewer parts than an automatic transmission, so it can be rebuilt more quickly. Transmissions with automatic transmissions need extra and inspection. Because hydraulic pumps and torque converters are more complicated.
The labor cost of rebuilding an automatic transmission may be higher than that of rebuilding a manual transmission. Because of the longer rebuilding process and the greater specialized knowledge required.
Manual transmission parts may be more readily available than automatic transmission parts. This depends on the make and model of the vehicle. Rebuilding can be slowed down if certain parts need to be ordered or made custom-made.
On Rebuilding a manual transmission can take between 4 and 10 hours. While rebuilding an automatic transmission can take between 6 and 20 hours. It may take longer depending on the make and model of the vehicle, the damage, and the skill level of the mechanic.
If you’re considering a transmission rebuild, it’s important to find a reputable mechanic with experience working on your vehicle’s transmission. A successful rebuild can be ensured and the risk of future problems can be reduced.
How Long Does a Rebuilt Transmission Last?
Rebuilt transmissions should last just as long as new or remanufactured transmissions – around 100,000-200,000 miles. It is likely that the transmission will last at least 40,000 miles if the rebuild was done on the cheap and not all worn parts were replaced.
Your transmission’s number will change depending on how well you maintain it and whether the mechanic rebuilt it correctly.
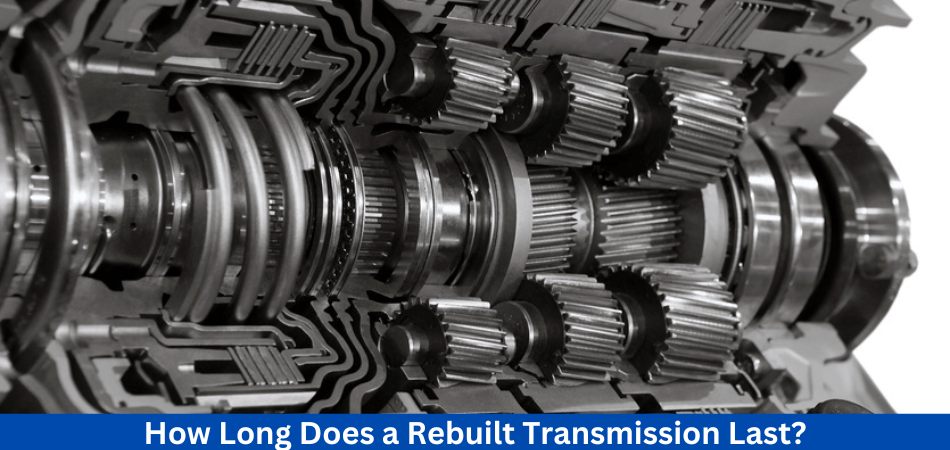
If you tow a trailer every day and drive a lot, you can expect the transmission to last less than 200,000 miles. Alternatively, if you drive your car only on weekends and take good care of it, the transmission may last much longer than 200,000 miles.
What are the Pros and cons of Rebuilding a Transmission?
It is a good idea to rebuild your car’s transmission (if it is in good enough condition to be rebuilt) when it comes to reliability and longevity. Rebuilt transmissions can last another 100,000 miles or more if they are done well by a professional. Additionally, since the mechanic will disassemble the transmission, you’ll be able to check every single internal part and ensure there are no surprises down the road.
Rebuilt transmissions are likely to last for a very long time, but they are expensive to rebuild. It is important to note that rebuilding your car’s transmission gives you certainty that every component is in good working order.
Is a Transmission Rebuild Worth It?
In light of recent economic events, you may wonder whether it’s even worth rebuilding your car’s transmission. Rebuilding a transmission, buying a junkyard replacement, or purchasing a remanufactured transmission are all options for fixing a broken transmission.
In If you can afford it, remanufactured transmissions will probably last another 200,000 miles. Rebuilding your transmission can save you some money if it’s possible. Last but not least, if you’re on a really tight budget, consider replacing your transmission with one from a wrecked vehicle.
There are many factors to consider when choosing the best option for your case. Let’s go over most of them now.
Is it cheaper to Rebuild a Transmission Instead of Replacing it?
Rebuilding a transmission is cheaper than replacing it. New transmissions can cost well over $4000 while rebuilding could cost between $1500 and $4000. In contrast, it may be faster to replace a failed transmission than to rebuild it. The lasting time of a rebuilt transmission varies. About 50,000 miles is the average lifespan of a rebuilt transmission. Alternatively, a new transmission will last up to 300,000 miles if it serviced and checked frequently.
Transmission rebuild vs. Remanufactured Transmission
In some cases, remanufactured transmissions are better than rebuilding your car’s transmission. A remanufactured transmission may be better than a rebuilt transmission in some cases. As a result, a remanufactured transmission returned to its factory settings by the remanufacturer.
Only remanufactured transmissions handled by these specialists. You can replace your failed transmission with a ready-and-waiting remanufactured one. Experts who conduct it thoroughly examine the transmission in a manner similar to a transmission rebuild.
In order to restore the transmission to its original state, they replace all the soft and hard parts and use factory settings. Due to the fact that these transmissions built according to the manufacturer’s specifications, they may even be better than the originals. CVT transmission problems and symptoms differ from those of regular automatic transmissions in part because of the type of transmission.
This is due to manufacturers making adjustments to the same type of transmission for upcoming models. This way, you can find a transmission with no known faults that has updated and brought back to factory condition. Having a mechanic that is familiar with your particular transmission type can save you a lot of time and money.
Why a Remanufactured Transmission Might Be a Good Option For You?
Remanufactured transmissions are an excellent alternative to brand-new ones. These are completely reengineered and assembled in a factory. Typically, they upgraded from their stock form, which means they can eliminate many design flaws that cause premature component failure. As a result, a remanufactured transmission will last much longer than an original one.
Each remanufactured transmission from Street Smart Transmission undergoes a rigorous build process to ensure quality. Nearly 100 technicians specialize in different aspects of the construction process.
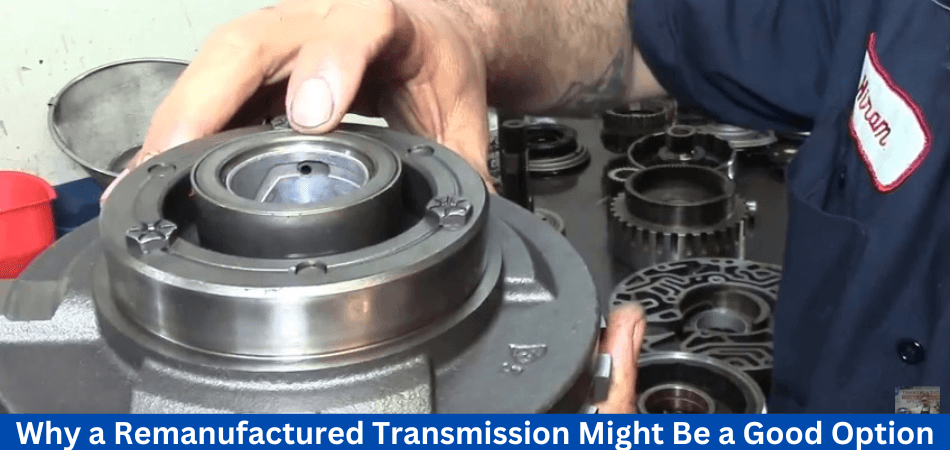
During this remanufacturing process, all of the crucial components from the donor transmission tested to ensure that they meet the original equipment specifications. Cases, pumps, gears, shafts, valve bodies, torque converters, and other components examined for hairline cracks, metal tensile strength, warping, etc. Components that do not meet the specifications discarded and replaced.
Once the parts have cleaned, they sent to the appropriate assembly stations for reassembly. It is the responsibility of quality control managers to ensure that the build meets the specified parameters throughout the process. Any necessary modifications or upgrades are also performed or added in order to fix factory design flaws. A dyno machine used to test the valve body and ensure it performs as specified. Prior to installation, all solenoids tested.
A newly remanufactured transmission goes to the dyno room for testing after its final quality control inspection, using software called CARS (Computer Aided Real-World Simulation) to simulate the real world. A number of real-world driving situations cycled through the transmission to ensure it performs as specified by the factory. As well as breaking in the friction components, it also ensures that it is completely ready to use once it installed.
What to Expect After a Transmission Rebuild?
When your transmission is rebuilt, your vehicle will drive smoother and shift more smoothly. Rebuilding your transmission should restore your vehicle’s performance and reliability.
As part of the rebuilding process, the transmission disassembled, inspected, and rebuilt with new or repaired parts. Taking care of existing transmission problems, such as slipping or shifting, will prevent future problems.
It will be necessary to inspect the transmission after the rebuild has completed to ensure that it is operating properly. Diagnostic equipment may used to check for issues during the test drive.
It’s important to keep in mind that a transmission rebuild might solve some problems with a defective transmission, but it might not address all your concerns. Also, the engine or drivetrain may need to inspected and repaired.
After a transmission rebuild, your mechanic will provide maintenance and care instructions. Your rebuilt transmission will be more reliable and perform better if you do this.
Your vehicle can benefit from a transmission rebuild in many ways, including improved performance, reliability, and lifespan. A properly rebuilt transmission can last for many miles if you work with an experienced, qualified mechanic and follow proper care instructions.
Final Thoughts: How long does it take to rebuild a transmission?
Now you have some idea of How long does it take to rebuild a transmission? It’s a costly experience to rebuild or replace a transmission, and most drivers won’t look forward to it.
It usually takes no longer than two days to rebuild a transmission, but the cost of doing so can be as high as $1,500. Alternatively, you can purchase a remanufactured one or simply get one from the wreckers, rather than having your transmission rebuilt.
A number of pros and cons can found in each approach, so it’s up to you to decide which is right for you based on your particular situation.
Read more of our articles here.
FAQs
Is it possible to drive my vehicle while the transmission is being rebuilt?
In If your transmission needs to be rebuilt, you won’t be able to drive it, since it must removed from the vehicle. During this time, alternative transportation will be necessary.
Could my transmission need a rebuild to avoid a lengthy downtime?
Delaying transmission repairs may lead to more extensive damage and a longer rebuilding process. You should have your transmission inspected promptly if you notice signs such as slipping gears, strange noises, or fluid leaks.
Do transmission shops give accurate timeframes for rebuilds?
You should receive a realistic estimate of how long it will take to rebuild your transmission from a reputable transmission repair shop. Selecting a trustworthy shop with a reputation for quality work and transparency is crucial.
How can a DIY transmission rebuild save time and money?
Transmission rebuilding is a highly specialized and complex task that requires expert knowledge. If not done correctly, DIY rebuilds can result in costly mistakes and longer downtime. Professionals should generally handle this job.
How can I make the transmission rebuild process go more smoothly and more quickly?
To Make sure your transmission maintained regularly, address any issues promptly, find a reputable repair shop, and follow their recommendations. Understanding the timeline and progress of the rebuild requires communication with the technician.


Carquest, headquartered in Raleigh, North Carolina, is a subsidiary of Advance Auto Parts, comprising WORLDPAC and Autopart International. With over 85 years of combined automotive expertise, their total automotive knowledge is extensive, and they have over 71,000 Team Members who are enthusiastic about the business and devoted to their success. But the question is, is Carquest a good brand?
Carquest offers industry-leading, no-hassle labor claim coverage to its shop partners and Professional customers. Carquest Distribution Centres are strategically situated nationwide and serve as the core of our parts network.
They employ cutting-edge data and technology systems to guarantee that our distribution centers have the proper mix of items depending on the sorts of cars that are most frequent in your region so you can anticipate inventory that is suited to the demands of your market.
Carquest has an excellent HUB presence in addition to its Distribution Centre network, bringing best-in-class availability at your fingertips. Read more to learn about Carquest and the answer to your question; “Is Carquest a good brand?”
Are Carquest Starters Good?
Carquest starters are a reliable brand. They are long-lasting and dependable. They are also reasonably priced and provide a diverse selection of models.
Carquest is a well-known car parts brand in the United States. It is a division of Advance Auto Parts, one of the country’s major automobile parts retailers.
Carquest began in 1932 as an auto parts business in Richmond, Virginia. By purchasing other firms like as Napa Auto Parts and Duralast Automotive Brands, it became a multinational company with outlets throughout North America, Europe, and Asia Pacific.
Why Should You Choose Carquest?
Carquest is a well-known name in the automobile business, offering an extensive selection of vehicle parts, equipment, and accessories. With a significant presence in North America, Carquest has proven itself as a reliable source for all things automotive.
One of the main reasons Carquest has grown into a go-to brand for automotive enthusiasts and experts is its dedication to quality. Carquest products are recognized for their durability and dependability, ensuring that customers can rely on them for their automobile needs.
The company has many items covering engine components, brakes, filters, electrical systems, etc. It has you covered whether you need replacement components or performance modifications.

It also offers excellent customer service in addition to its product offerings. Their skilled team is always ready to help clients discover the correct components or answer any concerns regarding their automobiles. This level of service guarantees that clients enjoy a pleasant shopping experience with Carquest.
Furthermore, Carquest recognizes the value of convenience in today’s fast-paced environment. They offer an extensive network of retail sites and authorized dealers across North America, making it easier for clients to get what they need close to home.
Ultimately, Carquest is a brand that vehicle lovers and experts can rely on. It is a prominent choice in the automobile sector due to its commitment to excellent goods and customer service.
How is the Product Quality of Carquest?
Carquest is a name that shines out in the automobile sector regarding dependable and high-quality car components. They have earned a solid reputation for producing high-quality items, making it a reliable choice for auto enthusiasts and experts.
The company has many car parts for many makes and models, guaranteeing that consumers can locate the precise item they want for their vehicle. Carquest manufactures items that are noted for their durability and performance, ranging from engine components to brake systems.
Carquest’s dedication to quality is one of the primary differentiators. Their stringent testing procedures guarantee that each component meets or exceeds industry standards, offering clients piece of mind that they are acquiring dependable items. You can rely on Carquest to provide components that will keep your car operating smoothly, whether you’re a DIY enthusiast or a professional technician.
Carquest delivers outstanding customer service in addition to its exceptional product selections. Their skilled team is always available to answer any inquiries or issues consumers may have. Carquest goes the extra mile to ensure client happiness, whether assisting you in selecting the proper item or giving technical assistance.
Overall, if you need auto components for your car, Carquest ought to be at the top of your list. Carquest can deliver the dependability and performance you’re looking for from an automobile parts provider with their large assortment of excellent goods and devotion to customer service.
What Does the Customer Think About Carquest?
Customer input is significant at Carquest. Carquest values its customers’ ideas and experiences because they help to improve their goods and services. Customer feedback can guarantee that Carquest is fulfilling their requirements and surpassing their expectations by aggressively seeking and listening to client feedback.
Carquest recognizes that every engagement with a consumer is a chance to learn and improve. That is why they have created several methods for clients to submit feedback, such as questionnaires, online reviews, and direct connections with their dedicated customer support team.
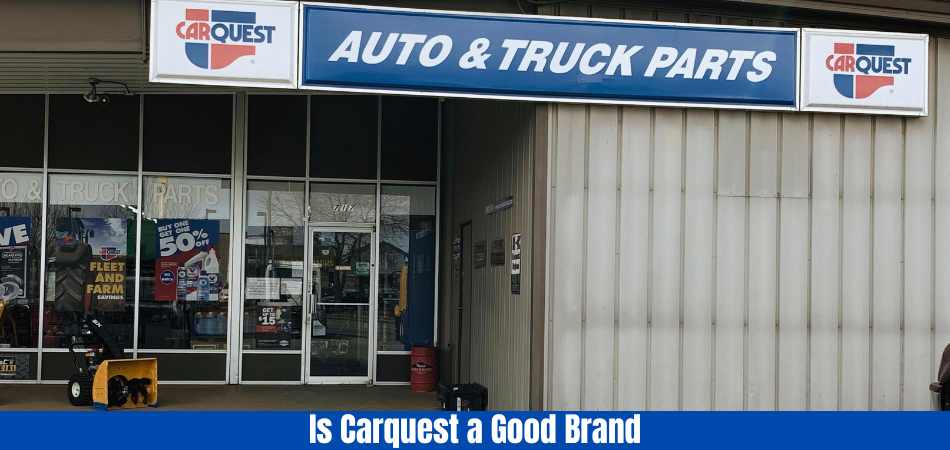
Carquest can make educated decisions that benefit customers and businesses by analyzing and acting on feedback. Whether it’s resolving particular complaints or integrating new features based on customer feedback, Carquest is dedicated to consistently enhancing the entire experience for all those who pick Carquest as their trustworthy automobile partner.
What are the Automotive products Available in Carquest?
Carquest is a well-known brand when it comes to automotive supplies. It has become a trusted name among automobile enthusiasts and experts thanks to its extensive selection of high-quality parts and accessories.
You can find anything you need, such as filters, brakes, belts, or any other automotive component. Their comprehensive catalog assures that you will be able to discover the correct component for your car, regardless of make or model.
The longevity and performance of Carquest’s products demonstrate their dedication to excellence. You can be guaranteed that every Carquest automotive product meets or exceeds industry standards thanks to thorough testing and strict quality control processes.
Carquest not only provides high-quality items but also excellent customer service. Their skilled team is always available to answer any inquiries or address any concerns you may have about their goods or installation procedures.
Carquest is the brand to trust for all your automotive requirements, whether you are a DIY enthusiast trying to modify your vehicle or a professional technician searching for dependable components for your customers’ automobiles. Trust their knowledge and see for yourself how Carquest automotive solutions may improve the performance and longevity of your car.
Is Carquest a Good Brand?
Is Carquest a good brand? The answer is yes. Carquest is a well-known automobile company recognized for its high-quality goods and dependable services. Carquest has a strong market presence and a reputation for offering high-performance automobile parts and accessories.
One of the main reasons Carquest is a good brand is its commitment to supplying clients with high-quality items. Customers may get precisely what they need for their vehicles,
whether it’s replacement components or performance improvements, thanks to their large selection of auto parts. Customers can rely on Carquest’s commitment to quality to guarantee that their goods are dependable and long-lasting.
Furthermore, Carquest offers an extensive network of authorized dealers and service centers, making it easy for clients to obtain their goods and get competent help. The brand’s dedication to client pleasure is shown in its skilled team, who are always available to give professional advice and help.
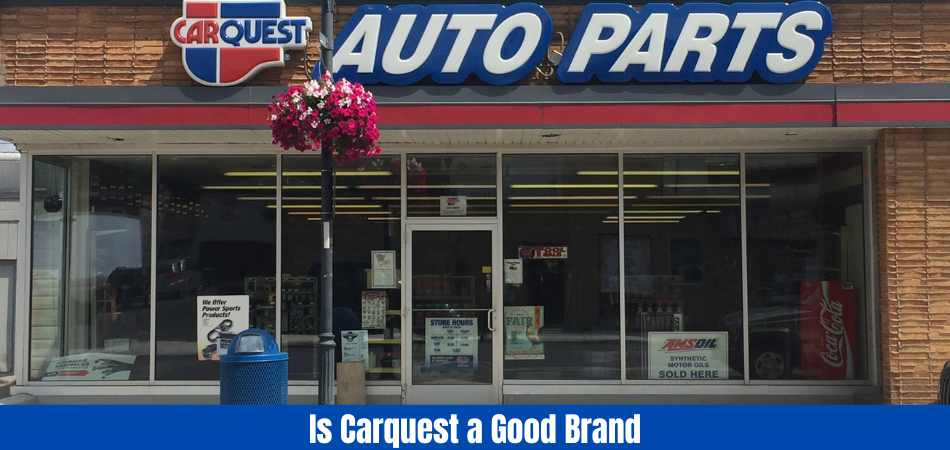
Carquest’s reputation goes beyond product excellence; they also value customer service. Their customer care team is always accessible to resolve any complaints or questions, ensuring that clients have a great experience with the business throughout their encounters.
Carquest is a good brand in the automobile business. Carquest stands out as a dependable alternative for auto lovers and experts alike, thanks to its focus on quality goods, a broad selection of car components, quick accessibility through authorized dealers and service centers, and excellent customer assistance.
AutoZone vs. Carquest: Which One to Choose?
When it comes to finding the appropriate car parts provider, two names that frequently come up are AutoZone and Carquest. Both firms have established themselves as leaders in the automobile sector, but how do they compare?
In this section, we will examine the primary differences and advantages of using AutoZone vs Carquest for your vehicle parts requirements.
While both AutoZone and Carquest provide a large variety of car components, each firm has its own set of advantages. AutoZone distinguishes out in terms of accessibility and ease. With over 6,000 locations across the United States, locating an AutoZone location near you is simple. This vast network enables speedy access to components when you need them the most.
Carquest, on the other hand, concentrates on delivering high-quality components mainly built for expert technicians. Their products are recognized for their durability and dependability, making them a popular choice among mechanics who want high-quality performance from their car components.
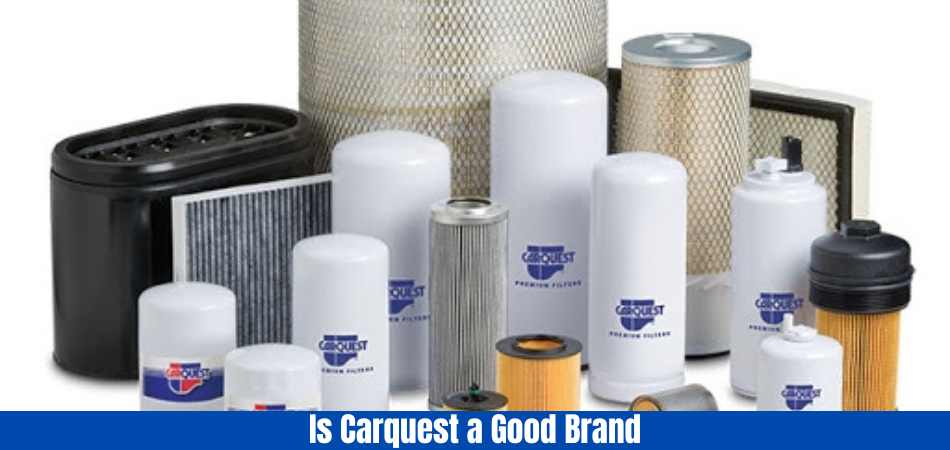
Another thing to consider is pricing competition. Both firms attempt to give competitive prices on their products. However, pricing may change depending on the individual goods and specials available.
So, AutoZone and Carquest offer distinct benefits regarding availability, product quality, and target demographic. Before choosing among these renowned car parts vendors, you must examine your unique requirements.
Duralast vs Carquest: Which Is Better?
Duralast and Carquest are two notable products that are frequently mentioned in conversations. Both companies provide a wide choice of automotive items, but recognizing their distinctions will help you make an informed purchase.
Carquest is a well-known business in the automotive sector that specializes in selling high-quality vehicle parts and accessories. They have earned a reputation for providing dependable goods that meet or surpass industry requirements. Carquest components are well-known for their durability and compatibility with various car makes and models.
Duralast, on the other hand, is another respected brand that provides a wide range of vehicle components. Duralast focuses on supplying high-quality replacement components that are built to last. Their goods are rigorously tested to verify that they meet or surpass OEM requirements.
When comparing Duralast vs Carquest, it is critical to evaluate elements such as pricing, availability, warranty coverage, and user feedback. This allows you to consider which brand best meets your needs and interests.
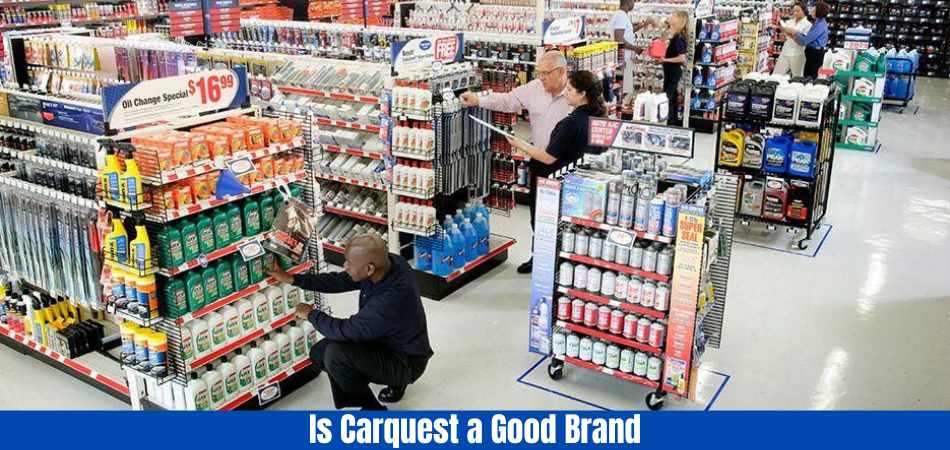
Finally, regarding vehicle components, both Duralast and Carquest have their perks and disadvantages. Before making a final selection based on your vehicle’s specifications and your particular preferences as a car owner, it is critical to conduct extensive study.
Learn more at here.
Is Carquest Better Than Napa?
Carquest is an auto parts and accessories business that offers a wide range of items for automobiles. Carquest was established in 1949 by Al Caraway. Al’s Auto Parts was the company’s initial name. Over the years, the firm has expanded to over 900 locations in the United States and Canada.
Napa is an auto parts company founded in 1925 by George H. Napa, headquartered in Torrance, California, USA. Through a global network of over 2,500 independent distributors, Napa produces, distributes, and sells automotive replacement parts for passenger vehicles and light trucks to wholesale and retail consumers.
Final Thought: Is Carquest a good brand?
To summarise, Carquest is a dependable and trustworthy brand in the automobile business. Carquest has serviced clients for many years with a diverse selection of high-quality car parts and accessories. Their dedication to quality and client satisfaction distinguishes them from their competition.
Carquest has the perfect supplies to fulfill your automotive needs, whether you are a professional technician or a DIY enthusiast. Carquest has you covered for everything from engine components to filters, brakes, and electrical supplies.
Furthermore, Carquest’s trained team is always available to answer any inquiries or address any problems you may have. Their knowledge guarantees that you always get the right part for your car.
Read more of our articles here.
FAQs
What exactly is Carquest, and what services do they provide?
Carquest is a well-known brand that sells car parts and accessories. They provide various products, including automotive batteries, filters, brakes, and other accessories.
Is Carquest a trustworthy brand for car parts?
Because Carquest’s long-standing involvement in the automotive business, many consumers rely on them for their car part requirements. Their reputation for producing high-quality goods is well-established.
Are Carquest components interchangeable with a variety of vehicles?
Yes, Carquest provides parts and products compatible with a wide range of car makes and models. They have an extensive catalog to fulfill a variety of vehicle demands.
How do Carquest goods compare in terms of quality to other brands?
Carquest goods are recognized for their high quality, although the comparison may differ based on the exact part or product. For precise comparisons, it’s a good idea to read reviews and talk with specialists.
Do Warranties cover Carquest items?
Carquest frequently provides warranties on its products; however, the conditions differ. It is suggested that you examine the warranty information for each item.

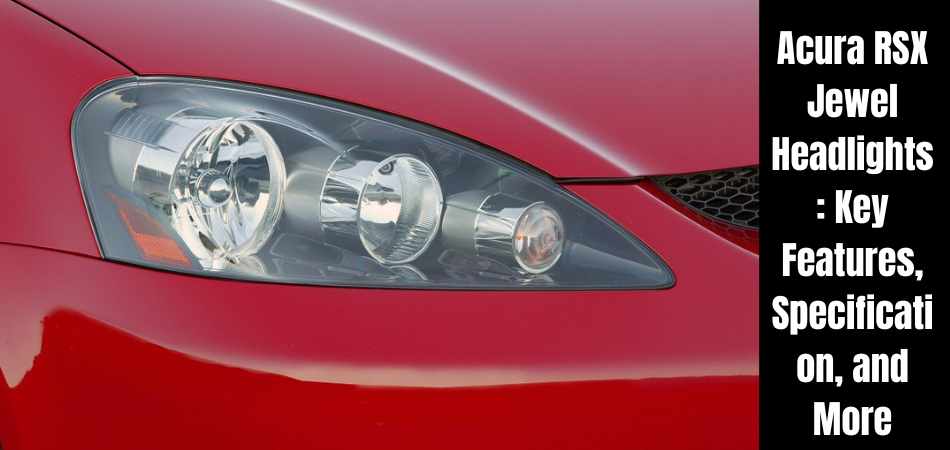
The term ” RSX Jewel headlights” refers to a unique design of headlights featured on certain Acura models, including the Acura RSX. The Jewel Eye headlights are a signature design element of Acura.
Acura, the prestige division of Honda, manufactured the Acura RSX, which is an affordable sports coupe. It was released as the replacement for the Acura Integra. The RSX was renowned for its streamlined appearance, agile handling, and extensive selection of high-performance options. However, the RSX predominantly employs jewel headlamps.
Let’s have a look at the key specifications, features, advantages, and drawbacks of RSX Jewel Headlights.
How is The evolution of Car Headlights?
The headlights are probably the first thing you notice when you see a car for the first time. Furthermore, headlights play an important role in defining the character of a car in addition to being an important stylistic feature.
Today’s car headlights are a world away from yesterday’s acetylene or oil lamps. Increasingly, LED headlights are becoming a standard feature in new models of cars because they provide a wide field of vision and save drivers money over time.
In addition to being more automated and intelligent than ever before, today’s headlights are also more intelligent as well. With the introduction of High Beam Assist, the vehicle’s front view camera automatically turns the high beam lights on and off when another light source is detected, and with the Intelligent Front Lighting System, the high beam lights that disrupt other road users’ vision are turned off so Hyundai drivers have maximum visibility at all times.
The development of car headlights from the 19th century to the present has been examined.
Acetylene lamps
Early headlights fuelled by acetylene or oil and introduced in the late 1880s. The flame of acetylene lamps is resistant to wind and rain, which made them popular with manufacturers. The light focused forward by mirrors placed behind the flame, even though the beam itself was not particularly focused. Due to this, they less effective at night since the light was scattered rather than being focused on a specific object or road.
Electric headlights
A dynamo small enough to fit in the car and still produce enough power to light the bulb was difficult to design in the early 1900s, so electric headlights took around a decade before becoming the industry standard.
Peerless introduced electric headlights across its entire line in 1904, and four years later British-based supplier Pockley Automobile Electric Lighting developed a complete set of electric lights powered by an eight-volt battery, including headlights, rear lights, and sidelights. A modern vehicle electric system with integrated ignition and lighting launched in the US automobile market in 1912.
Sealed beam headlights
In the US, sealed beam lights became mandatory between 1940 and 1983 when they were introduced in 1939. To produce a brighter, more focused light source by utilizing a tungsten filament, they combined a parabolic reflector with a lens and a filament sealed together.
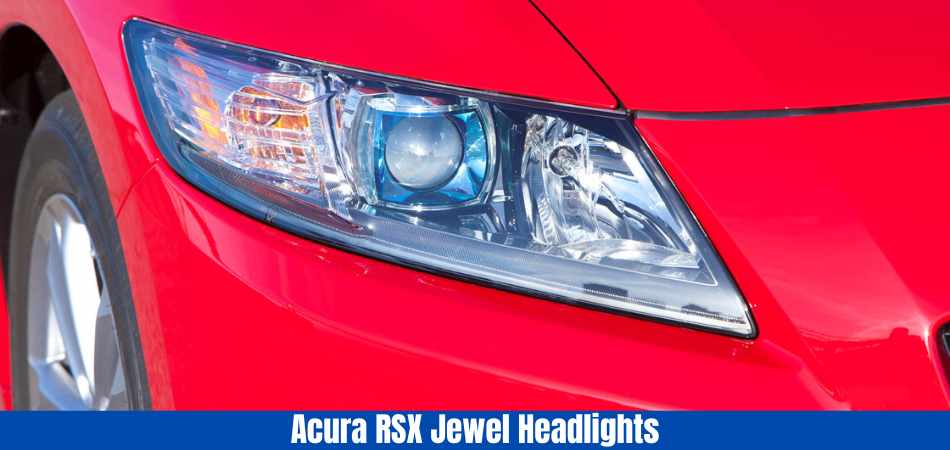
In spite of the amount of power they required, early sealed beam lights provided a relatively small amount of light, and the boiling filament would often leave dark residues on the glass, limiting light transmission. Rain, wet roads, or cleaning water could not enter the sealed beam and obscure the light, but this also meant the entire light had to be replaced if one bulb inside was damaged.
The first vehicle-mounted halogen lamp produced in 1962 by a consortium of French, German, and Italian bulb and headlamp makers. Because of the reaction between halogen gas and tungsten, these headlights provided brighter, more durable illumination. With this process, drivers were able to see much better on the road, especially at high beams.
High-intensity discharge headlights
As early as the 1990’s, High-Intensity Discharge (HID) lamps, also known as xenon headlights, introduced, which emit light by creating an electrical arc between two metal electrodes inside a glass bulb filled with inert gas xenon. A HID headlight produces far more light for the same amount of energy as a halogen bulb.
Due to their high cost, xenon headlights became increasingly popular in the early 2000s as they offered drivers a clearer image of the road, lasted three times longer than halogen bulbs, and consumed less energy. The 2010s brought them to a broader market with the introduction of cars such as Hyundai’s i40 – which had Bi-Xenon headlamps with Smart High Beams (SHB) to avoid dazzling other drivers.
LED headlights
LEDs are excellent light sources due to their brightness, low energy requirement and long lifespan. Traditional halogen bulbs have a thin filament that degrades over time and eventually fails, but LEDs have no filament, instead using semiconductors to release photons of light when charged.
Additionally, LEDs project better-quality light. It is easier for drivers to distinguish objects at night with blue lights because they are more illuminating and provide more contrast. As a result, it reduces driver fatigue, reduces blinding for other road users, and makes it easier to see in poor visibility conditions.
Read more at here.
What are the Acura Jewel Headlights?
The legendary Acura Jewel Eye headlights are a dazzling improvement over conventional halogen or even HID headlights. Five LEDs per side produce a whiter, brighter beam of light while consuming less energy than conventional headlamps.
Multiple LED light elements are typically arrayed in an arrangement that resembles a cluster of gemstones in Jewel Eye headlights. Compared to conventional halogen or HID headlights, these headlights provide enhanced visibility and a distinct look.
How Does RSX Jewel Headlight Work?
In the low beam mode, the outermost three LEDs of the headlights are precisely arranged at varying angles to uniformly illumine the road and environs without blinding oncoming traffic. When the high beam mode is engaged.
The two innermost LEDs are active and contribute to the illumination of objects in the distance. Even during the day, Acura’s Jewel Eye LED headlights have a distinct appearance.
The low-power LEDs also function as daytime running lights (DRL), and the lenses and reflections emit a jewel-like radiance.
RSX Jewel Headlights: Technical Specification
Here are some of the key specifications of RSX Jewel Headlights.
- 2014+ Acura RSX LED low beam units.
- Maintains the original turn indicator and park light bulbs.
- The high beams are eliminated;
- For clearance, the inner bezel is reduced.
- The bezel on the RSX was painted matte black to coordinate.
- Pigtailed and socketed LED drivers are utilized.
- PNP wiring incorporates 9006->H1 adapters.
- Keeps original setting and horizontal level cutoff.100% functional retrofit, not a static fit or “for show only”.
What are the Key Features of RSX Jewel Headlights?
Let’s now compare the RSX Jewel Headlights to other headlights. Acura has devised a particular form of LED headlights called Jewel Eye. Hence the name, they consist of a collection of LED light elements designed to resemble a cluster of gemstones.
Here are a few characteristics and advantages of Acura Jewel Eye headlights compared to other types:
Reduce Fatigue & Enhance Driving Experience
The Jewel Eye LED Headlights are intended to reduce driver fatigue and improve the driving experience by emulating the sun’s natural light. These lamps give the latest Acura RSX cars a sharp, refined, and distinguished appearance and improve visibility. You’re going to adore how they make your Acura RSX appear. And you’re going to appreciate how much more pleasant they make nighttime driving.

High Durability & 500% Brighter
The Jewel EYE LED Headlights will last 5 times longer and be 500% brighter than High-Intensity Discharge (HID) headlights. Compared to conventional halogen headlights, these Acura RSX LED headlights are 10 times more durable and consume 57% less energy.
You will appreciate the fact that these lights are a significant enhancement over the HID headlights available on earlier Acura models. The Acura RSX offers a reasonable luxury experience with graceful, fashionable, and highly functional premium headlights.
Improved Visibility
Jewel Eye LEDs provide superior illumination and road visibility. These headlamps’ LED technology provides a dazzling, concentrated beam, improving your capacity to navigate the road and any potential hazards.
Energy Efficiency
LED headlights, such as Acura’s Jewel Eye headlights, tend to be more energy-efficient than halogen or high-intensity discharge (HID) headlights. LEDs consume less energy, which can increase fuel economy.
Longer Lifespan
LED headlights possess an extended lifespan than halogen or HID headlights on average. The Acura RSX Jewel Eye headlights have been engineered to be long-lasting and sturdy, decreasing the requirement for repairs on a regular basis.
Distinctive Appearance
The design of Jewel Eye headlights is distinctive and easy to identify. The arrangement of LED elements provides the headlamps with a distinctive appearance and improves the vehicle’s general aesthetics.
What are the Different Versions of Acura Jewel Headlights?
The jewel headlights may have different versions such as, RLX, MDX, RSX etc.
The RLX utilizes the four outermost LEDs and eight lenses (four pairs, two lenses per LED) for each of the lowbeams.
During the day, the low beams serve as daytime running lights. While the inner high beams are activated, distant objects can be distinguished 200 milliseconds quicker than with conventional headlights (which equates to approximately 17 feet at 60 miles per hour).
Unlike the RLX, MDX models use only one lens per LED, but the system is essentially identical. The low beams are comprised of the outermost three LEDs on each side.
Each lens is constructed to precisely direct light over a broad area. The high beams consist of an additional two LEDs per side. During the day, all ten lenses function as daytime running lights, ensuring that your vehicle is visible to other drivers and giving it a distinctive appearance day or night.
What are the Components RSX Jewel Headlights?
Among the components of car headlamps are:
- The battery of a car provides electricity for the lighting system
- From the battery to the lamp, a series of wires carry electricity.
- A fuse is used to secure the electrical system.
- The main switch that disconnects and reconnects the electric current.
- Turns off and on the lights with a combination switch.
- Combination switch security relay.
- For short distance lighting, low beam lights range from 50W – 90W in power.
- For long-distance lights, high beam lights with a power range of 60 W to 100 W are available.
How to Use Your RSX Jewel Headlights at Night?
In the dark, car headlights are primarily used for driving, but this is subjective. It is possible that what one person considers dark might seem quite light to another. As such, when one person turns on their main headlights, another may not feel the need to turn on their sidelights.
In any case, if in doubt, turn on the main headlights to make sure you are seen as well as able to see the road. Low beams (also known as ‘dipped’) headlights should be turned on about an hour before sunset and kept on for an hour after sunrise. Making sure you are visible to other drivers, as well as seeing the road clearly, will help you stay safe.
During the dark hours of the night, you should switch on your high-beam headlights if you are travelling on an unlit road. If another car approaches, ensure that you turn them back down to low beam – otherwise, you may dazzle the driver and make them more difficult to see.
Using your lights when there’s fog
There will be a rear fog light on all cars, and a wiggly line will appear next to it when the button is pressed. There will also be fog lights on the front of some cars. Most of the time, the light on the fog light button will point in the same direction as the light on the headlight switch.
What is the minimum amount of fog that makes it officially foggy? If you have fog lights, when is the right time to turn them on? You should use your rear fog light if you are unable to see beyond 100m from your car, according to the Highway Code. The best way to determine whether your fog lights are needed is to use the car in front of you: if you have trouble seeing their rear lights, then turn yours on. Fog lights, however, can obstruct brake lights and dazzle other motorists, so should only be used when necessary.
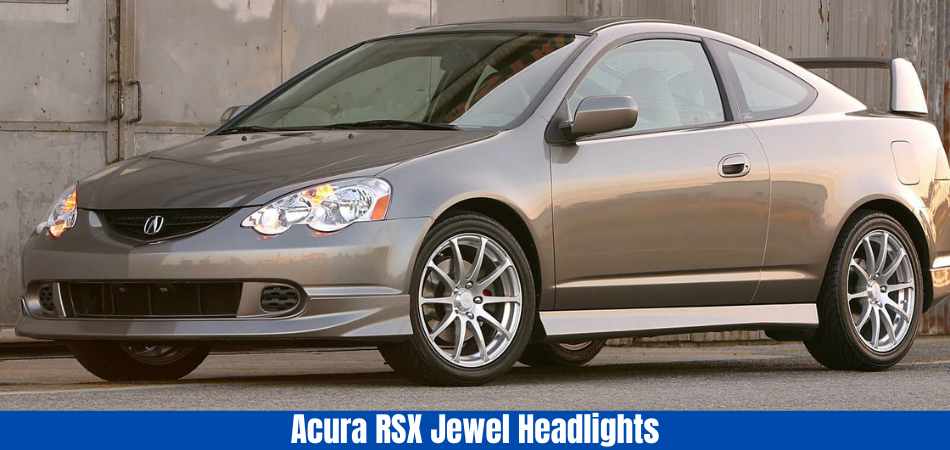
Using your lights in wet weather
Rain and storms are a common occurrence in the UK! It is possible to lose visibility when driving due to falling rain as well as spray caused by standing water. For rainy weather, simply turn on your low beams (dipped headlights) instead of your high beams. In some cases, you may have to use the rear fog light when driving on motorways where the spray is so bad. You should turn on your main lights if you cannot see the car in front of you and the car behind you cannot see you.
What are the Major Drawbacks of RSX Jewel Headlights?
Cost
Acura Jewel Eye headlights might be a bit more costly than normal halogen headlights and even some LED headlight alternatives. The higher price is a result of the product’s sophisticated technology and unique design.
Limited Compatibility
Jewel Eye headlights exclusively designed for Acura vehicles. Consequently, they might not be easily accessible as additional options for other brands and models. Compatibility with specific Acura models and model years may limited.
Potential Repair Costs
If an element of the Jewel Eye headlamps fails or needs repair, it may necessitate specialized knowledge and materials, resulting in higher repair costs compared to conventional headlights.
Subjective Design Preference
Despite the fact that many people appreciate the unique appearance of Jewel Eye headlights, it is essential to keep in mind that design tastes can vary. Some people may prefer a different aesthetic or feel the Jewel Eye design to be less enticing.
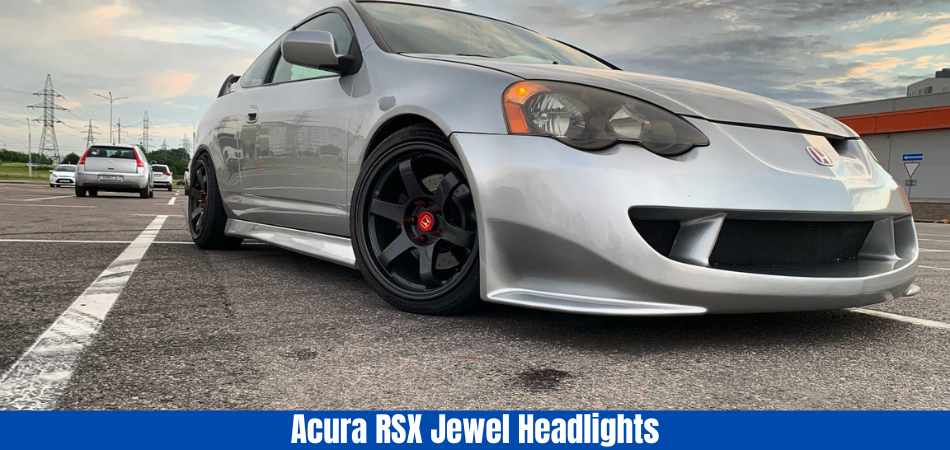
Tips For Cleaning RSX Jewel Headlights Lens With Plastic Cover: Practical Tips
Following are some tips for avoiding damage to plastic cover lenses:
- You should never clean plastic cover lenses with a dry cloth (there is a risk of scratches).
- Check the instructions in the vehicle handbook before adding anything to the lens cleaning system water, such as a cleaning agent or antifreeze.
- Using the wrong cleaning chemicals or too aggressive cleaning agents can destroy plastic cover lenses.
- You should never use impermissible high-wattage bulbs!
- Make sure your bulbs have UV filters!
Conclusion: RSX Jewel Headlights
In summary, Acura Jewel Eye headlights offer a number of noteworthy benefits. The systems utilize LEDs to produce a whiter, brighter beam than HID or halogen headlamps. Additionally, LEDs have a longer lifespan than other illumination systems and consume less energy, which could increase fuel economy.
However, there are also a few possible drawbacks to consider, including the higher price compared to standard headlamps, restricted connectivity with non-Acura vehicles, probable cost of repair, and relative design preference. In the end, the decision to install Acura Jewel Eye headlights is dependent on your own tastes, budget, and the specific Acura model you possess or plan to acquire.
Read more of our articles here.
FAQs
How do Acura RSX Jewel headlights function?
Acura RSX Jewel headlamps aftermarket headlights designed to impart a unique and distinctive aspect to the Acura RSX. In comparison to the original headlamps, they feature a jewel-like design with numerous LED rings and offer improved illumination performance.
What advantages do Acura RSX Jewel headlights offer?
Acura RSX Jewel headlights offer enhanced visibility and illumination performance, an elegant and eye-catching appearance, and the ability to personalize the appearance of your Acura RSX.
How do the headlights of the Acura RSX Jewel enhance visibility?
Compared to original halogen headlights, Acura RSX Jewel headlights typically feature sophisticated lighting technologies, such as LED or HID bulbs, which provide brighter and more focused illumination. This can improve visibility and make nighttime and low-light travel safer.
Are the headlamps of the Acura RSX Jewel plug-and-play?
It depends on the product and manufacturer in question. Some Acura RSX Jewel headlights designed as plug-and-play replacements, meaning they can be installed directly in place of the original headlights without additional modifications.
Can Acura RSX Jewel headlights installed without assistance from a professional?
Yes, Acura RSX Jewel headlights can typically be installed without the assistance of a professional, particularly if they are plug-and-play replacements. If you are unfamiliar with automotive electrical systems or headlamp installations, it may be prudent to seek professional assistance to ensure proper installation and avoid potential complications.
Maintaining the appearance of your vehicle is a point of pride for car enthusiasts. Cleaning your vehicle with cleaner wax can help keep it in top condition. But it is not the end of the process. Knowing what to use after cleaner wax will help you maintain your vehicle’s shine.
After cleaning your car with cleaner wax, what can you do to maintain its luster? Trim detailers or dressings can be used for moldings and trim. Hard, shiny plastic can benefit from wax. Touch-up paint may be necessary for scratches that are intense. The best option is to repaint if the paint is incorrect.
Discover the best options for achieving a long-lasting, glossy appearance that will make your car stand out. Let’s know, what to use after cleaner wax?
What is Cleaner Wax?
A cleaner wax also polishes your vehicle as a one-step process. Cleaner wax removes all other debris (which car wash soap couldn’t reach). It is a one-step process that cleans and shines at the same time.
Cleaner waxes serve a dual purpose: offering protection and effectively eliminating minor surface defects. The best cleaner wax for cars;
- Meguiar’s G7016 Gold Class Carnauba Plus Premium Liquid Wax: Best Overall Wax.
- Mothers California Gold Pure Brazilian Carnauba Liquid Wax: Best Carnauba Liquid Wax.
- Turtle Wax Hybrid Solutions Pro Graphene Spray Wax: Best Spray Wax.
- Chemical Guys Butter Wet Wax: Best Soft Wax.
What’s The Difference Between Cleaner Wax And Normal Wax?
Cleaner wax is basically a normal finishing wax with abrasives and cleaning agents added to polish away surface defects and remove paint defects.
Unlike typical polishes, it leaves a protective paint sealant behind after polishing and removing contaminants.
When Should You Use a Cleaner Wax?
It is only necessary to use cleaner waxes when light contamination or light scratches on the clear coat need to be removed. Using a cleaner wax is pointless if your vehicle doesn’t have many defects and the finish is glassy smooth.
Wax cleaners remove a thin layer of paint from the surface. When you make paint thinner unnecessarily, you reduce the amount you can polish it later when you may need the extra thickness.
Is Cleaner Wax the Same as Polish?
Cleaner waxes are similar to polish, but not quite the same. A cleaner wax contains a polishing abrasives and chemical cleaners in addition to a finishing wax or sealant.
The cleaner wax will leave behind a layer of protection after polishing your car or truck, eliminating the need to apply a wax or paint sealant afterward.
How Do You Use Cleaner Wax?
- With a dual action polisher or by hand, cleaner wax can be applied. A bit of liquid product is applied to the polishing pad, then dabbed around the area you’re polishing.
- When polishing by hand, use circular motions.
- When using a DA polisher, work in sections of 2 feet by 2 feet and move the polisher horizontally. Be sure to overlap with the previous path to ensure that no area is missed in the opposite direction.
- Repeat the process vertically after polishing the horizontal area.
- Once you are done, you can buff away any remaining cleaner wax, and you should now have a high-gloss finish once again.
How Often Can You Use Cleaner Wax?
There is generally no problem with polishing a car or truck 4 to 5 times over its factory paint’s useful life. It is possible to compromise the integrity of the clear coat by applying more than this because the clear coat contains UV inhibitors that protect the paint from fading and oxidation.
Although you may have enough paint thickness to polish several times, you may have purchased your vehicle second-hand and do not know how many times it has been polished. You can use a paint thickness gauge to determine if you need to polish again if you’re concerned that you have less paint than is acceptable.
What To Use After Cleaner Wax?
Yes, if time and budget aren’t an issue, you can apply another layer of wax after the Cleaner Wax. However, it is essential to ensure that this wax does not contain any cleaning agents or polishing oils.
For some time, a debate has been raging on the internet about whether you should use after-cleaner wax. People have been taking both sides of the argument, so let’s take a look at a few of the reasons why it might be beneficial.
What are the Enhancers to Apply After Cleaner Wax?
Applying a cleaner wax to your car is a great way to keep it looking shiny and new. However, for an even deeper shine. You can apply many methods of enhancers after the cleaner wax.
Remove Contaminants Using a Clay Bar
Apply a lubricant to the car’s paint and rub the clay bar over it. By sliding over the paint, the clay bar will begin to pick up contaminants. Clean the car with a microfiber cloth after removing all the contaminants.
Benefits of Clay Bar Application
Clay bars are useful for removing contaminants left behind by cleaner waxes. Surface contaminants like rust or tar can be grabbed and removed by clay bars.
Furthermore, applying wax or sealant to the surface afterward provides an added layer of protection, safeguarding the paint from the elements.
Refine The Finish With a Polishing Compound
Using a microfiber cloth, apply a small amount of polishing compound. In order to achieve the desired polished finish, repeat this process a few times.
To achieve a glossy finish, buff off the polishing compound after it has been applied. As a result of buffing, the paint becomes smoother.
Benefits of Polishing Compound
The polishing compound not only helps to shine the paint but also seals and protects it from future harm. This helps to ensure that your car retains its beautiful appearance for longer.
It helps to remove any remaining surface imperfections. Also, helps to protect against further damage.
A Shinier Finish With Carnauba Wax
Before applying carnauba wax to your car, prepare the surface properly. Wash your vehicle with soap and water, then dry it with a clean microfiber cloth.
Once the car is completely dry. Apply a small amount of the wax with a foam applicator pad or cloth. Spread it over the surface in a circular motion. Allow the resin to cure for several minutes.
Benefits of Carnauba Wax
When applied after a cleaner wax, Carnauba wax can give a vehicle’s finish an extra shine. It also helps to protect the paint from the sun’s UV rays. It protects against smudges, streaks, and other environmental contaminants.
Regular car washes can help preserve the car’s paint and keep it looking attractive.
So, carnauba wax is a great way to enhance the shine of a finish. The car can look stunning and show-worthy with the proper application and care.
Apply quality Sealant
Apply a quality sealant onto the car’s exterior surfaces. Apply the cleaner wax with a soft foam applicator after washing the vehicle. The sealant provides a protective layer between the car’s exterior and the outside elements.
It helps prevent the paint’s fading and decay and makes cleaning and maintenance easier.
Benefits of Sealant
The sealant helps protect the paint from contaminants such as road salt. It can make removing dirt, grime, and road film easier. It further helps to give the color a glossy and vibrant finish, making it look better for longer.
And so, the glossy finish can be achieved with no issues.
Apply Synthetic Wax
To apply the wax, use a foam applicator pad and a microfiber cloth. First, apply the wax in a thin, even layer on the entire vehicle, covering every surface. Once the wax is dry, buff it out with a microfiber towel.
This will help to work the wax into the paint and create a glossy shine. With the right approach, you can achieve a clean car or complete detail with a thorough wash.
Benefits of Synthetic Wax
Synthetic wax is a superior protective layer to cleaner wax. As it is more durable and offers a longer-lasting shine and protection for the paint.
By using a combination of cleaner wax and synthetic wax, your vehicle’s paint stays protected. This is for a more extended period and is more resilient against dirt, debris, and harsh weather conditions.
To properly wax your car, start by washing the surface with soap and water and drying it with a clean cloth. Then apply a light coat of cleaner wax, spread it, and let it dry to a haze. Repeat this step with synthetic resin. Finally, buff the car’s surface with a clean cloth to shine.
What To Use After Cleaner Wax: Importance of Using Enhancers
Using an enhancer after a cleaner wax helps to add an extra layer of protection and gloss to your car’s finish. Enhancer works in various ways, such as:
Restoring shine: Enhancers help restore shine by adding depth and clarity to the paintwork. They provide a glossy finish that enhances the overall appearance of the car.
Masking minor imperfections: Even after using a cleaner wax, some minor scratches, and swirl marks may be visible on the paint. Enhancers contain fillers and polishing agents. That can help mask these imperfections.
Protection against environmental factors: Enhancers often include protective ingredients like polymers, waxes, or sealants. The protective layer helps prevent further damage or fading.
Prolonging the lifespan of the cleaner wax: Enhancers can extend the durability and longevity of the cleaner wax applied previously. By adding a layer of protection and enhancing the shine, they help preserve the results achieved from the cleaner wax.
5 Reasons Why You Can Apply Another Layer Of Wax
Your car will look better and be protected more if you apply a second layer of wax after the initial cleaner wax. Paint blemishes, scratches, and swirls should not be concealed by cleaner wax.
Neither will it give you a glossy look, nor will it provide lasting protection. A number of scenarios need to be considered here, and the application would depend on the reasons.
Reason 1: For The Moldings And Trim
In areas such as the dashboard and door panels, textured plastic is commonly used on the exterior of cars. This plastic should be treated with a trim detailer or dressing to keep it looking new and prevent discoloration.
This can be accomplished with Meguiar’s Ultimate Black Plastic Restorer. Besides protecting plastic from UV rays, this product gives it a glossy finish. A longer-lasting shine is also achieved with the product because it helps repel dust and dirt.
Reason 2: For Preserving The Paint Job
The finish of a car takes on a glossy and hard appearance after applying a cleaner wax. To help preserve the paint job of a car, you can also use shiny plastic wax.
To treat the entire car, begin by using Swirlx, a mild-abrasive compound. It is important to seal your car’s finish with a sealant in order to prevent dust, dirt, and UV rays from damaging the finish. In addition, it can improve your car’s appearance by reducing the appearance of minor scratches and blemishes.
Reason 3: For Removing Visible Scratches And Swirls
Meguiar’s ScratchX can be used on smaller areas if scratches remain visible. You can then move on to Ultimate Compound if this doesn’t work.
The Scratch X and ultimate compounds are great for removing visible scratches on the exterior of your car. You can then buff out the scratch with a clean cloth after you rub the product on the scratch.
You should also avoid using purple power paint on autos due to a few drawbacks.
When used on automotive surfaces, purple power paint may result in decreased visibility, sunlight fading, and chipping or peeling. Therefore, if you are advised to use this approach, be careful!
Reason 4: For Removing The Deeper Scratches
It may be necessary to purchase some good quality touch-up paint and use a fine-tip paint brush to repair deep scratches. It should be invisible and last for many years without rusting if the repair is done correctly.
A touch-up paint job can be a great way to repair your car’s paintwork. Cleaning and removing dirt or debris must be done before starting the repair process.
It is best to use a mild car soap or scratch remover for this. Once the area has been prepped, apply the touch-up paint with a small brush. You may need to add an additional layer if needed after letting the first one dry completely.
Applied properly, the repair should be seamless and protect the exterior from rust and other problems.
Reason 5: For Safeguarding Damages From Severe Scratches
In cases where the scratch is too severe, it is best to respray. As a result of the job, the scratch must be removed by sanding down the area. In order to give it a fresh new appearance, primer, a base coat, and a clear coat are applied.
Before repainting, the area must be thoroughly cleaned and all dirt, oils, and other contaminants must be removed. It is then necessary to apply a primer so that the paint has a consistent and even base, followed by a base coat to restore the color.
It is essential to apply a clear coat to protect the paint, and as mentioned previously, such outlining gives a glossy finish.
Tips & Tricks for Using Enhancers After Cleaner Wax
To prevent scratches, use a microfiber cloth and gentle car wash soap. UV damage and other environmental factors can be prevented by doing this.
Apply a sealant or clear coat to your car. Apply a quality sealant or clear coat designed for automotive use.
Scratches and chips can ruin the look of your car’s paint job. Wash and wax your car carefully to avoid scratching the paint.
Keep your car looking great by maintaining a durable paint finish. A long-lasting paint job requires proper cleaning, waxing, protection, and avoiding scratches.
What are the Disadvantages of Cleaner Wax?
Is the phrase “Jack of all trades, master of none” familiar to you? The same can be said of most products that attempt to do several things at once. Cleaning waxes aren’t the best waxes or polishers, neither will they give you the best results. A big job can be cut in half with this method.
80% of the outcome results from 20% of the input, according to the 80-20 rule. This is an example where focusing on 20% of the results can yield 80% of the results.
Purchasing two separate products to shine and protect your vehicle will give you an extra 20% of results, but most people will be happy with the outcome of a good cleaner wax.
Is cleaner wax bad for your car?
Using cleaner waxes on a regular basis isn’t recommended, but they aren’t harmful. Designed to remove paint contaminants and imperfections from your car’s clear coat, it’s formulated with powerful cleaning chemicals and harsh abrasives.
Over time, minor surface defects and environmental contaminants will accumulate on your daily driver. A cleaner wax removes a thin layer from the surface of clear coats. It also removes bonded microscopic road grime and environmental fallout that normal car care and washing can’t remove, such as light swirls and scratches.
By removing these defects and surface contaminants periodically, you can restore a high gloss to your paint and leave a layer of protection on the surface.
Conclusion: What To Use After Cleaner Wax
When you are wondering what to use after cleaner wax. Ensure maximum shine and protection by using a finishing wax. By sealing the cleaner wax and adding a finishing wax, you can achieve a long-lasting glow.
Cleaner wax provides some level of protection for the vehicle’s paint. But, it is less durable and long-lasting than synthetic waxes. Using an additional product after cleaner wax can enhance and extend the protection of the vehicle’s paintwork.
Frequently Asked Questions
Why is it necessary to use something after cleaner wax?
Cleaner wax provides some level of protection for the vehicle’s paint. But, it is less durable and long-lasting than synthetic waxes. Therefore, use an additional product after cleaner wax to enhance and extend the protection of the vehicle’s paintwork.
When should you use a cleaner wax?
When the paint is heavily oxidized or needs a deep cleaning use cleaner waxes. This removes contaminants from the surface.
How often should I apply these products?
The frequency of application depends on various factors such as the product used, driving conditions, and climate. Ceramic coatings provide long-term protection, lasting two to five years. Refer to the manufacturer’s recommendations for the specific product you choose.
What is the difference between cleaner wax and polish?
Wax that is cleaner is not the same as wax that is polished. Cleaner wax combines wax and cleaner and is best used to protect and clean the paint. While the polish is best used to remove defects and restore shine.
How often should I use cleaner wax?
You should use cleaner wax on your vehicle’s paint every 3-4 months. This will help eliminate any contamination or buildup accumulated on the color. Cleaner wax will provide extra protection if done.