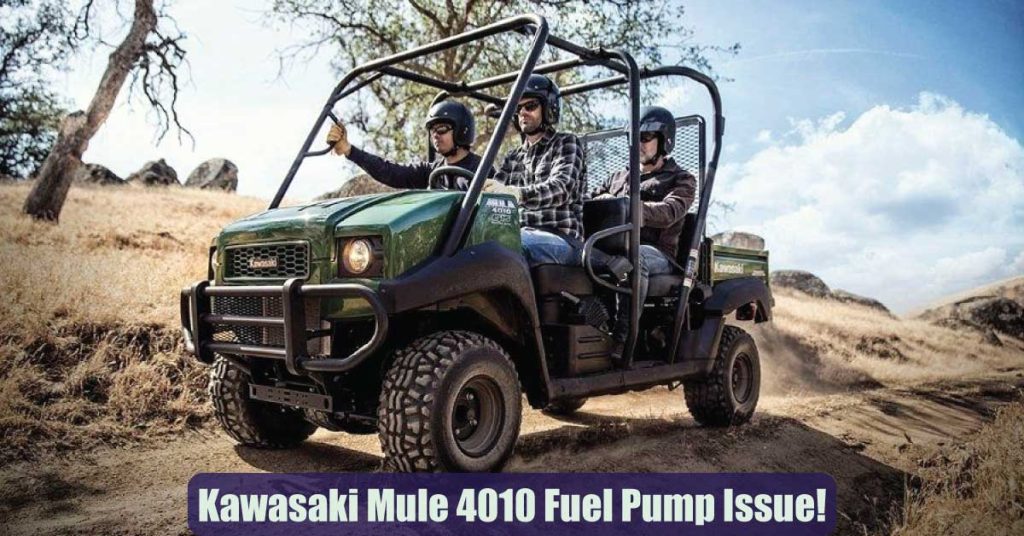
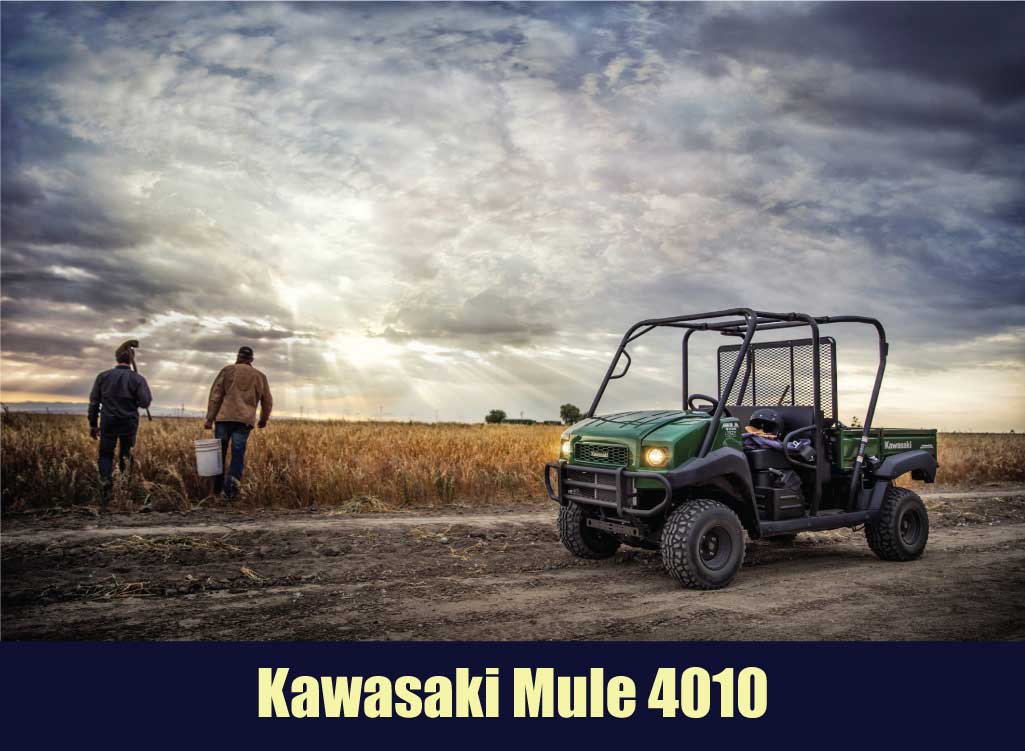
The Kawasaki Mule 4010 tackles the most challenging jobs as a reliable and rugged workhorse. The fuel pump in this UTV is a critical component, yet it is prone to different issues. The common Kawasaki Mule 4010 fuel pump problems include insufficient fuel delivery, clogged fuel filter, failure, electrical problems, etc.
This off-road utility vehicle, however, handles any task, from hauling heavy loads to traversing challenging terrain. No matter what you use it for. Unfortunately, the Kawasaki Mule 4010, in particular, has fuel pump problems. Having that fixed can be expensive, which also affects the vehicle’s safety.
Let’s know the Common Kawasaki Mule 4010 Fuel Pump Problems and how to solve them.
Fuel Pump Issue & Short Solution On Kawasaki Mule 4010
A UTV’s fuel pump might bring on numerous issues. In 2020, the most popular pumps were made by Polaris and Can-Am. However, most customers need a replacement. The reason for this is that their original pump broke down. Engine and environmental heat often cause fuel pump failure.
The fuel pumps that come standard on UTVs need to be built to last. Therefore, you will need to purchase aftermarket parts. So, these two companies make fuel pumps for cars – All Balls and Quantum Fuel Systems. But the thing is, Quantum is the better choice because they offer a lifetime warranty on their pumps. All Balls only give you a limited one. So, if you want to be covered for the long haul, go with Quantum.
These fuel pumps can be easily installed. You may get a kit to fix your Kawasaki Mike 4000 that costs little and has everything you need. The gasoline pump replacement kit is universal and may be used on any UTV.
Common Kawasaki Mule 4010 Fuel Pump Problems
Some common Kawasaki Mule 4010 Fuel Pump Problems may include-
- Insufficient Fuel Delivery
- Fuel Pump Noises
- Clogged Fuel Filter
- Electrical Problems
- Fuel Pump Failure
Insufficient Fuel Delivery in Kawasaki Mule 4010
The common fuel pump problem in Kawasaki Mule 4010 is insufficient fuel delivery. The engine may operate poorly, stall, or even fail to start as a result of this problem.
A clogged or dirty fuel filter is the root of insufficient fuel delivery. Another potential cause could be a malfunctioning fuel pump relay or a weak fuel pump.
Solution
To address this problem, start by checking the fuel filter. If it appears dirty or clogged, replace it with a new one. Additionally, inspect the fuel lines for any blockages or leaks. If necessary, clean or replace them. If the problem persists, consult a professional mechanic, and check the fuel pump.
Fuel Pump Noises
Unusual noises emanating from the fuel pump area can be an issue. Rattling, whining, or buzzing sounds are common symptoms.
A worn-out or damaged fuel pump motor is a common source of noise coming from the fuel pump. Over time, the pump’s internal components can wear down. That leads to abnormal sounds during the operation.
Solution
If you notice strange noises coming from the fuel pump. Check the gasoline pump and replace it if necessary. Install a new fuel pump if required.
Clogged Kawasaki Mule 4010 Fuel Filter
Fuel cannot flow freely to the engine because of a clogged fuel filter. That leads to reduced performance and potential fuel pump issues. It could happen because of the buildup of impurities and debris.
Kawasaki Mule 4010 Fuel Filter Location
To know the fuel filter location of the Kawasaki Mule 4010, you can follow these general steps:
- Open the hood or access the engine compartment of the Mule 4010.
- Find the gasoline tank, which is often located at the back of the car.
- Trace the fuel line as it flows from the fuel compartment to the engine.
- Look for a cylindrical component that is connected to the fuel line. The fuel filter is usually housed inside a metal or plastic casing.
Solution
A clogged fuel filter can sometimes be a symptom of a larger problem. The finest thing to do is to swap out the old, fouled gasoline filter for a new one. More affordable fuel filters are available at auto parts retailers. Instead of replacing them, you can clean certain fuel filters.
Thereafter, If you want to replace your Kawasaki Mule 4010 Fuel Filter; Follow this
Kawasaki Mule 4010 Fuel Pump Electrical Problems
Electrical problems can also affect the fuel pump’s functionality. That leads to starting issues, poor performance, or intermittent operational systems.
Common causes of fuel pump electrical problems include corroded wiring connections, a faulty fuel pump relay, or a defective fuel pump control module.
Solution
Begin by inspecting the wiring connections. Ensure they are clean and secure. Replace any corroded or damaged wires. If the issue persists, swap out the relay or the fuel pump control module.
Fuel Pump Failure
The fuel pump might at times stop working altogether. That can result in the engine not starting or shutting down while in operation. Various factors, including wear and tear, internal component failure, or electrical issues, can cause this.
Solution
When facing fuel pump failure, several possible solutions exist: Clean the fuel filter, identify and address the faulty component, check the fuel lines, and replace damaged fuel lines as necessary. Also, address electrical issues and perform diagnostic testing.
Signs When You Replace Your Kawasaki Mule 4010 Fuel Pump
Engine Stuttering
Your vehicle’s fuel pump is not working if your engine jolts or stutters at a steady speed. When your engine’s fuel pump has trouble keeping up, stuttering happens. Because of this, maintaining a set speed for the engine is challenging. Fuel pump problems are dangerous because they affect control.
Engine Surges
A gasoline pump that releases too much fuel may even flood your engine. On the highway, it can cause your car to stall out.
Engine surges occur in the opposite direction. A sudden increase in speed can also be felt when driving. A fuel pump overflows an engine. There is a risk of the engine revving.
Reduced Fuel Efficiency
Your vehicle’s overall fuel efficiency may suffer from a malfunctioning fuel pump. Your engine will use more fuel than is necessary as it strives to run as it was intended to.
Fuel pump problems can lead to sudden decreases in vehicle mileage. Early resolution of this issue is advisable. Because the expense of more frequent petrol tank refills will soon exceed the cost of replacement.
A High-Pitched Noise
You should also replace your fuel pump if you hear a high-pitched whine or squeal while driving. This noise most likely signifies excessive component wear in the fuel pump. A more severe mechanical failure will come before these screeches.
Irresponsive Engine
Finally, having trouble starting your engine may be the most obvious indication that your fuel pump is malfunctioning. The engine won’t start correctly if the gasoline pumps don’t supply it with adequate fuel.
Improper Kawasaki Mule 4010 Diesel
The Kawasaki Mule 4010 Diesel is designed to handle various tasks. It is commonly used in agricultural, industrial, and recreational settings. But using low-grade diesel might cause problems for the vehicle.
Maintenance of Kawasaki Mule 4010 Fuel Pump
To prevent future fuel pump problems on your Mule 4010. Regular maintenance and inspections are crucial. Here are some tips for preventing future fuel pump problems:
Change the fuel filter daily: The fuel filter should be changed at least once a year or more often if you drive in dusty or dirty conditions.
Use high-quality fuel: Using high-quality fuel can help prevent debris from clogging the fuel filter and fuel pump.
Keep the gas tank at least half full: The gasoline pump can avoid overheating if the gas tank is at least half filled.
About Kawasaki Mule 4010
If you’re in the market for a dependable and compact motorbike for your off-road excursions, the Kawasaki Mule 4010 is the perfect choice with a 4-stroke, single-cylinder engine that can produce up to 24 hp and a continuously variable transmission (CVT) and 4-wheel drive. This product is engineered to navigate through diverse terrains and weather conditions effectively.
But that’s not all – the Mule 4010 also features a tilt bed for easy loading and unloading of cargo and a comfortable seat perfect for long rides. This bike is a champ when it comes to dealing with rough weather. Its water-resistant exterior makes sure it can handle anything thrown its way.
It’s no wonder that the Mule 4010 is a top pick among off-road enthusiasts. Its reliable performance and sturdy design make it the ideal companion for any adventure, whether you’re exploring the great outdoors or tackling challenging terrain.
Kawasaki Mules have gasoline-only fuel pumps. Many individuals have relied on Kawasaki Mike 4010 for a long time. The robustness of this approach has made it a favorite among farmers, hunters, and construction workers.
You may be having trouble starting the engine or picking up speed. This indicates that a new fuel pump is required.
While the Kawasaki Mule has a solid reputation for dependability and productivity, specific components wear out more quickly than others. Fuel pump replacement is a standard maintenance option for UTV owners.
Conclusion
The engine of your Mule 4010 depends on the fuel pump. If you notice any symptoms of a failing fuel pump, it is important to diagnose and fix the issue as soon as possible.
You can assist in averting potential fuel pump issues by carrying out routine maintenance and inspections. If you need help diagnosing or repairing a fuel pump issue, don’t hesitate to seek professional help.
FAQs
How do I know if my fuel pump is faulty?
Some common signs of a failing fuel pump include engine sputtering or stalling, difficulty starting the vehicle, loss of power or acceleration, and unusual noise coming from the fuel tank area.
How frequently should I change the gasoline pump in my Kawasaki Mule 4010?
Fuel quality, use, maintenance, and other elements can all affect a fuel pump’s lifespan. Generally, one should replace the fuel pump every 60,000 to 90,000 miles.
Can a jammed fuel filter cause complications with the fuel pump?
Yes, a blocked fuel filter can limit gasoline flow and put more strain on the fuel pump.
How should I change the gas pump safely?
When handling fuel systems, it’s crucial to take the correct safety precautions. Make sure the engine is cold and unplug the battery before replacing the fuel pump.
Can I use low-quality or contaminated fuel to damage the fuel pump?
Yes. Fuel contaminated with dirt, water, or other substances can damage the fuel pump over time. Maintaining the health of the fuel pump requires using high-quality fuel. Inspect and clean the fuel system daily.

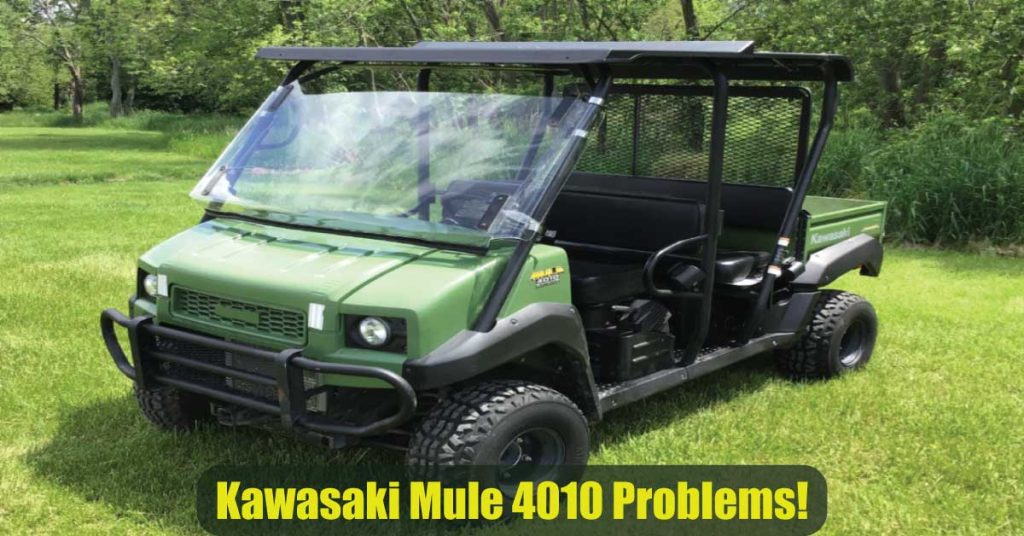
The Kawasaki Mule 4010 is a versatile vehicle that Kawasaki produces. As the least costly 4×4 utility UTV from Kawasaki, it is extremely popular due to its affordable price. Despite its low cost, you may be overwhelmed by a few Kawasaki Mule 4010 Problems.
The vehicle has an automated gearbox and a strong engine. Since its introduction in 2011, the Kawasaki Mule 4010 has seen robust sales. Despite some issues afflicting the Kawasaki Mule 4010, it continues to be a popular option among car enthusiasts. The reason is that it offers exceptional fuel economy. Also, high-performance levels at a reasonable price.
However, before purchasing one of these vehicles, there are a few Kawasaki Mule 4010 Problems that you should be aware of.
What are the most common Kawasaki Mule 4010 Problems?
- Problems with Engine Idling
- Fuel Pump Problem
- Transmission Issue
- Throttle Body and Sensor problems
- Overheating Issue
- Power loss & Steering Issue
- Braking Noise Issue
- Wire Harnesses
- Gear shifting Issue
Major Kawasaki Mule 4010 Problems and Solutions!
A clear understanding of a problem’s underlying factors can significantly simplify identifying a solution. Armed with this knowledge, you can tackle the issue independently, saving you the expense of hiring a mechanic.
If you’re working on your Kawasaki Mule 4010 and run into any problems, we’ve got you covered with a handy guide that covers the most common issues and how to solve them. It’s perfect for all your DIY needs!
Problems with Engine Idling
The vehicle’s idle problem is shown by its constant sputtering and stopping, which is typical of Mule types like the 4010. When the Mules remain idle and move slowly, the motor oil never gets hot enough to boil off the mixture of fuel, air, and waste products that get into the crankcase. This buildup can make the car hard to start.
Solution
If you’re having issues with your Kawasaki Mule’s engine idling, check the fuel quality and air filter to ensure they’re not dirty or contaminated. Also, look at the spark plug and see if it looks worn or damaged. If it does, you’ll want to replace it. Hope that helps!
Adjust the idle speed per the manufacturer’s recommendations in your owner’s manual, as improper idle settings can lead to idling issues. Verify that the throttle and choke mechanisms are functioning smoothly without any sticking, and lubricate or replace them if needed. Lastly, inspect the fuel system for any clogs or issues affecting fuel delivery to the engine. By systematically addressing these common causes, you can often resolve engine idling problems in your Kawasaki Mule.
Fuel Pump Problem
The Kawasaki Mule 4010 has quickly become a favorite among those who enjoy riding motorcycles off-road. But, like any other piece of equipment, it can break down for various reasons. Problems with the fuel pump system are widespread.
Numerous customer complaints have been made about this on the Mule 4010. An issue with the pump is brought on by a buildup of junk in the fuel filter. This obstruction may cause a lack of lubrication, which in turn results in less coolant getting to the drive motor. As a result, it may cause the drive motor and the fuel pump in the vehicle to malfunction.
Ensuring proper fuel flow is essential for optimal engine performance, as clogged filters or weak pumps can cause issues. The engine may stall or act erratically if the fuel pump pressure is too low.
Solution
Maintaining a clean and fully operational gasoline filter is crucial to avoid fuel system problems. Regularly check and replace filters to prevent supply gasoline blockages. Additionally, keep an eye on your fuel pressure every once in a while. It’s essential to ensure it’s in the proper range to keep your car running smoothly.
It’s essential to investigate any pressure that falls outside the normal range. The Kawasaki Mule 4010 motorcycle is an impressive vehicle renowned for its incredible functionality, reliability, and performance. However, it is subject to occasional breakdowns like any other vehicle. Common concerns include starting issues, low gas mileage, and technical complications like clogged fuel filters and spark plugs.
Maintaining a reliable Mule 4010 requires regular checks for damage and the proactive replacement of worn components. Investing in aftermarket warranties and roadside assistance plans can provide added security. With proper maintenance, the Kawasaki Mule 4010 can last for years without any issues.
Transmission Problem
Debris and grime buildup in the system might also result in transmission issues. Some customers report that shifting up or down is difficult when the gear stick is stuck. The difference will be apparent the moment you switch from low to high mode or high to reverse mode.
The Kawasaki Mule 4010 motorcycle is a standard pick for those searching for an off-road vehicle. Its robust construction and potent engine make it the car of choice for explorers of the vast outdoors. However, several riders have reported shifting and jerking gearbox issues with the Mule 4010.
This can be very aggravating when attempting to climb or traverse steep inclines. Several things, including old or broken parts or a lack of transmission fluid, could cause the problem. The good news is that answers exist for these issues. By replacing worn-out components or adjusting the transmission fluid level, one can achieve smoother shifting and less jerking.
Solution
If you want your Kawasaki Mule 4010 to keep running smoothly, staying on top of regular maintenance and inspections is essential. Remember to give your ride some TLC now and then! Don’t let transmission issues get you down. Plenty of preventive measures are available to keep your vehicle in top shape. Stay proactive and confident!
Taking care of your transmission is crucial to ensuring smooth performance. Regular maintenance, like changing the fluid and filter, can prevent or reduce transmission issues. Remember to inspect the components for any signs of wear and tear, as catching problems early can save you from costly repairs. Stay proactive and enjoy a worry-free driving experience!
Throttle Body and Sensor Problem
A prevalent concern that many encounters involves the throttle body and associated sensors. This situation may stem from various causes, such as insufficient engine exhaust ventilation, buildup of carbon within the throttle body, and a malfunctioning CCV (closed crankcase vent) system and throttle assembly.
However, we’re confident in our ability to address these challenges with our inventory of TPS sensor parts.
The cause of the problem with the throttle body and sensor stems from the engine exhaust being directly expelled into the air intake tubing by USEPA regulations rather than released into the surrounding environment. Consequently, the burnt oil adheres to the throttle body.
Solution
To efficiently address the problem at hand, there are a few steps you should take. Initially, it’s recommended to disconnect the tube from the TB and apply throttle body cleaner onto it while the engine is running. If the issue persists, it may be necessary to replace the part.
Over-Heating
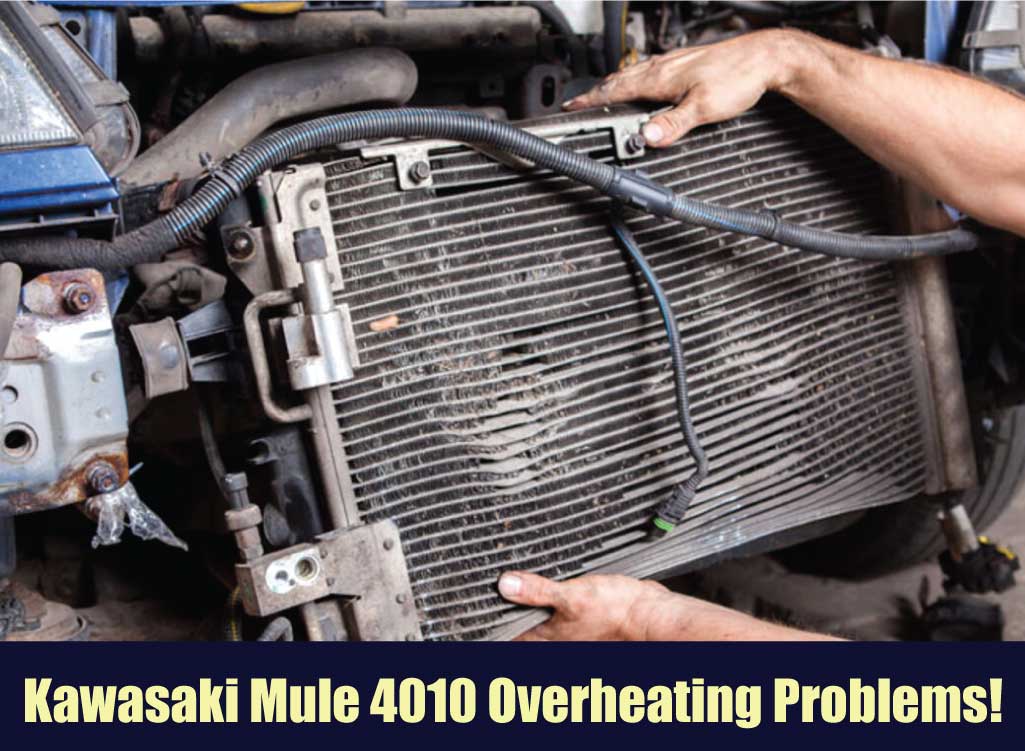
For extreme off-road conditions, choose the Kawasaki Mule 4010 ATV. However, this durable vehicle may experience overheating issues. Clogged radiators or malfunctioning fans are the most common causes of this issue.
Unrestricted airflow into the engine compartment, which is positioned below the floor, is the root of this problem. The front seat area becomes heated as a result of the hot air passing through the air vents installed beneath the floor.
Clogged radiators prevent the proper circulation of coolant, leading to engine overheating. If the radiator is broken or not doing its job correctly, the engine’s temperature will soon rise, causing expensive damage. The motorbike’s fan is another potential source of overheating. If the fan isn’t functioning properly, the radiator won’t get enough air to keep the engine cool.
Solution
The Kawasaki Mule 4010 requires routine maintenance to avoid overheating. This requires regular maintenance, such as radiator flushing and oil and filter changes. Damage to the engine could result from overheating if the radiator became clogged.
Checking your fuel filter regularly for debris ensures optimal engine performance. If needed, replacing it promptly can prevent costly repairs. Inspect the hoses and belts thoroughly and replace them if damaged or worn out. If you follow these guidelines, your Kawasaki Mule 4010 will operate more smoothly and safely.
Power loss and Steering Problem
Unfortunately, numerous Mule 4010 customers experienced significant power loss and acceleration deterioration after using their machines for a few hundred hours.
There are several potential causes for this power outage. A blockage in the gasoline lines or a malfunctioning fuel pump are two potential causes. It could also be brought on by an improper engine spark.
The Kawasaki is a well-liked utility vehicle because it performs well in rough terrain. As a vehicle, occasional breakdowns may occur. Power steering concerns have been noted frequently by Kawasaki Mule 4010 users.
Several things, such as insufficient fluid, broken power steering lines, or a broken power steering pump, can cause these issues. If your Kawasaki 4010 has power steering issues, you should get them fixed as soon as possible. Paying attention to the case may make driving on rocky terrain easier.
Solution
However, if your power steering lines are damaged, a professional mechanic should repair them. In addition, if the front of your car got messed up, know that you won’t be able to get it completely fixed unless the frame is straightened out, too. If the Mule has difficulties stopping, you may also want to inspect and adjust the brakes.
Keeping your Kawasaki Mule 4010 in top shape requires regular maintenance. Regularly inspecting the air filter, brakes, and power steering lines is crucial for keeping your Mule healthy. Immediately fixing any issues you notice will save you time and money in the long run.
Problems of Brake Noise
Even when the brakes are not used, one might still hear a loud screeching or chirping noise. One of the most frequent problems mentioned by Mule 4010 owners is this one.
The brake dust that has accumulated on the brake pads is what causes the screaming sound you hear. The dust acts as an abrasive between the brake pads and rotors, screeching as it does so.
Solution
Replacement of the brake pads is the simplest remedy for this problem.
Wire Harnesses
Corrosion or rusting is the most typical issue with a wire harness. Corrosion happens when moisture collects in the wires, eventually making them fragile. This can occur along the wire’s length on either side, but it frequently happens where the wire reaches a connector block at the end.
Solution
You should seek the assistance of an electrician to replace the wiring harness, as it is a dangerous task that requires experience.
Gear shifting issue
Attempting to raise the gearing on your 4010 could be problematic. Especially while shifting the gears of your Kawasaki Mule up, down, or in reverse.
Many off-road vehicles have issues with gear changing. This can occur for several reasons, including manufacturer design flaws or stopped equipment.
Solution
Due to a manufacturing defect, there is no surefire fix. You can still contact them to lodge a complaint and request a resolution.
Customer’s Feedback on Kawasaki Mule 4010 Problems
Surprisingly, this model has received positive consumer feedback from around the world. The proprietors are pleased with the results. They can depend on the mule for their journeys.
Consumers indicate that the model is genuine and produced by the company. Outstanding in its durability and longevity. Their reviews also incorporated the issues. They had to resolve them without assistance from machinery.
In some instances, however, a significant number of individuals spent a substantial amount of money on repair costs.
Does Kawasaki Mule 4010 worth the Money?
The Kawasaki Mule 4010 is an off-road utility vehicle that has garnered generally excellent feedback from users and industry analysts.
Whether it is worthwhile depends on your unique requirements and intended use for the car. The Mule 4010 is well-known for its durability, dependability, and flexibility, which makes it an attractive option for farm labor, hunting, and general-purpose use.
If you’re looking for a utility vehicle that can handle rough terrain and hefty loads, the Kawasaki Mule 4010 might be worth a look.
Maintenance Guide Of Kawasaki Mule 4010!
To keep your Kawasaki Mule 4010 working well, you need regular maintenance. Maintaining your car regularly will help it run better for longer and save you money on repairs in the long run. A Kawasaki Mule 4010 motorcycle can provide a safer and smoother ride with regular maintenance.
First, you should always make sure the oil level is correct, as the engine can’t run without it. Taking your car in for an oil change every 100 hours or once a year is usually a good idea – whichever comes first. It keeps your ride running smoothly! If the engine isn’t getting enough air, it’s time to inspect the air filter and either clean it or replace it. Every 7,500 miles, or sooner if damaged, you should check the condition of your spark plugs and replace them if necessary.
Brakes, tires, and batteries are crucial parts that need regular upkeep. Ensuring optimal performance of your vehicle is easy! Regularly inspect and replace worn-out tire pressure, tread depth, brake pads, and rotors. Also, remember to keep your battery charged and avoid running it down.
Buyer’s guide: Maintain Your Kawasaki Mule 4010!
Keeping the Mule clean and free from debris is crucial, as dirt and dust can clog the engine and decrease efficiency. Regular washing and lubrication may keep the bike in good working order. If you want to keep your Kawasaki Mule 4010 motorcycle in the best condition possible, how often should you have it serviced? Your bike should be serviced after a set amount of time has passed or a certain number of miles have been traveled, whichever comes first.
Kawasaki recommends 1200 miles or six months before scheduling servicing for your Mule 4010. However, mileage, climate, and riding style can affect how often maintenance is required.
If you frequently use your bike or ride in rough conditions, you may need to maintain it more often than every three to four months or every 500 to 800 miles. On the other hand, if you use your bike less frequently or only on mild days, you can extend the time between services. If you own a Kawasaki Mule 4010, it is recommended that you check the brakes, tires, and wheel bearings every 500 kilometers.
Worn or misaligned parts should be fixed as soon as possible. Inspect it, and if necessary, replace it. All liquids, such as engine oil and radiator fluid. Ensuring the chain and sprockets are well-maintained leads to seamless and efficient operation. Last but not least, the engine needs to be checked and calibrated every few thousand miles to ensure peak performance.
About Kawasaki Mule 4010!
If you’re in the market for a dependable and compact motorbike for your off-road excursions, the Kawasaki Mule 4010 is the perfect choice with a 4-stroke, single-cylinder engine that can produce up to 24 hp and a continuously variable transmission (CVT) and 4-wheel drive. This product is engineered to navigate through diverse terrains and weather conditions effectively.
But that’s not all – the Mule 4010 also features a tilt bed for easy loading and unloading of cargo and a comfortable seat perfect for long rides. This bike is a champ when it comes to dealing with rough weather. Its water-resistant exterior makes sure it can handle anything thrown its way.
It’s no wonder that the Mule 4010 is a top pick among off-road enthusiasts. Its reliable performance and sturdy design make it the ideal companion for any adventure, whether you’re exploring the great outdoors or tackling challenging terrain.
Final Thought
In addition to its reliability and power, the Kawasaki Mule 4010 has a large payload and towing capacity. Nevertheless, it does have some issues. For you to get the most out of this model, you need to be aware of any possible hazards and take precautions to avoid them.
Troubleshooting and repairing frequent Kawasaki Mule 4010 problems can help to guarantee that it functions smoothly and safely.
If you know the potential causes of these problems, you can diagnose and resolve them more effectively. Proper maintenance is essential in keeping your mule working smoothly and avoiding potential hazards, from malfunctioning ECUs to under-seat overheating.
FAQs
What are some typical Kawasaki Mule 4010 issues?
Problems with the engine, the electrical system, the brakes, and the suspension are among the most common problems reported by vehicle owners.
How trustworthy is the Kawasaki Mule 4010?
Depending on how well it is maintained and utilized, the Kawasaki Mule 4010’s dependability can fluctuate. Many owners, however, have reported that the vehicle is dependable and durable, with some units surviving for several years.
Is the Kawasaki Mule 4010 subject to any recalls?
The Kawasaki Mule 4010 has, over the years, been subject to multiple recalls. Typical causes include fuel leakage, defective brakes, and defective suspension components.
How much does it cost to fix typical Kawasaki Mule 4010 problems?
Depending on the nature of the problem and the extent of the damage, the cost to remedy common Kawasaki Mule 4010 issues can vary. However, some proprietors have reported repair costs between a few hundred and several thousand dollars.
How can I keep my Kawasaki Mule 4010 problem-free?
To avoid problems with your Kawasaki Mule 4010, it is essential to adhere to the manufacturer-recommended maintenance schedule, perform routine inspections, and address any issues as soon as possible. Additionally, use the vehicle only for its intended purpose and drive safely and responsibly.

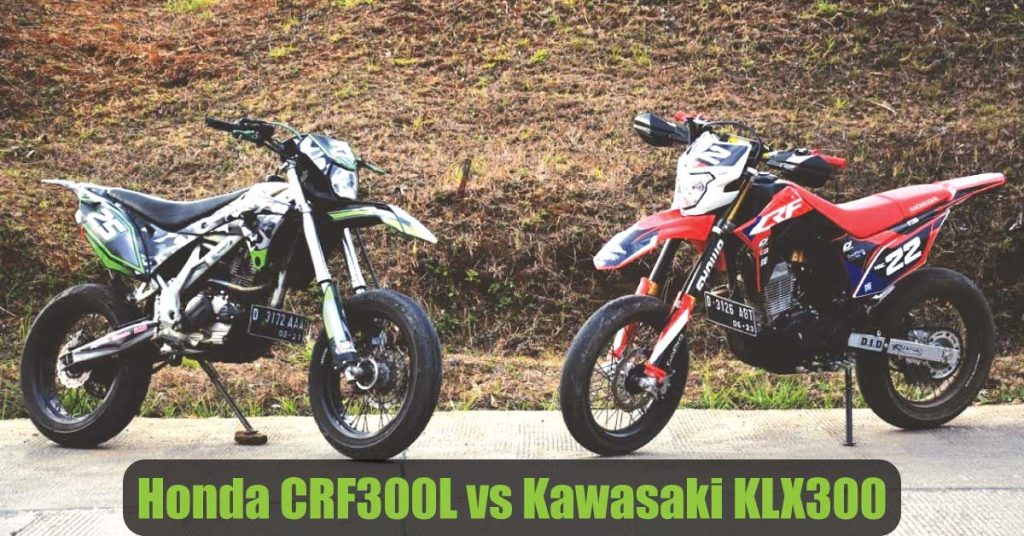
The joy of riding a solid adventure bike across uncharted territory is immense if you are an avid off-road enthusiast. Choosing which investment to make might be complicated with so many possibilities available. Like Honda CRF300L Vs Kawasaki KLX300. Furthermore, there is a larger than ever variety of machines in the dual sport category.
Two well-known adventure bikes on the market are the Honda CRF300L and the Kawasaki KLX300. Honda and Kawasaki belong to a distinct subsection of the dual sport segment.
Honda CRF300L Vs Kawasaki KLX300 is a complicated choice. The Kawasaki KLX300 is more suitable for riders seeking more suspension adjustability and braking power. The Honda CRF300L may be better for fuel efficiency, lightweight, and affordability.
Let’s experience more of the thrill of the Honda CRF300L vs Kawasaki KLX300, the ultimate adventure bike for off-road enthusiasts. But remember that the rider’s specific requirements, tastes, and intended use will determine which motorcycle is best in Honda CRF300L vs Kawasaki KLX300.
The Honda CRF300L Overview

Honda Motor Company produces the dual-sport Honda CRF300L motorbike. It made its debut in 2021 as the Honda CRF250L’s replacement.
A substantial upgrade over the 249cc engine of the CRF250L, the CRF300L has a 286cc liquid-cooled, single-cylinder engine that generates 27 horsepower and 19 lb-ft of torque with a slipper clutch for more comfortable downshifts. A six-speed transmission couples with the engine for better performance.
Aluminum and steel combine to create the bike’s lightweight, durable chassis. It sports a rear suspension system with Pro-Link and a 43mm inverted fork. The bike travels on knobby tires appropriate for both on- and off-road riding.
Key Features of the Honda CRF300L
The Honda CRF300L is a top-notch adventure bike. Below are some of the standout features of the Honda CRF300L:
Lightweight and Agile Design
The Honda CRF300L boasts a sleek frame. It allows for effortless handling and navigating in narrow areas. The bike’s lightness also contributes to its superior performance and fuel economy.
Liquid-Cooled 286cc Engine
The Honda CRF300L features a single-cylinder, liquid-cooled 286cc engine. It delivers 27 horsepower and 19 lb-ft of torque. This engine has a DOHC design, fuel injection, and a six-speed transmission with a slipper clutch. These make it perfect for off-road adventures while providing smooth power and torque.
Long-Travel Suspension
The suspension system equips the Honda CRF300L.The system offers remarkable stability and control on uneven terrain.
Rear Wheels
21-inch front and 18-inch rear wheels equip the Honda CRF300L. These offer sufficient ground clearance to tackle challenging off-road terrain.
LED Lighting
The Honda CRF300L has a well-equipped lighting system. LED headlights, taillights, and turn signals. This feature ensures that riders have excellent visibility, especially in low-light conditions, which enhances their safety.
Chassis
A combination of steel and aluminum makes up the bike’s frame. The chassis makes it both lightweight and durable. Its long-travel suspension comprises a 43mm inverted fork at the front and a Pro-Link rear suspension system. 256mm disc brakes are mounted at the front of the CRF300L, and 220mm disc brakes are mounted at the rear.
Pros and Cons of the Honda CRF300L
Pros of the Honda CRF300L
- Versatility: A versatile bike for exploration and adventure. They built the CRF300L to tackle both on- and off-road riding.
- Lightweight: The bike’s lightweight steel and aluminum build makes it easier to control on various terrains.
- Braking: The strong stopping power of the front and rear disc brakes is crucial for safety when riding both on and off-road.
- Touchscreen sensor cluster: The rider can easily keep track of crucial information with the help of the latest LCD digital display. That offers clear and essential information.
Cons of the Honda CRF300L
- Fuel capacity: The bike’s 7.8-liter fuel tank capacity may limit its range on longer rides.
- Seat comfort: Even though the seat is intended to be comfy, some riders could find it to be too small for long trips.
- Price: The CRF300L costs more than some other bikes in its class. The Honda CRF300L has a starting price of around $5,249 USD.
- Wind protection: The bike’s simple design provides little wind protection. This could be more pleasant for users on extended highway trips.
- Power delivery: Compared to larger bikes, the CRF300L’s acceleration and top speed may seem less impressive to some riders. But it is smooth and controllable.
Kawasaki KLX300 Overview
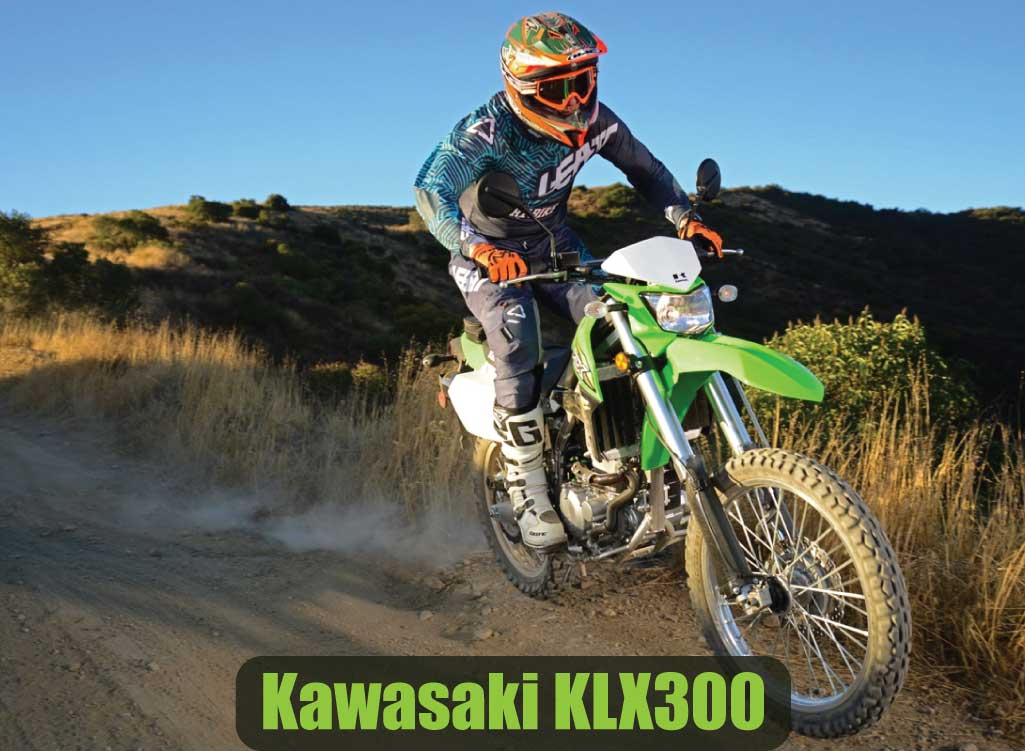
Motorcycle manufacturer Kawasaki manufactures the KLX300 dual-sport motorcycle. It replaced the Kawasaki KLX250 in 2020.
An engine producing 33 horsepower and 21 lb-ft of torque powers the 292cc liquid-cooled, four-stroke, single-cylinder KLX300. With a wet clutch, the engine is coupled to a six-speed transmission. An inverted 43mm front fork, an adjustable Uni-Trak rear suspension, and a steel chassis provide long-travel suspension. This bike features dual-sport tires that are suitable for off-road and on-road riding and front and rear disc brakes.
Key features of the Kawasaki KLX300
The Kawasaki KLX300 is an adventure bike with several features that make it stand out from the competition. Here are some key features of the Kawasaki KLX300:
Rugged Design
The Kawasaki KLX300 has a rigid design that suits it for difficult off-road conditions. The bike’s design also increases its longevity and robustness.
Liquid-Cooled Engine
The 292cc liquid-cooled Kawasaki KLX300 engine produces impressive power and torque, making it suitable for off-road excursions.
Long-Travel Suspension
The Kawasaki KLX300’s long-travel suspension system provides excellent comfort and control.
Rear Wheels
Front and rear wheels measure 21 inches and 18 inches on the Kawasaki KLX300. This bike performs and is safe on any terrain thanks to its excellent traction wheels.
Disc Brakes
The Kawasaki KLX300 is manufactured with disc brakes. It provides excellent stopping power, improving the rider’s safety.
Comfortable seat
The bike’s seat provides comfort on longer rides. Its narrow profile allows the rider to move freely and quickly reach the ground.
Pros and Cons of the Kawasaki KLX300
Pros of the Kawasaki KLX300
- Versatility: Because of its versatility and ability to manage both on- and off-road riding, the KLX300 is an excellent bike for exploration and adventure.
- Dual-sport tires: The bike’s dual-sport tires are appropriate for both on- and off-road riding and offer good traction and stability on various surfaces.
- Digital instrument cluster: The rider can easily keep track of critical information thanks to the rider-friendly clarity and functionality of the contemporary LCD digital display.
- LED illumination: Compared to conventional bulbs, LED lighting improves visibility and uses less electricity, which is advantageous for nighttime driving.
Cons of the Kawasaki KLX300
- Wind protection: Wind is not protected by the bike’s simple construction. Riders on long highway trips may find that challenging.
- Price: The KLX300 costs more than some other bikes in its class. Priced at roughly USD 5,599, the Kawasaki KLX300 is available now.
- Gasoline capacity: The bike’s 7.9-liter gasoline tank is only moderately large. This may reduce its range on long rides.
- Weight: The KLX300 weighs more than some of the other bikes in its class. That could make it less agile and maneuverable on particular types of terrain.
Honda CRF300L vs Kawasaki KLX300
The Kawasaki KLX300 and Honda CRF300L are both off-road bikes. Although the two motorcycles share certain similarities, they also differ significantly.
A liquid-cooled 286 cc engine delivers smooth power and torque on the Honda CRF300L. The slim design of the bike makes maneuvering it through tight spaces easy. The Honda CRF300L offers excellent stability and control on rough terrain. On the other hand, a liquid-cooled 292 cc engine powers the Kawasaki KLX300.
See the ultimate showdown.
Which Bike is the Best? Honda CRF300L Vs Kawasaki KLX300
To determine which adventure bike is best for off-road enthusiasts. The rider’s preferences and needs must be taken into consideration. It is a great adventure bike with unique features is both the Honda CRF300L and Kawasaki KLX300.
The Honda CRF300L is a great choice if you are looking for a lightweight, agile bike suitable for tight spaces. Off-road rides on this bike are comfortable and controlled thanks to its long-travel suspension system. A Kawasaki KLX300’s disc brakes improve rider safety by providing excellent stopping power.
As a result, the Honda CRF300L is more suitable for riders who value fuel efficiency, lightweight, and affordability. While the Kawasaki KLX300 may be better for riders who value suspension adjustability and braking power.
Comparison Of Honda CRF300L Vs Kawasaki KLX300
Price
Several choices can be made here. You can’t go wrong with either bike, as both are available for under $6000. The Honda has a lower MSRP ($5249) than the Kawasaki ($5599), the other bike we compared. It’s not a significant change, but that’s a lot of cash for gas.
The Honda CRF300L may be equipped with anti-lock brakes. However, the KLX300 cannot. If you want ABS on your Honda, expect to pay an extra $300—still $50 less than the Kawi. With the KLX, however, you can choose between the classic Kawasaki Lime green and the stealthy Fragment Camo gray. The price of the Camo model is $200 higher than that of the standard green model. There’s just one color option for the Honda: red, but you wouldn’t like it any other way. This brings us to the next group.
Style
The Honda easily outperforms the Kawasaki in this situation. While the Honda is sleek and sporty, the Kawasaki appears dated and uninteresting.
It’s not that the KLX is an ugly motorcycle; it’s merely that the CRF300L is so much more attractive. The CRF300L is next to Honda factory motocross bikes like those that Ken Roczen and Chase Sexton rode at the RedBud National.
The Honda’s paint job, decals, and black rims are all quite sharp. In contrast, the KLR300 comes off as staid and unimaginative. The Camo version of the Kawi, with its blacked-out frame and black rims, looks more contemporary, but our reviewers reacted differently to this feature. Some folks dig it. Others are meh about it.
Comfort ness
Determining a definite victory between these two bikes is challenging since they are both incredibly comfortable. The riding position on both bikes is laid-back, enabling riders to traverse smooth and uneven terrains easily. The Honda bike’s seat is marginally more padded and lower than the handlebars.
Nevertheless, we have observed that the Honda’s L seat foam tends to wear out quickly, potentially causing discomfort based on experiences. In contrast, the 300’s seat appears to be holding up well up to this point, but its durability can only be determined over time.
The Kawasaki motorcycle boasts a seat height that is slightly elevated in comparison to its pegs and handlebars, offering a more spacious feel for riders with a taller stature. However, the footpegs must be more robust in the bike’s ergonomic design. Their diminutive size demands some acclimation time. Riding both motorcycles in succession illuminates that the Honda’s more generously sized pegs provide a heightened level of stability.
The height of the bike’s seat is a crucial consideration for many riders, particularly those new to riding or shorter in stature. Being able to place both feet firmly on the ground when the bike is stationary can provide a boost in confidence. Unfortunately, there is only one easy solution if the seat height meets your needs.
For example, Honda and Kawasaki bikes have similar seat heights, around 35 inches, but the Honda’s seat is slightly lower at 34.6 inches compared to the Kawasaki’s 35.2 inches. To determine which bike is a better match for you, visit your local dealer and sit on both bikes without taking a test ride. This will help you make an informed decision about which bike suits your needs best.
Suspension
Alright, things are beginning to break apart. In terms of suspension, one option is superior to the other. Think back on that extra $350 you dropped on the Kawasaki. You may now look at what you get in exchange for those additional dollars: superior suspension.
Kawasaki KLX300
Kawasaki, following in the footsteps of its predecessor, the KLX250, equipped the KLX300 with some very respectable suspension parts. A relatively advanced 43mm inverted (USD) cartridge fork is upfront. The “cartridge” element is essential since it allows for the adjustment of damping, in this instance, both rebound and compression, with 16 “clicks” each. The cartridge also stops oil and air from mixing for more stable damping. The Honda also features 43mm USD forks, but unlike the Yamaha, these are not cartridge-adjustable.
Both bikes have a single shock mounted on a linkage at the rear. Kawasaki calls theirs Uni-Trak, whereas Honda calls theirs Pro-Link. They share a standard structure despite dissimilar names. Kawasaki’s fork and shock are adjustable in 16 ways for compression and rebound. But the surprise is more high-tech, with a piggyback reservoir with a springy preload. All fantastic features rarely found on motorcycles cost less than $6000—my compliments to Kawasaki.
Honda CRF300L
To save money, Honda took a different approach. K’s Honda only provides these with the L’s suspension after adjusting the preload on the shocks soon. Honda aimed for a low suggested retail price because it believes the bike’s intended audience of novice riders won’t appreciate the additional value offered by a more expensive shock. Honda could very well be correct. After all, the L has been very successful for Big Red in terms of sales.
The CRF’s basic suspension may be unrefined, but it serves the beginner well. Again, a novice rider will give little of a second thought to the factory, setting it up with very soft spring and damping. On the other hand, intermediate and advanced riders will fast outpace the under-sprung, thus under-damped shock. And it will have to spend much more than $350 to fix the problem.
Highly skilled riders will appreciate the adjustability of the Kawasaki’s shock. That is factory-set to be significantly stiffer than the Honda’s but still a touch on the softer side overall.
The fork on the Honda is just as mushy as the shock. The Kawi’s division is also plush, but its stiffness may be adjusted, unlike the Honda’s.
The Kawasaki’s suspension is comfortable for new riders and provides a good ride for more experienced, aggressive riders. On a similarly technical trail, the Kawasaki can be pushed far further before the suspension gives up than the Honda.
You may not notice the disparity between the two suspensions if you are a novice rider. But the experts and larger riders will find the Kawi’s rest superior.
Handling
The Kawasaki’s better performance is due to its superior suspension, making riding at high speeds and navigating rough terrain easier. On the other hand, the Honda’s front end tends to feel unstable due to the soft rear shock that squats down while turning. However, both bikes are suitable for beginners and can be ridden safely with confidence.
The Honda and Kawasaki weigh just over 300 pounds with fuel, making them relatively light despite not being overly hefty. The Honda is only nine pounds heavier than the Kawasaki. However, some riders may perceive it as being lightweight or at least comparable to the Kawasaki due to the Honda’s low seat position and low center of gravity.
Both bikes behave similarly at low speeds, but the Honda will cause you to lose confidence sooner than the Kawasaki.
Brakes
Our analysis revealed that the Kawasaki outperformed the Honda regarding braking capabilities, as its front brakes exhibited a more significant initial bite. Conversely, the Honda’s front brakes felt comparatively soft and necessitated more lever pressure for sudden stops. Nevertheless, this aspect could prove advantageous for novice riders still acclimate to operating the front brakes, given that the Honda’s brakes are more forgiving than those of the Kawasaki.
Within this particular category, no single contender stands out as the clear victor or vanquished. Nevertheless, we wish to extend recognition to Honda for equipping their offering with ABS. You can deactivate this feature for off-road maneuvering. Even our seasoned testers appreciate the availability of front ABS on dual-sport motorcycles. It’s important to mention that the specific Honda model we evaluated did not come equipped with ABS.
Engine Performance
When it comes to how well their engines function, it’s a toss-up. They’re both great performers, but in their unique ways. The Honda gained the most performance from the year-over-year increase in engine capacity.
These bikes are fun for seasoned trail riders because they can chug over easy terrain, quickly accelerate out of corners, and climb reasonable hills. The Kawasaki had more power when shifting gears during drag races, but our test riders did not notice any significant difference. Since the CRF is 12cc more minor than the KLX (from 286cc to 298cc), this didn’t come as much of a surprise.
Again, novice riders should benefit from the Honda’s superior low- and mid-range performance and torque, as one of our testers reported. Both bikes were free from bothersome vibrations. Neither motorbike had any issues maintaining a steady 60–65 mph when traveling.
Did you know the Kawasaki and Honda bikes can hold around 2.0-2.1 gallons of fuel? That should be enough to get you going, whether you’re a beginner or an experienced rider.
Conclusion: Honda CRF300L Vs Kawasaki KLX300!
Rider preferences, needs, and intended use will ultimately determine the winner between Honda CRF300L vs Kawasaki KLX300. Which one will you choose? Test ride both bikes to decide which feels better and suits your’s style before making a decision. The Kawasaki KLX300 and Honda CRF300L are both excellent adventure bikes. Your preferences and needs will determine what bike is best for you.
FAQs
Which bike is more fuel-efficient, the Honda CRF300L vs Kawasaki KLX300?
The Honda CRF300L is more fuel-efficient than the Kawasaki KLX300 due to its smaller engine and lighter weight. The CRF300L has a fuel tank capacity of 7.8 liters, while the KLX300 has a larger fuel tank capacity of 7.7 liters.
Which bike has better off-road capabilities?
The Kawasaki KLX300 has an adjustable rear shock and larger front and rear disc brakes than the Honda CRF300L.
Which bike is more suitable for long highway rides?
Neither bike is designed for long highway rides. However, the Honda CRF300L might be cozier. The Kawasaki KLX300’s minimalist design offers little wind protection.
Which bike is more affordable, the Honda CRF300L or the Kawasaki KLX300?
The two motorcycles are only slightly different in price. The ultimate decision is based on the rider’s needs and preferences.
Which bike is better for beginners, the Honda CRF300L or the Kawasaki KLX300?
Beginners can ride any bike. The Honda CRF300L might be a better option because of its smaller engine, lighter weight, and more comfortable seat.

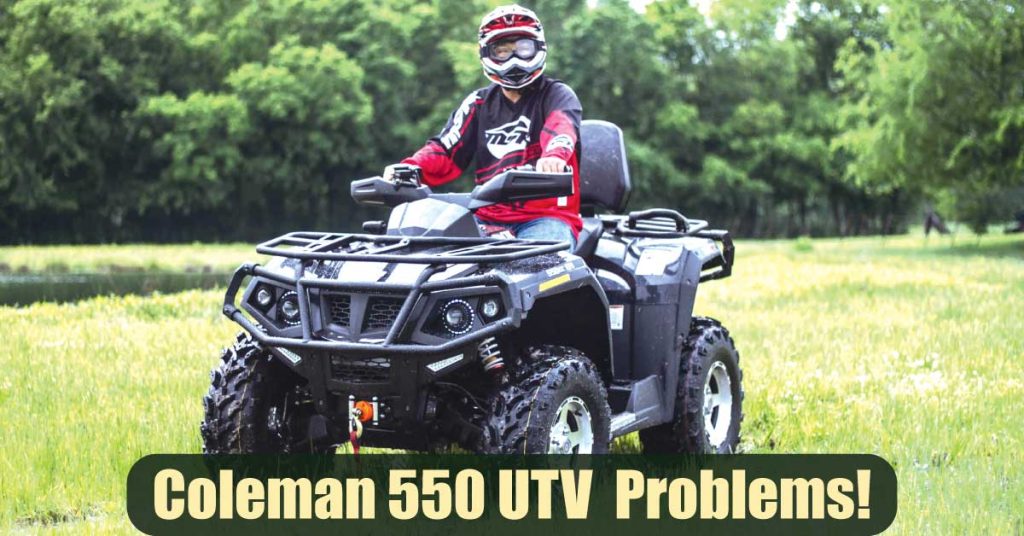
Coleman 550 UTVs are popular off-road vehicles. Although it is a reliable, easy-to-use vehicle, there are many Coleman 550 UTV problems. However, this vehicle’s affordability, accessibility, and features make it an appealing choice for many consumers.
It’s hard to find a better UTV than the Coleman 550. The Coleman 550 UTV has won the approval of many users, but some users need help to avoid issues.
The major problems in Coleman 550 UTV include gummed throttle bodies, sputtering, battery issues, the engine failing to start, improper valve clearances, faulty spark plugs, faulty temperature sensors, and blown head gaskets.
Let’s see the Coleman 550 UTV problems and solutions.
What are the Coleman 550 UTV Problems?
Engine failure is one of the most bothersome Coleman 550 UTV problems. In some cases, the engine will start and turn over. Some fundamental factors can account for the failure. They consist of the following:
1. A faulty or frozen battery
If the battery dies, your UTV’s engine won’t turn over. Check your battery with a multimeter. Your battery is good if the multimeter displays 12 volts. If not, it is gone forever.
Fortunately, replacing dead batteries is simple. To start the battery, use jumper cables, and to recharge it, use a compatible charger. The engine should start right away if you can revive your dead battery.
2. Insufficient Valve Clearance
The Coleman 550 UTV has an intake and outlet valve. The valve draw in air and remove exhaust air. Adjusting valves either too tight or too loose affects the clearance. In the first scenario, in particular, this may result in engine failure.
To check the intake valve clearance on your UTV, follow these steps.
- Rotate the crankshaft to position the engine at TDC (Top Dead Center).
- To select a gauge that fits, situate the feeler gauge alongside the cam and the shim bucket and alternate between them.
- While fitting the feeler gauge shouldn’t require much force, there should be some resistance.
- The ideal feeler gauge will reveal the valve clearance range.
- Repeat the same for the outtake valve, but place the feeler gauge between the exhaust rocker arm and the shim this time. We must now adjust the valves to the manual’s recommended clearances.
- To accomplish this, take out the cam and swap out the shim underneath.
For a practical idea on Coleman 550 UTV running issues you can check this out
3. Suspension Issue in Coleman 550 UTV
Choosing the correct suspension is crucial while off-roading. Since your UTV will bounce up and down without the proper suspension, your ride will be uncomfortable and risky.
Due to its nitrogen-filled MacPherson independent dual A-arm front and rear suspension, the Coleman 550 is popular among UTV riders. While these suspensions are sufficient for the UTV at higher speeds.
Several riders have complained that they are uncomfortable when traveling over the highlands.
The mechanism in 4WD mode causes this, which triggers a complete differential lock mode when a button is pressed. It’s essential to know the terrain, drive cautiously, and watch out for pushing the UTV too hard if you want to reduce the annoyance.
4. Engine problems in Coleman 550 UTV
- Faulty Spark Plugs in Coleman 550 UTV
One of the most frequent Coleman 550 UTV problems is dirty or poorly connected spark plugs. The engine can’t start because the spark plugs are filthy or malfunctioning. For corrosion or accumulation, inspect the spark plug.
Sand the spark plug to remove grit and file the spark plug to remove tough buildup. A wire brush and carb cleaner should then be used to remove the thread debris. Dry the spark plug before reinstalling. Change out rusted spark plugs for fresh ones.
- Stale Fuel
The gasoline will go stale if you keep your Coleman 550 UTV idle for a short time. A thin layer of stale fuel accumulating on engine parts is quite harmful. This might cause issues, including idle or total engine failure. After replacing the fuel, the engine should restart; however, before doing so, use Sea Foam Motor Treatment to clear the fuel lines of any debris and old fuel.
5. Overheating problems in Coleman 550 UTV
The engines of Coleman 550 UTVs are susceptible to irreversible damage because of their propensity for overheating. The following variables trigger overheating:
- Clogs in the Coleman 550 UTV Coolant System
For the radiator to cool down and prepare for another cycle, the water pump transfers hot coolant. Occasionally, air from the fan might enter the water pump and obstruct the flow of coolant to and from the radiator, resulting in overheating.
To correct this, move the front end of the UTV up a steep hill. After the engine has cooled down enough, remove the radiator cap and bleeder bolt. Until the coolant exits the bleeder line, fill the radiator with coolant. Reinstall the bleeder bolt, then finish topping off the radiator with coolant. As a result, we should resolve the problem of overheating.
6. Faulty Temperature Sensor in Coleman 550 UTV
The temperature sensor detects the coolant temperature and activates the electric fan when it reaches a particular degree. The radiator fan doesn’t operate when this sensor malfunctions, which causes overheating and other issues with the Coleman 550 UTV.
Bypass switches or new temperature sensors can be used to overcome this problem. By bypassing the temperature sensor, this switch enables you to operate the radiator fan whenever possible. However, it is preferable to replace the temperature sensor.
- Blown Head Gasket in Coleman 550 UTV
The head gasket will blow if it overheats. A burst head gasket causes air and fuel leaks, worsening the overheating issue.
You must disassemble the engine and inspect the head gasket yourself to determine whether you have a blown head gasket. You can consult a mechanic to determine if you should fix or replace the blown head gasket.
7. Clutch problems in Coleman 550 UTV
Coleman 550 makes use of the wet clutch. The clutch is lubricated with engine oil. A wet grip is ideal for prolonging the life of the transmission, but these clutches are prone to malfunctioning in many cases.
You can notice when you initially rev your machine, it moves slower than it should. It is a sign your clutch may be slipping due to worn or clutch shoes. Then you need to replace it as early as possible.
A wet clutch may fail for several reasons. For instance ;
- Driving in high gear at low speed
- Hauling heavier loads in high gear
- The use of regular motor oil rather than oil approved for wet clutches.
8. Engine Sputtering and Idling in Coleman 550 UTV
Although the Coleman 550 UTV can perform heavy-duty work, the engine has choppy idles, sputters, or complete stalls. Most owners find this annoying, but there is a simple solution. There are two causes of idling and sputtering in engines, and they are as follows:
- The Safety Feature on Seat Belts of Coleman 550 UTV
A safety belt feature on the Coleman 550 UTV prevents the vehicle from entering limp mode. When your safety belt is fastened, a sensor in the belt only permits limp mode, which keeps the speed at 6mph. Because of this, the engine sputters, which is bothersome for drivers who don’t want to fasten and unfasten their seatbelts while driving.
Fortunately, there is an easy fix for this issue. Just purchase a seat belt blank to connect to the seatbelt for short rides. Remove the blank and use the authentic seat belts on lengthy, perilous journeys.
- Gummed Throttle Body in Coleman 550 UTV
The throttle body gets sticky as soot, dust, and particles build up. The UTV’s performance could be better by this stickiness since it causes stalling and sputtering. Gum can be used to clean the throttle body and solve this issue.
Here’s how to go about doing that:
- Take your UTV’s throttle body out. Specifically, in the region where the shaft is held, clean the throttle body of any debris with a wire brush.
- To get rid of tenacious dirt clumps, spray with carburetor cleaner. Watch the motion of the throttle body as you turn the key.
- The throttle pushed the body back. Your throttle body will only clog up if you clean it occasionally. For routine use, do this every 30,000 miles and every 20,000 miles if you go through dusty or muddy terrain.
What are the top features of the Coleman 550 UTV?
Engine
The engine’s specifications are enough to make anyone swoon. A four-stroke motor powers the Coleman 550 UTV. The cylinders’ cooling system relies on liquid. The engine also features a bore stroke. It has a very respectable displacement ranging between 500 and 546 cubic cm. This UTV offers a dependable compression ratio of 9.6:1. One notable feature of the engine is its power, which is 20-22.5HP. There is a 28-liter (7.4-gallon) fuel economy in the machine.
Powertrain
The vehicle’s powertrain is controlled automatically. Produces two different speeds. Compatible with the CVT gearbox. These requirements ensure that a Coleman product is simple to use. And the back is dual as well. Having both rear-wheel drive and all-wheel drive (2WD) is included. Electronic power steering is also included in the package. Regarding providing extra reliability, the EFI’s Delphi nature is crucial.
Spark Plug
It has an electronic starter. A separate toggle manages the ignition. This UTV requires a 12-volt battery with a Cold Cranking Amp rating of 300 CCA.
Scale Of Lubrication
This UTV has a unique oil filter. Hence, it has a limited lubrication range and oil volume. This UTV should be lubricated with SAE 10W-40 or 10W-30 oil for optimal operation. DOT 3 braking fluids are the industry standard and never fail to perform.
Wheels
Aluminum is used for the rims. It has AT26 X 9-14 wheels up front. However, the rear wheels have a dimension of AT26 X 11-14. The wheel rims are also a good fit. These help the vehicle maintain stability when traveling through rough terrain.
Brakes
The front brakes are wet discs. Axle brake pedals are located in the back. Specialized hydraulic disc brakes with vents are standard on several Coleman UTV models.
Suspension
The front and rear suspensions each have a pair of A-arms. These MacPherson arms are filled with nitrogen. The rest provides a remarkable turning radius as well. The vehicle’s stability is increased as a result. One of the best features of a 4WD system is how it prevents the tires from slipping. The various locking modes can also be accessed with a single button.
What’s the Benefits and Drawbacks of Coleman 550?
As far as possible, we’ve covered the most often encountered issues with the Coleman 550. It is time to weigh the benefits and drawbacks of Coleman 550.
Benefits
- With a 500 cc engine, it has a lot of power thanks to an increase in displacement of 16%.
- Exceptional quickness is available from idle speeds.
- This utility vehicle has all the conveniences you might want.
- These UTVs are affordable options.
- You can trust these on just about any trail surface.
- None of the quads’ owners reported braking issues.
- Each Coleman 550 UTV comes with a one-year warranty. Depending on the dealer, the maximum allowed age could be as high as two years.
Drawbacks
- When the UTV’s rev limit is exceeded, it may experience numerous jolts.
- Having to use the parking brake all the time might get annoying.
- Measuring the equilibrium between suspensions could take some time.
- Air pressure can change along the trail.
Final Thoughts about Coleman 550 UTV problems
A typical UTV with average power and performance is the Coleman 550. This quad is competitively priced and capable, yet there may be some limitations, such as the requirement for independence while handling mechanical concerns.
For the vehicle to operate at its optimum, it is critical to be aware of its limitations and to execute regular maintenance. The Coleman 550 UTV is ultimately up for purchase by the user. You should be able to get the most out of your Coleman 550 UTV now that you understand its most common problems.
FAQs
What qualities does the Coleman 550 UTV possess?
To ensure the comfort and functionality of this UTV, it has a variety of amenities. These include independent suspension, hydraulic disc brakes, a digital dashboard display, and a two-inch hitch receiver. A roof, tilting steering, and adjustable seats protect the car’s occupants from the elements.
How much does the Coleman 550 UTV costs?
The Coleman 550 UTV’s pricing varies depending on the retailer and any relevant special offers. The car’s MSRP was about $8,000 as of 2021.
Why is it difficult to start a car?
A dead battery or a damaged starter motor are the two most typical reasons a Coleman 550 UTV has trouble starting. A dirty spark plug or a blocked fuel filter are some additional probable culprits.
How would I repair the brakes on my Coleman 550 UTV?
A defective master cylinder, worn brake pads, or damaged brake lines can all lead to brake problems in a Coleman 550 UTV. You might need to swap out the broken components or bleed the brake system to solve the issue.
How can I keep my Coleman 550 UTV from having issues?
It’s crucial to do routine maintenance, such as oil changes, filter replacements, and brake inspections, on your Coleman 550 UTV to avoid issues. Additionally, you should refrain from overloading the car and operating it in hazardous situations. Additionally, always operate and maintain your UTV in
Honda Pioneer offers a variety of side-by-side utility vehicle (UTV) models that are tailored to different needs and tastes. Users can select the Honda Pioneer model that best meets their needs from a variety of models each with distinctive features and specs. There are thus a lot of differences when comparing the Honda Pioneer 1000-5 vs 700-4.
The best model for your unique needs should take into account aspects like seating capacity, power, load capacity, size, and maneuverability.
So now let’s have a look at the major differences between Honda Pioneer 1000-5 and Pioneer 700-4. This article might help you to choose your next UTV.
Honda Pioneer 1000-5 Vs 700-4: Key Specification at A Glance!
Honda Pioneer 700-4 Key Specifications
- Engine: OHV, liquid-cooled single-cylinder
- Displacement: 675cc
- Bore x Stroke: 102.0 x 82.6mm
- Compression Ratio: 9.2:1
- Transmission: Torque converter three-speed automatic w/ reverse; manual mode on Deluxe
- Horsepower: 36
- Fuel System: PGM-FI fuel injection w/ 40mm throttle body
- Steering: Electric power steering on Deluxe model
- Drivetrain: Selectable 2WD, 4WD, and 4WD w/ diff-lock
- Suspension: Independent double wishbone, 7.9 in. travel
- Brakes: Dual 200mm hydraulic discs
- Wheelbase: 76.8 in.
- Bed Capacity: 1,000 lb.
- Towing Capacity: 1,500 lb.
Honda Pioneer 1000-5 Key Specifications
- Engine: Unicam liquid-cooled parallel twin
- Displacement: 999cc
- Bore x Stroke: 92.0 x 75.2mm
- Compression Ratio: 10.0:1
- Transmission: 6-speed dual-clutch automatic w/ reverse
- Horsepower: 72 hp
- Fuel System: PGM-FI fuel injection w/ 44mm throttle bodies
- Steering: Electric power steering
- Drivetrain: 2WD/4WD/front and rear diff-lock, turf mode; Honda i-4WD
- Suspension: Independent double wishbone; 10.6 in. travel
- Brakes: Hydraulic 210mm discs
- Wheelbase: 80.2 in.
- Bed Capacity: 1,000 lb. (49-state) / 600 lb. (CA)
Honda Pioneer 1000-5 Vs 700-4: Key Features
ENGINEERING
Exclusive i-4WD system is featured in the Pioneer 1000-5 Trail and Forest. This brake-traction control mechanism for side-by-sides, a first in the industry, makes operation simpler, improves manoeuvrability, and maximizes traction.
While You have two options when shifting gears with the Honda Pioneer 700-4 Deluxe and Forest: you can let the automatic transmission do it for you, or you can take control and select the gears yourself using the paddle shifters placed on the steering column.
PERFORMANCE
All Pioneer 1000-5 models receive a ton of power from the potent 999cc Twin-Cylinder Engine, especially in the midrange and high end. As a result of the reduced gear ratios, you’ll experience rapid acceleration and excellent overall performance.
While the 700-4, however, receives its power from the 675cc four-stroke single. In addition, it has reduced cabin vibration thanks to rubber mounting, dependable starts, and performance in bad conditions thanks to fuel injection. Moreover, it has a track record of delivering thrill after thrill.
Despite the fact that both models have automatic transmissions, the Pioneer 1000-5 has a more sophisticated Dual-Clutch Transmission (DCT). For greater control and agility in various driving situations, the DCT offers both automatic and manual shifting modes.
HANDLING
The Pioneer 1000-5 has massive ground clearance, independent front and rear suspension with lengthy travel, and wider tires. The engine and exhaust system are positioned on rubber mounts to reduce excessive vibration, and the self-leveling rear suspension adapts to shifting loads.
While the new next-generation brushless motor and new return-to-center feature are features of the 700-4. As usual, there are no belts or pumps that could snag, malfunction, or leak.
VERSATILITY
Both UTVs are adaptable and can traverse a variety of terrain. The two rows of seating on the Pioneer 700-4 may hold up to four passengers. The Pioneer 1000-5, on the other hand, offers more room for passengers and has two rows of seating in addition to a rear bench seat, which can hold up to five people.
Although the Pioneer 1000-5 has a larger cargo bed, both models have a cargo bed at the back. Although the Pioneer 700-4 has a slightly larger cargo bed, it has a somewhat lower weight capacity of up to 1,000 pounds (453.6 kg).
SAFETY
Large-diameter tubing is used in the Pioneer 1000-5’s Occupant Protection Structure, which complies with ISO’s rollover protection requirement. Hard doors and roll-up side nets prevent debris from entering the cabin, and emergency locking retractor mechanisms are included in auto-style three-point seatbelts to enhance passenger security.
The ISO rollover protection requirement is reached by the Pioneer 700-4’s Occupant Protection Structure, which uses large-diameter tubing.
Honda Pioneer 1000-5 vs 700-4 Pricing
Compared to the Pioneer 700-4, the Pioneer 1000-5 often comes with a higher price tag. While the 700-4 costs between $11,799 and $16,899, the Pioneer 1000-5 is roughly $21,499 in price.
Think about your spending limit for a UTV and your budget. The Pioneer 700-4 can present a more cost-effective choice if price is a major consideration.
Honda Pioneer 1000-5 Vs 700-4: Pros & Cons
Here are some pros and cons of the Honda Pioneer 1000-5:
Pros of the Honda Pioneer 1000-5
- Up to five passengers may sit comfortably in the Pioneer 1000-5, giving it a fantastic option for larger groups or families.
- The Pioneer 1000-5’s 999cc engine provides strong power and torque, enabling it to handle difficult terrain and heavy loads.
- The flexible rear seating and roomy cargo bed with hydraulic-assist tilt feature allow you to transport people or tote goods.
- The sophisticated DCT provides seamless and accurate gear changes in both automatic and manual shifting modes.
Cons of the Honda Pioneer 1000-5
- In comparison to lesser UTVs, the Pioneer 1000-5’s bigger size can make it harder to manoeuvre in confined situations or along narrow tracks.
- The Pioneer 1000-5 tends to be more expensive than smaller UTV models, which can be a concern for individuals with limited funds.
Here are some pros and cons of the Honda Pioneer 700-4:
Pros of the Honda Pioneer 700-4
- The Pioneer 700-4 offers improved agility and simplicity of handling due to its smaller size, which makes it easier to navigate in confined situations and along narrow routes.
- The Pioneer 700-4 often has a lower price point than larger UTV models, making it a desirable alternative for individuals on a tight budget.
- With its automatic transmission, the Pioneer 700-4 is simple and trouble-free to operate for users of all skill levels.
Cons of the Honda Pioneer 700-4
- Despite having enough power for many uses, the Pioneer 700-4 may not have as much power and torque as larger UTV models, which would limit its performance in more demanding circumstances.
- The Pioneer 700-4’s cargo bed has a little lesser capacity than that of larger UTVs, which may limit the amount of cargo that can be transported.
Honda Pioneer 1000-5 Vs 700-4: which one to choose?
In the end, which model you choose—the Honda Pioneer 1000-5 or the Pioneer 700-4—depends on your own requirements and objectives. The Pioneer 1000-5 is a superior option because it has an additional seat if you routinely transport up to five persons or need more seating space. The Pioneer 1000-5 also has a larger engine, which produces greater power and torque and qualifies it for heavy loads and difficult terrains.
Additionally, it has a greater cargo bed capacity, which is helpful if you frequently transport bulkier or heavier objects. However, the Pioneer 700-4 offers enough space for four passengers and is more affordable than the Pioneer 1000-5 if you have a smaller group and don’t need seats for five.
Its reduced size also improves mobility in confined areas and on narrow routes. In order to make an informed choice, take into account these aspects in addition to your spending limit and particular usage needs.
What are the Off-Road Capability and Durability Differences Between Honda Pioneer 1000-5 and 700-4?
Compared to the Honda Pioneer 1000-5 and 700-4, the Pioneer 1000-5 is more capable off-road and durable. Generally, the Pioneer 1000-5 is equipped with a more powerful engine, offering greater horsepower and torque for improved performance in challenging off-road conditions, especially when tackling steep inclines.
Furthermore, the Pioneer 1000-5 typically has a more advanced suspension system that offers longer travel and adjustable shocks to enhance bump absorption and traction. Due to its high ground clearance, the Pioneer 1000-5 is able to overcome obstacles more effectively and is less likely to bottom out as a result.
Moreover, the 1000-5’s longer wheelbase enhances stability at higher speeds, while the 700-4’s shorter wheelbase is more maneuverable in tight quarters. With durable frames and skid plates, both models are designed to endure off-road impacts and stresses.
There may, however, be differences in certain features, such as differential locks and tire options, which may influence their off-road capabilities.
Unlike the Honda Pioneer 700-4, the Honda Pioneer 1000-5 combines maneuverability and durability with enhanced power, suspension, and clearance, ensuring it is well-suited for demanding off-road adventures.
User Experiences of Honda Pioneer 1000-5 Vs 700-4
Detailed user reviews of the Honda Pioneer 1000-5 and 700-4 can provide valuable insights into their ownership and performance. Powerful engines in the Pioneer 1000-5 provide impressive acceleration and towing abilities, allowing owners to traverse rugged terrain and conquer challenging off-road trails without a worry.
Up to five passengers can be comfortably accommodated in the 1000-5’s spacious seating arrangement, making it a good choice for larger groups or families. In contrast, the Pioneer 700-4 is praised for its maneuverability and versatility, offering a compact design that excels on tight trails.
Depending on the configuration of the seats, the 700-4 can accommodate up to four passengers or expand the cargo area by folding the rear seats. In addition to their robust construction and ability to endure demanding off-road adventures, users appreciate the durability and reliability of both models. It is important to note, however, that individual preferences may vary depending on factors such as seating capacity requirements, the desire for more power, or the importance of maneuverability in various off-road situations.
Users can make informed decisions based on their specific requirements and preferences based on actual experiences with the Pioneer 1000-5 and 700-4, which provide real-world insights into their strengths and advantages.
Conclusion
Both the Honda Pioneer 1000-5 and 700-4 are superior UTVs for everyday use. However, there may be distinct benefits and drawbacks depending on your demands.
Therefore, it’s wise to weigh these advantages and disadvantages in light of your individual needs before making a choice. The Pioneer 1000-5’s suitability for your intended uses can also be determined by taking it for a test drive or talking to a Honda dealer.
FAQ
What distinguishes the Honda Pioneer 1000-5 from the Pioneer 700-4?
The seating capacity, engine output, and overall dimensions of the Honda Pioneer 1000-5 and 700-4 differ most significantly from one another. The Pioneer 1000-5 can handle up to five passengers, whereas the Pioneer 700-4 can hold up to four.
How many people can the Honda Pioneer 700-4 and 1000-5 carry?
With three front row seats and a bench seat in the back for two passengers, the Honda Pioneer 1000-5 has room for up to five passengers. In contrast, the Honda Pioneer 700-4 has a fold-down rear seat that can accommodate two additional people and has two seats in the front row..
What is the difference in engine power between the Honda Pioneer 700-4 and 1000-5?
Compared to the Honda Pioneer 700-4, the 1000-5 has a more potent engine. A 999cc twin-cylinder, liquid-cooled engine with excellent power and torque powers the Pioneer 1000-5. The Pioneer 700-4, in comparison, is propelled by a 675cc single-cylinder, liquid-cooled engine.
Are there any differences between the Honda Pioneer 1000-5 and the 700-4 in terms of load capacity?
Yes, the Honda Pioneer 1000-5 and the 700-4 have different cargo capacities. The Pioneer 1000-5 has a bigger cargo bed and a 1,000-pound payload limit. For simple loading and unloading, it also has a tilt function with hydraulic assistance. On the other hand, the Pioneer 700-4 has a smaller cargo bed and a maximum weight of 1,000 pounds.
What are the suspension and handling differences between the Honda Pioneer 700-4 and 1000-5?
The suspension systems and handling qualities of the Honda Pioneer 1000-5 and the 700-4 are dissimilar. With completely independent front and rear suspensions and extended suspension travel, the Pioneer 1000-5 offers a smoother ride and greater off-road performance. However, the Pioneer 700-4 uses a dual-wishbone suspension at the front and back, providing excellent handling and comfort on a variety of terrains.
Understanding the weight of a UTV may prove crucial when choosing the right UTV to purchase. For example, the Honda Pioneer 1000 Weight is roughly 1777 pounds.
If you’re in search of a new UTV or what individuals call a side-by-side or SXS, there are several factors to consider before making a purchase. Especially the weight of the UTV you intend to purchase may be one of the most essential factors.
So, determining the weight can assist you in selecting the appropriate UTV.
For instance, if you intend to transport your UTV on a trailer, you must know the weight of the model you want to buy. Because you want to make sure that the vehicle or SUV you intend to use to tow it can manage the weight of the UTV. The same applies to the trailer, which may buckle or shatter if the UTV you buy is too weighty.
Therefore, in this article, we’ll take an in-depth look at the Honda Pioneer 1000 weight, along with other information that will assist you in making a purchasing decision. Therefore, continue reading to learn various details about the Honda Pioneer 1000’s weight.
Honda Pioneer 1000 Overview
The Honda Pioneer 1000 is the company’s top model for 2023. Nothing in the Honda lineup or the market comes close to this UTV. This is mostly due to its 999cc twin-cylinder engine, which is the largest in its class.
In addition, it includes the first and only 6-speed Dual Clutch Transmission in the industry. As a result, you get a combination of driving capability and sheer power that offers unmatched capacity in the workplace and the trails.
Furthermore, it features the longest axle travel of any versatile side-by-side and completely independent front and rear suspension. And the front and rear differentials that are either open or locked to stop you from unintentionally damaging delicate surfaces. Moreover, the Honda Pioneer 1000 life expectancy is exceptionally high.
Honda Pioneer 1000 Specification
Engine Specs
- Type: Liquid-cooled twin-cylinder Unicam, four-stroke
- Displacement: 999 cm3
- Bore X Stroke: 3.6×3.0 in OR 91 mm
- Horsepower: 72/0 KW(hp)/RPM
- Torque: 0/- lb-ft/RPM OR 0 Nm/RPM
Transmission Specs
- Gearbox: Automatic Dual Clutch Transmission
- Clutch: Wet Multi-plate
Chassis Specs
- Front & Rear Suspension: Independent double-wishbone
- Front & Rear Brake: Double hydraulic discs
Dimension Specs
- Overall Length: 116.8 in
- Overall Width: 62.9 in
- Seat Height: 33 in OR 838 mm
- Ground Clearance: 12.4 in
- Weight: 1777 pounds
Different Types of Honda Pioneer 1000 Weight
Based on various metrics, the Honda Pioneer 1000 could have various weights.
Firstly, dry weight is the UTV’s weight as it would appear on the display floor, without any oil, fuel, or other liquids.
However, Honda uses a term known as wet weight, which can alternatively be referred to as curb weight or ready to ride. This refers to the UTV’s weight when it is fully loaded with all of its normal equipment, fluids, and gasoline.
But this won’t add much weight to a UTV and probably won’t be enough to influence your choice to get one.
Last but not least, you could see a Gross Weight UTV listing. This relates to the UTV and the maximum weight it is capable of carrying, including riders and any available accessories.
Honda Pioneer 1000 weight vs Other Honda Models’ Weight
Honda has taken what they’ve learned from their UTVs and side-by-sides and incorporated it into the Pioneer 1000. With lower transmission ratios and extra torque derived from the 999cc twin engine, the new model offers better acceleration, adaptability, and performance.
Moreover, the towing capacity has grown to 1,134 kg, and there is also more ground clearance and bigger tires.
Various UTVs from the Honda lineup have different weights such as-
- Honda Pioneer 500: Approximately 1,025 pounds (465 kg).
- Honda Pioneer 700: Approximately 1,268 pounds (575 kg) to 1,442 pounds (655 kg), depending on the model and options.
- Honda Talon 1000R: Approximately 1,498 pounds (680 kg).
- Honda Talon 1000X: Approximately 1,503 pounds (682 kg).
So, considering this, the 2023 Honda Pioneer 1000 has a much higher weight, but it also has some advantages. For example-
- Low maintenance transmission- Durable, all-gear 6-Speed fully automatic Dual Clutch Transmission (DCT) with manual over-ride mode
- Hydraulic assist tilt bed- Makes moving/dumping cargo a breeze
- Reliable, hardworking powerhouse- Powerful 999cc liquid-cooled twin-cylinder Unicam® four-stroke engine that can tow over a ton!
- Large towing capacity- Towing capacity is now over a tonne (at 1,134kg).
What are the Factors Affecting Honda Pioneer 1000 Weight?
Dimensions
Your UTV’s dimensions will assist you decide whether it falls within the lesser or heavier range. A larger UTV will be considerably heavier than a smaller UTV.
Number of Seats
The seats weigh very little on their own. However, if a UTV has more seats, it will have greater dimensions, as the increased passenger capacity necessitates a bigger vehicle.
Version
The weight of a UTV can also be determined by its year of manufacture. various years frequently produce various brands and models, which can have a substantial impact on the weight.
Aftermarket Accessories
It’s essential to know how much your Honda Pioneer weighs, but you should also be aware that the Honda Pioneer’s weight typically fluctuates. The majority of aftermarket equipment adds weight to the vehicle.
How Does the Weight Affect Honda Pioneer’s Handling?
In sport UTVs, or high-performance UTVs, you won’t need to worry about storage space or hauling abilities, as they go fast and manoeuvre better, without having to worry about storage space. Consequently, they weigh less than utility models, which do not have to accelerate as fast or reach the highest speeds of sports models.
When a vehicle brakes into a corner, it has less weight on the rear wheels (all of the weight has shifted forward). Consequently, the rear end of the vehicle may lose traction, reducing the effectiveness of the rear brakes (the rear brakes cannot brake if the road is not gripped) and causing the rear of the car to slide outward during a corner.
However, in the case of Honda Pioneer, the handling works perfectly fine due to it’s perfect weight distribution.
How to Reduce the Weight of Your Honda Pioneer 1000?
- Wheels
If you want to lose the most weight on your UTV, replacing the stock wheels with high-end aftermarket ones ranks the highest. It makes sense to replace stock wheels if you race MX or off-road because it not only gives you a weight advantage but also better traction and handling. - Remove the Parking Brake
Unless you intend to race an UTV, you won’t see any serious racers using the parking brake. Removing it will save you a few pounds. - Trim the Fat
You can gain weight and lose weight over time if you add the necessary elements to realistically compete in Motocross with a little bit here and there:
Install an air shock in the front of the vehicle
The lead acid battery should be replaced with a lithium battery
Lighter aftermarket exhaust should be used
Make the airbox lighter by replacing it with an aftermarket one
Motocross tires should be used when racing MX, otherwise off-road tires should be used
As a result of all these changes, you get a faster, more responsive UTV thanks to the weight savings.
Does Weight Affect the Fuel Efficiency?
A lighter UTV will use less fuel over time. This may seem obvious, but the lighter your UTV, the less fuel it will use.
In order to move a heavy vehicle, more energy is required. Increasing power requires more energy, which results in more fuel being burned, thus affecting fuel economy. The heavier the vehicle, the more fuel it burns. The lighter it is, the less fuel it burns.
To keep your UTV from being overburdened with weight, minimize how much gear and supplies you bring along with you. Also, consider the weight of all passengers and aftermarket accessories.
How Does the Weight Affect the Safety of Honda Pioneer 1000 UTV?
Utility terrain vehicles (UTVs) are highly dependent on their weight for their safety. Here are some key points to consider:
Depending on the weight of a UTV, it may have a lower center of gravity, which makes it less likely to tip over on sharp turns or uneven terrain. In particular, this stability can increase safety when driving at high speeds or on challenging off-road trails.
In the event of a collision, a UTV that is heavier generally offers increased protection. By adding mass to the chassis, manufacturers can absorb and distribute impact forces, reducing injury risks. In heavier UTVs, manufacturers often reinforce the chassis and incorporate safety features to improve crashworthiness.
Does the weight of the Honda Pioneer 1000 Affect its Towing and Hauling Capability?
When towing and hauling, proper weight distribution is crucial. If the weight distribution is uneven, it can result in uneven handling, reduced stability, and increased accidents. Make sure that the load is evenly distributed across the trailer or UTV bed, and that it is securely secured to avoid shifting during transit.
In addition, the Pioneer UTV’s center of gravity and stability can be affected by the weight of the load being towed or hauled. Excessive weight can increase the risk of rollover, especially when making sharp turns or on uneven terrain. To maintain stability, operators should keep weight distribution in mind and drive cautiously.
Conclusion
It cannot be said that the weight of the Honda Pioneer 1000 is inherently excellent or poor. A UTV’s weight is a design factor that may result in both benefits and drawbacks. The vehicle’s increased weight boosts its Stability, Traction, and Payload Capacity, but reduces its maneuverability, Fuel economy, and transportability.
Whether the weight of the Honda Pioneer 1000 is thought to be good or negative ultimately depends on your particular requirements and preferences. Consider factors such as stability, maneuverability, and payload capacity when evaluating the effect of weight on the off road performance.
FAQs
What is the Honda Pioneer 1000’s maximum carrying capacity?
The Honda Pioneer 1000’s weight capacity varies depending on the model and configuration. It has an average payload capacity of approximately 1777 pounds.
How does the Honda Pioneer 1000’s weight impact its off-road performance?
Weight can have both positive and negative influences on the off-road performance of the Honda Pioneer 1000. The additional weight increases stability and traction, which can be advantageous in difficult off-road conditions.
Can the Honda Pioneer 1000’s weight present an issue in certain situations?
Yes, the Honda Pioneer 1000’s weight can be a disadvantage in certain circumstances. The increased weight can make it more difficult to navigate narrow trails, manoeuvre around obstacles, and transport the UTV on trailers with weight limits. Additionally, a heavier UTV may have a marginally lower fuel economy than lighter variants. Depending on your intended use and the terrain you intend to traverse, it is essential to consider the aforementioned factors.
Is the Honda Pioneer 1000’s weight appropriate for towing?
Yes, the Honda Pioneer 1000’s weight is generally suitable for transporting. The weight and towing capacity of the UTV enable it to tow light to moderate cargo.
How does the Honda Pioneer 1000’s weight compared to other UTV models?
The Honda Pioneer 1000 falls within the typical weight range for midsize UTVs. Generally, it is heavier than lesser UTV models but lighter than full-size UTVs. The Honda Pioneer 1000’s weight can be better understood in the context of the UTV market as a whole if compared to the weight of other UTV models from various manufacturers.
The Jeep Wrangler JK is an iconic off-road vehicle. That is famous for its ruggedness and versatility. Many off-road enthusiasts need an ultimate guide on the Jeep JK Sway Bar disconnect system.
One of the key features that make the JK ideal for off-roading adventures is its sway bar disconnect system. A sway bar is also known as an anti-roll bar or stabilizer bar. This is a component of a vehicle’s suspension system.
You need to explore the Jeep JK sway bar disconnect, explaining its purpose, benefits, installation process, and maintenance tips. For enhancing your Jeep JK’s performance. This guide will provide you with valuable insights to master the sway bar disconnect system.
Let’s improve your off-road performance with enhanced suspension articulation and increased wheel travel. Learn how to maintain and troubleshoot the electronic sway bar disconnect for a smoother and safer off-road adventure.
What is A Sway Bar?
A sway bar is a component that makes up your vehicle’s suspension system. It’s a U-shaped bar made of steel, the bar is connected to the front wheels.
At its core, a sway bar is really just a torsion spring—a piece of metal that reacts to a twisting movement. When your vehicle turns, the sway bar works to level everything out.
The majority of vehicles have a sway bar, (and many cars have two). Sway bars keep your Jeep JK from rolling or leaning in corners. When you’re driving at high speeds, the sway bar supports the vehicle.
Why do you need a sway bar?
Vehicles need a sway bar to handle corners. The sway bar prevents the vehicle from rolling. The idea is to enhance grip and corner control.
A sway bar functions so that one wheel is elevated above the other. Without a sway bar, it can be difficult to keep your vehicle steady. A sway bar works by resistance, it goes against the twisting motion that’s applied when the wheel moves.
The resistance aims to keep the wheels level and connect the components of the vehicle. The mechanism is used to reduce unweighting on either side of the car. If a vehicle leans over to one side, this is called a ‘body roll.’
What are the pros and cons of Sway Bar in Jeep JK?
Pros of Sway Bar in Jeep JK
Improved Stability:
A sway bar’s most significant benefit is its ability to reduce body roll during cornering. When making aggressive turns, taller vehicles with a high center of gravity, such as the Jeep Wrangler JK, are more prone to tipping.
Enhanced Handling:
By distributing weight evenly between the wheels when turning, a sway bar helps make the vehicle more stable. If you drive on uneven or winding roads, you will be able to take better control of the vehicle and receive a more predictable response.
Safer Driving:
A sway bar contributes to safer driving conditions by reducing body roll and keeping the vehicle more level during cornering, especially at higher speeds or during sudden maneuvers.
Reduced Tire Wear:
A more uniform distribution of weight on all tires leads to a more uniform tire wear pattern. By doing so, you can extend the lifespan of your tires and save money over time.
Cons of Sway Bar in Jeep JK
Reduced Articulation
In addition to limiting body roll, sway bars can also limit the suspension’s ability to articulate, which plays a crucial role in off-road performance. As a result of the Jeep’s reduced articulation, it may be less able to handle rough terrain and obstacles effectively.
Stiffer Ride
By installing a sway bar, you can stiffen your suspension, which may lead to a less comfortable ride on bumpy roads or off-road trails. Off-road adventures can be made more comfortable by using softer suspension on Jeeps.
Tire Lift Off
When driving off-road, the sway bar can cause one or more tires to lift off the ground more easily, such as when negotiating steep inclines or rocks. In challenging terrain, this can reduce traction and make the vehicle less maneuverable.
Installation and Adjustments
Even though aftermarket sway bars can be installed, they may require modifications to the suspension system. Increasing maintenance complexity and potential compatibility issues can result.
Cost
It can be expensive to upgrade or modify a sway bar system, especially if you choose higher-end aftermarket parts. In some cases, Jeep owners may not be able to justify this, particularly if they don’t frequently engage in aggressive cornering or off-roading.
Why Disconnect Your sway bars in Jeep JK?
- Sway bars have plenty of benefits. If you enjoy driving off-road, you might consider disconnecting your sway bar. When you do this, you’ll benefit from improved suspension.
- On your Jeep Jk it’s useful to disengage your sway bar. While you’re driving at a high speed. Sway bars are for keeping the wheels level.
- Regardless, when you’re going off-road you’ll want the wheels to move. If you’re driving on uneven ground, it’s important to maintain traction.
- When you disconnect the sway bar, you’ll put less pressure on the wheel axles, and achieve softer suspension. With more axle control, you can tackle large obstacles, and boost your ramp travel index. Disconnecting your sway bar will help you to improve your driving experience.
How to disconnect Jeep JK Sway Bar?
- Here’s a step-by-step ultimate guide on how to Jeep JK electronic sway bar disconnect
- Firstly, ensure that your Jeep is parked on a level surface. Then turned off the engine.
- Locate the sway bar links on both the front and rear axles. The sway bar links connect the sway bar to the axle on each side. The front sway bar links are more accessible and visible than the rear ones.
- You may need to remove components that obstruct access to the sway bar links. Use the appropriate tools to remove these obstacles.
- After that identify the quick disconnect mechanism. Most Jeep JK models come with quick disconnects.
- Use a wrench or socket to remove the retaining pins or bolts that secure the quick disconnects. You may need to hold the opposite side of the bolt or pin with another wrench to prevent it from rotating.
- Repeat the same process for both the front and rear sway bar links.
- After disconnecting the sway bar links, secure them out of the way. To prevent them from dangling or interfering with the suspension components. You can use bungee cords, zip ties, or any other suitable method to secure them.
- Before driving your Jeep, test the suspension movement by rocking the vehicle back and forth. Ensure that there is enough clearance and that no components are binding or interfering with the suspension travel.
This can help you practice electronic sway bar disconnect jk.
How to Reconnect Jeep JK Sway Bar?
- To reconnect the Jeep JK Sway Bar Park the vehicle on a flat. A level surface and engage the parking brake for safety. Then follow these steps:
- Firstly, Check the condition of the sway bar links, the bushings, and any connecting hardware. If any components are damaged or worn out, replace them before reconnection.
- After that loosen the sway bar link bolts or nuts. Use appropriate tools (such as wrenches or sockets).
- Now, reconnect the sway bar links. Tighten the bolts or nuts.
- Take a short test drive to evaluate the effectiveness of the sway bar reconnection. Pay attention to any unusual noises, vibrations, or handling issues. If everything seems normal, the sway bar has likely been successfully reconnected.
Jeeps That Have Sway Bar Disconnect
Jeep Wrangler Rubicon JK, JL, and JT models come with an electronic disconnect sway bar system. They all have standard equipment. That’s allowing drivers to gain advantages.
Jeep Wrangler Rubicon JK, JL, and JT models only need to push of a button when going off-road. Then, when coming off the trail, the sway bar re-attaches with that same button.
What are the maintenance of Sway Bar in Jeep JK?
Maintaining your Jeep Wrangler JK’s sway bar system ensures its proper functioning and extends its lifespan. The following tips will help you maintain your Jeep JK’s sway bar:
Regular Inspection:
Keep an eye out for wear, damage, or corrosion on the sway bar and its components. If you notice any loose bolts, cracked bushings, or bent components, you might want to check them out. It is possible to prevent more significant problems down the road by catching issues early.
Lubrication:
In order to prevent squeaking and ensure smooth movement of the sway bar bushings and links, they should be lubricated occasionally. Make sure your bushings and links are kept in good condition by using a rubber-compatible lubricant.
Cleanliness:
Aside from dirt, mud, and debris, off-roading can expose the sway bar system to a variety of elements. Make sure the sway bar, bushings, and links are cleaned regularly to prevent grime from building up.
Tightening Bolts:
The bolts that hold the sway bar components in place, including the end links and brackets, should be checked. Due to vibration and movement, these bolts can become loose over time. To ensure proper tightening, make sure that all bolts are tightened according to the manufacturer’s instructions.
Replacement of bushings and links: Over time, sway bar bushings and links can wear out, resulting in reduced performance and safety concerns. To maintain optimal sway bar performance, replace these components if you notice cracking or excessive play.
Sway Bar Disconnects:
Check the sway bar disconnects on your Jeep Wrangler JK if they are equipped with an off-road package. You can disengage the sway bar during off-road driving to improve suspension articulation. Make sure they are regularly lubricated and inspected.
Off-Road Considerations:
Use quick-disconnect sway bar links if you frequently engage in off-road activities that require maximum suspension articulation. When you want to improve off-road performance, you can disconnect the sway bar and reconnect it when you want to drive on the road.
Alignment:
If you have performed any maintenance or modifications to your suspension system, including the sway bar, consider having your wheels aligned. By doing this, you will be able to maintain proper alignment of your Jeep’s tires, reducing wear and ensuring that it handles well.
Upgrades:
Maintain and adjust your sway bar system according to the manufacturer’s recommendations if you’re considering upgrading for better performance or off-road capabilities.
Owner’s Manual:
For specific maintenance guidelines and recommendations related to the Jeep Wrangler JK’s sway bar system, consult the owner’s manual.
Conclusion
The Jeep JK sway bar disconnect system is a valuable feature. For off-road enthusiasts who seeking to maximize their vehicle’s capability. It allows greater suspension articulation. The sway bar disconnect enhances traction, stability, and maneuverability over rugged terrains.
However, it’s essential to exercise caution. Reconnect the sway bar before driving on regular roads. To maintain optimal safety and handling. Jeep JK owners should tackle off-road adventures with increased confidence and enjoyment.
FAQ
How does the sway bar disconnect system work in a Jeep JK?
The sway bar disconnect system in a Jeep JK allows the driver to increase suspension articulation. It allows the wheels to move independently for better traction and flexibility. While navigating challenging off-road terrain.
What are the benefits of using a sway bar disconnect system?
It improves suspension articulation, enhances traction on uneven terrain, minimizes body roll during extreme off-roading, and increased wheel travel for a smoother ride.
Can I install the sway bar disconnect system on my Jeep JK by myself?
Yes. The sway bar disconnect system can be installed as a DIY project. If you’re unsure or inexperienced, it’s recommended to seek professional assistance for installation.
How often should I inspect and maintain the sway bar disconnect system?
Regular inspection and maintenance are crucial for optimal performance. Inspect the sway bar disconnect system before and after off-road trips.
How can I adapt my driving techniques with a disconnect sway bar?
With a disconnect sway bar, the Jeep’s handling characteristics may change. Slow down and approach obstacles with caution. Allow the suspension to absorb impacts. Increase your off-road driving skills to ensure a safe and enjoyable experience.
How can I troubleshoot common issues with the sway bar disconnect system?
Common issues with the sway bar disconnect system may include connection problems, unusual noises, or difficulty in reconnection.
Owners of Jeeps often experience Jeeps shaking while driving. But if you’re new to this, you may think, why is my Jeep shaking when idling? So, it’s not uncommon if you’re experiencing a Jeep shaking while idling.
There are several reasons why your Jeep Cherokee or Jeep Wrangler shaking while driving. One possible culprit is the engine itself. If there are issues with the engine cylinders, such as misfires or worn-out spark plugs, it can cause your Jeep to shake and vibrate when idling.
Another possibility could be an issue with your vehicle’s transmission system or low fluid levels. That can cause vibrations through the body of your car even when stationary. Problems in suspension systems like damaged motor mounts or bent axles might also lead to a bumpy ride during the idling.
Here we’ll discuss all the possible causes behind the Jeep shaking while driving. Understanding why your Jeep is shaking while idling will help you identify what needs fixing and keep you safe on the road ahead! Let’s begin!
What are the Different Models of Jeep?
Known for their off-road capabilities, rugged designs, and iconic status, Jeep vehicles are known for their off-road capabilities. Depending on the model, year, and trim level of a Jeep vehicle, the specifications can vary greatly. Until then, here is a brief overview of the Jeep brand and some of its most popular models:
Jeep Wrangler:
- Among Jeep models, the Wrangler is perhaps the most recognizable and iconic.
- The rugged design, removable doors, and fold-down windshield make it a favorite off-road vehicle.
- Some models come with turbocharged four-cylinder engines instead of V6 gasoline engines.
- The Sport, Sahara, and Rubicon trim levels offer different levels of off-road capability and luxury.
- Off-road performance is enhanced by 4WD systems, lockable differentials, and disconnects for the sway bars.
Jeep Grand Cherokee:
- Jeep Grand Cherokee is a midsize SUV that is both capable off-road and comfortable on-road.
- It is available with various engine options, including gasoline V6s and V8s, along with diesel engines sometimes.
- The interior features of the car vary depending on its trim level, from the most basic to the most luxurious.
- It specializes in off-road-oriented trims, such as the Trailhawk, and offers advanced towing capabilities.
Jeep Cherokee:
In addition to providing off-road capability, the Jeep Cherokee is practical and easy to drive on a daily basis.
The vehicle comes with a variety of engines, including four-cylinders and V6s.
It is renowned for its modern design, comfortable interior, and advanced safety features.
Jeep Renegade:
- Subcompact SUV Jeep Renegade designed for urban driving as well as light off-roading.
- Smaller turbocharged engines are often used to improve fuel efficiency.
- With its distinctive design, it is aimed at young, urban-oriented drivers who want some off-road capability as well.
Jeep Compass:
- Between the Jeep Renegade and Cherokee, the Jeep Compass is a compact SUV.
- The vehicle offers a balance between city-friendly features and light off-road capabilities.
- A variety of engines are available along with a variety of features, including safety and infotainment systems.
Most common issues: why is the Jeep shaking while driving?
Jeep owners may have experienced a frightening phenomenon where their vehicle shakes while idling. This can occur for several reasons, but the most common issue includes:
- An engine misfire
- Worn-out spark plugs or wires
- Clogged air filters
- Dirty throttle bodies
- Clogged fuel injector
Paying attention to these issues is essential as they could lead to more significant problems if left untreated! This section will teach us how to inspect off-road vehicles thoroughly for potential problems, signs, and warnings.
Engine Misfire
If your Jeep Wrangler is shaking on highway, engine misfiring can be the issue. It could be due to various reasons, such as problems with the spark plugs, insufficient fuel pressure, or a lack of fuel. Such engine misfires can lead to jerking, spitting, and vibrations. That makes the driver uncomfortable.
Acquiring a high-quality OBDII scanner is recommended to read and troubleshoot codes efficiently to identify the issue. Moreover, an engine misfire usually activates the “check engine” light on the instrument panel. That helps alert you to the problem.
Worn-out spark plugs or wires!
When a spark plug becomes worn out, it can result in a weak or non-existent spark. That can lead to a cylinder failing to demolish, which causes the engine to vibrate uncontrollably. You can easily detect this vibration through an audible difference in the engine idle. You may also feel excessive vibrations throughout the body, steering, and seats. It’s common for Jeep Grand Cherokee shaking when idle.
It’s essential to remember that even something as small as a spark plug can cause these types of vibrations if the cylinders misfire during idling or running speeds. If you’re experiencing problems, swapping out any old spark plugs with new ones that meet the OE specifications is the best solution.
Clogged air filters
Air filters often get clogged, leading to issues with your heating and cooling system. Several factors can contribute to clogged air filters, including poor maintenance practices, dusty or dirty environments, and pet hair or dander.
When air filters become clogged, they can restrict airflow and reduce the efficiency of your Jeep. It often results in higher energy bills, reduced indoor air quality, and equipment failure over time.
The simplest solution is to replace your filter regularly according to manufacturer recommendations. It’ll help prevent excess buildup from occurring in the first place. Consider upgrading to a higher-quality or more efficient filter if you experience chronic issues with clogs.
Dirty throttle bodies
Dirty throttle bodies can cause a frustrating and noticeable issue in Jeep shaking while driving. It occurs because the buildup of dirt, grime, and debris on the throttle body prevents it from functioning well.
The throttle body regulates airflow to the engine, so it can’t control the air entering it when it becomes clogged with gunk. As a result, the engine struggles to maintain a steady idle speed and begins to shake or vibrate.
Luckily, cleaning your Jeep’s dirty throttle body is easy to fix. Remove the air intake tube, spray some carb cleaner onto the throttle body, use a toothbrush or rag to scrub away any buildup, and rinse everything off with water before reassembling.
Clogged fuel injector
A clogged fuel injector is a common issue that affects the performance of jeeps. The problem arises when debris or dirt accumulates in the injector, preventing it from dispensing fuel as it should. As a result, the engine may experience rough idling and poor acceleration.
Sometimes, you may even notice black smoke from your exhaust pipe. A clogged fuel injector can occur for several reasons, including dirty gasoline or low-quality fuel filters. Off-road jeep use can lead to more dust and mud, raising the risk of this issue.
Use a fuel injector cleaner that helps clear up the buildup inside your Jeep’s injectors without disassembling them. It dissolves varnish and carbon deposits with potent chemicals while lubricating your engine’s essential parts.
Or, replace the clogged injectors entirely. Regular maintenance practices such as changing air filters and using high-quality fuel can also help prevent future occurrences of clogging in your Jeep’s fuel system.
What are the pros and cons of jeep models?
Jeep models, known for their off-road capabilities and rugged design, have several pros and cons that potential buyers should consider. Keep in mind that the specific pros and cons can vary depending on the model and the year it was produced. Here’s a general overview:
Known for their rugged design and off-road capabilities, Jeeps have several pros and cons that potential buyers should consider. There can be specific pros and cons depending on the model and the year it was manufactured. In general, here’s what you need to know:
Pros of jeep
Off-Road Capability:
Jeeps are known for their impressive off-road performance. In order to handle challenging terrain, they often feature four-wheel drive systems, durable suspensions, and high ground clearance.
Iconic Design:
A lot of people find Jeeps attractive because of their distinctive and timeless design. There is often a sense of adventure and exploration associated with their rugged, boxy appearance.
Customization:
Jeep vehicles are equipped with an extensive aftermarket support network, allowing owners to add various accessories, modifications, and upgrades to personalize their vehicles.
Resale Value:
The popularity and reputation for durability of Jeeps help them maintain their value on the used market.
Open-Air Experience:
Jeep models often come with convertible or removable tops, so drivers and passengers can drive open-air.
Strong Community:
There are many Jeep clubs, events, and forums dedicated to Jeep enthusiasts, making it a tight-knit community.
Cons of jeep
Fuel Efficiency:
Because of their size and off-road capabilities, Jeeps are often criticized for their poor fuel efficiency compared to smaller vehicles.
Ride Comfort:
The ride quality on regular roads can be stiffer on some Jeep models, particularly the ones designed for off-road performance.
Noise and Wind:
In comparison to more aerodynamic vehicles, Jeeps’ rugged design can cause more noise in the cabin from wind and road.
Limited Cargo Space:
Compared to other types of cars, Jeep models may have less cargo space because of their design and size limitations.
Handling:
As a result of their higher center of gravity and off-road suspension setups, some Jeep models can handle less precisely on paved roads than traditional SUVs.
Reliability Concerns:
Jeeps have improved in terms of reliability in recent years, but certain models have experienced mechanical problems or have been recalled. It is possible to gain insight into the reliability of a particular model year and read owner reviews by researching specific model years.
Higher Maintenance Costs:
There can be a difference in cost between Jeeps and regular passenger vehicles when it comes to repair and maintenance, especially for off-road Jeeps.
Final Thought: Why is My Jeep Shaking When Idling?
We’ve discussed the most common issues with possible solutions regarding why a Jeep shakes while idling. Still, some new owners, whether they own a Jeep Cherokee, Wrangler, or jeep compass, often seem worried about why is my Jeep Cherokee shaking when idling. Or the Jeep compass shaking when stopped or Jeep Liberty shaking when idle.
Various reasons include engine misfires, worn-out spark plugs, or a faulty fuel system can cause these issues. Ignoring the problem may cause further damage to your vehicle, so it’s essential to address it ASAP.
Monitoring your Jeep’s performance is essential to catch any issues early on and identify the root cause. If all other attempts fail, you should take your car to a reliable mechanic for expert diagnosis and repair. Don’t let this frustrating issue go unresolved—nip it before it leads to more significant problems!
FAQs
Do Jeeps often encounter shaking issues?
If your Jeep’s been shaking lately, it could be because of its height, significantly if you’ve raised it. Do you know that thing called the Death Wobble? Yeah, it’s a pain, and it can happen to both lifted and stock-height Jeeps.
How do I stop my Jeep from wobbling?
Maintaining proper tire pressure is essential to prevent death wobble. This means avoiding over-inflated, under-inflated, or mismatched tire pressures.
What causes my Jeep to shake at 70 mph?
Generally, when your car vibrates between 50-70 mph, it’s due to your wheels being out of balance. The vibrations will originate from the steering wheel, travel across the seats, and penetrate the vehicle’s floor.
Do unbalanced tires pose a safety risk?
When the tires are unbalanced, the vehicle’s suspension system is more likely to undergo significant wear and tear. Experiencing vibrations, uneven tire wear, and louder road noise are possible consequences of this issue.
Can low oil cause a Jeep to shake?
Yeah, it can. Refill your Jeep oil tank to get the optimum performance. Otherwise, your Jeep’s engine will create more friction at low oil.
What do you do if you want to add some extra horsepower to the road beast without changing a lot in the Engine area? As of today, superchargers are among the best solutions. Get Unmatched Power with RIPP Supercharger 3.6 Challenger.
Automotive supercharger kits from RIPP are well known. This can quickly add some extra horsepower to your off-road vehicle. RIPP superchargers can add up to 170 HP to your engine.
Superchargers are among the most exciting upgrades in the world of automotive performance. With their unmatched power gains and cutting-edge technology, RIPP Superchargers stand out among the top competitors.
In this comprehensive guide, we delve into the world of the RIPP Supercharger 3.6 Challenger. We will explore their features and benefits. Also, know why they are the go-to choice for automotive enthusiasts seeking uncompromising performance.
What is RIPP Superchargers?
RIPP superchargers are leading forced inductions in automotive parts. Since 1997, this company has been manufacturing superchargers for Jeep, Chrysler, and Dodge vehicles.
A supercharger system has also been offered for the JK Jeep! RIPP gives your engine an extra boost. So, you can find your off-road wheels and tires in a larger frame. It is a better choice than the diesel fuel powering style for the environment.
RIPP Supercharger 3.6 Challenger uses advanced centrifugal technology to make the under-bonnet comfortable. It also comes with everything in need of easy installation and tuning for all-climate performance.
What are the Key Features of RIPP Superchargers?
RIPP Superchargers are good in MPG in sea level highway speed and flat ground. Some key Features and Advantages of RIPP Supercharger 3.6 Challenger are;
Superior Design and Engineering
The RIPP Supercharger 3.6 Challenger embodies superior design and engineering. That pushes the limits of performance in the automotive world.
RIPP Superchargers provide precise fuel management and optimal airflow. With its unwavering pursuit of automotive excellence, the RIPP Supercharger 3.6 Challenger stands out on the racetrack or the open road.
Unmatched Power Gains
The RIPP Supercharger sets a new standard for performance upgrades. The RIPP delivers a substantial increase in horsepower and torque. That can transform the driving experience to a whole new level.
It can optimize airflow and maximizes engine efficiency. Also, can unlock the true potential of the vehicle.
RIPP’s powerful superchargers are perfect for muscle cars and high-performance sports cars alike.
Enhanced Drivability
One of the key features that enable this optimization is the precisely engineered supercharger pulley system. The pulley system provides drivability with an optimal amount of boost pressure at various RPMs. That ensures a linear power delivery curve.
The power is accessible and responsive across the entire RPM range. From low-end torque to high-end horsepower.
It incorporates advanced tuning and fuel management systems. These systems work in harmony to deliver the right amount of fuel and air mixture at different engine speeds.
Smooth Combustion
The RIPP Supercharger 3.6 Challenger has complete and smooth combustion. With poor ignition, and improved cold starting.
It reduces exhaust smoke and specific fuel consumption. Increases mechanical efficiency, and smooth operation and reduces the tendency of knocking in diesel engines.
What are the Benefits of having a RIPP Supercharger 3.6 Challenger?
Reputable Brand: RIPP Superchargers are well-regarded in the automotive aftermarket industry.
They deliver high-quality and reliable performance upgrades. Your Challenger’s engine works seamlessly with a well-engineered product from a reputable brand.
Increased Power: The RIPP Supercharger increases the power output of the 3.6-liter Challenger engine. Forced induction achieves increased horsepower and torque.
This enables the delivery of more air and fuel to the engine. Vehicle acceleration and overall performance can be greatly improved with this upgrade.
Improved Performance: RIPP Superchargers provide enhanced performance on various fronts in the Challenger.
Faster acceleration allows for easier overtaking and merging onto highways. Furthermore, the improved torque provides better low-end power, resulting in a more agile and responsive vehicle.
Enhanced Engine Efficiency: RIPP Superchargers can increase engine efficiency as well as power.
Superchargers improve combustion and fuel atomization by compressing air entering engines. This can improve fuel efficiency and better mileage.
How to use the RIPP Supercharger Jeep JK?
Using the RIPP Supercharger for Jeep JK involves several steps and considerations. Here’s a general guide on how to use the RIPP Supercharger for your Jeep JK:
Preparation:
Familiarize yourself with the installation instructions provided by RIPP. It’s crucial to understand the process and required tools before starting.
Gather the necessary tools and components mentioned in the installation manual. Wrenches, sockets, torque wrenches, and pliers for instance.
Installation:
Disconnect the negative terminal of the battery. To prevent electrical issues during the installation process. Begin installing the supercharger components following the step-by-step instructions.
- The process involves removing various components. Replacing the stock air intake, throttle body, and intercooler with RIPP Supercharger components.
- Install the new supercharger unit, ensuring all connections and fittings are secure and aligned. Reinstall components that were removed. Make sure all connections, hoses, and fittings are securely installed and tight.
Tuning and Calibration:
RIPP Supercharger kits require tuning and calibration after physical installation to optimize performance.
A handheld tuner or a tuning shop specializing in RIPP Supercharger installation may be used during tuning.
For optimal performance gains and safe operation of your supercharger, this step is essential.
Testing and Maintenance:
After the installation and tuning process, start the engine. Let it idle to check for any abnormal sounds or leaks.
Ensure that everything is functioning correctly. Take the vehicle for a test drive and monitor its performance. Look for signs of a successful installation, such as throttle response and power delivery.
To ensure proper cooling and airflow, check and service supercharger oil, and inspect belts, and pulleys. Maintenance is essential for RIPP Supercharger longevity and performance.
Conclusion
RIPP Superchargers offers a compelling solution for automotive enthusiasts. RIPP Supercharger 3.6 Challenger offers unparalleled power gains and performance enhancements. With their dedication to engineering excellence, ease of installation, and impressive real-world results, RIPP Superchargers are a top choice. For those looking to take their vehicles to new heights. Unlock the true potential of your engine and experience the thrill of RIPP Superchargers today.
FAQs
What are the benefits of installing the RIPP Supercharger on my Challenger?
The RIPP Supercharger kit provides a significant boost in horsepower and torque. For improving acceleration and overall performance. It enhances the driving experience by delivering more power. It can increase throttle response.
How much horsepower can I expect to gain with the RIPP Supercharger 3.6 Challenger?
The RIPP Supercharger kit adds around 100-150 horsepower to the 3.6-liter V6 engine. This increase in power can vary based on other modifications and factors.
Does the RIPP Supercharger 3.6 Challenger require any other modifications?
The RIPP Supercharger design allows for a complete bolt-on system. It’s installed on a stock Challenger without requiring any other modifications. However, you can upgrade other components, such as the exhaust system or fuel injectors. For maximizing the benefits of the supercharger.
Which vehicles are compatible with RIPP Supercharger?
RIPP offers a supercharger for a variety of vehicles. Popular models like the Jeep Wrangler, Dodge Challenger, Dodge Charger, and Ram trucks.
Do you intend to increase the horsepower of your engine? If yes, then you might be thinking about the purchase of a supercharger. But, if you intend to buy a Ripp supercharger then you might consider some Ripp Supercharger Problems.
The Ripp Supercharger is an equipment that utilizes air pressure to turn an engine’s turbine. Without any effort, RIPP superchargers can increase power by up to 170HP. Moreover, it employs cutting-edge centrifugal technology to create a comfortable interior. In addition, it includes everything required for simple installation and calibration for all-weather performance.
Ripp Superchargers also offers supercharger kits for various vehicles, including the ripp supercharger v6 challenger. The specific supercharger kit for the V6 Challenger is designed to increase its horsepower and performance. Moreover, the RIPP Superchargers coil packs also improve the performance of vehicles. However, it has a negative reputation for several reasons.
So, let’s have a look at the most common Ripp superchargers problems:
Why Adding A RIPP Super Charger to Your Vehicle?
Enhancing your Jeep’s performance with Ripp components results in superior quality and dependability. Ripp is renowned for its quality, so you can enjoy traveling without fretting about whether your supercharger can withstand the elements.
Each supercharger package includes all the components required for installation. You can do it yourself or hire your preferred mechanic to complete the task. Installation may take between six and eight hours.
What are the Most Common Ripp Superchargers Problems?
Some Jeep owners claim their Ripp Superchargers are malfunctioning. The majority of the time, these issues are not so severe that you cannot handle them.
However, certain people find them difficult to solve! Let’s analyze some of the challenges that you may encounter.
Installation Issues
If you have no previous experience installing superchargers, it is likely that you will encounter this problem sooner than later.
If you have some mechanical knowledge, you may set up the Ripp supercharger yourself, as the directions are explicit and simple to follow. Improper setups result in numerous complications.
The correct assembly of this supercharger kit necessitates automotive and mechanical expertise as well as practical experience.
Solution: If you are uncertain then an expert installer or specialist should be contacted for the job. You could contact a local RIPP or Vortech dealer or installer for prospective assistance.
Installation Cost
If you lack experience fitting superchargers, you may encounter this problem sooner. For instance, the labor cost estimate for Dodge Challenger Ripp Superchargers is between $238 and $300, while the cost of assembling the elements is approximately $7000.
And when compared to a turbo or diesel engine and refining procedure, it sometimes appears to be more expensive.
Solution: If you have some mechanical knowledge, you can do it yourself by simply following the provided instruction.
Air-Filters Malfunction
Some individuals have problems with the RIPP superchargers’ air-filter configuration. Oil may saturate the chassis, air temperature sensor, and any other components that pass through the filter.
In addition, a JK-07 owner affirms that after 18,000 miles of use, the air filter separated from its base.
Solution: Clean the air filter occasionally and replace the part if necessary.
Centrifugal Problem
The failure of the RIPP centrifugal Technology can be seen very frequently. It can cause calibration issues and decrease horsepower at lower RPM. The most prevalent issue with RIPP centrifugal is an absence of torque at low revolutions per minute. In addition, the wheel rotation is insufficient for low-speed acceleration.
Solution: Be cautious if you are operating a large jeep, rock crawling, or caught in a gridlock. Keep your vehicle at a sufficient speed rate to avoid this problem.
Transmission Problem
This transmission problem only appears in the third and fourth gear while towing. The upper gears in the gearbox failed after 13,000 to 15,000 miles due to the installation of superchargers.
Whenever the pedals are slammed for the most acceleration, the gearbox changes down a gear. This issue implicates the torque converter, clutch management, and RIPP’s centrifugal system.
Solution: Reprogramming the transmission may be necessary if the Ripp Superchargers are not generating enough centrifugal force at low rpm torque.
Oil Leak Problem
Some users recently shared that their Ripp Supercharger emits oil. This is a prevalent issue that can be caused by a variety of issues, such as a worn-out seal, a leak in the supercharger, or an issue with the oil line. And the problem becomes serious when the vehicle accelerates rapidly.
Solution: Search for potential leaks in the joining lines. If found then replace the parts immediately.
Warranty Issues
Many customers discontinue using RIPP Superchargers after the warranty has expired because they no longer have trust in them. Since adding any kind of supercharger will void the warranty on your Jeep.
As a consequence, before adding RIPP to boost your engine’s power, you should give it some serious thinking.
Solution: Although it’s not the ideal solution, it could be your ideal choice to set up if your Jeep is older and out of warranty.
What are the Advantages and Disadvantages of Ripp Superchargers?
In this session, let’s briefly look over this RIPP supercharger feedback.
Pros of Ripp Superchargers
- In flat terrain and at highway speeds at sea level, RIPP Superchargers offer decent MPG.
- It is a more environmentally friendly option than using diesel fuel.
Cons of Ripp Superchargers
- Given that it uses forced induction, it could reduce engine longevity.
- A typical Jeeper cannot readily do the extreme tuning that RIPP requires. Cost of the mechanics is important here.
- Extra horsepower is mostly produced at mid- to high-RPM.
- According to the user’s purpose, RIPP customer care does not offer a satisfactory response.
- The engine of the car must undergo several adjustments in order to be tuned appropriately.
Is the RIPP Supercharger Hampering Motor Lifespan?
Some users have complained that Ripp SC shortens the engine’s lifecycle. This supercharger’s calibration issues occurred during stage 1 rather than stage 2.
As can be seen, a variety of modifications, including an exhaust system, a reprogrammed ECM, spark injectors, etc., are required. This necessitates that the engine endure a substantial strain.
Consequently, there is a greater possibility that your beast’s heart will lose durability. If the engine is unhealthy, operating at a safe frequency can still result in catastrophic failure. This is a problem exclusive to all SC types and manufacturers.
Is Ripp Supercharger worth the Money?
Ripp Superchargers has earned a reputation for manufacturing superior products that provide perceptible boosts in power. Numerous customers have reported substantial rises in horsepower and torque after adding Ripp Superchargers’ packages, which can boost acceleration and towing capacities. Additionally, the company offers detailed directions for installation and support services to aid in the installation process.
Therefore, consumers appear to be extremely pleased with Ripp Superchargers. It is important to note, however, that performance and user experience may vary based on variables such as the particular vehicle, engine configuration, and calibration.
Overall, Ripp Superchargers are an excellent choice for anyone seeking to enhance the horsepower of their Jeep. They provide a significant increase in power, enhanced fuel economy, and are simple to install. Ripp Superchargers are worth contemplating if you’re searching for a solution to make driving your Jeep more enjoyable.
Maintenance Guide for RIPP Superchargers
- Properly maintaining your RIPP supercharger is essential for ensuring its durability and achieving peak performance. Here is a guide to maintenance that will help you maintain your RIPP supercharger in excellent condition:
- At regular intervals, conduct visual inspections of the supercharger’s components. Check for signs of deterioration, damage, and leakage.
Periodically examine the belt tension on the supercharger. It should have the appropriate amount of tension to ensure the transmission of power without excessive strain on the components. - Certain components of certain supercharger systems must be lubricated periodically. Consult the manufacturer’s recommendations for the specific lubrication points and apply the appropriate lubricant as specified.
- If your supercharger equipment has a cooler or an extra conditioning system, ensure that it is in good working condition.
- Consult the manufacturer of the supercharger or RIPP’s maintenance schedule. This schedule details the recommended maintenance procedures and intervals for your supercharger system.
Is RIPP the Perfect Super Charger for You?
Since a Ripp supercharger kit is a pricey addition, you want the finest one for your vehicle. When you’re on the road or the trail, Ripp delivers the performance and maneuverability you require. When you have a supercharger providing you with the power you need to succeed, enjoy the added power you get when accelerating on the road or the boost when ascending a steep slope. Find the one that is compatible with your model and manufacturer.
Customizing your Jeep to tackle the challenging terrain will help you become ready for your next offroading objectives. One of the finest upgrades you can make to help you climb over boulders on a trail or have greater acceleration on the road is a supercharger.
Conclusion: A Recommended Supercharger
Installing a Ripp supercharger in your vehicle can be an intriguing endeavor. However, it is always necessary to understand the nature of a problem to solve it.
Ripp Supercharger issues may be avoided if proper maintenance standards are met. You must inspect their superchargers for damage and secure all wiring until the issue is resolved. If you encounter any issues, you should contact the dealer if the problems fall within the warranty’s parameters.
Moreover, when installing the supercharger, be sure to work with a professional mechanic. Since nothing is flawless, every component of a vehicle is flawed. If you wish to give your Jeeps more horsepower, RIPP SCs are still a viable option.
FAQs
How many horsepower does a Jeep Wrangler RIPP Supercharger add?
According to preliminary tests, an Automatic 3.6L Pentastar Jeep Wrangler Unlimited only generates 215 rear wheel horsepower (WHP) in stock condition. RIPP Superchargers’ straightforward bolt-on solution will increase wheel horsepower (whp) by 160+ in an easy 8–10 hour installation.
Can I install a supercharger on any vehicle?
Supercharger kits are typically designed for specific vehicle models and engine configurations. It’s important to ensure that the supercharger kit you choose is compatible with your vehicle’s make, model, and engine type. Additionally, modifications to other engine components may be necessary to handle the increased power.
Do superchargers make engines last longer?
Supercharging typically won’t shorten the life of an engine, just like OEM turbocharging (with adequate cooldown for turbochargers), assuming a properly tuned system, proper oil change and engine maintenance, and similar driving.
How much does a supercharger installation cost?
The cost of a supercharger kit and installation can vary depending on the specific vehicle, supercharger brand, and installation complexity. It’s recommended to research and consult with reputable installers or supercharger manufacturers for accurate pricing information.
Is my warranty voided by an aftermarket supercharger?
It is likely that a supercharger will void your powertrain warranty, but not other parts of the guarantee.