
If your actuator clicking when car is off, it can be a bit disturbing. Most seasoned drivers and mechanics will tell you that actuators make such clicking sounds. If you hear a clicking sound, you should be concerned and work to resolve the issue as soon as possible. Although some actuator-clicking sounds can be alarming, most problems can resolved.
In this article, we explore actuators in more detail. In particular, we investigate why actuator clicking when car is off. We will examine how actuators work in order to better understand the problem. In addition, we will investigate possible ways to fix actuator clicking.
What is an Actuator?
Electrical signals are converted into mechanical motion by actuators. They control various car systems, including power door locks, power windows, and power seats. These components are essential to the proper functioning of these systems and can significantly enhance the comfort and convenience of passengers.
Actuators in cars come in different types. The solenoid actuator is commonly used in power door locks and starter motors, for example. In contrast, linear actuators used in power seats and windows. Your car’s actuators are all crucial to its operation, regardless of their type. Learn more about it here.
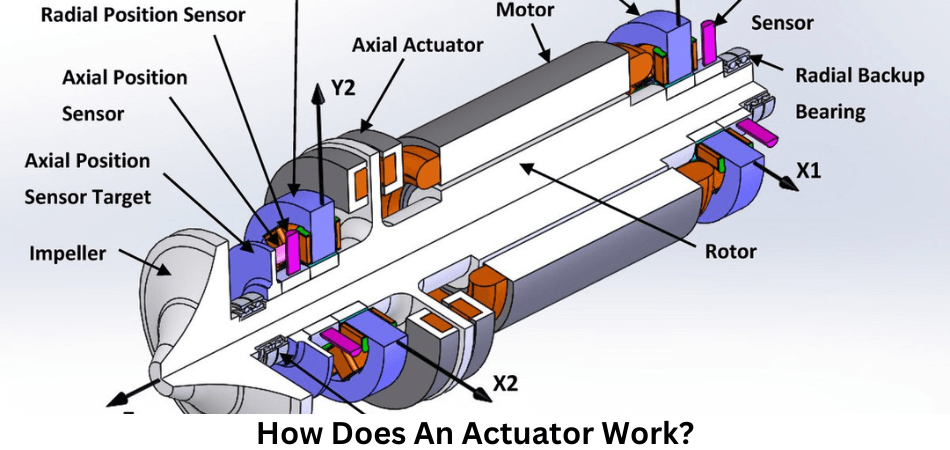
How Does An Actuator Work?
In cars, actuators are devices that convert electrical, hydraulic, or pneumatic signals into mechanical motion or force to control various functions and systems. The following systems can included in these systems:
HVAC (Heating, Ventilation, and Air Conditioning):
In As part of the HVAC system, actuators control the blend doors and mode doors, which regulate the cabin’s temperature and airflow. The car’s vents can opened or closed, the temperature can adjusted, and air can directed to different parts of the vehicle.
Power Locks:
The door locks of a vehicle can be remotely locked and unlocked using actuators. The actuator engages or disengages the locking mechanism when you press the lock or unlock button on your key fob or inside the car.
Power Windows:
The power window actuators raise and lower the windows based on your commands. Window actuators move the window up and down when you press the switch.
Variable Valve Timing (VVT):
VVT (variable valve timing adjust the timing of the engine’s valves, which can optimize performance and fuel efficiency by altering when the valves open and close.
Power Seats:
Actuators control some power seat adjustments, such as moving the seat forward or backward, raising or lowering it, and adjusting the seatback angle.
Throttle Control:
ETC (electronic throttle control) systems are often used in modern cars, where an actuator adjusts the throttle plate’s position in response to accelerator pedal input. As a result, engine power can regulated.
The following is a simplified explanation of how actuators work:
- Input Signal: The actuator operated by an input signal from a control module, such as a button press or a sensor reading.
- Mechanical Action: By converting the input signal into mechanical action, the actuator responds to the input signal. The specific action it controls can involve opening or closing a valve, moving a rod, or rotating a gear.
- Control and Feedback: In many actuators, there are sensors or feedback mechanisms that enable them to watch their position and provide feedback to the control system. When we receive feedback, we are able to ensure that our actions or positions are as we would like them to be.
- Power Source: There are several types of actuators, including electric, hydraulic, pneumatic, and combinations of these. Electric actuators, for instance, generate motion with an electric motor.
In modern vehicles, actuators allow precise control of various systems, enhancing comfort, safety, and efficiency. Onboard computer systems control them to provide a seamless driving experience and are an integral part of the car’s overall functionality.
How Do You Know If Your Actuator Has Problems?
It is possible for your actuator to be defective or malfunctioning if you notice any of these signs. These are some of the most common symptoms to watch out for:
Slow or unresponsive system
The actuator could fail if the system controlled by it (such as power door locks or power windows) is unresponsive or slow to respond.
Clicking sounds
Even if your car is not running, you might hear clicking sounds coming from the actuator if the ignition is off.
Operational inconsistency
Inconsistent operation, such as partial opening and closing of the power windows or stopping mid-operation, might indicate a problem with the actuator.
The system stops working altogether
If the actuator controls a system that stops working completely, it could be a sign that the actuator has completely failed.
And if you notice any of these symptoms, you should address the problem as soon as possible. Furthermore, if the actuator malfunctions, it can cause damage to the car’s electrical system and lead to further problems.
What Causes Actuator Clicking When Car is Off?
A clicking sound may heard on the dashboard after you turn off the engine. Even though this might not seem alarming, it is something to concerned about. In most cases, it has proven to be tricky and engaging, which is why you need a professional to help you find the reason behind the clicking sound. So let’s find out why actuator clicking when car is off.
1) Faulty blend door actuator
The blend door actuator is the leading cause of the clicking noise in the dashboard when the car is off. To regulate the climate control system in the car, the blend door actuator works in conjunction with the temperature sensors. The blend door actuator actually communicates with you when you want cool or warm air in the car. Depending on the actuator, the air will come from different vents in the car. Newer cars with climate controls for the front and back have two actuators for the blend doors.
When the car is off, a clicking noise is most likely to indicate a faulty blend door actuator. It originates from below the dashboard and is incessant. There may also be times when you hear a knock on the door. When you start the engine, you hear this noise, but it’s less common than the clicking noise.
Solution
A professional can help you solve this problem with your car. If you know a little about car mechanics and have a calibrator on hand, follow these steps. Prior to starting, you will also need a blend door actuator.
- Your battery’s negative terminal should disconnected.
- Pull off the retaining knobs on the glove box to remove it.
- Remove the wiring harness and locate the heater core, which is normally located behind the glove box.
- In order to remove the actuator for the door, you will need to remove the filter assembly first.
- Rotate the blend door in both directions to test whether it is working properly. As a result, the door will be operating correctly and the new actuator won’t damaged.
- Replace the actuator with the new one.
2) Faulty relay
The majority of your car’s relays located under the hood. In addition to the glove box, you may find relays inside the cabin. It is likely that you will hear clicking sounds even when the car turned off when a relay goes bad. The relay makes the noise when it engages and disengages. It may be necessary to use an OBD-II scanner to determine which relay is faulty or listen carefully to your car to recognize the source of the clicking sound.
Solution
It is relatively easy and inexpensive to fix a relay problem. You will need to purchase and install a replacement. It is important, however, to read the relay and fuse map on the cover to ensure you purchase the correct replacement. It is actually possible to replace a relay by yourself.
3) The HVAC system is uncalibrated
It is the HVAC module that is responsible for controlling the HVAC system’s sensors, motors, and actuators. When the HVAC system is not calibrated, the sensors pick up the wrong figures, causing the module to miscalculate the motor position. With the wrong readings, the motor and actuator will make a clicking sound.
Solution
It is necessary to calibrate the HVAC system again in order to solve this problem. To resolve this issue, follow these steps;
- Start the engine by turning the ignition on.
- For climate control, press the ‘auto’ button.
- Make sure the ignition turned off.
- Switch on the engine after disconnecting the HVAC fuse for one minute. Turn the ignition on and leave it on for two minutes. By doing this, the HVAC system is reset. In order to resolve the issue effectively, you must act quickly.
- For the relearn mode to activated, let the HVAC system run for about 15 seconds.
- Let’s get started.
- On GM cars, this process is used. Using the process illustrated, other cars will calibrate their HVAC systems in a similar way.
4) Faulty stepper motor
The stepper motor is a small component located inside the dashboard. An electromagnetic actuator is a stepper motor. In your car, you’ll find a number of them. Their main function is to control the idle speed of the engine by measuring RPMs per hour. In modern cars, stepper motors are very common. Failure of a stepper motor means a step or a process has been bypassed, and the motor is making noise as a result.
Solution
An expert mechanic can diagnose stepper motor faults correctly by identifying the faulty part. The extent of damage will determine whether a stepper motor can be repaired or replaced.
In order to fix this problem, you need to disconnect the connector on the pigtail. As soon as the stepper motor has been replaced or repaired, you should calibrate the system since the control module has been scrambled and needs to be retrained.
Can Actuator Clicking Be Dangerous?
In general, actuator clicking when car is off is not dangerous. Many different parts of a car use actuators, including the HVAC (Heating, Ventilation, and Air Conditioning) system, power locks, or even the engine’s variable valve timing system. Specific functions performed by these actuators by moving certain components.
An actuator that generates a clicking sound is usually working as intended and engaging or disengaging to control a specific function. There is nothing unusual about this. It is a normal part of the operation of a car. Nevertheless, if the clicking sound is excessively loud, constant, or accompanied by other symptoms, such as a malfunction in the associated system (e.g., a door that does not lock or unlock properly), it may indicate a problem with the actuator.
If If you suspect an issue with an actuator or any other component in your car, you should have it inspected and repaired by a qualified mechanic. When you ignore potential problems with your vehicle’s systems, you may face safety risks or more significant and expensive repairs in the future. In order to ensure the safe and reliable operation of your vehicle, it is critical to resolve any underlying issues promptly.
Can I Still Drive My Car With Actuator Clicking When Car is Off?
The actuator’s relevance depends on the specific system it controls and how important it is for the car’s driving. The drivability of a car may not affected by a faulty power window actuator, but by a faulty brake actuator, certainly. To determine whether driving the car is safe, it is best to have a professional mechanic diagnose the problem.
How to Prevent Actuator Clicking?
Often, actuator clicking is the result of normal wear and tear or age-related deterioration of the actuator or other electrical components. In spite of the fact that actuator clicking and other electrical issues cannot be prevented, regular maintenance and prompt repairs can minimize the risk.
The clicking of actuators is a normal part of a car’s operation, and it cannot be prevented since these components engage and disengage to perform specific functions. Many systems inside a car use actuators and their operation accompanied by these clicking sounds. Among these systems are:
HVAC (Heating, Ventilation, and Air Conditioning):
In the cabin, HVAC actuators control the blend of hot and cold air, as well as the direction of airflow. When these actuators adjust the temperature or vents, clicking noises may heard.
Power Locks:
Power door lock systems use actuators to lock and unlock doors remotely or by pressing a button. When the actuators engage and disengage the locks, clicking sounds may heard.
Engine Components:
As actuators adjust valve timing, they can produce clicking sounds as they adjust the timing of the valves.
Other Systems:
Besides power seats and power windows, actuators are also used in various other car systems.
As actuator clicking is inherent to their operation, it cannot prevented without disabling the systems they control. It is not recommended to attempt to prevent the clicking sounds, as this could result in malfunction or reduced functionality of these systems.
To ensure that there are no underlying problems with the actuators or the systems they control, have your car inspected by a qualified mechanic if the clicking noises are excessively loud or unusual. Maintaining and repairing your car regularly can help keep its components, including actuators, in good working order.
How To Maintain Actuators In Your Car?
The key to maintaining actuators in a car is to ensure that the systems they control are running smoothly and efficiently. The following tips will help you maintain your car actuators:
Inspecting regularly:
Your car’s actuators should inspected periodically. Any actuator-driven system, including HVAC, power locks, and power windows, falls under this category. If you hear or see unusual sounds, check for signs of wear or damage.
Maintain a clean and lubricated engine:
It is possible for dust, debris, and a lack of lubrication to affect the performance of actuators. It may be possible to clean the actuator and apply a suitable lubricant to ensure smooth operation depending on its type and location. Lubrication should used carefully, as some actuators do not require it and excessive lubrication can damage them.
Electrical connections should be checked:
Electrical connections are often found on actuators. It is important to ensure that these connections are secure and clean. It is possible for electrical problems to occur due to corrosion or loose connections.
Functionality testing:
Test the actuator-controlled systems on a regular basis. Make sure doors lock and unlock smoothly, windows move up and down smoothly, and the HVAC system directs air where it should. Address any issues immediately if you notice them.
Recommendations from the manufacturer:
Detailed maintenance recommendations for actuators and systems that they are a part of can be found in your vehicle’s owner’s manual. It is often recommended by the manufacturers to maintain these components in good working order.
Inspecting professionally:
A qualified mechanic should inspect your car if you suspect a problem with an actuator or are not comfortable performing maintenance tasks on your own. Diagnoses and solutions can implemented effectively by them because they possess the necessary knowledge and tools.
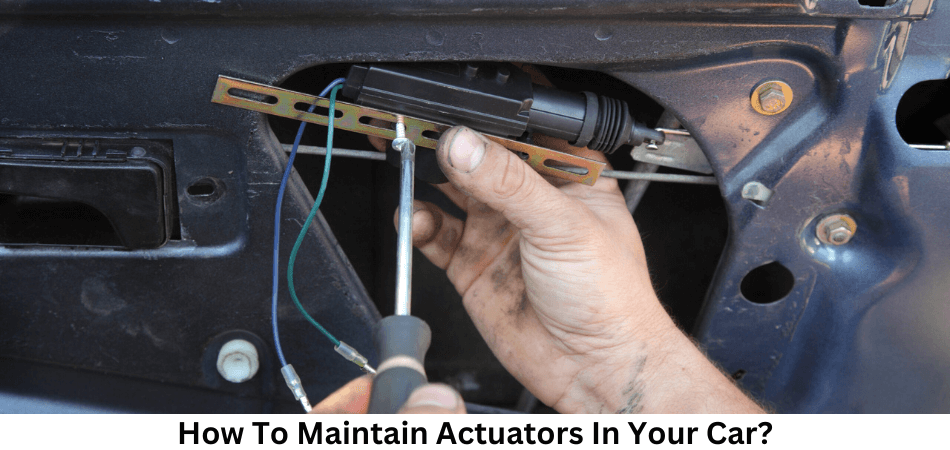
Replace Worn Parts:
It is possible for actuators or related components to wear out over time and need to be replaced. It is crucial to replace worn or damaged actuators and associated parts with genuine or high-quality replacements.
How Much Does It Cost To Replace An Actuator?
Depending on the make and model of the automobile, as well as the type of actuator that needs to be replaced, the cost of replacing an actuator can vary greatly. In general, parts and labor can cost between a few hundred dollars and over a thousand dollars.
Depending on the make and model of the car as well as the type of actuator that needs to be replaced, it can take a long time to replace an actuator. Including diagnosis, parts acquisition, and installation, it typically takes between a few hours and a full day.
Can I Fix A Faulty Actuator Myself?
The type of actuator that needs to be repaired and your level of experience determine how difficult it will be to fix it. In some cases, actuator repairs can be done by a knowledgeable DIYer, but in others, specialized tools and expertise are required.
The best way to ensure that the repair is done safely and correctly is to have a professional mechanic diagnose and fix the problem.
Conclusion: Actuator Clicking When Car is Off
A clicking sound from your car’s actuator when it’s off might be normal, related to security features, or indicative of a problem. Whenever the sound seems abnormal or persists, you should seek professional assistance. Maintaining your vehicle regularly and addressing issues promptly can help ensure reliable and safe operation. It’s advisable to consult a qualified mechanic or automotive technician if you’re unsure what’s causing the clicking sound. In addition to diagnosing the issue accurately, they can run diagnostic tests and recommend the necessary repairs or maintenance.
Read our more articles in here..
FAQs
When my car is off, why does the actuator click?
Several reasons can cause actuators to click when the car is off, including residual power, a faulty actuator, or a security system.
When the car is off, do actuators make clicking sounds?
In some cases, residual power in the car’s electrical system can cause actuators to make clicking sounds. Nevertheless, excessive or irregular clicking should be investigated.
Do I have a faulty actuator if I hear a clicking sound?
Listen carefully for the source of the clicking to determine if it is a faulty actuator. A problem with an actuator may be causing the sound to come from a specific door or component.
Is it possible for a security system to cause actuators to click when the car is off?
The car security system may activate actuators to lock or unlock doors, causing clicking sounds when the car is off. For confirmation, check the settings of your security system.
If the clicking bothers me, what should I do?
Consult your car’s manual or a professional mechanic if the clicking noise is bothering you. It can be dangerous to ignore unusual sounds.


If you’re looking for a superior SUV experience, the 2023 Chevrolet Equinox is the perfect vehicle for you. Whatever your needs are, the Equinox can handle it. Prescott Valley Chevrolet customers report the Equinox has superb handling, with a smooth, responsive ride. Additionally, fuel economy is excellent. Yet, the Chevy Equinox Maintenance Schedule is necessary to keep the vehicle running.
Those in the backseat will appreciate the Equinox’s spaciousness. Budget-conscious buyers will appreciate the 2023 Equinox’s affordable price tag. Its turbocharged 1.5-liter four-cylinder engine produces 170 horsepower and 203 lb-ft of torque. If you’re looking for a reliable, comfortable, and stylish SUV, the 2023 Chevy Equinox is the perfect choice.
Maintaining your Equinox at the Prescott Valley Chevrolet dealership is the best way to keep it operating at its best. A few of Equinox’s scheduled maintenance visits highlighted below. So let’s learn more about the Chevy Equinox Maintenance Schedule.
What are the Features of Chevy Equinox?
The 2023 Chevy Equinox is a capable mainstream compact SUV. It comes standard with a variety of infotainment and safety technology, even at the base LS trim level. Aside from its inoffensive design, the Equinox offers generous interior space for passengers and cargo. It’s a lot more fun to drive than it looks. The car’s anemic turbocharged four-cylinder engine delivers only 175 horsepower. Equinox lacks flavor compared to many more flavorful competitors. All these alternatives have more personality and verve than the Mazda CX-50, Honda CR-V, VW Tiguan, and Ford Bronco Sport. But, the Equinox remains one of the best-selling compact SUVs. Read here more.
Engine, Transmission, and Performance
With its sluggish performance and underpowered turbocharged 1.5-liter four-cylinder, Equinox’s turbocharged 1.5-liter four-cylinder won’t impress any fans. Equipped with the optional (and heavier) all-wheel-drive system (front-wheel drive is standard), the Equinox requires a heavy foot to speed up to highway speeds. In spite of its fuel-saving design, the six-speed automatic shifts , but it is reluctant to downshift when extra power needed. We tested an all-wheel-drive Equinox RS trim at our test track, which reached 60 mph in 8.0 seconds.
Equinox’s handling is competent and its steering is accurate and direct. Rougher stretches of road send some unpleasantness into the cabin, especially with the optional 19-inch wheels (17s are standard). Additionally, the Chevy is capable of towing up to 3500 pounds.
Fuel Economy and Real-World MPG
According to the EPA, the front-wheel-drive Equinox will achieve 26 mpg in the city and 31 mpg on the highway. AWD reduces fuel economy by 2 and 1 miles per gallon, . In our real-world fuel-economy test route, we drove a 1.5-liter Equinox with front-wheel drive at 75 mph and it returned 32 mpg.
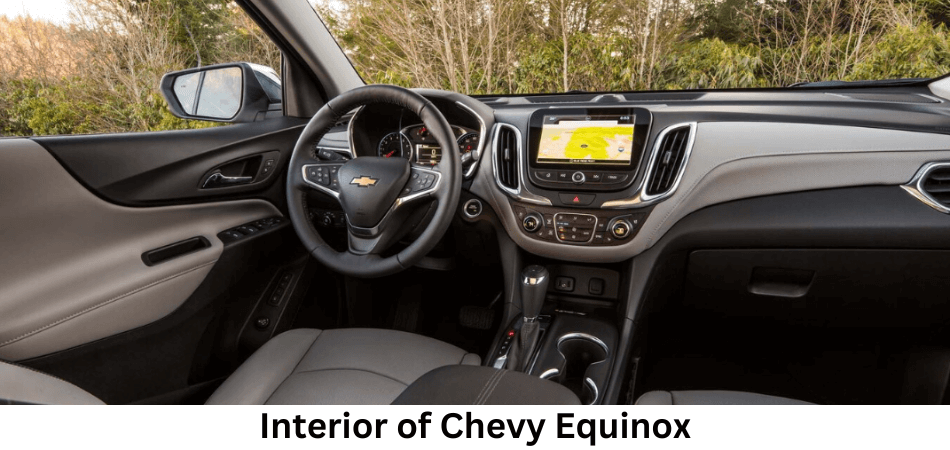
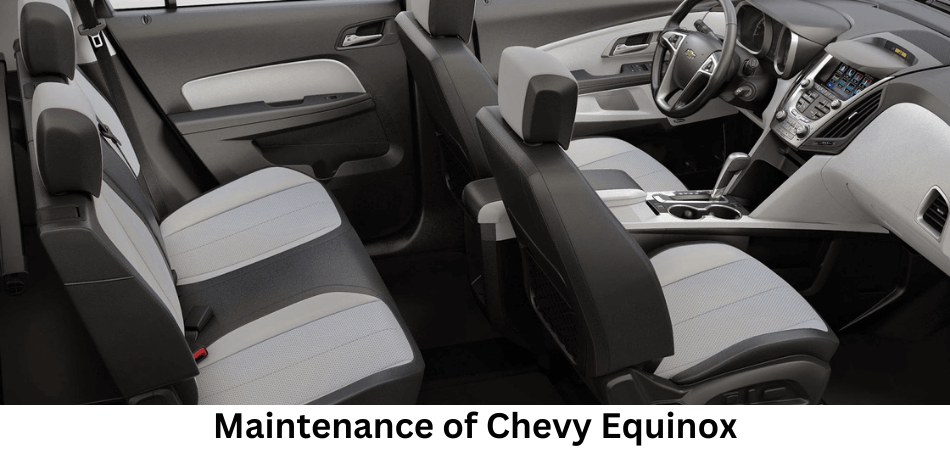
Interior, Comfort, and Cargo
Equinox’s cabin has a nice design and built with durable materials. There are enough amenities to keep front- and rear-seat passengers happy on longer trips in the spacious interior. While there are plenty of cupholders in the cabin, the most luxurious features are either optional or standard equipment on LT and RS models. Despite some rivals offering more space behind the rear seats, we were still able to fit eight carry-on suitcases. Except for a large center console storage bin, Equinox’s cabin storage is average.
Infotainment and Connectivity
The Equinox’s dash features a 7.0-inch touchscreen that displays Chevrolet’s MyLink infotainment system with its ease of use and speed of response. Bluetooth phone and audio streaming, USB connectivity, and an auxiliary input jack are all standard. Equinox offers 4G LTE onboard Wi-Fi, making it one of the most connected crossovers on the market.
Safety and Driver-Assistance Features
NHTSA gave the Equinox a five-star rating, but the Insurance Institute for Highway Safety (IIHS) did not name it a Top Safety Pick. There are also a variety of driver-assistance technologies available with the compact crossover. Among the key safety features are:
- Automatic emergency braking with pedestrian detection as standard
- With lane-departure warning and standard lane-keep assist
- Cruise control with adaptive settings is available
- Warranty and Maintenance Coverage
Chevy’s basic warranty package is as basic are those of its competitors. Hyundai Tucson and Kia Sportage both offer longer protection plans. One dealer maintenance visit is also free within the first year of ownership, which is a nice perk.
- The limited warranty covers 36,000 miles or three years
- The powertrain warranty covers 60,000 miles or five years
- For the first visit, maintenance is complimentary
What are the Problems with Chevy Equinox?
1.Issues with the Timing Chain in a V6 Engine
A damaged timing chain in a V6 engine is one of the most common problems Chevy Equinox owners face.
combustion engines consist of fixed cylinders and pistons that move. Through the intake valve, fuel and wind mix to form a mixture that passes through the cylinder. Burning fuel and air produce energy once they enter the cylinder.
The combustion cycle releases gases that drive the pistons down the cylinders. In turn, this causes the crankshaft to spin, which raises the pistons again. During this part of the process, burned gases leave the exhaust valve. Both intake and exhaust valves controlled by a camshaft. In order for these valves to open and close at the best time, a timing chain used. Additionally, a timing chain synchronizes the rotation of the crankshaft and camshaft. Intake and exhaust valves close at ideal times when the timing chain is working . Timing chains stretch out, which affects this process.
The vehicle’s internal computer system will sense something is wrong and light up the check engine light. The check engine light may come on when the timing chain stretches or becomes slack due to this reason.
2. Oil Consumption Problems in the 4 Cylinder Engine
Because the Chevy Equinox has a four-cylinder engine, it’s not uncommon for this kind of engine to consume oil . There is one major drawback to four-cylinder engines: they tend to consume a lot of oil compared to engines with fewer cylinders.
As For a Chevy Equinox, GM recommends burning less than one quart of oil every 2,000 miles. A four-cylinder engine in a Chevy Equinox can consume over four quarts of oil every month, according to owners and drivers. There is no doubt that this is higher than what General Motors estimated. Your Chevy Equinox may consume even more oil per month depending on how often you drive it.
3. Oil Leaks Are Another Common Problem with the Chevy Equinox
Whether it’s because of a bad rear main seal or another problem, oil leaks with Chevy Equinoxes tend to happen more than they do with other vehicles.
4. Bad Piston Rings Are Also a Common Issue as well
The fix for a Chevy Equinox that consumes oil like there’s no tomorrow may be as simple as replacing the piston rings. It is possible for excessive oil to seep through piston rings if they aren’t sealing . GM acknowledges that this is a common problem, especially with second-generation Chevy Equinoxes introduced between 2010 and 2017.
According to General Motors, most of the common causes of excessive oil leakage in Chevy Equinoxes explained in a technical service bulletin.
5. Issues with EVAP Codes
When the gas cap on a Chevy Equinox fails, it can cause a whole host of problems. The evaporation emission control system (EVAP) is an important part of the vehicle. It prevents gas fumes from escaping from the gas tank.
Also to keeping your car from smelling of gas outside, the EVAP serves another important purpose. As a result of the EVAP, toxic pollution reduced. An EVAP code will appear in the diagnostic process if the gas cap loosens, wears out, or the purge valve malfunctions.
What is the Chevy Equinox Maintenance Schedule?
Let’s have a look at the Chevy Equinox Maintenance Schedule and necessary services.
7,500-Mile Service
By Chevrolet, you should perform scheduled maintenance on your 2023 Equinox every 7,500 miles. At this first visit, the technicians will check the engine’s oil level and change the oil and oil filter. Despite designed to lubricate and protect engines for a long time, motor oil deteriorates over time. Changing the oil regularly will reduce engine wear .
Whenever you bring your Chevrolet Equinox in for its 7,500-mile service, the technicians will inspect all the features that keep your SUV running , including the brakes and tires. They will check the fluid levels and top them off if necessary. Additionally, they’ll rotate the tires and check the wipers’ condition. During every maintenance visit, these services included, so you can drive your Equinox in safety and comfort.
22,500-Mile Service
It recommended that the passenger compartment air filter replaced besides to regular maintenance. Incoming outside air filtered by this piece of equipment before it enters the passenger cabin through the vents. It’s important to replace this piece of equipment, since it’s filthy and can cause health problems for you and your passengers.
45,000-Mile Service
To keep the engine running , the air filter needs to replaced after 45,000 miles. Low fuel economy, poor engine performance, and weak acceleration are all signs that the air filter needs to replaced. To keep the engine components running, the service technicians will also replace the transmission fluid.
60,000-Mile Service
Besides to the usual services, replace the spark plugs and inspect the spark plug wires during this mileage interval. By performing this service, you can be sure that you will be able to start your car every time you turn the key.
90,000-Mile Service
It’s 90,000 miles and your car is running great, so it’s time for a comprehensive inspection to ensure that continues in the future.
All your car’s parts need to be in good condition to keep functioning for the next 90,000 miles during this inspection and service appointment. This includes all the services between the 7,500- and 60,000-mile service intervals. Check the tread depth of your Chevy Equinox tires to make sure they don’t exceed 4/32″. Consider replacing your vehicle’s tires if this is the case.
100,000-Mile Service
To reduce fuel economy, poor performance, and hard starts, the spark plugs will replaced after 100,000 miles.
150,000-Mile Service
A flush and change of the engine coolant will performed at 150,000 miles. During the winter and summer, this fluid prevents the engine from freezing and overheating. Another reason to change the coolant at this point is that old coolant cannot protect the cooling system from rust. During the service, the technicians will also check the coolant hoses for wear and leaks. If necessary, they will replace the drive belts as well.
By taking care of these service items, you will ensure your Equinox runs properly and for years to come.
How Often Should You Service Your Chevrolet Equinox?
If you want your car to last, make sure it serviced on time and according to the proper schedule. Also to preventing more extensive problems in the future, taking your car in for service as recommended by the manufacturer means you’ll save money on car repairs and get to drive your car longer. In your vehicle’s manual, you can find the Chevrolet Equinox maintenance schedule to ensure proper service performed. To keep your Chevrolet Equinox in top shape and safe to drive, you must keep up with all service intervals.
What are the Additional Maintenance / Care for your Chevrolet Equinox?
Earlier you have learnt about the Chevy Equinox Maintenance Schedule. However, apart from Chevy Equinox Maintenance Schedule there are some additional maintenance too. Read to learn more.
Alignment
- For your tires to perform at their best, alignment is crucial.
- You may need to adjust your alignment if you notice your vehicle pulling one way or the other as you drive.
Batteries
- During engine start-up, the battery supplies energy to the vehicle.
- A great battery with full cranking power can prevent breakdowns and failures to start your vehicle. The Reserve Capacity (RC) is also important due to additional electrical accessories like on-board computers and navigation systems.

Brakes
- To drive safely and successfully, you must have good stopping power. In addition, it’s important to know if your brakes are working properly when you need to stop.
- A chirping, grinding, or squealing noise or difficulty stopping the vehicle are signs of brake wear.
Fluids
- In order to maintain optimum performance, you should maintain adequate fluid levels in your vehicle.
Hoses
- Maintaining the condition of hoses such as heater and radiator hoses is important.
- A worn, cracked, soft, or blistered hose is a sign of wear.
Lights
Make sure your headlights are bright and work properly when there limited visibility.
Multi Point Vehicle Inspection
- Invest in a multi-point vehicle inspection to protect yourself and your investment. Dealers can examine critical systems and inform you when they may need to repaired. Many components are also checked visually.
- The inspection includes a check of your tires, brakes, belts, hoses, lights, and fluids.
Tires
- The tires on your vehicle are what keep it moving, so we make sure they are properly aligned, balanced, and in top condition. Tire rotation recommended every 7,500 miles or 12,000 kilometers.
- Your tire needs replacing if: three or more tread wear indicators are visible around the tire; the cord or fabric is visible through the rubber; or the tread or sidewall cracked or cut.
Windshields
- Take advantage of the best view of the road. Clean and scratch-free windshields are essential for safety, appearance, and optimum performance.
- Scratches, cracks, wind noise, or water leaks are all signs of wear.
Wiper Blades
- Ensure your wiper blades are in good condition so you can see clearly through your windshield.
- Rubber that worn or split may show signs of wear, such as streaks or skipping across the windshield.
What are the Pros and Cons of Chevy Equinox?
Pros of Chevy Equinox
- Welcoming Interior
As a result of the Equinox’s top-of-the-line Premier trim, its interior was both well-equipped and enjoyable to be in. The cabin features a stylish two-tone design and excellent materials quality, as well as niceties such as a heated steering wheel, hands-free power liftgate, and heated front seats on the Premier trim.
- Easy Controls
Depending on trim, the Equinox comes with either a 7- or 8-inch touchscreen mounted high in the center of the dashboard. In addition to accommodating convenient physical controls for audio and climate, the system responds quickly and has a simple menu structure.
- Room for the (Small) Gang

Even though some others in the category are more spacious, the cabin offers enough legroom and headroom for adults front and rear. It’s easy to install car seats with Latch anchors, and the seat belt stalks are tall enough to connect easily with booster seats. The cargo space is likewise adequate, if not class-leading, and a handy underfloor storage area keeps small items contained.
- Budget Friendly, With a Catch
Pricing is one of the areas where Equinox has an edge over some competitors. Base 2023 Equinox models with front-wheel drive start at $27,995 (including destination) – significantly less than Honda CR-Vs or Toyota RAV4s. It’s still a bit more than a Hyundai Tucson, and all of these competitors offer more standard safety features.
Cons of Chevy Equinox
- Powertrain Problems
An automatic transmission and a turbocharged four-cylinder engine provide 175 horsepower. In addition to not being particularly peppy nor refined, the engine is slow to respond from a stop and has little reserve power for passing and merging. Additionally, the engine contributes to an already noisy cabin, and the automatic stop-start system is anything but smooth. When the SUV started, it automatically turns on again.
- Disappointing MPG
As a result of its lackluster performance and stop-start system, the Equinox is not particularly fuel-efficient. According to the EPA, base models with FWD achieve 26/31/28 mpg city/highway/combined, which is less than similar versions of the CR-V, Tucson, and RAV4.
- Noisy Cabin
Compared to its competitors, Equinox’s cabin is louder due to wind, road, and engine noise. It is arguably the engine that is the worst offender, exhibiting a lack of refinement that is not only unpleasant to listen to, but also causes vibrations in the steering wheel and accelerator pedal that only worsen with speed.
- Rough Rider
In addition to its ride and handling, Equinox is also behind its competitors. When compared to the best in the category, which offers either a comfortable ride or sporty handling or a combination of both, the Equinox is just rough and unrefined. There is a lack of composure throughout the cabin as it shakes and bounces over road imperfections.
How Reliable is The Chevrolet Equinox?
Chevrolet Equinox’s reliability can vary depending on factors such as maintenance, usage, and model year. In general, the Chevrolet Equinox considered a reliable compact SUV, but there can be differences between model years and models.
On highways and in cities, the Chevrolet Equinox offers a solid handling experience. It is a smooth and comfortable drive. There is a good grip on the road by the vehicle. The fuel economy is one of the best in the class for a compact SUV. A segment-leading 39 MPG achieved by the 2018 Chevrolet Equinox Diesel.
As a result of Equinox’s seat height, drivers have excellent forward visibility. Longer drives are more comfortable since there is ample support. In terms of driving comfort, the Chevy Equinox is a very comfortable vehicle. As well as offering a wide range of powertrain options, the car meant to provide comfort and convenience for its occupants. Long journeys made more comfortable with bucket seats.
Although Chevrolet Equinox models have generally had a good reputation for reliability, individual experiences may vary. Consider the vehicle’s maintenance history before making a purchase, and have a trusted mechanic inspect the vehicle if you can. A reputable dealership may also offer certified pre-owned options with warranties and comprehensive inspections, providing additional peace of mind.
Conclusion: Chevy Equinox Maintenance Schedule
Now you have some idea about the Chevy Equinox Maintenance Schedule. Chevrolet Equinox has been a compact SUV in its lineup for many years. For individuals and families seeking an affordable compact SUV with decent interior space and features, the Chevrolet Equinox is a good choice. In order to ensure a vehicle meets your expectations and needs, you should research the exact model year and trim level you’re interested in. For the latest information on the vehicle’s performance, reliability, and features, consider driving it and consulting reviews.
FAQs
Does the Chevrolet Equinox come with both front-wheel drive (FWD) and all-wheel drive (AWD)?
In addition to FWD and AWD configurations, the Chevrolet Equinox comes in a variety of trim levels and engine choices.
How many seats does the Chevrolet Equinox have?
There is a standard seating capacity of five passengers for the Equinox, but some models offer the option of a third-row seat to accommodate seven passengers.
Is the Chevrolet Equinox equipped with any notable safety features?
Typical Chevrolet Equinox safety features include lane departure warning, forward collision alert, automatic emergency braking, and more. Depending on the trim level, some of these features may be standard or optional.
How much can the Chevrolet Equinox tow?
Equinox’s towing capacity varies based on engine and drivetrain configuration. The towing capacity ranges from 1,500 to 3,500 pounds, depending on the model year and configuration.
How fuel-efficient is the Chevrolet Equinox?
It depends on the engine choice and driving conditions to determine the fuel efficiency of the Equinox. The compact SUV segment known for its competitive fuel economy.

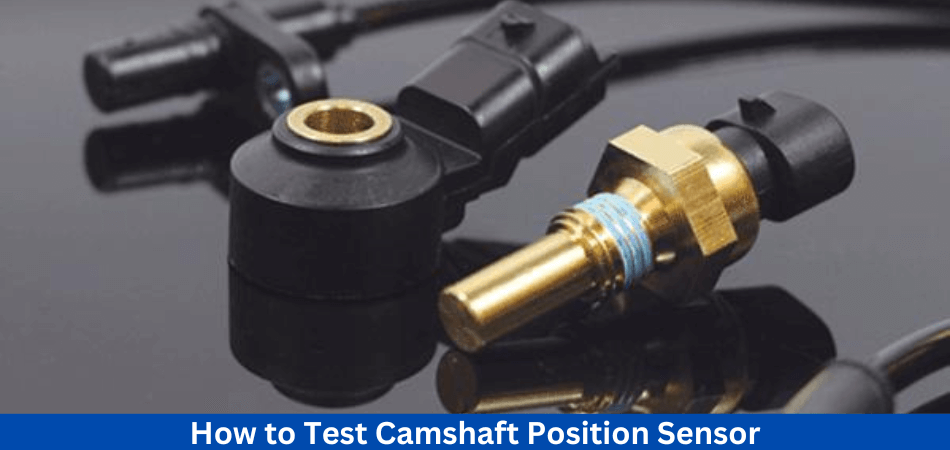
Crankshaft and camshaft position sensors make the rotation of a vehicle’s engine possible. When a sensor malfunctions, a car won’t start; it would make noise, but won’t move. The engine may lose power, misfire, or not spark while starting. Cars can be driven with faulty sensors in many cases, but they shouldn’t as it leads to more danger. Without treatment, you will have to pay for expensive repairs, and your engine may suffer permanent damage. So, How to Test Camshaft Position Sensor?
The camshaft position sensor (CMP) can be checked for functionality and correct operation by checking its functions. The symptoms of malfunction show a total failure of the sensor or its unstable operation, and a multimeter or diagnostic scanner is needed for an accurate diagnosis. It is rare for the sensor itself to fail, but its wiring and plug require attention. In this article, we’ll briefly learn about everything about Camshaft Position Sensor including, How to Test Camshaft Position Sensor.
What Is a Camshaft Position Sensor?
Camshaft position sensors (CMPs) track and send information to vehicle ECMs/PCMs about the actual position of an engine’s camshaft. As a result, this information becomes crucial in determining the positions. Because intake and exhaust valves are throughout both engine banks, since lifters/pushrods correlate with cam/valve timing.
The timing of an engine’s ignition system and fuel injectors is dependent on its camshaft timing. It would be impossible to regulate injector pulse timing or spark advance without such feedback. Additionally, implementing such technology as variable valve timing between banks 1 and 2 would be a pipe dream. A tone ring positioned at one end of the camshaft position sensor captures the signal from the camshaft position sensor, which operates on magnetism.
An engine’s management software receives feedback via a waveform signal generated by the teeth of the tone ring as the camshaft spins. Learn more here.
What are the Types of Camshaft Sensors?
Generally, camshaft position sensors come in two types:
1. Magnetic type or variable reluctance: There are two wires on this type of sensor, which makes it easy to identify. There is an alternating current (AC) sine wave signal produced by the magnetic type.
2. Hall effect type: In this type, there are three wires: one for the reference signal or power, one for the ground, and one for the signal voltage.
Identify the type of sensor you have in your system. There may be a third shielded wire on some magnetic types that helps cancel noise. Consult your vehicle’s service manual if necessary.
What are The Functions of the Camshaft Position Sensor?
In order to better understand how the camshaft position sensor works, let’s look at an example. The camshaft opens the engine valves when an internal combustion engine is started.
As a result, air and fuel directed into the combustion chamber by the engine control module. Then, the valves closed so the piston could begin compressing the air and fuel.
Power produced when the engine control module ignites the combustion process to drive the piston down. Then it reaches its highest point. By opening the exhaust valves, the camshaft permits the piston to return to its original position. After that it release exhaust gases from the exhaust manifold.
The camshaft position sensor and other components also contribute to combustion in an engine.
Where Is the Camshaft Position Sensor Located?
The exact position of an engine’s camshaft position sensor varies from vehicle to vehicle. Depending on the engine, the sensor may be mounted directly within the unit’s front timing cover. In some vehicles, this sensor is mounted on the valve cover or cylinder head.
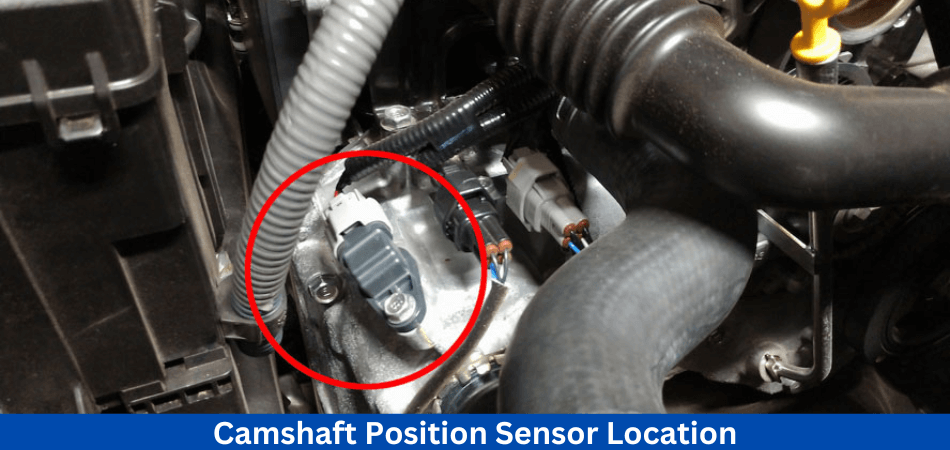
If you are unsure about the exact location of your vehicle’s camshaft position sensor. Then consult your factory-specific service and repair manual.
What are the Symptoms of a Faulty Camshaft Position Sensor?
There are a variety of secondary symptoms associated with a faulty Camshaft Position Sensor, some of which can be quite troubling. When diagnosing an issue of this type, recognizing these symptoms can be invaluable.
There are several common issues associated with a faulty or failing camshaft position sensor.
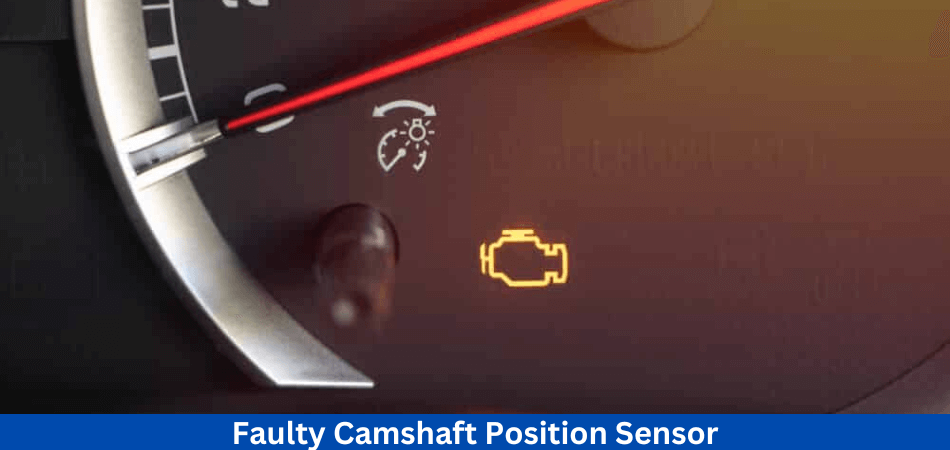
1. Illuminated Check Engine Light
Most of the time, a faulty camshaft position sensor will illuminate the check engine light on a vehicle. When a vehicle’s PCM logs one or more timing-related diagnostic trouble codes, this occurs.
2. Starting Difficulties
A vehicle won’t start without a valid timing signal from the camshaft position sensor. Vehicles may only start intermittently or fail to start altogether when this happens.
3. Stalling
For some vehicles, an accurate camshaft position sensor signal required to continue operating. The engine will likely stall if this signal is lost, even for a moment.
4. Erratic Idle
A vehicle’s camshaft position sensor may begin to malfunction when the engine idles at first. Any signal data presented to the vehicle’s ECM/PCM is relatively inaccurate.
5. Hesitation/Loss Of Power
An engine with a failing camshaft position sensor might also appear low on power, hesitate under load, or lurch or jerk when accelerating. The ECM/PCM of an engine receives inaccurate or inadequate feedback.
6. Reduced Fuel Economy
To facilitate efficient fuel delivery and spark timing, internal combustion engines require accurate camshaft position sensors. When the sensor fails, fuel is often consumed excessively, resulting in reduced fuel economy and increased exhaust odor.
7. Failed Emissions Test
A malfunctioning camshaft position sensor can cause state-mandated emissions tests. Even short periods of overfeeding can result in overly rich exhaust emissions.
What Causes the Camshaft Position Sensor to Fail?
There are a number of reasons why a vehicle’s camshaft position sensor can fail. Exposure to prolonged periods of extreme heat is one of these causes. Camshaft position sensors often fail following instances of engine overheating. Which explains the higher-than-normal frequency of such failures.
Premature fatigue and failure can also caused by contamination from oil, coolant, or other chemicals. Sensor wiring receptacles or other wiring can contaminated by this contamination. As a result, the insulation material that protects the wiring of the circuit can break down.
It is also possible for this sensor to damaged by road debris when it is hit by an impact. If not protected by a suitable undercover, debris can strike timing cover-mounted camshaft position sensors.
Can You Drive With a Bad Camshaft Position Sensor?
In most cases, it is not recommended to drive with a bad camshaft position sensor, unless it is absolutely necessary to reach a safe destination for repairs. Such failures are often accompanied by a variety of drivability-related symptoms.
If one drives in this manner, one may end up stranded on the side of the road with little recourse.
It is always advisable to replace a faulty sensor at the earliest opportunity. Since the camshaft sensor in question continues to deteriorate, this prevents further hardship. A trusted service center should contacted as soon as possible if you do not feel comfortable doing the repairs yourself.
Why Should You Check Crank Sensors Regularly?
Crankshaft sensors convert mechanical energy into electrical signals that power ignition and fuel injection systems in engines. Multimeter testing ensures that the crankshaft sensor is functioning and sending accurate information to the vehicle’s computer.
Misfires, poor power, stalling, hard starting in cold weather, and reduced acceleration can caused by faulty crank sensors. It may be possible to identify problems with a crank sensor that might otherwise be difficult to diagnose without testing it. By checking your crankshaft sensor, you can extend the lifespan of your vehicle. Read more to learn about How to Test Camshaft Position Sensor.
What You Need To Know Before Testing Camshaft Position Sensor?
It is essential to ensure that all safety protocols have followed before using a multimeter to test the crankshaft position sensor. Be sure the vehicle parked safely, level, and that the negative battery cable disconnected before beginning any tests. Digital multimeters should also used with extreme caution. Since incorrect readings can damage electrical components or even short-circuit them.
Also, it’s important to know where the crankshaft sensor located within the engine and how it works. On either inline or V engines, these sensors are generally mounted near the flywheel, so some engine disassembly required to reach them. The type of crankshaft position sensor installed in your vehicle is also crucial. Many modern cars use either hall effect or variable reluctance sensors.
Then, using a multimeter, you can test the crankshaft position sensor once all safety precautions have been taken.
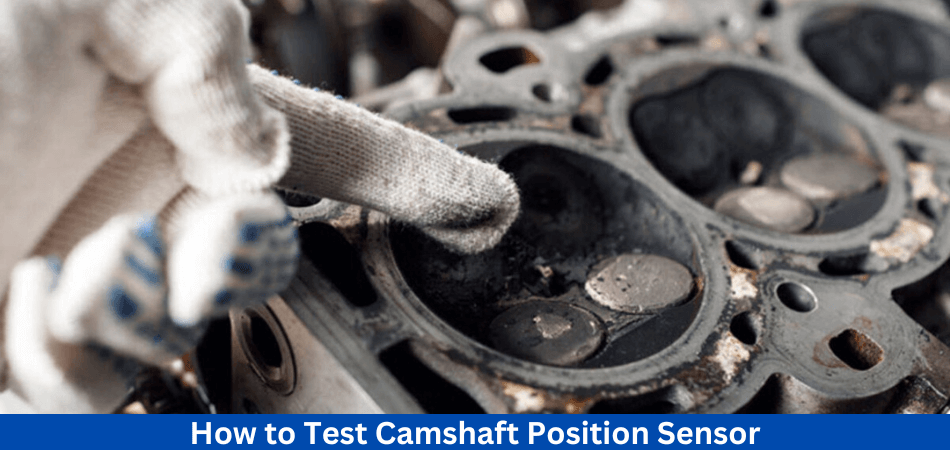
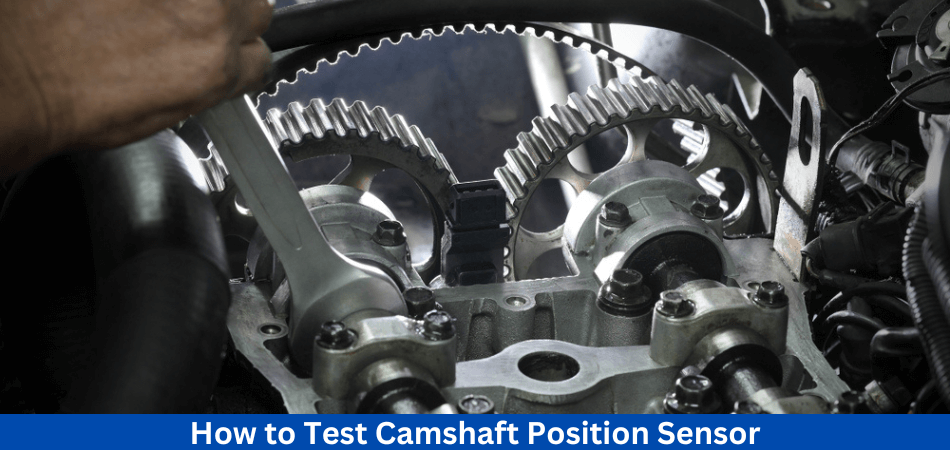
How to Test Camshaft Position Sensor?
Now let’s learn the steps of How to Test Camshaft Position Sensor.
1. Testing a Magnetic type CMP Sensor
The magnetic-type CMP sensors produce their own AC (sine wave) signal. If you want to test AC (alternating current) voltage, you will need a digital multimeter (DMM).
To prevent the engine from starting, disable the ignition system or fuel system. A jumping wire can used to ground the ignition coil and high tension wire from the distributor cap. Metal brackets or bolts can used on the engine for this purpose. You can also prevent the engine from starting by removing the fuel pump fuse. Refer to your vehicle’s manual if necessary.
- If you have a manual transmission, set it to Neutral or Park.
- Be sure to engage the emergency brakes.
- Make sure the CMP sensor unplugged.
- DC voltage should be set on your multimeter.
- If the ignition is on but the engine is off, check for voltage at the harness connector. The terminal may have around 1.5 volts depending on your particular model. You should consult the owner’s manual of your vehicle.
- You can now read AC voltage with your DMM meter.
- Make sure your DMM leads connected to the pins on the sensor terminals.
- For a few seconds, have an assistant crank the engine.
- You can check your multimeter’s voltage by reading it.
- Your results should compared to the specifications in your repair manual.
2. Testing a Hall Effect Type CMP Sensor
A Hall effect sensor produces a squared, digital signal representing the highest and lowest voltages.
- Park (automatic) or Neutral (manual) your transmission.
- Be sure to engage the emergency brakes.
- Stop the engine from starting by removing the fuel pump fuse. You may need to consult the owner’s manual of your vehicle if necessary.
- Make sure your DMM is set to DC volts.
- Connect your DMM’s ground lead (black) to battery negative, the post with the negative (-) sign. And back probe the power wire on the harness connector with the DMM’s red lead.
- For a few seconds, have an assistant crank the engine.
- A DMM reading of about 5 volts should be obtained.
- Back probe the harness connector’s ground wire with the red lead of your DMM. Connect the ground (black) lead of your DMM to the negative lead of the battery.
- Crank the engine for a few seconds with an assistant.
- A voltage reading of about 0.1 or 0.2 volts is normal.
- You can now back probe the signal wire on the harness connector with the red lead of your DMM. Make sure the ground (black) lead of your DMM connected to the negative terminal of your battery.
- Start the engine briefly with the assistance of an assistant.
- In the range of 0 to 5 volts you should get a fluctuating voltage reading.
- There are some errors with your signal values, but the power and ground values are fine, so replace the CMP sensor. If necessary, consult the electrical value specifications in your vehicle repair manual.
How Much Voltage Should a Crank Sensor Have?
Earlier you have learnt about How to Test Camshaft Position Sensor. Now lets move to the voltage section. It depends on the type and make of the vehicle and what voltage the crank sensor should have. A multimeter generally measures between 0.1 volts and 5 volts when testing crankshaft sensors. Crankshaft sensors operate on analog signals that fluctuate with engine speed. You’ll need to adjust your multimeter settings accordingly in order to accurately measure this signal.
If you’re not sure which setting to use, consult your vehicle’s repair manual or ask an experienced mechanic. You should check the voltage reading at idle speed after you’ve set up your multimeter correctly. You should see a reading between 0-2.5 volts, depending on your vehicle’s make and model. A crankshaft sensor that reads above or below this range should be replaced.
While the engine is running at higher speeds, you should also check the voltage. If the reading is outside of this range, the crank sensor needs to be replaced. The reading should usually be between two and five volts. Besides, if your vehicle has other electrical issues, such as a malfunctioning alternator or spark plugs,. Then the readings may not be accurate, and further diagnostics may required.
Can You Test a Crank Sensor With Oscilloscope?
Using an oscilloscope, you can test the crankshaft sensor. An oscilloscope measures electric signals over time.
With the crankshaft sensor connected, it displays voltage changes as the engine runs and the crankshaft rotates in real time. Using this information to diagnose or tune the sensor can provide valuable insight into its performance.
An oscilloscope can used to test your crankshaft sensor. Connect one probe from the oscilloscope to your engine’s ground point (the battery negative post is ideal), and the second probe to the crank sensor’s terminals. Observe the oscilloscope waveform after starting your engine. Voltage spikes and drops should not occur intermittently on the sensor’s waveform. You may need to conduct a further investigation if you notice any irregularities.
If you plan to use an oscilloscope to test your car’s crankshaft sensor. Not only should you check your car’s service manual, but also your vehicle’s manual may contain specific information about how to do so. Moreover, if you are unfamiliar with oscilloscopes, it is best to leave this task to a qualified mechanic with experience reading waveforms.
What If My Crankshaft Sensor Passes the Test?
You may not be experiencing a malfunction due to the crankshaft sensor if you pass the test. The problem may also be caused by other sensors, spark plugs, or wiring around the area. A professional diagnostic might be a good idea if you can’t find anything wrong with those components either. In some cases, a technician can diagnose the problem and fix it.
In some cases, crankshaft sensors that pass the test but still have problems with your vehicle’s performance are faulty or malfunctioning. It may be necessary to replace the component with a new one in this case.
No There’s no denying that crankshaft sensors are vital components of a vehicle. Maintain it in good working condition by testing it regularly and replacing it as needed to ensure optimal performance. By following these steps, you can avoid costly repairs in the future.
How to Replace the Crankshaft Sensor?
Once the crankshaft sensor has been tested and determined to be faulty, it needs to be replaced. There may be several steps involved in this process, depending on your vehicle. A crankshaft sensor is usually accessible by removing components and disconnecting wiring harnesses.
Disconnect any associated wiring after you have located the component and unbolted it from its mounting bracket. After removing the old crankshaft sensor, install the new one in reverse order, ensuring all connections secured.
Test that everything is working as expected by starting the car. After checking everything out, reinstall any removed components and reconnect any disconnected wiring harnesses. Now that your crankshaft sensor has replaced, it should work properly.
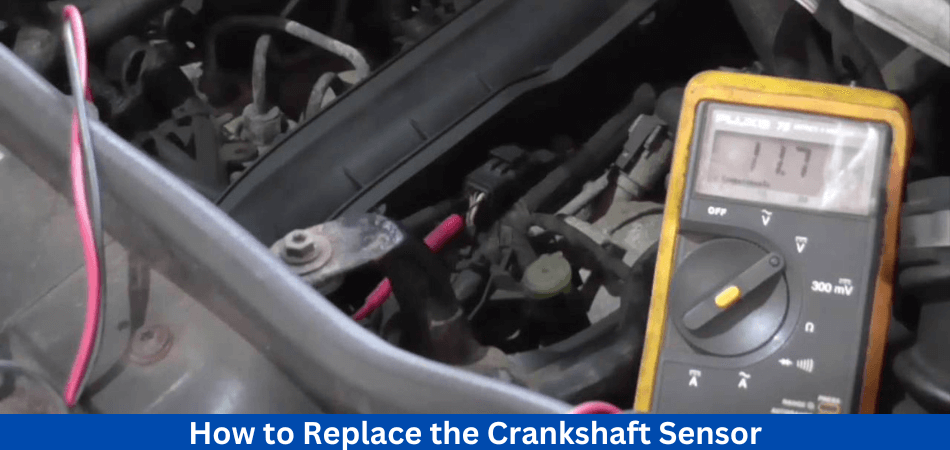
If you are replacing the crankshaft sensor, follow all safety instructions properly. By doing so, you will ensure you drive safely and your car runs optimally.
What is the Replacement Cost of a Camshaft Position Sensor?
Depending on the make and model of the vehicle, camshaft position sensor replacement can cost varying amounts. As a result, the costs of parts, labor, and labor hours required to complete such repairs differ significantly.
In spite of this, the cost of such repairs tends to be predictable. Typically, replacing the camshaft position sensor on a vehicle costs between $100 and $250. Purchasing a replacement sensor itself will cost around $30-$120. while installation-related labor will cost another $70-$130. A shop supply charge may incurred in certain cases.
Additional Tips and Advice
It is important to remember that crankshaft position sensors are delicate when testing them with a multimeter. When you handle them incorrectly, you risk damaging the sensor and causing bigger problems. You should follow the following advice to ensure that your tests are accurate and to avoid damaging the sensor:
Make sure to use a Current Limiting Resistor (CLR) when connecting the crankshaft position sensor to power sources. It prevents the sensor from being overloaded with voltage or current that could damage it.
Before performing any tests on the crankshaft position sensor, make sure all connections are secure. Sensors can be permanently damaged by loose connections leading to inaccurate readings.
When testing the crankshaft position sensor, make sure your multimeter is set to the appropriate range. It is important to adjust the settings and ranges of multimeters carefully to get accurate readings.
Make sure you have experience with electrical work before attempting to repair or replace a crankshaft position sensor. It is important to handle these sensors with care in order to avoid any potential damage.
Conclusion: How to Test Camshaft Position Sensor
Now you have a clear idea of How to Test Camshaft Position Sensor. In conclusion, testing a crankshaft sensor with a multimeter is a relatively easy process. Following these steps will help you determine if the sensor is functioning properly quickly and accurately. Keep yourself safe when working with electrical components by taking safety precautions. Regularly testing your crankshaft sensor will enable you to identify potential problems. For many years to come, this will help preserve the performance of your vehicle.
Read more of our articles here.
FAQs
What is the appropriate ohm value for a crank sensor?
Different models and makes of crankshaft position sensors have different resistances. A resistance of 500-1500 ohms is generally recommended. If you want to be sure, consult the service manual for your vehicle.
How does a faulty crankshaft sensor affect the engine?
Several engine problems can caused by a faulty sensor, including misfires, stalling. Also, it can cause fault codes to appear in your engine control module, resulting in an illuminated check engine light.
How safe is it to use a multimeter to test a crankshaft sensor?
You should always take the necessary safety precautions. Ehen testing your crankshaft position sensor with a multimeter. It is also important to read and follow the instructions for the multimeter you are using, as improper use could result in electric shock. For help using a multimeter safely, contact a qualified mechanic.
How can I determine if my crankshaft sensor is working correctly?
You should test your crankshaft position sensor with a multimeter to the instructions. A qualified mechanic can assist you if you’re not sure how to do this. A malfunctioning sensor can also be visually checked for signs of wear or damage.
When should I test my crankshaft position sensor?
You should perform regular maintenance checks on your vehicle’s crankshaft position sensor. To ensure optimal engine performance and reliability. Once a year or every 10,000 miles, test it with a multimeter according to the manufacturer’s instructions. The sensor should replaced as soon as possible if any issues found during the test.
There is nothing that lasts forever, and your transmission is no exception – especially if it is automatic. A transmission in a car will last up to 200,000 miles on average. Therefore you might need to rebuild it. But How long does it take to rebuild a transmission?
When your car has reached 200,000 miles, or if you are considering having it rebuilt, you might wonder how much it will cost and how long it will take. This article will cover How long does it take to rebuild a transmission, including it’s pros and cons. Lastly, we’ll discuss if the transmission rebuild is worth the money.
What is a Transmission Rebuild?
A transmission rebuild involves inspecting and replacing faulty transmission components with new ones. Yet, it’s not as easy as it sounds since it’s one of the most demanding automotive repair procedures.
You won’t be able to handle this on your own, and picking the right mechanic is important. When it comes to automatic cars, the transmission contains a lot of moving parts. In order for the rebuilt system to work, these sensitive parts must replaced.
Learn more at here.
How to Tell That Your Transmission Needs Repairs?
There is no light on the transmission of a vehicle, despite it being a vital component.
But, you can detect transmission issues before you become stranded with a car that won’t move. You can find them here:
1. The check engine light:
There are many problems that can indicated by this light, such as transmission problems. This light should never ignored, and you should visit a mechanic as soon as possible. A vehicle’s warning light is only illuminated when something serious is likely to happen. If you think there is a problem, you must have it checked as soon as possible.
2. Fluid Leaks:
You can drive either an automatic or a manual. Transmission fluids must lubricated, and leaks can cause a problem. You should check your transmission if you see brown spots on your parking space or if your transmission fluid is low.
3. Sluggish acceleration:
Generally, expert drivers can tell if their cars are malfunctioning. It’s likely that you have a transmission issue if you feel like your car is not accelerating. Check it out to save money on repairs.
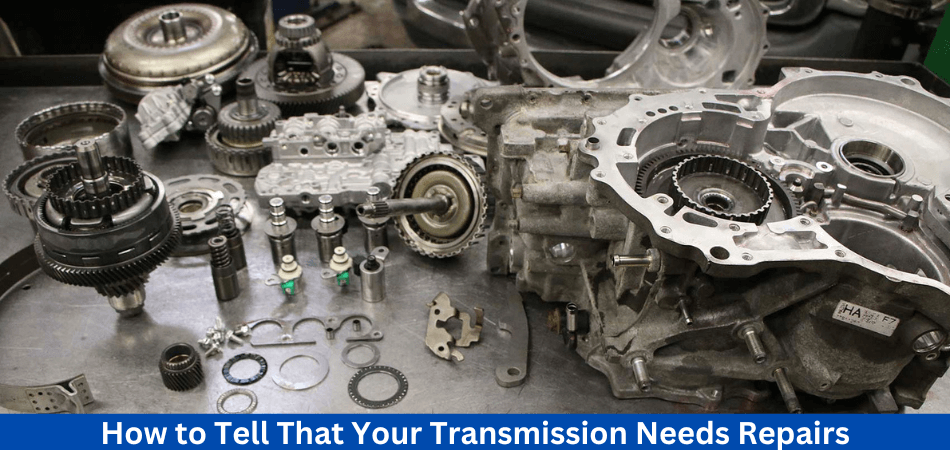
4. Sounds:
The transmission may be malfunctioning if you hear unusual sounds, especially during shifting.
If you hear clunking, squealing, rattling, or slight humming, your transmission is faulty. The sooner you get things under control, the lower your costs will be.
What You Should Know Before a Transmission Rebuild
You may need to consider a transmission rebuild if your vehicle’s transmission shows signs of wear or injury. During transmission rebuilding, the transmission disassembled, inspected, and any damaged or worn parts replaced. If you decide to rebuild your transmission, here are some things you need to consider:
Cost:
Rebuilding a transmission can be costly. Often costing several hundred to several thousand dollars. A lot depends on how your vehicle was built and model, where the transmission was damaged, and the cost of replacement parts.
Time:
In some cases, transmission rebuilds can take up to a week or more to complete. This depends on the difficulty of the rebuild and availability of replacement parts.
Quality of Parts:
The quality of replacement parts is crucial when it comes to transmission rebuilds. Rebuilding a transmission requires high-quality parts to ensure long-term durability. The mechanic may use low-cost parts in an attempt to save money. But this can result in future problems and potentially more expensive repairs.
Warranty:
Any transmission rebuild work performed by a reputable mechanic will be covered by a warranty. Before accepting the work, ask about the warranty.
Maintenance:
To ensure the longevity of a rebuilt transmission, proper maintenance is essential. If you need to change transmission fluid or perform other maintenance, follow the manufacturer’s recommendations.
Experience:
The transmission rebuild should be performed by an experienced, qualified mechanic. Choose a mechanic who has experience rebuilding transmissions for your vehicle’s make and model and who has a track record of success.
While transmission rebuilding is a time-consuming and costly process, it is crucial for ensuring your vehicle’s longevity and performance. It is important to choose a reputable mechanic and use high-quality parts, as well as maintain the rebuilt transmission properly to ensure its longevity.
What are the Processes to Rebuild Manual Transmission?
- Make sure your problem is not limited to your clutch, and rebuild the transmission if necessary.
- Remove the transmission from the vehicle.
- Check the clutch disc, pressure plate, flywheel, and other connected components.
- To restore clutch function, replace any cracked elements.
- Reinstalling the transmission is time-consuming. If necessary, top up the transmission fluid.
- Make sure the clutch installed and adjusted by performing a lift check.
- It will be ready to drive several miles after being street-tested to confirm optimal transmission and clutch operation.
What are the Factors Affecting How Long a Transmission Rebuild Will Take?
A Busy mechanic shop – It’s said that a busy mechanic shop is a good one. And often this can be true. The mechanics will be in high demand, so it may be difficult to get a fast turnaround if they are good.
There is also the possibility of the opposite happening. Due to the mechanics’ poor skills, anything they do takes a long time. Whatever you do, don’t expect to get your car back the next day if you have the transmission rebuilt.
Parts availability –
Most part suppliers will carry the most common transmission parts if you drive a popular type of vehicle. It’s likely that you’ll only need to make a phone call to get things like a master transmission rebuild kit, solenoids, and gaskets. A gear or pump can found from a salvage yard if a hard part needs to replaced. The parts required to rebuild your transmission may take longer to get if your vehicle is a bit more unusual.
Installing and removing the transmission –
On some vehicles, removing the transmission takes only a couple of hours. Besides, it can take as long as 4-6 hours to remove the old transmission from more complicated vehicles. After the transmission has been rebuilt, it must be reinstalled.
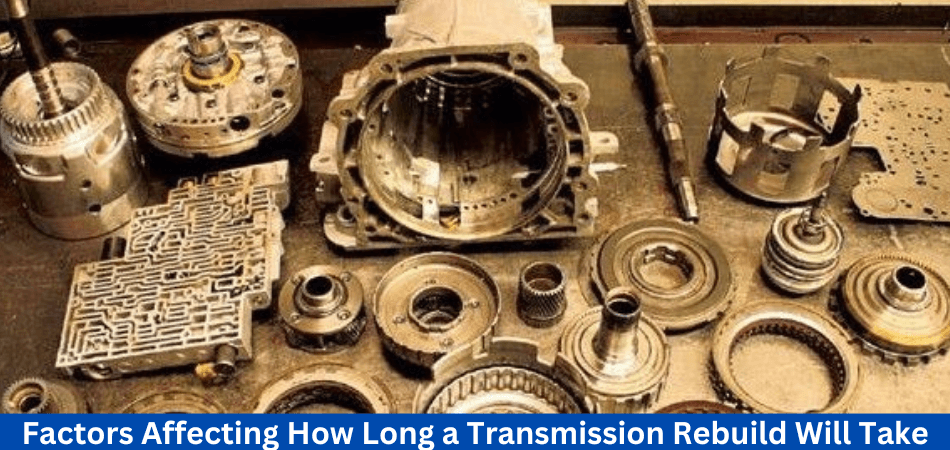
Rebuilding the transmission –
Transmissions can dismantled, diagnosed, and rebuilt in 3-4 hours by an experienced transmission rebuilder. It can be time-consuming and distracting for them to jump from one job to another in a busy shop. Additionally, some automatic transmissions are more complex than others. , which takes more time.
As soon as the rebuilt transmission has reinstalled, the vehicle needs to tested to ensure that it is working . It may be necessary to remove and disassemble the transmission if it doesn’t work . Even more time will required for this.
Rebuilding a transmission takes time. , it’s not a good idea to be without your vehicle too long. In the same vein, you don’t win a mechanic by rushing the job and not doing it right.
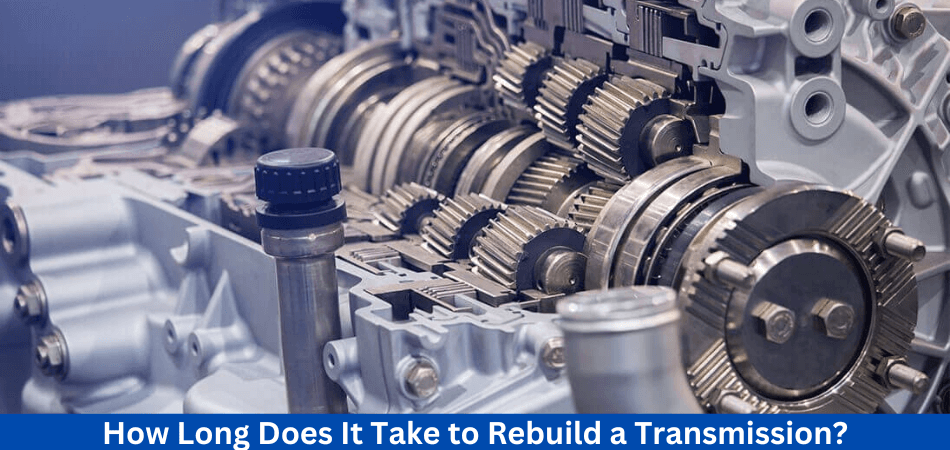
How Long Does It Take To Rebuild a Transmission?
So the question is How long does it take to rebuild a transmission? A qualified shop can rebuild a car transmission in 1-2 days, and a truck transmission in 2-3 days.
There are many factors that determine how long it will take to rebuild your transmission:
- Transmission complexity
- Parts and tools are available
- Difficulty in removing and reinstalling
- Mechanic’s level of experience
The rebuilding of most passenger vehicle automatic transmissions will take up to two days 9 times out of 10. There is a good chance that your manual transmission will be rebuilt within the same day if your car built before 2010.
How Much Does It Cost to Rebuild a Transmission?
Okay, so we’ve discussed how long it will take a transmission to be rebuilt, but what about the cost?
It depends on the type of transmission and the year, make, and model of your vehicle and what it will cost to rebuild a transmission. A transmission in an older car is generally much cheaper to rebuild than one in a new car with complicated internals.
In general, rebuilding a car transmission costs between $1,500 and $4,000, and rebuilding a truck transmission costs between $2,500 and $6,000. It depends on the specific transmission, the number of parts that need to replaced, and how much labor needed.
Major transmission damage (broken teeth on many gears, etc.) will be more expensive to rebuild than minor damage (like blown seals).

By transmission type, here’s how much it costs to rebuild a transmission:
- Manual Transmission – $1,500 to $2,500
- Automatic Transmission – $2,500 to $4,000
- CVT Transmission – $3,000 to $5,000
- Diesel Transmission – $3,500 to $6,000
The average cost of rebuilding an automatic transmission is higher than that of rebuilding a manual transmission.
Different Expenses to Rebuild a Transmission
There are several factors that can affect the specific costs associated with replacing or rebuilding a transmission. Among the most important expenses are:
For transmission repairs or rebuilds, labor costs can be a significant part of the cost. Labor costs affected by many factors, including the expertise and experience of the mechanic performing the repair.
The cost of replacement parts can vary significantly depending on the type of transmission and the amount of repair needed. Some components are very expensive, while others are quite affordable.
- The repair may must additional expenses for fluids and supplies as well as replacement parts.
- For diagnosing specific transmission issues, it may be necessary to charge a diagnostic fee.
- There may be additional costs associated with towing a car to the shop for repairs if it can’t be driven.
- According to the regional and local laws, taxes, and fees may increase the cost of the repair.
Before agreeing to any transmission work, ask the repair shop for a detailed estimate. This can help you comprehend the exact costs involved and help you decide whether to proceed with the repair or consider other options. If you’re looking for a repair shop, it’s important to choose one that has a good reputation and consider factors such as warranties and guarantees.
What are the Time Differences Between Manual vs. Automatic Transmission Rebuilding?
How long does it take to rebuild a transmission? Because it requires the removal and of the transmission, replacement, or repair of worn or damaged parts. And assembly and installation of the transmission. Although the rebuild process is similar for manual and automatic transmissions. There are some key differences that may affect the rebuilding time.
A manual transmission has fewer parts than an automatic transmission, so it can be rebuilt more quickly. Transmissions with automatic transmissions need extra and inspection. Because hydraulic pumps and torque converters are more complicated.
The labor cost of rebuilding an automatic transmission may be higher than that of rebuilding a manual transmission. Because of the longer rebuilding process and the greater specialized knowledge required.
Manual transmission parts may be more readily available than automatic transmission parts. This depends on the make and model of the vehicle. Rebuilding can be slowed down if certain parts need to be ordered or made custom-made.
On Rebuilding a manual transmission can take between 4 and 10 hours. While rebuilding an automatic transmission can take between 6 and 20 hours. It may take longer depending on the make and model of the vehicle, the damage, and the skill level of the mechanic.
If you’re considering a transmission rebuild, it’s important to find a reputable mechanic with experience working on your vehicle’s transmission. A successful rebuild can be ensured and the risk of future problems can be reduced.
How Long Does a Rebuilt Transmission Last?
Rebuilt transmissions should last just as long as new or remanufactured transmissions – around 100,000-200,000 miles. It is likely that the transmission will last at least 40,000 miles if the rebuild was done on the cheap and not all worn parts were replaced.
Your transmission’s number will change depending on how well you maintain it and whether the mechanic rebuilt it correctly.
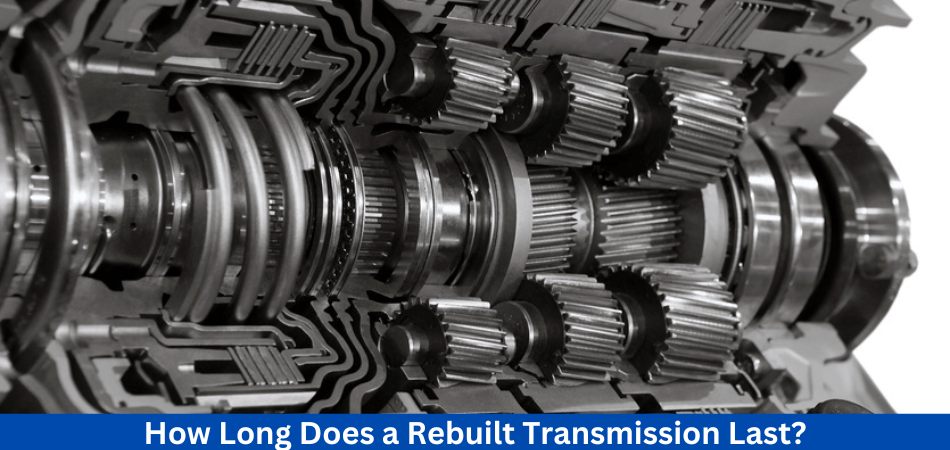
If you tow a trailer every day and drive a lot, you can expect the transmission to last less than 200,000 miles. Alternatively, if you drive your car only on weekends and take good care of it, the transmission may last much longer than 200,000 miles.
What are the Pros and cons of Rebuilding a Transmission?
It is a good idea to rebuild your car’s transmission (if it is in good enough condition to be rebuilt) when it comes to reliability and longevity. Rebuilt transmissions can last another 100,000 miles or more if they are done well by a professional. Additionally, since the mechanic will disassemble the transmission, you’ll be able to check every single internal part and ensure there are no surprises down the road.
Rebuilt transmissions are likely to last for a very long time, but they are expensive to rebuild. It is important to note that rebuilding your car’s transmission gives you certainty that every component is in good working order.
Is a Transmission Rebuild Worth It?
In light of recent economic events, you may wonder whether it’s even worth rebuilding your car’s transmission. Rebuilding a transmission, buying a junkyard replacement, or purchasing a remanufactured transmission are all options for fixing a broken transmission.
In If you can afford it, remanufactured transmissions will probably last another 200,000 miles. Rebuilding your transmission can save you some money if it’s possible. Last but not least, if you’re on a really tight budget, consider replacing your transmission with one from a wrecked vehicle.
There are many factors to consider when choosing the best option for your case. Let’s go over most of them now.
Is it cheaper to Rebuild a Transmission Instead of Replacing it?
Rebuilding a transmission is cheaper than replacing it. New transmissions can cost well over $4000 while rebuilding could cost between $1500 and $4000. In contrast, it may be faster to replace a failed transmission than to rebuild it. The lasting time of a rebuilt transmission varies. About 50,000 miles is the average lifespan of a rebuilt transmission. Alternatively, a new transmission will last up to 300,000 miles if it serviced and checked frequently.
Transmission rebuild vs. Remanufactured Transmission
In some cases, remanufactured transmissions are better than rebuilding your car’s transmission. A remanufactured transmission may be better than a rebuilt transmission in some cases. As a result, a remanufactured transmission returned to its factory settings by the remanufacturer.
Only remanufactured transmissions handled by these specialists. You can replace your failed transmission with a ready-and-waiting remanufactured one. Experts who conduct it thoroughly examine the transmission in a manner similar to a transmission rebuild.
In order to restore the transmission to its original state, they replace all the soft and hard parts and use factory settings. Due to the fact that these transmissions built according to the manufacturer’s specifications, they may even be better than the originals. CVT transmission problems and symptoms differ from those of regular automatic transmissions in part because of the type of transmission.
This is due to manufacturers making adjustments to the same type of transmission for upcoming models. This way, you can find a transmission with no known faults that has updated and brought back to factory condition. Having a mechanic that is familiar with your particular transmission type can save you a lot of time and money.
Why a Remanufactured Transmission Might Be a Good Option For You?
Remanufactured transmissions are an excellent alternative to brand-new ones. These are completely reengineered and assembled in a factory. Typically, they upgraded from their stock form, which means they can eliminate many design flaws that cause premature component failure. As a result, a remanufactured transmission will last much longer than an original one.
Each remanufactured transmission from Street Smart Transmission undergoes a rigorous build process to ensure quality. Nearly 100 technicians specialize in different aspects of the construction process.
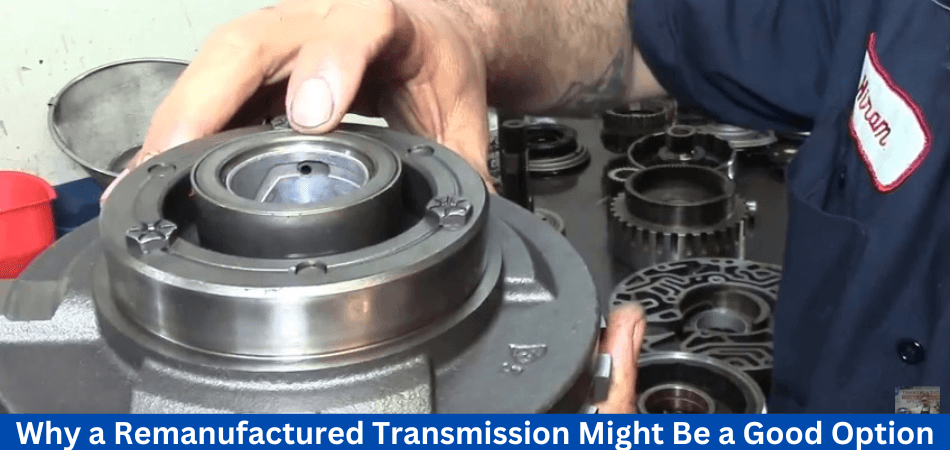
During this remanufacturing process, all of the crucial components from the donor transmission tested to ensure that they meet the original equipment specifications. Cases, pumps, gears, shafts, valve bodies, torque converters, and other components examined for hairline cracks, metal tensile strength, warping, etc. Components that do not meet the specifications discarded and replaced.
Once the parts have cleaned, they sent to the appropriate assembly stations for reassembly. It is the responsibility of quality control managers to ensure that the build meets the specified parameters throughout the process. Any necessary modifications or upgrades are also performed or added in order to fix factory design flaws. A dyno machine used to test the valve body and ensure it performs as specified. Prior to installation, all solenoids tested.
A newly remanufactured transmission goes to the dyno room for testing after its final quality control inspection, using software called CARS (Computer Aided Real-World Simulation) to simulate the real world. A number of real-world driving situations cycled through the transmission to ensure it performs as specified by the factory. As well as breaking in the friction components, it also ensures that it is completely ready to use once it installed.
What to Expect After a Transmission Rebuild?
When your transmission is rebuilt, your vehicle will drive smoother and shift more smoothly. Rebuilding your transmission should restore your vehicle’s performance and reliability.
As part of the rebuilding process, the transmission disassembled, inspected, and rebuilt with new or repaired parts. Taking care of existing transmission problems, such as slipping or shifting, will prevent future problems.
It will be necessary to inspect the transmission after the rebuild has completed to ensure that it is operating properly. Diagnostic equipment may used to check for issues during the test drive.
It’s important to keep in mind that a transmission rebuild might solve some problems with a defective transmission, but it might not address all your concerns. Also, the engine or drivetrain may need to inspected and repaired.
After a transmission rebuild, your mechanic will provide maintenance and care instructions. Your rebuilt transmission will be more reliable and perform better if you do this.
Your vehicle can benefit from a transmission rebuild in many ways, including improved performance, reliability, and lifespan. A properly rebuilt transmission can last for many miles if you work with an experienced, qualified mechanic and follow proper care instructions.
Final Thoughts: How long does it take to rebuild a transmission?
Now you have some idea of How long does it take to rebuild a transmission? It’s a costly experience to rebuild or replace a transmission, and most drivers won’t look forward to it.
It usually takes no longer than two days to rebuild a transmission, but the cost of doing so can be as high as $1,500. Alternatively, you can purchase a remanufactured one or simply get one from the wreckers, rather than having your transmission rebuilt.
A number of pros and cons can found in each approach, so it’s up to you to decide which is right for you based on your particular situation.
Read more of our articles here.
FAQs
Is it possible to drive my vehicle while the transmission is being rebuilt?
In If your transmission needs to be rebuilt, you won’t be able to drive it, since it must removed from the vehicle. During this time, alternative transportation will be necessary.
Could my transmission need a rebuild to avoid a lengthy downtime?
Delaying transmission repairs may lead to more extensive damage and a longer rebuilding process. You should have your transmission inspected promptly if you notice signs such as slipping gears, strange noises, or fluid leaks.
Do transmission shops give accurate timeframes for rebuilds?
You should receive a realistic estimate of how long it will take to rebuild your transmission from a reputable transmission repair shop. Selecting a trustworthy shop with a reputation for quality work and transparency is crucial.
How can a DIY transmission rebuild save time and money?
Transmission rebuilding is a highly specialized and complex task that requires expert knowledge. If not done correctly, DIY rebuilds can result in costly mistakes and longer downtime. Professionals should generally handle this job.
How can I make the transmission rebuild process go more smoothly and more quickly?
To Make sure your transmission maintained regularly, address any issues promptly, find a reputable repair shop, and follow their recommendations. Understanding the timeline and progress of the rebuild requires communication with the technician.


Although most people think of pickup trucks as work vehicles, truck enthusiasts buy them for other reasons as well. For those who want a reliable work truck during the day and a luxurious vehicle at night, the GMC Sierra 1500 is the perfect choice. But what are the Best Tires for GMC Sierra 1500. Or are there any Best Tires for GMC Sierra 1500 available in the market?
There are several factors to consider when choosing the right tires for your GMC Sierra. You should also consider your priorities for tire replacement. A factory tire, or OEM, was chosen by GMC as the most economical and reasonable compromise between capability, fuel economy, and price. One factor may be more important to you than another, depending on your priorities.
It is our firm belief that there is no one-size-fits-all set of tires. Off-roading tires won’t do much for the best street tires, and vice versa. It is just as important to choose your tires according to your needs and budget as to buy a high-quality product. Read on to learn everything you need to know about Best Tires for GMC Sierra 1500.
Choosing the Right Tires for Your GMC Sierra 1500
Choose the right tires for your GMC Sierra 1500 based on the model you choose and how often you drive. If you drive off Royal Oak highways often, or if you use your GMC Sierra for off-roading and racing, you should choose a tire accordingly. Here are some of the best tires for your GMC Sierra based on your driving needs:
GMC Sierra 1500 base and SLE
- Budget– Suitable for pickup trucks, General Tire Grabber HTS is an all-season light truck tire. A combination of comfort, durability, and performance makes the Grabber HTS an attractive choice.
- Mid-Priced– The Falken Wildpeak A/T 3W tires are all-weather off-road and on-road tires with severe snow duty ratings thrown in.
- Most Expensive– The Michelin Defender LTX M/S offers a smooth, quiet ride with long life. Tires like this one offer excellent traction in wet, dry and wintry conditions, even in light snow.
Best Tire for GMC Sierra 1500 Elevation and SLT
- Budget– The Continental CrossContact LX20 is an affordable all-season pickup truck tire that offers performance on the highway and in mild off-road conditions.
- Mid-Priced– The Cooper Discoverer H/T Plus tires are a budget-friendly option for the AT4 model Sierra. Providing moderate off-road capability, these tires emphasize all-season traction.
- Most Expensive– The Michelin Defender LTX M/S offers a smooth, quiet ride with long life. Tires like this one offer excellent traction in wet, dry and wintry conditions, even in light snow.
Best Tire for GMC Sierra AT4
- Budget– A There are few budget tires like the BFGoodrich All-Terrain T/A K02. However, we recommend some low-cost pickup truck tires in this size and style. This is our mid-priced pick for off-road and on-road tires.
- Mid-Priced– The Cooper Discoverer AT3 tires are equipped with white raised lettering and have a snow duty rating of severe.
- Most Expensive– Most off-road adventure vehicles use the Falken Wildpeak A/T3W as their OEM tire. Due to their severe snow duty rating, they are suitable for all weather conditions.
Best Tire for GMC Sierra Denali
- Budget– For a premium vehicle, the Goodyear Wrangler Trailrunner A/T is a great tire. The tire is designed for longevity and overall balance. The tread compound is chip- and tear-resistant.
- Mid-Priced– The Long Trail T/A Tour tire from BFGoodrich offers drivers maneuverability as well as comfort, traction, and durability for highway driving.
- Most Expensive– The Pirelli Scorpion Verde All-Season Plus II tire provides premium performance and fuel efficiency.
Best Tires for GMC Sierra 1500 for Highway Driving
- Michelin Defender LTX M/S
- General Grabber HTS60
- Cooper Discoverer HTP
Best Tires for GMC Sierra 1500 4×4 / Off-Road
- BF Goodrich All-Terrain T/A KO2
- Yokohama Geolander M/T G003
- Cooper Discoverer AT3
Best Tires for GMC Sierra 1500 Sport / High-Performance
- Yokohama Parada Spec X
- Falken Ziex STZ05
- Nitto NT 421Q
Best Tires for GMC Sierra 1500 Winter
- Bridgestone Blizzak DM-V2
What are the Best 10 Tires for GMC Sierra?
1. Bridgestone Dueler H/L Alenza Plus
Bridgestone Dueler H/L Alenza Plus tires are the most popular touring tires among crossovers, SUVs, and trucks that don’t tow frequently. Their performance is long-lasting, and they offer a balanced driving experience.
There is no better tire for GMC Sierra 1500 right now – it comes with an 80,000-mile treadwear warranty. For a more luxurious ride, it is also very quiet and comfortable.
Learn more about it here.
Pros
- Exceptionally quiet and comfortable on the street
- Wet and dry handling is excellent
- Category’s best durability
- Stable at high speeds
Cons
- The best option for towing is not this one
- The traction on snow could be improved
2. General Grabber HTS60
It is very popular among trailer enthusiasts in the USA, especially the General Grabber HTS60. Although the treadwear warranty doesn’t reflect that (65,000-mile treadwear warranty for models with S- and T-speed ratings, and 50,000-mile treadwear warranty for models with LT sizes and H-speed ratings), the tire is powerful and durable.

Pros
- A heavy-duty version is ideal for towing
- Comfortable and quiet
- Excellent performance in both dry and wet conditions
- Gravel-friendly
- The price is fair
Cons
- In the rain, heavy-duty models aren’t as good
3. Pirelli Scorpion Verde All-Season Plus
Scorpion Verde is one of the best touring tires for trucks, especially for those who want to save money and have an elevated driving experience.
Apart from Pirelli’s slightly lower 65,000-mile treadwear warranty, its competitor is excellent in every other respect. This tire offers excellent high-speed stability, traction, and grip.

Pros
- Response time is excellent
- Handles wet and dry surfaces well
- Braking performance is excellent
- Resistance to rolling is low
Cons
- Treadwear warranty reduced to 65,000 miles
4. Falken Wildpeak AT3W
There is no treadwear warranty offered by Falken on the Wildpeak AT3W. Nevertheless, we believe that it is durable and strong. In addition to providing you with ample traction, this tire can handle even the harshest off-road terrain. It has the deepest tread in its category. Due to the heat diffuser technology, the Falken provides excellent high-speed stability on the road, especially when pulling heavy loads or towing.
Both dry and wet handling and braking are excellent. Noise is a concern on highways, however, as with most all-terrain tires.
Pros
- Benefitsllent off-road traction
- Traction is excellent off-roadabilities
- Strong and durable
Cons
- Highway noise is a problem
- There is no warranty on treadwear
5. Yokohama Parada Spec X
If If you own the sportiest version of the Sierra 1500 with the largest 275/55R20 wheels, the Yokohama Parada Spec X will enhance your driving experience significantly. Additionally, the tire offers excellent grip and traction, as well as excellent braking performance.
Due to its wide circumferential center groove and sweeping lateral grooves, the Yokohama tire also performs well in wet conditions. However, light-snow traction isn’t as good as heavy snow.

Pros
- Response time is excellent
- Ability to corner well
- Comfortable and quiet
- Wet traction is very good
Cons
- There is no warranty on treadwear
- The traction on light snow could be improved
6. Bridgestone Blizzak DM-V2
Blizzak DM-V2 BridgestoneM-V2 comes with the NanoPro Tech Multicell compound that has a water-loving hydrophilic coating. It literally removes water from the snow or ice beneath you, improving traction and braking. It sounds silly, but it works.
Additionally, the Bridgestone provides excellent traction, grip, and braking on wet and dry surfaces in cold weather, thanks to its Multicell compound. However, Bridgestone does not offer a treadwear warranty.
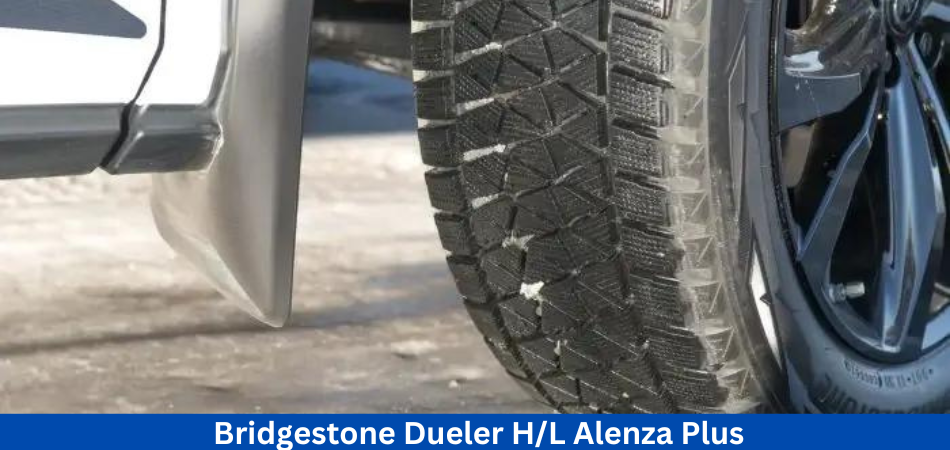
Pros
- Capability to handle snow well
- Wet and dry handling is excellent
- Suitable for use on ice as well
- Class-leading snow and ice braking
Cons
- There is no warranty on treadwear
7. Cooper Discoverer HTP
It is cheaper to buy the Cooper Discoverer HTP than the Defender LTX. Don’t be fooled by its price – this is a great all-season highway tire for GMC Sierra 1500s.
On Coopers are very quiet and comfortable on the road, almost as good as Michelins. In addition to traction and grip, responsiveness is also excellent. In heavy rain, the Cooper works great, but it doesn’t have the best winter traction.
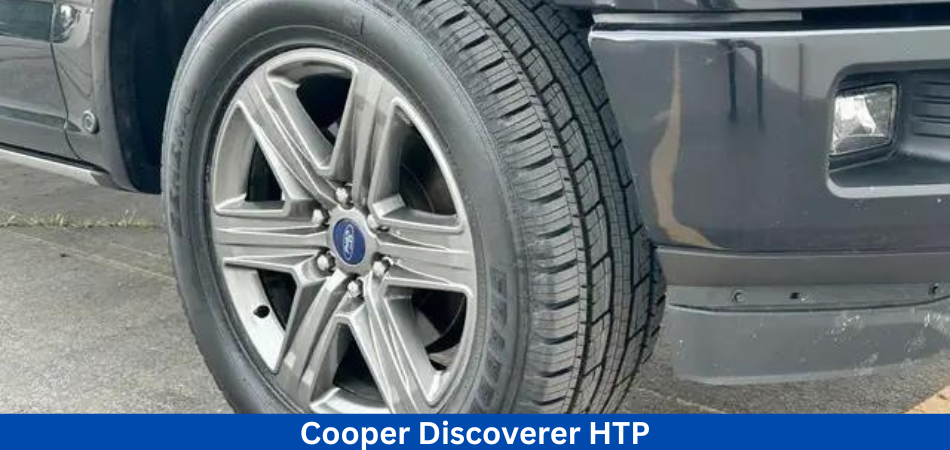
Pros
- Comfortable and quiet
- Exceptional traction and braking in wet conditions
- Dry conditions are stable
Cons
- Traction isn’t the best in light snow
8. BFGoodrich All-Terrain T/A KO2
A/T KO2 by BFGoodrichwl-Tek compound, the BFGoodrich All-Terrain T/A KO2 offers amazing off-road traction on gravel, rocks, sand, and mud, almost on the level of mud-terrain tires. In addition to Sidewall Armor, the T/A KO2 has a loose object rejection feature.

Pros
- Off-road capabilities that are outstanding
- Strong and durable
- Warranty of 50,000 miles on treadwear
- Traction on the road is excellent
Cons
- Definitely not the quietest all-terrain tire
9. Michelin Defender LTX M/S
There is no doubt that Michelin Defender LTX M/S is one of the best highway tires on the market right now. Exceptional high-speed stability, excellent grip, and dependable traction on dry and wet pavement. With a large trailer attached, models with a higher load range offer excellent stability. Although hydroplaning resistance is excellent, light-snow traction could be improved.

Pros
- Dry handling in warm and cold temperatures
- Exceptional traction in wet conditions
- Towable and haulable
- Comfortable and quiet
Cons
- Winter conditions are not the best time to use it
10. Continental CrossContact LX20 with EcoPlus Technology
Those who want to save on fuel while driving should consider the Continental CrossContact LX20. Tires with low rolling resistance improve fuel economy in trucks. Plus, the Continental CrossContact LX20 is very quiet and comfortable – perfect for trucks like the GMC Sierra 1500. They also provide excellent grip and traction in dry, wet, and snowy conditions.
Last but not least, this GMC Sierra tire comes with a 70,000-mile treadwear warranty, which is excellent, but still falls short of the best touring tires for SUVs today.
Pros
- Dry handling is excellent
- Wet performance is very good
- A plush ride
- Highway traffic is quiet
- Fuel economy is improved
Cons
- The treadwear warranty of some competitors is better
What is the Buying Guide for Choosing the Best Tires for GMC Sierra 1500?
If you do not haul or tow heavy items, touring tires are great
For pickup trucks and SUVs, touring tires offer the best balance. For most GMC Sierra 1500 drivers, these are the best tires. The first reason is that they are very affordable today, even models made by premium manufacturers such as Michelin, Bridgestone, and Pirelli. However, comfort is the main reason they are so popular with truck owners.
When driving over smaller and larger imperfections on the road, touring tires offer the best ride quality. Even at highway speeds, they are very quiet. It used to be that trucks were noisy, especially those with tire noise; now, modern touring tires are quieter.
Additionally, touring tires last for a long time. As a result, they cannot used on very uneven terrain, but their tread life is longer than any other type of tire. Today, most premium touring tires for trucks come with a treadwear warranty between 70,000 and 80,000 miles, which we think is pretty impressive.
Towing and hauling with highway tires is a great option
Similar to touring tires, highway tires offer a balanced set of qualities. Touring tires, however, do not come with high load range capacities, whereas highway tires do.
On Additionally, highway tires tend to have tougher casings, making them better for driving over uneven terrain, such as dirt or gravel.
On Highway tires provide dependable and safe handling on the road. You can’t drive like a racing enthusiast on these tires if you want your GMC Sierra 1500 to be sporty. In spite of this, they will still provide excellent traction, both on 2WD and 4WD models, and strong braking.
How Do I Get Sporty Handling?
If Street/Sport tires will provide better handling for your GMC Sierra 1500 V8, compared to touring or highway tires. Designed for high speeds and hard cornering or braking, Street/Sport models provide a unique driving experience.
On A Street/Sport tire feels much livelier and more responsive on the road. Driving a lighter truck will almost feel natural. On more powerful versions of the Sierra 1500, they also have better traction during hard acceleration. In addition to the better grip, the cornering speeds are also higher. Last but not least, braking is stronger when you drive fast. These things apply both to dry and wet surfaces.
How Does Off-Road Driving Work?
For dirt and gravel driving, highway tires are a good choice, but not for other off-road surfaces. With the Sierra 1500, all-terrain tires are a more reliable choice for off-roading.
Besides designed for off-road driving, all terrain tires are great for on-road driving as well. On dry and wet pavement, you’ll still get good traction and grip. Despite not being as responsive as touring or highway tires, these Sierra tires are perfectly fine for everyday use.
They can also used on most off-road terrains safely. Today’s best all terrain tires perform well on dirt and gravel, as well as on rocks and in mud. With these tires, you can pretty much tackle any terrain.
The durability of all-terrain tires is also very high. These tires made from very tough casings that are resistant to cuts, chips, and punctures, so even the toughest terrain won’t damage them. Additionally, they offer 50,000- to 60,000-mile treadwear warranties.
And What About the Climate?
This is also very important because the rubber compound of the tires designed to work in a narrow temperature range. You get all-season, all-weather, summer, and winter designations from there.
When temperatures drop, tires that work well in warm conditions become hard and brittle. As a result, traction, grip, and stopping power will be rapidly lost, especially on wet pavement. Conversely, tires designed for cold weather will become too soft in hot weather, resulting in less grip and responsiveness.
To In order to mitigate these issues, most tires available for GMC Sierra 1500 are all-season tires. As a result, they can used in a wider temperature range than other tires. They are neither too brittle in the winter nor too soft in the summer.
Regardless of the temperature, the best all-season tires today provide dependable handling and braking. Even though some of them work in light snow, that’s pushing it. In harsh winter conditions, you shouldn’t rely on these tires.
When Should You Replace Tires on Your GMC Sierra 1500?
Whether on a Sierra pickup or any other vehicle, time and mileage are the two enemies of tires. From the date of manufacture, most vehicle tires, whether for a truck or car, have a lifespan of about five years. Tires for trucks usually have a life expectancy of 40,000 to 70,000 miles.
As time goes on, checking for a “use by” date becomes easier. DOT numbers give an accurate date of manufacture on all U.S. tires. Each of these 12-digit codes has four digits. It identifies the manufacturer and place of manufacture, among other things. Three numbers indicate the week and year of manufacture. Tires with 3219 codes made during the 32nd week of 2019 (September 11-17, 2019). The code 1918 indicates manufacture during the 19th week of 2018 (May 7-13). Date of manufacture plus five years indicates tire expiration.
Mileage, however, is the most likely indicator of tire replacement. Vehicle mileage is usually measured by tread wear rather than actual mileage. By tread wear indicator, a tire rated for “70,000 miles” may need replacement after 65,000 or 75,000 miles.
Most tread wear measurements based on practical safety expectations. Tire wear is most often determined by tread depth, face wear, and so on. The “rules of thumb” governing treat depth checks known to most vehicle repair experts and technicians. To determine how much tread left, simply insert a coin into the tread. It is best to consult an expert before replacing a tire. As your Sierra’s first line of safety, you should treat its tires well.
Why Should You Use Original GMC Equipment Tires for your GMC Sierra 1500?
GMC recommends OEM (original equipment manufacturer) tires for your Sierra because they are the most suitable for it. However, GMC decides on your truck’s eligibility based on several factors that may or may not apply to you.
GMC assumes the Sierra 1500 will used on roads, highways, and in all weather conditions. Over the first few years of ownership, they consider the average user of the Sierra and what they can expect from its tires. Also, GMC considers its own relationship with tire manufacturers as well as the costs associated with choosing one tire over another as the OE choice. It is also important to consider road noise, handling characteristics, and the “sell factor” (how much of an impact the tire will have on truck sales).
As However, as a consumer, you have many choices when it comes to your GMC Sierra. Depending on your needs, you may want more all-weather capability, better off-road handling, or better hydroplaning resistance. Depending on your specific needs, warranties and dependability are also important factors as a consumer. The cost will also increase.
Although the original equipment choice from GMC might do, another option might also work for you.
How to Change GMC Sierra 1500 Tire Sizes?
There are a wide variety of wheel sizes and tires available for your Sierra. However, truck owners often replace those with aftermarket options that differ in size and style from the originals.
There are different sizes of wheels and tires mounted on them. It’s a good idea to keep the overall diameter of the wheel and tire the same unless you plan to change other aspects of the suspension. A larger wheel needs to proportioned to a smaller sidewall tire, or a smaller wheel needs to have a larger sidewall. Your truck will maintain its alignment, drive characteristics, safety metrics, and speedometer readings in accordance with its manufacturer’s specifications.
You may choose to upgrade or downsize wheels and tires to improve ride quality, reduce replacement costs, or to meet seasonal needs. For off-roading, you may need a smaller wheel and a larger tire wall depending on the truck’s use metrics.
How to Read Tire Sizes on Your GMC Sierra 1500?
A tire’s size determined by a number or letter. There are several things they indicate about the tire, however, and they are universal. These tire size indicators are important to know when matching tires or shopping for replacements.
A It is common for GMC Sierra tires to sized 235/65R17. In addition to the tread width, the sidewall height, and the opening of the wheel, the numbers give information about the tire. The 235 refers to the width of the tread of the tire, which is 235 millimeters. Generally, the higher the 65, the larger the tire’s sidewall height compared with its overall width–the higher this number, the bigger the tire. 152.75mm is the height of this tire (65% of its width). “R” indicates radial construction, which means the plies of the tire’s body radiate out from the hub or wheel’s center. Due to its radial construction, most tires distribute loads more evenly across their surfaces. In this case, a 17-inch wheel specified by the last two digits of the tire size.
The tire’s size and construction followed by more digits and letters that identify other features. Service Descriptions, although not related to size, are important to the consumer’s expectations of the tire’s use. A typical example would be “103H”. A tire’s two- or three-digit load rating indicates how much weight it can handle. The load rating of most truck tires is 100 or higher. Typically, this number followed by a letter, which indicates the tire’s maximum speed rating. Tires fall into the following categories: N, P, Q, R, S, T, U, and H. They range from 87 mph (N) to 130 mph (H). The use of tires beyond their speed rating may result in overinflation, warping, or worse. 106 to 112 mph is the speed rating on your Sierra’s tires.
Final Words: Best Tires for GMC Sierra 1500
Above, you can see that we primarily covered Best Tires for GMC Sierra 1500 from reputable manufacturers. Our choice is driven by our belief that the GMC Sierra 1500 deserves premium tires, but also by your own safety. In wet conditions, cheap tires made by manufacturers you don’t know are outright dangerous. Furthermore, they don’t last very long and might end up costing more in the long run. Choose high-quality GMC Sierra tires that suit your driving needs, the roads in your area, and the climate in your area to get the most out of your new tires.
Read more of our articles here.
FAQs
Is it a good idea to put all-terrain tires on a GMC Sierra 1500?
GMC Sierra 1500 all-terrain tires offer good performance both on and off-road. These vehicles are ideal for drivers who want to balance on-road comfort with off-road performance.
What is the recommended tire size for a GMC Sierra 1500?
The recommended tire size for a GMC Sierra 1500 depends on the model and year. To determine the correct tire size, consult your vehicle’s owner’s manual or the tire placard on the door jamb.
For my GMC Sierra 1500, should I get winter tires if I live in a snowy region?
In areas with significant snow and ice, winter tires are an excellent choice. In winter conditions, they improve safety and control by providing better traction and handling.
Will my GMC Sierra 1500 look better with larger tires?
If you want to use larger tires, make sure they are compatible with your vehicle’s specifications. Consider fuel efficiency, speedometer accuracy, and overall performance when considering potential impacts.
When should I rotate the tires on my GMC Sierra 1500?
To ensure even tire wear, it is essential to rotate the tires regularly. It is recommended that you rotate your tires every 6,000 to 8,000 miles or as recommended by the tire manufacturer.


Your car’s head gasket is one of the most important parts of the engine, and if it becomes damaged, it will need to be repaired quickly. Head gaskets prevent the engine’s combustion chamber from remaining fully sealed and this results in poor engine performance due to insufficient compression from the building. But How to Use BlueDevil Head Gasket Sealer?
A blown head gasket can be repaired with Blue Devil Head Gasket Sealer, as can leaks in the radiator and cooling system. Blue Devil should be used on freshly flushed radiators and is recommended for engines with four or six cylinders. Let your engine idle for approximately 15 minutes, then pour the correct amount of Blue Devil into your radiator.
Read the article to learn everything about, “How to Use BlueDevil Head Gasket Sealer”
What are the Symptoms of Blown Head Gasket?
A bad head gasket can cause big problems for your engine. When an engine is warming up, the cylinder head and engine block expand at different speeds, resulting in a blown head gasket. The gasket becomes damaged as a result of not being able to seal the gap correctly.
Vehicles with aluminum head gaskets and iron cylinder blocks are more likely to have blown head gaskets. There are, however, exceptions to this rule. The heads can blow when the clamps are not strong enough or the clamps are not fitted correctly if they are warped.
A blown head gasket is more commonly characterized by sweet-smelling white smoke coming from the exhaust. There is a good chance that your head gasket isn’t working properly if you notice this. The following are some other common symptoms of a damaged head gasket, in addition to white smoke:
- A power outage.
- Engine overheating.
- Leak of coolant.
- The oil leaks.
- White smoke coming from the exhaust.
- Contaminated oil with coolant.
If The following signs may indicate that you should pop the hood and check out what’s going on in the engine.
It doesn’t have to mean the end of your car; with the right head gasket sealing product, you can fix the problem and have your engine working again in no time. Read more at here.
What is the Purpose of Sealing the Head Gasket?
Engine blocks and cylinder heads are divided into two parts by the head gasket, which serves as a seal between them.
There is also a common meeting point between the cylinder head and the engine block where the fuel and air mixture is under the greatest pressure. The majority of engines have this configuration, but not all. In order to keep the combustion chamber under pressure, the head gasket is most critical.
Further, the head gasket ensures that coolant and oil do not leak into the combustion chamber and mix with the fuel and air mixture. When the combustion chamber is drained of oil or coolant, less power will be produced.
What is BlueDevil Head Gasket Sealer?
In order to repair a head gasket yourself at home, you will need a sealing solution. As well as sealing leaks in head gaskets, BlueDevil Head Gasket Sealer repairs freeze plugs, cracked heads, and heater cores. It may seem daunting to add a solution to your engine, but there is no need to worry. Your engine won’t get clogged up by BlueDevil because it has no solid parts.
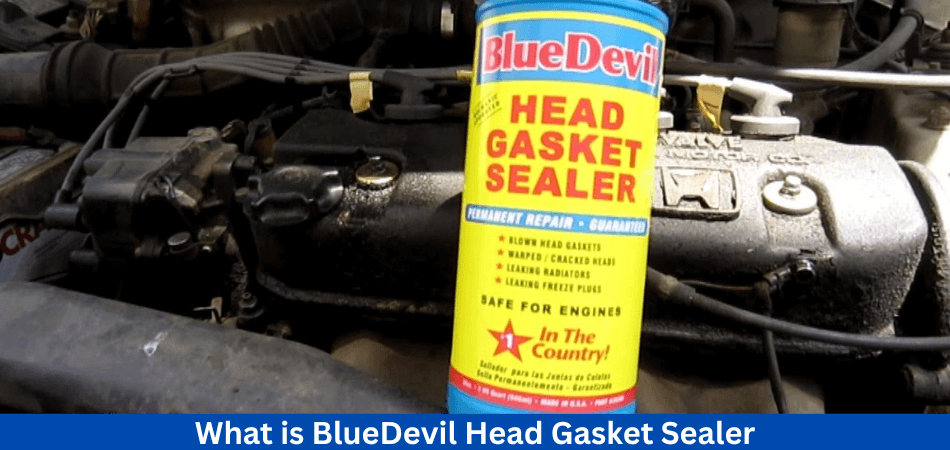
Due to its permanent fix, BlueDevil is superior to other head gasket sealing solutions on the market. Other products simply mask the problem temporarily, causing more problems in the future.
By reacting to the difference in temperature created by the passing airflow, the BlueDevil sealer works by sealing the leak. The Blue Devil builds a chemical seal using the catalyst created by this temperature differential. Among the materials BlueDevil bonds are aluminum, plastic, metal, cast iron, and alloys. Besides sealing the head gasket, BlueDevil is also effective on other parts of the engine, because it can be used on so many different materials.
While BlueDevil can be used on a wide range of engines, it performs best on those that have four or six cylinders.
What Are the Benefits of Using BlueDevil Head Gasket Sealer?
1. Eliminates leaks
The problem of blown gaskets is serious, especially when they go unnoticed. By using a high-grade sealer like BlueDevil head gasket sealer, you ensure that leaks do not recur.
2. Cost-savings
Repairing head gaskets at the mechanic is expensive. You may need to go back for more servicing or, worse, replace the whole head gasket if it is not done well. With the BlueDevil head gasket sealer, you get a permanent alternative solution at an affordable price.
3. Save time
An easy way to seal gaskets. All leaks will sealed in no time when you pour the sealer into the radiator cap. As opposed to replacing the entire gasket, this solution saves time.
4. Various uses
Besides sealing leaks, high-grade sealants do more. It also seals freeze plugs and heater cores, ensuring all parts of your engine are functioning properly.
5. Effective
With Blue Devil Head Gasket Sealer, blown head gaskets can be effectively sealed. Furthermore, it can used to repair warped or cracked heads and fix leaks caused by freeze plugs or heater cores. To prevent engine cracking, the sealant prevents fluid loss from a slow leak in the coolant and maintains the temperature of the plugs.
6. User-friendly
In addition to being easy to use, the Blue Devil Head Gasket Sealer also saves time during the repair process. All you need to do is pour the product into the radiator, start the engine, and let it idle for a set period of time. The head gasket leaks are then sealed by circulating sealant throughout the cooling system. It takes about 50 minutes to complete the process.
7. Long-Lasting Results
As the new gasket can fail after some time, replacing a head gasket is not a permanent solution. A permanent fix for blown head gaskets is Blue Devil Head Gasket Sealer. After the sealant has circulated throughout the cooling system, it hardens, preventing further leaks.
Where to Put BlueDevil Head Gasket Sealer?
After draining down the antifreeze, Bluedevil head gasket sealer should poured into the radiator.
If you make a slight mistake regarding an unattended major severe issue, then using a gasket sealer can make the situation worse rather than solve it. So it also recommended to follow the instructions and capacity measurements accordingly.
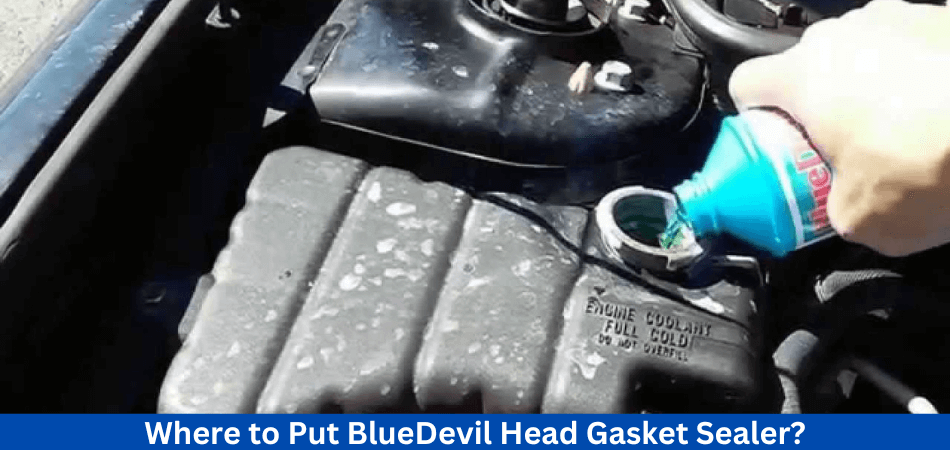
Thus, if following the instructions seems difficult, do not hesitate to ask for help from a mechanic. As well as helping you pour the sealer correctly, a professional can check if the engine requires any major repairs or if only the sealer will fix it.
How Much to Use BlueDevil Pour-N-Go Head Gasket Sealer?
This particular BlueDevil pour-n-go head gasket sealer designed for customers who are more into do-it-yourself, since it designed for a single repair.
If you are not mechanically inclined and are looking for a permanent solution to simple problems like a leak in the cooling system, you can try Bluedevil pour-n-go. Compared to the blue devil head gasket sealer, this one works more simply.
In contrast, the blue devil head gasket sealer measures 32oz, and it required for engines with large cooling capacity, severe cooling system leaks, etc. With only 16oz, this product can effectively stop a single leak in a 4- or 6-cylinder engine’s cooling system.
How to Use BlueDevil Head Gasket Sealer?
If The Blue Devil Head Gasket Sealer is an effective way to seal your head gasket. Follow this guide to learn How to Use BlueDevil Head Gasket Sealer. Here are the essentials:
- Radiator flush solution.
- Water.
- Funnel.
- Blue Devil Head Gasket Sealer.
Step-by-step Guide
Step 1 – The first step is to remove the thermostat from the engine.
Step 2 – According to the Blue Devil instructions, the cooling system needs to be free-flowing before the sealant applied. Therefore, you will need to flush the system before applying the sealer. Use either a Blue Devil Radiator Flush solution or one from your favorite brand. Repeat the flushing process using only water after following the instructions.
Step 3 – The third step is to flush is complete, fill the cooling system back up with water and make sure you leave enough room for the recommended volume of Blue Devil Head Gasket Sealer. Blue Devil bottles contain recommended amounts of sealant. The amount you need depends on the size of your cooling system.
Step 4 – Then the next step is The radiator cap should removed when the engine is cold.
Step 5 – After that The fifth step is sart up the engine and set the heater to the maximum temperature. However, The Blue Devil solution should be slowly poured into the radiator while the engine is idling using a funnel. For half of the bottle to emptied, the solution should poured slowly. It should take about 30 seconds.
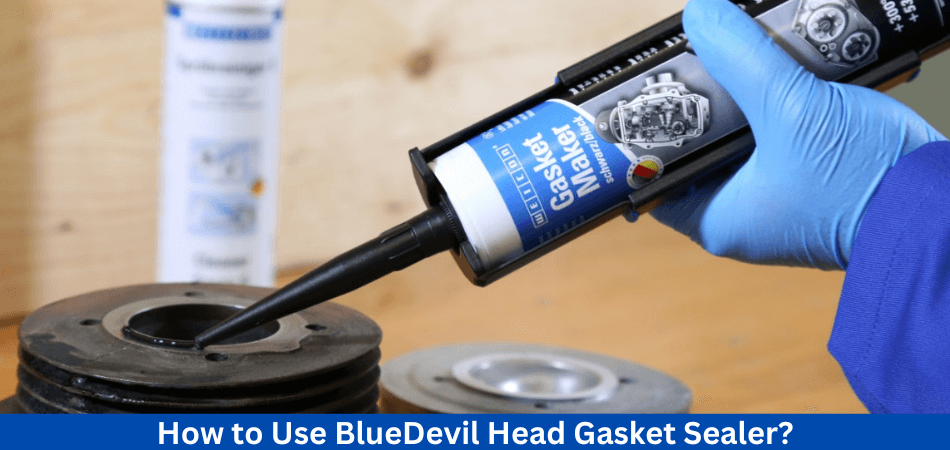
Step 6 – Let the engine idle for around 15 minutes with the radiator cap back on. After this, the system won’t need to flushed again.
Step 7 – It is now possible to reinstall the thermostat and repair any leaks or cracks in the head gasket and cooling system. For drivers who do not want to continue paying out expensive repair bills, Blue Devil permanently repairs the seal in the head gasket.
What are the Pros and Cons of Blue Devil Head Gasket Sealer?
You may think that the Blue Devil Head Gasket Sealer sounds amazing now that you know How to Use BlueDevil Head Gasket Sealer, right? There is no doubt that Blue Devil is one of the best sealers on the market today, but it does have some drawbacks as well.
Let’s examine the key pros and cons of Blue Devil so you can decide whether it is right for you.
Pros of Blue Devil Head Gasket Sealer
- It is a versatile solution that can used for more than just repairing head gaskets. In addition to fixing leaks in heater cores, Blue Devil bonds to aluminum, alloys, plastics, casts, and metals.
- Solids and particulates free.
- Contains no harmful chemicals.
- It takes approximately 15 – 30 minutes to complete.
- A cost-effective solution for repairing head gaskets.
- Provides a permanent fix for head gasket cracks.
- It is easy to ease.
Cons of Blue Devil Head Gasket Sealer
- It is necessary to flush the radiator before using it.
- A minor crack or leak will only repaired.
- Because the bottle is opaque, it is difficult to monitor how much solution used.
- Depending on the size of the cooling system, different amounts of solution will needed.
How to Clean Your Vehicle’s Cooling System After Using Blue Devil Head Gasket Sealer?
1. Refresh the cooling system.
Flushing your cooling system is the first step in cleaning it after using Blue Devil Head Gasket Sealer. It is imperative that the cooling system is free-flowing and clean before applying the sealer. Before flushing, it recommended to remove the thermostat. By using a garden hose, you can flush the cooling system.
Feed the output from the top hose into a large bucket by connecting the hose to the bottom radiator. Flushing the system effectively requires using the entire flow rate.
2. Make sure there are no clogs
The affected parts of the cooling system should replaced if Blue Devil Head Gasket Sealer clogs them. The thermostat should flushed first, followed by the rest of the system. As soon as you flush the system, ensure the heater core hoses are not kinked and the temperature is equal on high.
3. Check the temperature
To ensure the temperature gauge is functioning correctly after flushing the cooling system, ensure the vehicle’s cooling system has flushed.
Tips & Tricks For Choosing The Right Blue Devil Head Gasket Sealer
1. Choose The Right Gasket Sealer
Different types of head gasket sealers are available from Blue Devil to address different gasket issues. Blue Devil Head Gasket Sealer, for instance, resolves issues related to blown head gaskets.
In contrast, Blue Devil Pour-N-Go Head Gasket Sealer fixes minor gasket leaks and other coolant system problems quickly. In this case, you should evaluate your car’s gasket problem and choose the appropriate Blue Devil sealer.
2. Check Your Car’s Compatibility
Make sure that the Blue Devil Head Gasket Sealer you choose is compatible with your car’s engine and cooling system. There are some sealers that may not work well with certain types of engines, and using them can cause more damage than good.
You should therefore ensure that the sealer you choose is compatible with the make and model of your car by checking its specifications.
3. Take into account the price and value
Based on the type and size of the product, Blue Devil Head Gasket Sealers can vary in price. In addition to being more expensive, some sealers may also offer better quality and performance. It is therefore important to compare prices and evaluate the value of the product before purchasing it.
It’s also worth considering the potential savings you can make by using a head gasket sealer instead of paying for a costly repair.
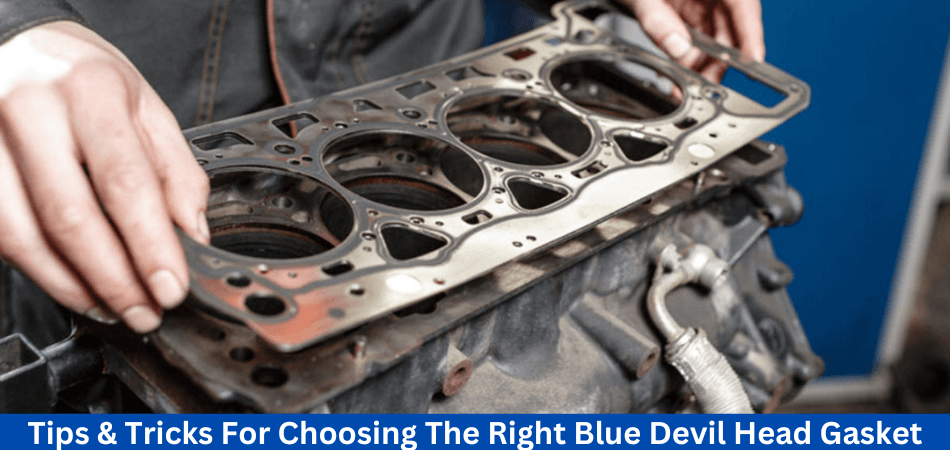
4. Review and rate customer reviews
You can evaluate a Blue Devil Head Gasket Sealer’s effectiveness and reliability by checking customer reviews.
You can gain valuable insights into how well the product works and what to expect by reading what other car owners have to say about it. The best way to get an accurate picture of a product is to be aware of biased or fake reviews and check multiple sources.
5. Pay close attention to the instructions
Regardless of which Blue Devil Head Gasket Sealer you choose, it is important to follow the instructions carefully to get the best results. Before using the sealer, make sure to read the instructions and requirements for the product carefully.
In addition to flushing the coolant system, removing the thermostat, pouring the sealer into the radiator, and letting the engine idle, some common steps include these. Observing the instructions ensures that the sealer applied correctly and has the best chance of fixing the gasket problem.
What are the Mistakes To Avoid When Using Blue Devil Head Gasket Sealer?
The following are some common mistakes to avoid:
1. Instructions not followed
Following the instructions properly is one of the most common mistakes when using Blue Devil Head Gasket Sealer. Before beginning the repair process, it is important to read and understand the instructions carefully. To ensure the best results, the instructions will provide instructions on how to use the product properly.
2. Cooling system not flushed
Using Blue Devil Head Gasket Sealer requires flushing the cooling system to remove any accumulated debris, rust, or sediment. These contaminants can clog the system and prevent sealer from circulating properly if they are not removed.
3. Thermostat not removed
Before using Blue Devil Head Gasket Sealer, it is important to remove the thermostat to allow the sealer to flow freely through the engine without becoming trapped. In the event that the sealer gets trapped in the thermostat, it may not circulate properly and could cause further problems. It is therefore recommended to remove the thermostat before using the product.
4. Using the product excessively
When the Blue Devil Head Gasket Sealer overused, excess sealer can build up in the system and cause blockages. It is important to use the product as directed and not exceed the recommended dosage. It is possible for the system to become clogged due to overuse, resulting in more serious problems.
5. Failure to check for leaks before and after using the product.
To ensure the Blue Devil Head Gasket Sealer works effectively, check for leaks before and after use. It may be necessary to address other underlying issues if still leaks occur after using the product.
How to Clean up BlueDevil Head Gasket Sealer?
The only time one required to clean up blue devil head gasket sealer is if the damage was severe and the person used it without consulting a professional mechanic. In this case, the sealer exacerbates the problems instead of resolving them.
If you use a head gasket sealer for major damages, white rock salt-like hard particles appear in the radiator, heater core, and cooling system.
So The preferred solution to this problem is to use a blue devil head gasket sealer on a regular basis:
Cover your engine bay with plastic and remove the radiator cap before you pour two separate Preston flashes back-to-back. Above the firewall, remove the heater core hoses.
Next, use an air compressor to blow air through each radiator hose. You should repeat this step as many times as you need to until it comes out clean.
Ensure that the hoses turned off before running air through the heater core.
It might seem complicated to some people to follow the above method. If that is the case, don’t hesitate to consult a professional mechanic. Taking the matter in hand without a professional makes things worse
Final Thought: How to Use BlueDevil Head Gasket Sealer
Now you have some idea of How to Use BlueDevil Head Gasket Sealer. Your vehicle’s head gasket leaks and coolant-related issues can effectively addressed with BlueDevil Head Gasket Sealer. As an alternative to costly head gasket repairs, this product is both convenient and cost-effective.
The BlueDevil Head Gasket Sealer designed to seal leaks in head gaskets by circling the sealer through the engine after the cooling system has been drained and flushed and the sealer has been added to the tank. To achieve the best results, you need to prepare properly and be patient.
It’s important to remember that BlueDevil Head Gasket Sealer may not be a permanent fix for severe head gasket damage. Professional mechanics should always be consulted for an accurate diagnosis and to determine whether this product is right for you. You don’t want to waste time and money applying Blue Devil if it isn’t going to work. It won’t damage your vehicle or clog the engine, but you don’t want to waste money either.
Read more of our articles here.
FAQs
Do all types of vehicles work with BlueDevil Head Gasket Sealer?
Most gasoline and diesel engines are compatible with BlueDevil. Check the product label and instructions to ensure the product is suitable for your vehicle.
What is the best way to use BlueDevil Head Gasket Sealer?
Generally, the process involves flushing the cooling system, adding BlueDevil to the radiator, and following the specific instructions provided on the product packaging. It is usually necessary to run the engine to circulate the product and seal the leak.
I am not experienced with automotive repairs. Can I still use BlueDevil?
There is no need for advanced mechanical skills to use BlueDevil, but following the instructions carefully is essential. Consider seeking professional assistance if you are unsure or uncomfortable.
When does BlueDevil start working?
It can take several hours for the sealing process to be completed. To ensure the product circulates and seals effectively, follow the instructions, which usually require running the engine for a specified time.
Is BlueDevil Head Gasket Sealer safe for engines and cooling systems?
The engine or cooling system should not be adversely affected by BlueDevil when used correctly. If you want to avoid any issues, follow the instructions precisely.
Among car enthusiasts, the 350 TBI engine is a popular choice. Despite this, it isn’t immune to problems, and one of the most common is off-timing. There are a range 350 TBI timing off symptoms that can affect an engine’s performance as a result.
When the ignition timing is not set correctly, off-timing occurs. There are a number of factors that can cause this, including a worn distributor or a faulty ignition control module. The effects of off-timing include reduced fuel efficiency, poor acceleration, and rough idling.
If you experience any of these 350 TBI timing off symptoms, you should seek attention immediately. If off-timing is ignored, it can lead to more serious problems, such as engine damage. The following article provides tips on how to diagnose and fix the problem 350 TBI timing off symptoms and explores it in more detail.
How does the Timing Mechanism in the 350 TBI Engine work?
350 TBI Engine performance depends heavily on the timing mechanism. And It affects the engine’s power output and fuel efficiency by controlling ignition and fuel injection timing.
However, Timing chains, camshafts, crankshafts, and distributors comprise the timing mechanism. Engine valves are opened and closed by the crankshaft and camshaft, while the distributor sends sparks to the spark plugs.
The timing can be adjusted by rotating the distributor or changing the camshaft position. By maintaining proper timing, engine performance is maximized and detonation is prevented.
Timing lights are used to check the timing of motors. When the engine is operating temperature, the timing marks on the crankshaft and timing cover should line up with the timing pointer. You may need to adjust the timing depending on the situation.
However, Engine misfires, poor acceleration, and reduced fuel efficiency can be caused by incorrect timing. Maintaining optimal engine performance requires an understanding of the timing mechanism and regularly checking and adjusting it.
Regular maintenance of the timing mechanism will prolong the engine’s life and keep repairs to a minimum. Learn more here.
What Are The 350 TBI Timing Off Symptoms?
When the timing on a 350 TBI (Throttle Body Injection) engine is off, you may experience a variety of 350 TBI timing off symptoms that can affect the vehicle’s performance. Timing problems are often caused by one or more of the following:
- Performance problems with the engine
- Starting problems or no-start conditions
- Inefficient fuel consumption
- Intermittent roughness
- Pinging or knocking of the engine
- Engine check light
- A reduction in engine performance overall
- Excessive heat
- Deficiency in emissions
- An excessive amount of vibration
There are a variety of factors that can cause these symptoms, including worn or damaged timing belts, faulty spark plugs or wires, and malfunctioning distributors. However, Engine damage can be prevented by addressing these issues as soon as possible.
It’s recommended you get a diagnostic test done by a professional mechanic if you suspect your 350 TBI is off-timing. In this way, the issue will be addressed and resolved properly.
Maintaining the engine regularly, such as replacing the timing belt and spark plugs at recommended intervals, can prevent off-timing problems. So, Make sure your engine runs smoothly by not ignoring the symptoms.
What are the Tools and Techniques Required for Fixing Off-Timing in 350 TBI Engine?
It can be frustrating to deal with timing issues in your 350 TBI engine, but you can fix them by using the right tools and techniques. The following tips will help you:
- Make sure your engine’s timing is accurate by investing in a timing light.
- Distributor caps and rotors should be checked for wear and replaced if necessary.
- Check the timing chain for wear and replace it if necessary.
- To ensure proper idle timing, adjust the idle speed screw.
- For more precise timing adjustments, consider upgrading to an adjustable timing set.
Ensure the engine is at operating temperature and all accessories are turned off before setting the timing.
- Check proper vacuum advance operation with a vacuum gauge.
- Make sure the ignition module is working properly and replace it if necessary.
- Check the spark plugs and wires for wear and replace them if necessary.
- You can improve timing control by upgrading to a high-performance ignition system.
Be sure to double-check your work and test the vehicle to ensure that it is performing as it should.
How To Diagnose And Fix 350 TBI Timing Off Issue?
To prevent further damage and ensure the best performance and fuel economy, it’s important to have your 350 TBI engine diagnosed and repaired by a qualified technician.
1. Performance issues with the engine
A 350 TBI engine’s incorrect ignition timing hinders the combustion process, resulting in poor performance. In order to maximize power output and efficiency, optimal timing is essential. Any deviation results in weak acceleration and reduced power.
To Check the ignition system, including spark plugs, wires, distributor cap, and rotor, to diagnose poor engine performance.

However, Consider checking the fuel system, including the fuel filter, fuel pump, and injectors, if the ignition system components are in good shape.
Last but not least, make sure the throttle body and sensors are clean and functioning properly. The affected component should replaced or repaired once the issue identified.
2. No-start or hard-starting conditions
It is possible to have difficulty starting a 350 TBI engine when the timing is faulty. An engine’s ability to start and function properly depends on accurate timing, which is crucial for initiating combustion.
Check the battery and its connections to ensure they are clean and tight. Next, check the starter motor, ignition system, and fuel system for any problems.
Use a timing light to verify that the engine’s timing is correct if no problems found. The timing should adjusted as necessary, and if the problem persists, consult a mechanic.
3. An inefficient fuel economy
When the timing is incorrect in a 350 TBI engine, fuel efficiency is negatively affected. Fuel consumption and MPG increase when the ignition timing is off, resulting in an inefficient burn of the air-fuel mixture.
If you want to improve fuel economy, check your air filter and make sure it’s clean and allowing proper airflow. Ensure the fuel system is in good working order, including the fuel filter, the fuel pump, and the injectors.
So, Set the tire pressure to the recommended levels and check it. Last but not least, make sure the engine’s timing is correct, and make any adjustments necessary. Mechanics can assist in diagnosing the problem if it persists.
4. The rough idle
Incorrect timing can cause rough idling in 350 TBI engines. When ignition timing is inaccurate, the engine shakes or stalls, making it difficult to maintain a smooth and stable idle.
Start by checking for vacuum leaks, which can cause rough idles. Spark plugs, wires, distributor caps, and rotors should examined as part of the ignition system inspection.
Clean the throttle body if necessary if it has become dirty or carbonized. Last but not least, make sure the idle air control (IAC) valve is working properly and check the timing of the engine. Consult a mechanic for further diagnosis if the timing needs to be adjusted.
5. Knocking or pinging from the engine
The premature ignition of the air-fuel mixture in a 350 TBI engine can cause knocking or pinging sounds. In the event that improper combustion is not addressed promptly, it can potentially cause damage to the engine.
Make sure you are using the right fuel octane rating for your vehicle if your engine is knocking or pinging. Adjust the timing of the engine if necessary.
The EGR (Exhaust Gas Recirculation) system and knock sensor should checked to ensure they are functioning properly. A mechanic should consulted if the problem persists.
6. The check engine light is on
A 350 TBI engine with incorrect timing may illuminate the check engine light. ECMs detect ignition timing issues and alert drivers to potential problems that could have an impact on engine performance.
So, Check the engine control module (ECM) for diagnostic trouble codes (DTCs) when the check engine light comes on.
Using these codes, you can determine which system or component is causing the problem. Further guidance on diagnosing and repairing the problem can found in the vehicle’s service manual or by consulting a mechanic.
7. A reduction in engine performance overall
Engine performance can reduced if the ignition timing is incorrect in a 350 TBI engine. An incorrect timing can reduce horsepower and torque output due to reduced combustion efficiency.
To Identify and correct problems with the ignition system, the fuel system, and the air intake system. Ensure the timing of the engine is correct, and make adjustments as needed.
Inspect all sensors for leaks and make sure they are working properly. To determine the cause of the problem, consult a mechanic.
8. Excessive heat
A 350 TBI engine that runs hotter than normal may damaged by incorrect ignition timing, resulting in overheating. In order to maintain optimal engine temperatures, proper timing is essential.
Make sure the coolant level is correct by checking it first. Make sure the radiator, water pump, thermostat, and cooling fan are in good working order.
So, Inspect the cooling system for leaks, and repair or replace any damaged components.
Lastly, verify the engine’s timing and make any necessary adjustments. For further diagnosis, consult a mechanic.
9. Poor emission levels
In a 350 TBI engine, off-timing can increase emissions of hydrocarbons, carbon monoxide, and nitrogen oxides. Minimizing the environmental impact of an engine requires accurate ignition timing.
To Identify any issues with your oxygen sensors, catalytic converter, and exhaust system before addressing poor emissions. Make any necessary adjustments to the timing of the engine.
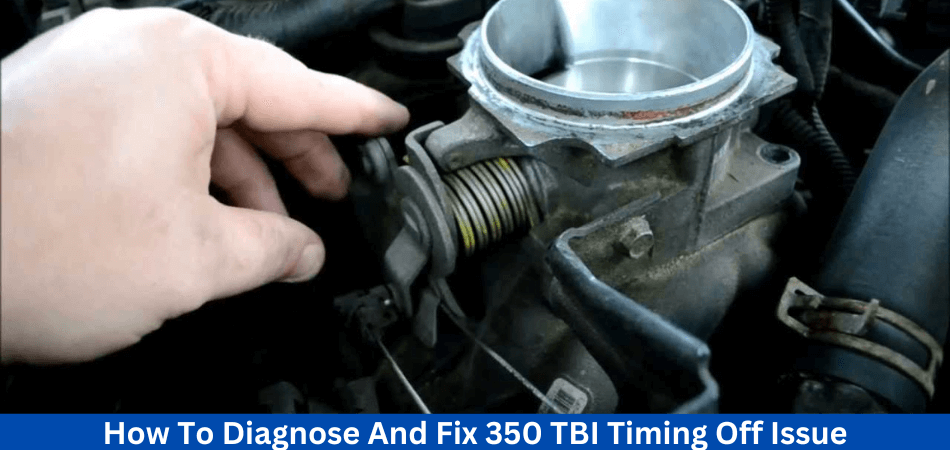
So, Ensure that the EGR system, the PCV (Positive Crankcase Ventilation) valve, and the evaporative emissions control system are working properly. The problem may need to diagnosed and repaired by a mechanic if it persists.
10. Vibrations are excessive
When the timing on a 350 TBI engine is incorrect, excessive vibration can occur, impacting the vehicle’s comfort and stability. Maintaining a smooth engine and minimizing vibration-related issues depends on the ignition timing.
So, If the engine mounts worn or damaged, replace them if necessary to diagnose and fix excessive vibration. Make sure the harmonic balancer is in good working order.
Check the ignition system, including the spark plugs, wires, distributor cap, and rotor, for any problems. Make sure the engine’s timing is correct, and adjust as needed. The problem may need to diagnosed and repaired by a mechanic if it persists.
What You Can Do to Avoid Timing Off on 350 TBI in the Future?
Proper maintenance and care can prevent timing issues and ensure optimal performance. You can prevent timing-off problems in the future by following these tips:
1. Scheduled maintenance
It is important to adhere to a routine maintenance schedule for your Chevy 350 TBI engine in order to avoid timing issues in the future. In Maintain a healthy ignition system by swapping spark plugs, ignition wires, distributor caps, and rotors regularly.
2. Inspection of timing chains and gears
You should check the timing chain and gears of your 350 TBI engine frequently for wear and damage. So, It is important to replace worn-out components in order to prevent timing issues and ensure smooth operation of the engine.
3. Ignition System and Distributor Care
Make sure the distributor is clean and functional. Replace the distributor cap and rotor as necessary if they show signs of corrosion or wear.
4. Regularly check the timing
Make sure your Chevrolet 350 TBI engine’s timing is correct by using a timing light. Maintain optimum ignition timing and avoid future problems by adjusting as necessary.
5. Reliable replacement parts
Ensure the dependability and longevity of your 350 TBI engine by using OEM-recommended components. By preventing timing problems, your engine will run more smoothly.
What is the Importance of Timely Repair for 350 TBI Engine?
A 350 TBI engine must repaired on time to ensure long-term performance. It is possible to cause costly damages and even engine failure by neglecting repairs.
Minor issues can prevented them from becoming major problems with regular maintenance. The failure of a machine can be catastrophic if warning signs, such as strange noises or decreased performance, ignored.
To ensure proper diagnosis and repair, it is important to hire a qualified mechanic.
Fuel efficiency and emissions improved when engines function properly. Fuel costs can reduced and environmental damage can prevented through timely repair.
So, It is possible to decrease fuel efficiency and increase emissions by ignoring repairs.
Additionally, timely repairs can prevent more costly repairs in the future.
The engine’s life can extended with regular maintenance, saving you money over time.
Engine problems shouldn’t ignored until it’s too late. In order to avoid costly breakdowns, it is important to repair your vehicle in a timely manner.
It is possible to catch issues before they become major problems by performing regular inspections. So, Preventing further damage and saving money on repairs can achieved by addressing issues immediately. Your engine will take care of you if you take care of it!
Final Thoughts: 350 TBI timing off symptoms
Now you have some idea of 350 TBI timing off symptoms. In order to maintain optimal performance, fuel efficiency, and engine longevity, timing issues in 350 TBI engines must detected and addressed. Performance can impaired, engines can knock, power can reduced, and fuel economy can reduced as a result of incorrect timing. Despite the temptation to ignore these signs, ignoring them can lead to more serious engine problems in the long run.
Keeping your 350 TBI engine running smoothly requires regular maintenance and timely diagnosis of timing problems by a qualified mechanic or technician. In addition to ensuring efficient combustion and minimizing engine damage, properly adjusted timing contributes to a vehicle’s reliability and performance. To maintain the health and efficiency of your 350 TBI engine, you should address timing issues promptly. Make sure your 350 TBI engine runs smoothly by keeping an eye on its timing, adhering to a regular maintenance plan, and only using high-quality replacement parts. With these preventative steps, you can ensure that your engine operates at its optimum level and gives you years of dependable and enjoyable driving.
Read more of our articles here.
FAQs
Without diagnostic tools, how can I tell if the timing is off on my 350 TBI engine?
When accelerating, you may notice symptoms such as rough idling, engine hesitation, and a lack of responsiveness. So, It could also be the result of timing issues if the engine doesn’t run smoothly or makes unusual noises.
How does incorrect timing lead to engine knocking?
The engine knocking sound occurs when the air and fuel mixture ignite prematurely or unevenly, resulting in an engine tapping or pinging. So, A malfunctioning timing system can cause engine knocking, which can eventually damage the engine.
Is it possible for incorrect timing to cause poor fuel efficiency in a 350 TBI engine?
Certainly, incorrect timing can result in poor fuel efficiency due to inefficient combustion, which can result in wasted fuel and reduced miles per gallon.
Can a 350 TBI engine be driven with off-timing?
A vehicle with incorrect timing shouldn’t driven for an extended period of time because it can damage the engine. So, It’s best to have the engine inspected and repaired promptly if you suspect timing problems.
What is the best way to diagnose and correct timing issues in my 350 TBI engine?
Using a timing light and following the manufacturer’s specifications may help you diagnose timing problems. So, When timing corrected, the distributor’s position adjusted or worn or damaged components replaced.

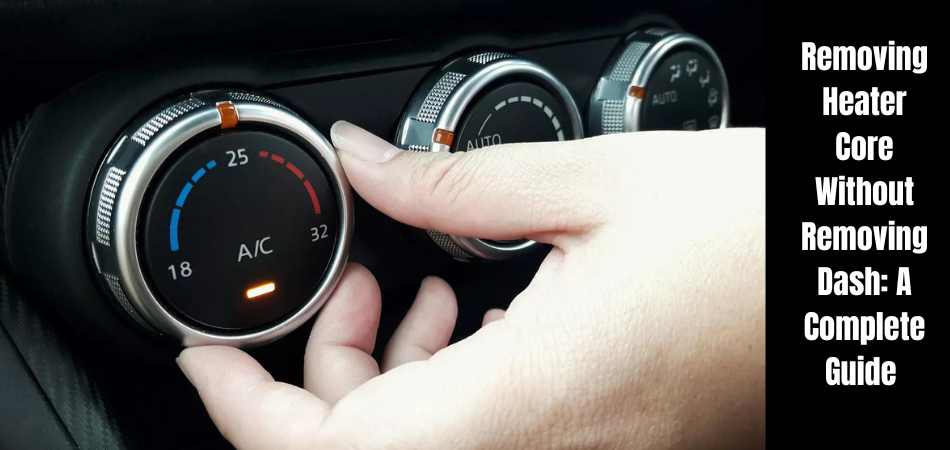
Leaks in the heater core can have various adverse effects on your car and can eventually cause damage. The car’s excellent coolant is transported through the core’s coiled tube, a heat exchanger between the cabin air and the coolant. It is, therefore, part of the cooling system of a car. But sometimes, there might be a need of removing heater core without removing dash.
You should maintain this element perfectly to prevent the engine from overheating. Therefore, it is essential to recognize when a part isn’t working and be aware of it.
You can find the detailed guide of removing heater core without removing dash in the sections below. Get out your pen and paper and start taking notes!
What Is The Location Of The Heater Core In A Vehicle?
It is our experience that the heater core will be located inside the passenger cabin of all cars, trucks, and SUVs. The heater core will likely be on the passenger side for domestic left-hand drive vehicles in the United States, especially older models.
The heater core inlet/outlet lines can usually be found by looking for the two heater hoses that route into the firewall of your engine bay.
The exciting part begins here.
Because heater cores are inside the passenger compartment, they can be challenging to access – we’re talking about removing the entire dash.
Many newer vehicles do not have an engine bay access panel, so swapping or repairing heater cores may require some interior disassembly.
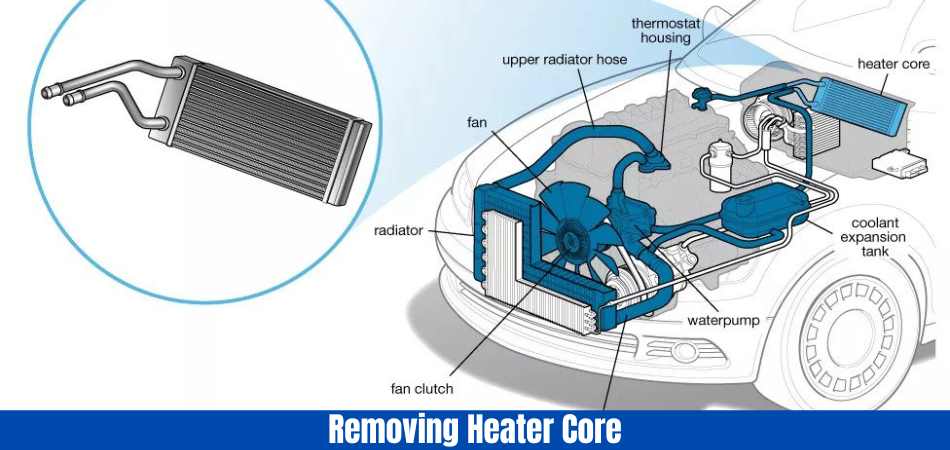
Swapping or repairing your heater core can be challenging, depending on your vehicle. This is especially true in modern cars, where sound/heat insulation, airbags, and more complex infotainment and HVAC systems are daily.
It’s straightforward to swap in/swap out the old heater core module once you get to it. We wouldn’t make extravagant dinner plans when it’s time to do the job since you must return everything.
What Is the Purpose of Heater Core?
Your car’s heater core plays an important role. The best course of action is to first discuss the function of this part before discussing how to remove it.
An automobile’s interior is heated with this small radiator, which circulates hot coolant from an engine. Coolant must circulate through the cooling system and radiator as it does for the machine.
Usually, the failed one comes from a liquid source in the footwell, with steam coming from the air vents or significant fogging on the inside of the windows.
A cooling system that smells appealing is another sign of failure. Most of the cost of replacing a part comes from the difficulty of removing it from the interior or engine compartment.
How Does A Heater Core Work?
A heater core, along with a blower motor, is one of the most critical components of a vehicle’s heating system. Heating cores look like mini radiators inside the cabin and function similarly. The engine’s cooling system is connected to the radiator via the inlet and outlet hoses. When the engine is warm, the water pump circulates hot coolant into the heater core and its many small tubes.
When the heater is turned on, air blows over the hot tubes and fins, cooling them and transferring heat. Warm air is forced through the HVAC vents while the coolant returns to the engine. Because of this, you don’t have HVAC heat right away on a bitterly cold day. Since the engine is cold and has not reached operating temperature, the heater core cannot exchange heat with the air, and the air vents are disappointing.
What Causes a Heater Core to Fail?
A heater core can fail for a variety of reasons. There are many reasons, such as age, corrosion, coolant issues, and other problems, such as a faulty thermostat or a clogged radiator. Maintaining your vehicle correctly is essential to preventing complete failure. Use the correct type of coolant and change the coolant regularly.
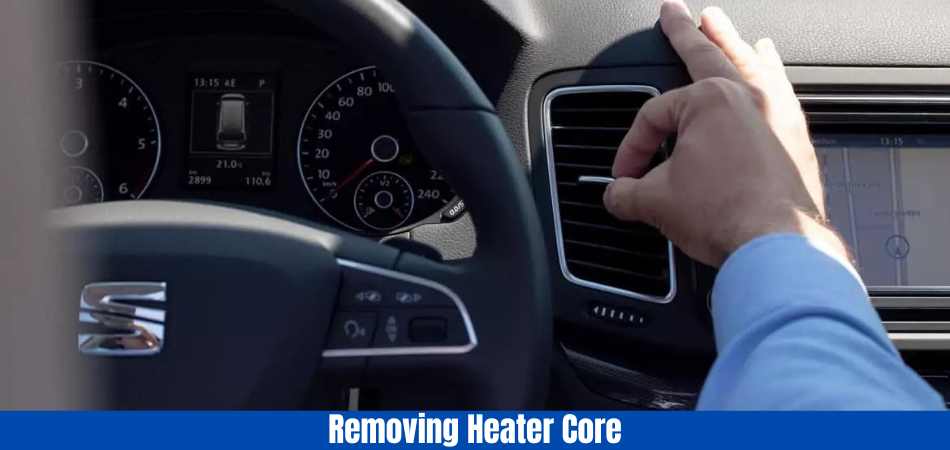
1. Age:
As with any mechanical component, the components can wear out over time. Older vehicles are more likely to have problems with the system.
2. Corrosion:
It comprises small tubes that can become clogged or corroded with time. The coolant can leak as a result, causing the system to fail.
3. Coolant issues:
A malfunctioning heater core can occur when the coolant in your vehicle is not maintained correctly. The system or components can fail if the coolant is not changed regularly or if the wrong type of coolant is used.
4. Other issues:
Other problems, such as a faulty thermostat or clogged radiator, can also affect the system.
What are the Signs of A Faulty Heater Core?
1. Foggy Windows
It may indicate an issue with the heater core if your windows are foggier than usual or foggy without apparent cause. This is not the typical fog you might find on your windows just from talking or breathing; it will be a pretty thick fog that will make it very difficult to see.
If you try to wipe it off, it will smear. It may also appear film-like. There may also be a sweet smell to the fog or film. You may notice any of those things if your coolant is leaking.
2. Overheating Engine
The heater core of your car may cause your car to overheat, but there are many other reasons. In addition to overheating, this is another severe symptom of a failing heater core.
Your car may overheat if it has a leaking or clogged heater core. Book an appointment with a professional as soon as possible if you think your car is overheating due to a faulty heater core.
3. Low Coolant Level
Maintaining the correct level of your car’s fluids is always important. It can seriously damage your vehicle if you do not have enough coolant, engine oil, windshield wiper fluid, brake fluid, power steering fluid, or transmission fluid.
Insufficient coolant could indicate that your car’s heater core isn’t working correctly or leaking coolant. To ensure that your car always has the right amount of coolant, you should fix the problem immediately.
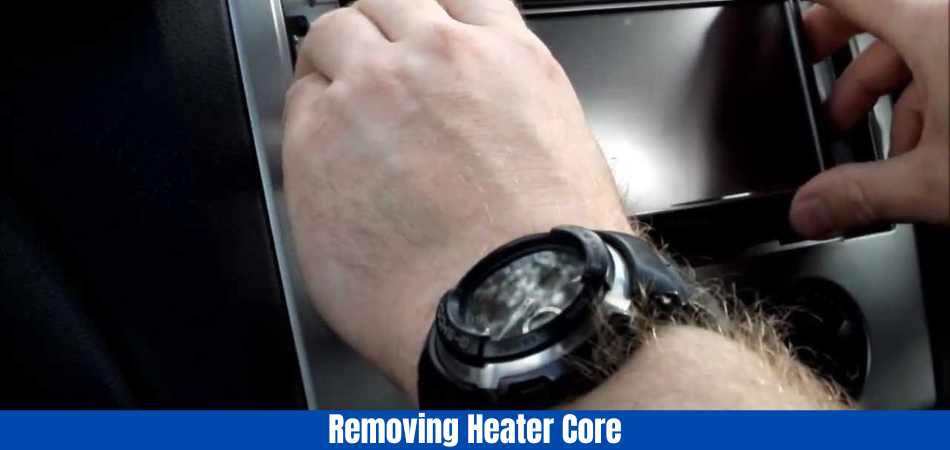
4. Coolant Leak
If your car’s coolant is leaking under your vehicle or you are using more coolant than usual, your heater core may be malfunctioning. You should inspect underneath your vehicle if you smell a sweet smell when you are standing outside your car.
5. Your cabin is filled with cold air.
The air that circulates your car might not be heated if your heater core is broken. Since you might purposefully try to cool down the cabin, it could be difficult to notice this symptom.
Nevertheless, if you blast the heat, but only cold air comes out, your heater core might leak. You could experience warm, lukewarm, or cold air from your vents due to the hole.
6. Car Smells Sweet
Another sign that your coolant leaks is a sweet scent from your air vents. Your car must always maintain a consistent level of coolant so that a sweet smell might be enjoyable. Low coolant levels can lead to problems that cost you a lot of money.
Removing Heater Core Without Removing Dash: 5 Major Steps?
Here’s what you need to know about removing heater core without removing dash.
- Find the heater core.
- The negative battery cable should be disconnected first when the hood is opened.
- Air vents should be removed.
- It is necessary to lift and remove the side panels and glove box.
- Remove the screws from behind the air vents.
- Press the release tabs on the upper side of the air vents to release the handle assembly.
- You can remove the dashboard handle by pressing the release tab.
- After disconnecting the tweeter wiring, the “A” pillar panel must be removed.
- In reverse, trim the “A” pillar.
- Before removing the dashboard, pry the face panel toward the cabin.
- The dashboard cover is held in place by seven 7mm bolts. Remove them all.
- You must disconnect all wires connected to the dashboard and ambient light sensor.
- The entire dash cover should be removed.
- Remove the top dashboard trim.
- The ambient light source should be unplugged.
- Remove the dashboard cover altogether.
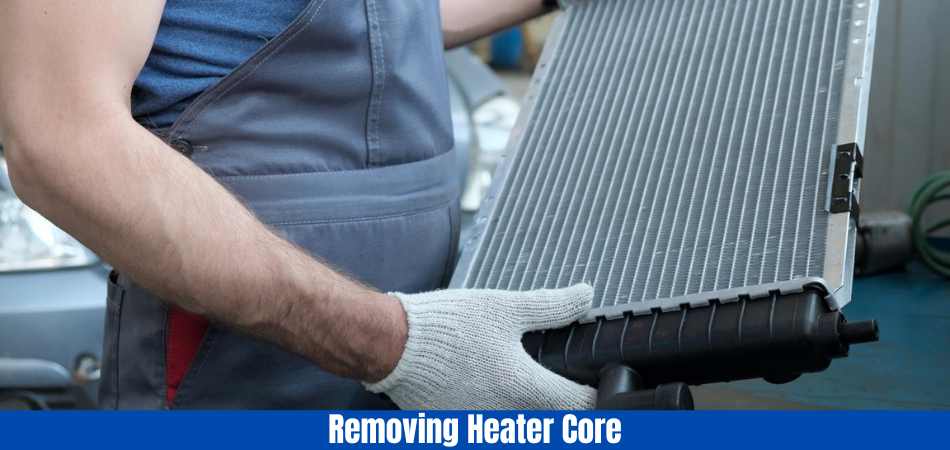
Remove The Dashboard Cover
- It is necessary to remove the 7mm bolts from the vent registers.
- The passenger-side airbag switch should be removed.
- Dash bolts must be loosened to remove the steering column.
- The steering wheel and steering column covers should be removed next.
- Remove the 7mm vent register fasteners by unscrewing them.
- Remove the airbag switch on the passenger side to remove the steering column.
Disassemble The Dashboard Components
- Ensure that the rear cup holder is fully extended.
- Unscrew the four mounting bolts.
- From the center console, remove the radio and antenna.
- Remove the wire harness clips from the interior of the cabin.
- The parking brake release lever should be removed.
- Turn off the SRS system to deactivate the side airbag.
- Remove the 10mm upper and lower airbag mounting bolts.
- From the communication interface module, remove the three 10mm mounting bolts.
Empty The Climate Control System
- After draining the system’s coolant, turn off the air conditioning.
Replace The Bad Heater Core
- The HVAC should be disassembled.
- Heater core replacement for 2004 Chevy Silverado or other models
- Replace the heater core.
- Don’t forget to cover it.
Reinstall Everything
- After removing all parts, reinstall them in the same order.
How To Take Off Heater Core Hoses?
Remove the heater core hoses by following these steps.
- Ensure that all heater hoses are replaced.
- Use pliers or a specialized tool to remove spring-loaded hose clamps from some vehicles. If the clamp has worm screws, remove it with a screwdriver.
- Once the tool is in place, move the hose clamp to access the mounting fitting.
- If the hose clamps have loosened and moved down the hose, use a blade or knife to cut the hose along the fitting gently.
- Lift and twist the heater hose after cutting it to release it from the core fitting. With the remaining hose, repeat this procedure.
- Locate and remove the heater hoses from the engine, usually near the water pump.
- Clean the heater hose fittings with a shop towel after removing the heater hoses.
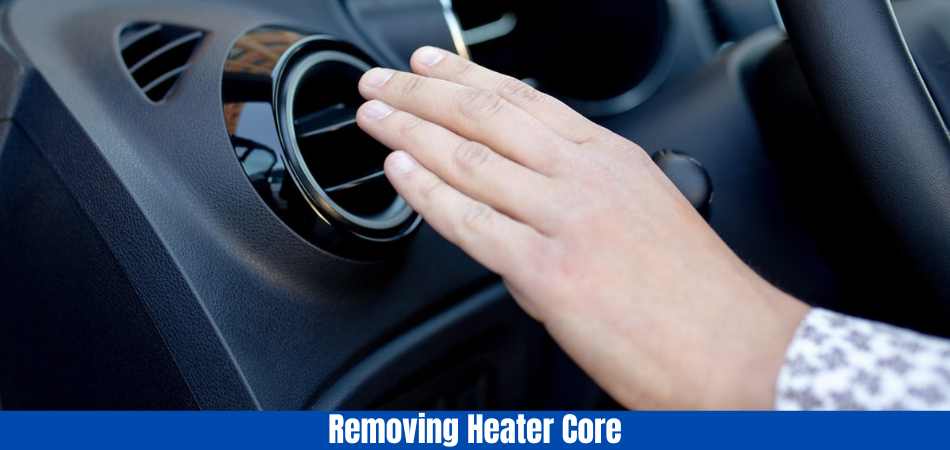
How Can You Tell Which Heater Core Hose is the Inlet and Outlet?
Are you familiar with the difference between the inlet and outlet hoses of the heater core? Make sure you connect the heater core hoses back the same way if you’re doing heater core repair. If you don’t, you might end up restricting the flow of coolant through the heater core—and, ultimately, the entire engine cooling system.
It’s not difficult to distinguish between the two hoses, though.
The two hoses are likely to have different sizes, to begin with. The inlet hose will generally be smaller in diameter than the outlet hose. Sometimes, the hose barbs or bulkheads will be labeled inlet/outlet, but don’t count on it.
Are you still unsure which is which? Run the engine for a few seconds and touch each hose carefully. Inlets will be hotter, and outlets will be more excellent.
If there’s still confusion, the inlet hose will come from the engine, and the outlet will connect to the water pump or radiator. Remember that your heater core’s inlet typically receives coolant at or near its hottest point, which usually means directly from the engine.
The outlet usually feeds the newly chilled coolant to the water pump or radiator to begin a new journey through the motor.
How To Remove The Heater Hose Connector Without A Tool?
Without a tool, it is difficult to remove the heater hose connector. A special tool releases spring fingers inside the connector to disconnect the heater hose. There is a tool for disconnecting heater hoses. The plastic tool is slipped into the connector after folding around the tube’s reverse side until the fingers are released. When the connector is no longer attached to the pipe, it slides easily away.
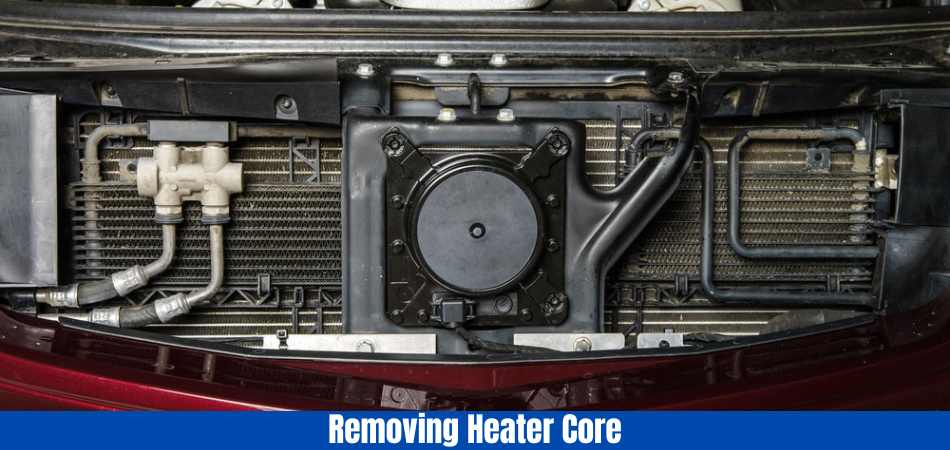
How Do You Fix A Heater Core Without Removing It?
If purchasing a new heater core is not an option, you may be able to repair your current heater core.
For this procedure, the heater core is boiled for several hours, and a rod is passed through the tubes to clear any blocked pipes. Lastly, solder the tubes where leaks have developed.
Copper heater cores can usually be repaired this way, but aluminum ones cannot. Additives meant to stop leaks from inside can clog elsewhere in the system, causing the engine to overheat.
How to Clean Heater Core Without Removing?
Blowing air or water through the heater core is necessary to clear the blockage. Grime and dirt, which cause clogs, will exit through the inlet hose. This is the point where you should connect a water hose to the outlet hose. If you have access to an air compressor, you can remove the coolant and grime using it.
You’ll want your heater core to function correctly during winter because it’s essential to your car’s cooling system. You can think of it as your radiator’s partner in moving coolant. If your vehicle doesn’t have a heater core, it won’t keep you warm during the winter.
Until you replace or repair the heater core, you can follow simple tips to maintain heat during winter. Some easy tips you can follow here include covering the windshield, wearing hand-warming gloves, using blankets, and drinking warm beverages. You can also purchase a heater that plugs into your vehicle.
Can You Drive My Car With A Broken Heater Core?
Regardless of what some people believe, you shouldn’t drive around with a broken or faulty heater core. Your car could overheat if you continue to drive with a faulty heater core, or you could accidentally damage its engine.
You should drive a very short distance if you monitor your temperature gauge. You should pull over if the temperature climbs and allow your car to cool down before continuing your journey.
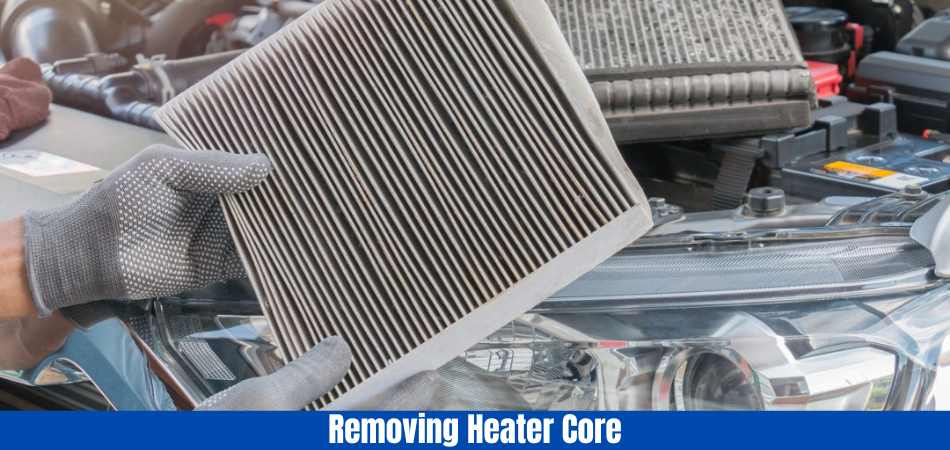
Having automotive problems can be inconvenient, so Wrench is here to help. The automotive industry is vital to us, and we want to make car ownership stress-free for everyone. You can schedule an appointment with us if you are in a sticky situation and need auto repair or maintenance services immediately. We can replace your heater core at your home, office, or other location.
How Long A Heater Core Last?
The average heater core lasts between eight and fifteen years. Insurance may cover repair or replacement if you begin experiencing issues at a certain point, but this is not always the case.
It’s common for manufacturers not to offer coverage for their vehicles’ heating systems because they’re considered “wear items” that break down over time rather than as the result of an accident.
Many cars with heater cores are only covered by the manufacturer’s warranty for one year or less. Therefore, if your warranty has run out or has been voided, you are responsible for paying for repairs.
How Often Should I Replace The Car Heater Core?
Heater cores are generally designed to last as long as the vehicle is installed. If your car is in for significant service, replacing it every ten years is a good idea.
It depends on your make and model of vehicle, how well you maintain it, where you live (in terms of temperature), how often you use your AC, and how you drive.
How Much Does It Cost To Repair A Car Heater Core?
The price ranges between $800 and $1,000. Getting quotes from at least two shops in your area is the best way to find out. To determine how much labor will be involved in a replacement and any additional costs, such as a disposal, you must find out precisely what will be involved.
Replacement of the car heater core is generally affected by several other factors:
- Price of the core;
- Some shops charge higher prices than others depending on where your car is repaired;
- You can buy OEM or aftermarket cores.
Conclusion: Removing Heater Core Without Removing Dash
Here is the guide for removing the heater core without removing the dash! You don’t have to worry about this task anymore if you follow these steps step by step.
You should look for unusual signs to detect issues as soon as possible. The earlier you repair the damage, the easier it will be to prevent it from spreading to other components.
Read more of Our article here.
Read more about Heater Core here.
FAQs
Is it possible to remove the heater core without disassembling the entire dashboard?
The heater core can be removed without removing the entire dashboard. Your vehicle’s make and model will determine the difficulty level and steps involved.
Is there a tool I need to remove the heater core without removing the dashboard?
A socket set, screwdrivers, and pliers are commonly required. You may also need a flare nut wrench, a coolant catch pan, and a repair manual specific to your vehicle.
Should I take any precautions before removing the heater core?
To ensure safety, disconnect the vehicle’s battery. Drain the coolant before starting the engine to prevent spills during removal.
Can the heater core be accessed from the engine compartment?
Yes, there are some vehicles. The heater core may be accessible from the engine compartment, making the process easier. For specific instructions, refer to your vehicle’s repair manual.
When removing the heater core without removing the dashboard, how long does it usually take?
The required time depends on your experience, the vehicle’s make and model, and the steps involved. Be patient and plan accordingly.

Jeep produced some iconic American vehicles, including the classic Wrangler. Jeep’s models weren’t all a roaring success – the Jeep Patriot, for instance, was discontinued. However, the 2015 Jeep Patriot Problems have been reported by many users.
Many people liked the Patriot SUV, but it wasn’t Jeep’s best seller. The Patriot was, therefore, no longer produced by Jeep. To buy a Jeep Patriot, you’ll have to buy it used.
Below are some of the 2015 Jeep Patriot Problems you should consider before buying one.
What are the 2015 Jeep Patriot Problems?
Many of the previous years carried over to the 2015 Jeep Patriot problems. Despite the CVT’s improvements, transmission problems persisted. In most cases, high-pitched whining noises indicated an overheating transmission that could eventually fail. Approximately $2,000 was spent on repairs for these issues.
In addition, this model year’s braking system had problems. Several owners reported grinding or squeaking noises when braking, which led to brake pads, callipers, and rotors being replaced. Between $300 and $500 was the average cost of these repairs.
There were also electrical issues with the TIPM module. Several electronic components of the vehicle failed due to this issue, including the headlights, airbags, and even the fuel pump. Around $1,000 is required to replace the TIPM module.
1. Brake System Problems
Besides transmission troubles, the 2015 model year had brake problems as well. The brake pads, calipers, and rotors needed to be replaced for owners who complained of grinding or squeaking noises while braking.
Solution: There is an average cost of $300 to $500 for these repairs. Owners should consider these potential brake system problems, affecting vehicle safety and ownership costs.
2. Electrical Issues
A persistent electrical issue also plagued the Totally Integrated Power Module (TIPM) for the 2015 model year. The problem can affect various electronic components in the vehicle, such as the headlights, airbags, and even the fuel pump.
Solution: TIPM modules cost around $1,000 to replace. Due to this issue’s prevalence, it is vital to understand potential electrical problems when considering a 2015 Jeep Patriot.
3. Transmission Overheating
Transmission overheating is one of the most common Jeep Patriot problems reported between 2011 and 2016. Many owners said the transmission overheated under normal driving conditions, such as highway driving or stop-and-go traffic.
Low transmission fluid levels, a malfunctioning transmission cooler, or a malfunctioning transmission control module can all lead to transmission overheating. Repairing the transmission and other components can be expensive when the transmission overheats.
The Jeep Patriot’s transmission should be serviced as the manufacturer recommends to prevent transmission overheating. Whenever you notice signs of transmission overheating, such as slipping gears or flashing dashboard warning lights, it is essential to have your vehicle inspected by a qualified mechanic as soon as possible.
Solution: Repairing a transmission cooler or control module may resolve the overheating issue. Transmissions that have already been damaged may need to be replaced, which can be costly.
Keeping up with regular maintenance is crucial to preventing transmission overheating and other potential problems with the 2011-2016 Jeep Patriot. The Jeep Patriot can provide reliable performance for many years if properly cared for and maintained.
4. Sunroof Leaks
There have also been reports of sunroof leaks on 2011-2016 Jeep Patriots. The sunroof has been reported to leak during rain or snow, causing water damage to the interior.
Faulty seals, clogged drainage tubes, or malfunctioning sunroof motors cause Jeep Patriot sunroof leaks. Your vehicle’s interior can suffer severe damage if a sunroof leak goes unattended, including mould growth, electrical issues, and upholstery damage.
Sunroof leaks in the Jeep Patriot 2011-2016 can be prevented by inspecting the sunroof regularly to ensure it is not damaged or worn. Regular cleaning of the drainage tubes is also necessary to prevent clogs from forming and causing water to go back into the vehicle.
Solution: If you notice water stains on your Jeep Patriot’s headliner or upholstery, you should have the vehicle inspected by a qualified mechanic as soon as possible. Replacement of faulty seals or cleaning drainage tubes are two standard methods for repairing sunroof leaks. Some cars, however, may require more extensive repairs to prevent further water damage.
Jeep Patriot owners may experience frustrating and potentially expensive sunroof leaks. It is possible to prevent sunroof leaks and other potential vehicle issues with regular maintenance and prompt attention to any signs of trouble.
5. Suspension Issues
Jeep Patriot owners have also reported suspension issues between 2011 and 2016. A rough ride, unusual tire wear, or excessive driving noise are all symptoms of suspension problems in the Patriot.
Solution: The Jeep Patriot may suffer from suspension problems due to worn or damaged components, such as bushings, struts, and shocks. These parts can become worn or damaged over time, negatively impacting driving performance.
6. Other Problems With The Jeep Patriots
Furthermore, the Jeep Patriot has also been plagued by several minor 2015 Jeep Patriot Problems that might concern some drivers. Although not as prevalent, these issues still deserve attention and understanding of how they may affect the vehicle’s performance.
Other problems identified include:
- Excessive oil consumption
- Power steering pump failure
- Failure of a catalytic converter
- Check engine light illumination for a variety of reasons
- A problem with the air conditioning system
- Leaking intake manifold gasket
- Tire pressure monitoring issues
- Problems with the brake system, such as premature wear or squeaking
- Locks that do not work
- Glitches in the infotainment system
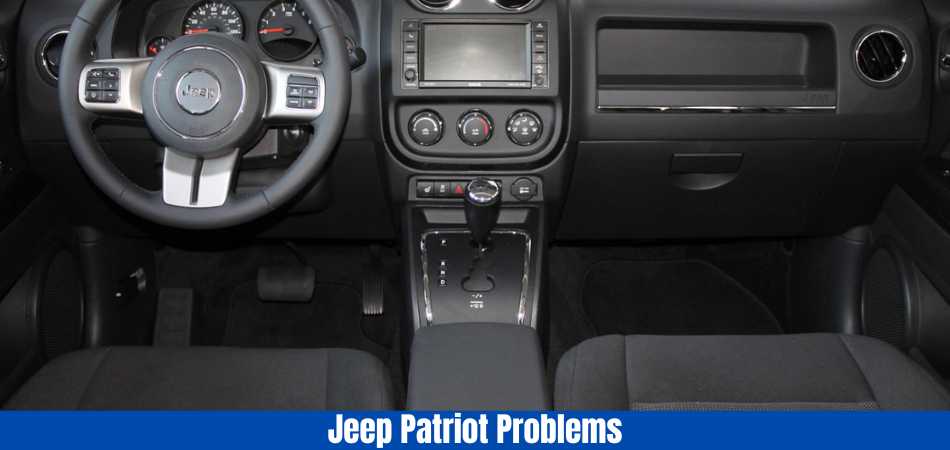
Although these problems are less common than the major issues discussed earlier in the article, they should still be considered when evaluating a Jeep Patriot. Owners can sometimes prevent these issues with regular maintenance and prompt attention to warning signs.
It is always a good idea to consult a qualified mechanic before dealing with any automotive issues.
What are the Pros and Cons of the 2015 Jeep Patriot?
Examining the positive and negative aspects of various Jeep Patriot models is essential. We will outline the general pros and cons of this product to assist potential owners in making an informed decision.
Pros of the 2015 Jeep Patriot
- Pricing is low
- Unique styling
- Suitable for off-roading (for some trims)
- The compact size makes parking and driving easy.
Cons of the 2015 Jeep Patriot
- Failure of a CVT transmission
- Cabin leaks water
- Manual transmission shifts are difficult
- Overheating of the engine
- Problems with the electrical system
- Problems with ball joints and suspension
- Failure of the wireless control module
- Damage to the lower areas and wheel wells as a result of rust
- Alternator with a loud noise
- The noise of wheel bearings
When purchasing a Jeep Patriot, one must consider both pros and cons. Each model and model year’s specific issues or strengths should be researched and discussed with a trusted mechanic.
What is the 2015 Jeep Patriot’s Resale Value?
Although famous for its box-like design and distinctive front grille, the Jeep Patriot has a relatively low resale value compared to other SUVs like the Jeep Wrangler or Toyota. Five years from now, a Jeep Patriot’s resale value is expected to depreciate by approximately 35-40%.
Jeep Patriot resale values are determined by various factors, including the year, model, trim, and mileage. Furthermore, private sales typically have a higher resale value than dealership trade-ins.
After five years, Jeeps usually retain 60% of their original price and 70% after three years. Despite being lower than other brands, these percentages are essential when determining a Jeep Patriot’s resale value.
Which Jeep Patriot Years You Should Avoid?
Since the Patriot has only 11 iterations, you must be very selective when buying one. The following Jeep Patriot years should be avoided:
- 2008 Jeep Patriot
- 2009 Jeep Patriot
- 2011 Jeep Patriot
- 2012 Jeep Patriot
- 2015 Jeep Patriot
- 2008 Jeep Patriot
Jeep’s sophomore effort with the Patriot wasn’t without its problems. According to Car Complaints, the 2008 Patriot had 436 NHTSA complaints, ranging from sunroof leaks to transmission problems.
Most complaints are about the Patriot’s leaky sunroof. Several reports stated that water leaked through the Patriot’s sunroof. Leaks can sometimes flow through the dash and radio and short the headlights. In some cases, owners could not even drive when it rained.
You should watch out for a transmission failure with the 2008 Patriot. Some Jeep owners have reported that their transmission failed at around 100k miles.
The market is flooded with options, so it’s easy to get lost in the choices – that’s where we come in. Learn about Jeep Patriot’s most reliable year, general reliability, and more.
2009 Jeep Patriot
A high-pitched noise started coming from the Jeep 2009’s transmission while decelerating. The warranty covers a complete transmission replacement. In any case, you’ll need to pay $2,730 for the repairs.
As with the 2008 Patriot, the 2009 Patriot also has a leaky sunroof. As a result of the water leaks, mold, and electrical problems will arise.
2011 Jeep Patriot
There are also several reasons to avoid the 2011 Jeep Patriot. Water leaks make an unwelcome return, along with new problems such as overheating transmissions.
There is a tendency for the 2011 Patriot’s transmission to overheat. In most cases, owners notice a whining engine noise around 70k miles before the transmission temperature light appears. CVT transmissions are prone to this particular problem.
In the 2011 Patriot, the leaky sunroof is back with a vengeance. As a result of the water leaks, things like damage to the radio or dome lights would be exacerbated.
2012 Jeep Patriot
Jeep Patriot’s performance improved significantly the following year. Still, buyers should be aware of plenty of reliability issues.
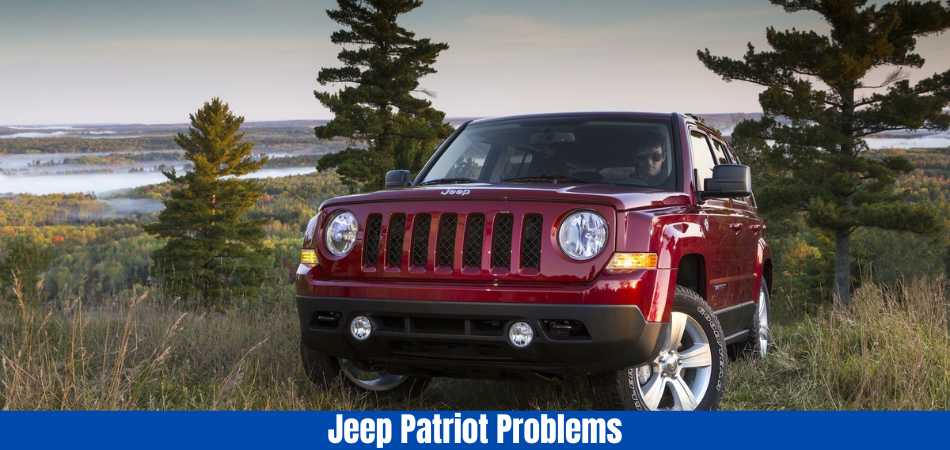
Specifically, the 2012 Patriot has a faulty CVT transmission. According to numerous complaints, the problem is characterized by a whining noise, difficulty accelerating, and overheating warnings. Repairs typically cost $3,940, which is costly. With the Patriot’s CVT transmission, this problem seems to be prevalent.
Additionally, the 2012 Patriot is also prone to faulty integrated power modules. TIPMs can fail for various reasons, including headlights turning on and off, broken power windows, and non-functioning blinkers. TIPMs typically cost $900 to replace.
2015 Jeep Patriot
According to Car Complaints, the 2015 Jeep Patriot is the worst Jeep Patriot model year. In addition to TIPM failure and water leaks, it also has a new stalling engine.
Most owners complain about the stalling engine in their 2015 Patriots. According to many accounts, the engine stalled while driving – there was no check engine light warning or warning. When you’re going on highways or freeways, this is a huge safety issue.
Water leaking into the interior is almost predictable at this point. There are no known recalls, but many owners believe this problem results from a design flaw.
2016 Jeep Patriot
Despite its lack of problems, the 2016 Jeep Patriot is one of the most problematic SUVs on the market. The top three complaints with this model are water leaking into the cabin, squeaking brakes, and failure to accelerate. According to many complainants, even though these issues aren’t as severe as those on this list, they’re still quite bothersome.
Furthermore, the 2016 Patriot model also experienced premature CVT transmission failure, which is present in many Patriot models. People reported whining noises, overheating warnings, and difficulty accelerating.
A five-speed manual transmission is available on the 2016, and an automatic transmission on certain trim levels. The CVT issue only affects Freedom Drive II off-road vehicles.
Which Jeep Patriot years are the Most Secure to Purchase?
After we’ve covered the Jeep Patriot years to avoid, let’s look at the ones that are safe to buy used.
2007 Jeep Patriot
Jeep Patriot 2007 has successfully carved out a niche for itself. If you’re looking for an older used model with decent off-road capabilities, the 2007 Patriot is a great choice. This vehicle has several reliability problems, such as control arm failures and stalling. Despite this, they are less significant than the problematic years listed above.
2017 Jeep Patriot
One of the best years for the Jeep Patriot is the 2017 model year – the last Patriot model before its unfortunate discontinuation. Jeep’s 2017 lineup offers robust features, good reliability scores (76 from J.D. Power), and good safety ratings.
The 2017 model year does have some familiar reliability issues, like a leaky sunroof, but they’re not as severe as they used to be.
Are the 2015 Jeep Patriots Dependable Car?
Until 2017, the Patriot served as Jeep’s budget model (along with the Jeep Compass). The build quality could be better, so it could be better. Some model years are prone to electrical problems and transmission issues. When shopping for a Jeep Patriot, find out what years to avoid. You should also have any vehicle you are considering inspected by a mechanic.
Is the 2015 Jeep Patriot a Good Buy?
The Patriot was introduced as Jeep’s entry-level model (along with the Compass). Chrysler’s Dodge Caliber and other vehicles share parts with this vehicle. Because of this, the Jeep isn’t as robust as you might expect (despite its “Trail-Rated” badge).
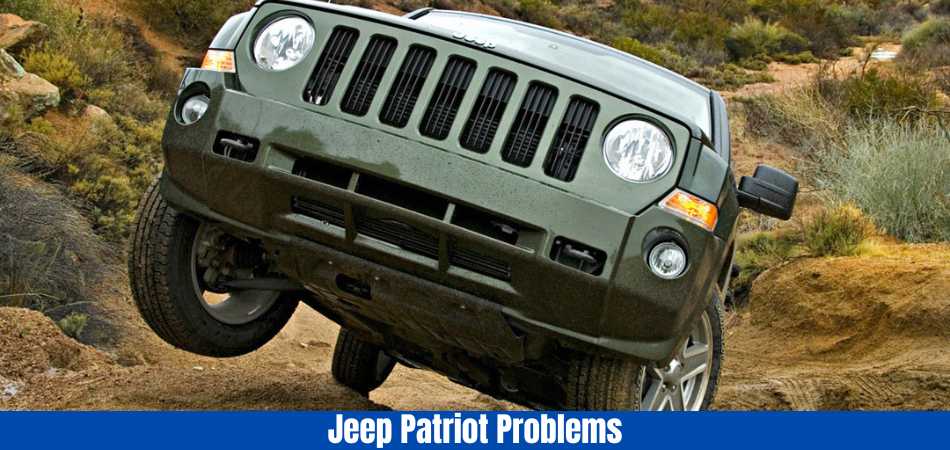
Consider the Patriot more of a suburban crossover than a backwoods SUV. The Patriot might be a suitable vehicle if you have explored what model years to avoid and if this usage meets your needs.
What is the Average Price of a Used 2015 Jeep Patriot?
What is the typical price of a used Jeep Patriotith about 150,000 miles, while a newer edition with fewer miles can fetch as much as $18,000. Crossovers remain in demand despite not being the most robust Jeeps ever made. According to CoPilot Price Pulse, the average price of a 2015 Jeep Patriot is $12,897. Without inflated market conditions, that would be 28% higher.
Does the 2015 Jeep Patriot Require High Maintenance?
Jeep Patriot is famous for those seeking an affordable and capable SUV. However, some owners complain that the Patriot requires a lot of maintenance. You can do a few things to keep your Patriot running smoothly and avoid costly repairs. It is cheaper to maintain a Jeep Patriot because it costs an average of $596 in annual maintenance.
The first thing you should do is keep up with your scheduled maintenance. Routine maintenance includes oil changes, tire rotations, and other services. These simple services can help prevent significant problems in the future.
In addition, be aware of common Patriot issues. There are transmission problems, engine problems, and electrical problems. If you notice any of these issues, your SUV should be repaired immediately.
Last but not least, drive responsibly. Maintaining your Patriot’s good condition can be achieved by avoiding accidents and following the speed limit. A qualified body shop should repair any damage to your SUV if you are involved in an accident.
Following these simple tips, you can keep your Jeep Patriot running smoothly for years. Take your SUV to a qualified mechanic if you experience problems.
How Do You Choose the Best Jeep Patriot Model?
When shopping for a used Jeep Patriot, it is essential to determine the model year that is right for you. You need to consider many factors when choosing the best model year for your needs, and this can be a difficult decision. If you are selecting the best Jeep Patriot for your needs, keep these things in mind:
Your first consideration should be how you intend to use the Jeep Patriot. For off-road adventures, you should choose a model year explicitly designed for that purpose. In the case of just needing a reliable daily driver, any model year will do.
Your budget influences any car purchase. Deciding how much you will spend before shopping for Jeep Patriots is essential.
It is also essential to consider the availability of parts and accessories. Finding replacement parts or accessories may be challenging if your Jeep Patriot is no longer in production.
The best Jeep Patriot model year will be determined based on all these factors. Depending on your needs, choose a model year.
What are the 2015 Jeep Patriot Alternatives?
Choosing a new car requires consideration of many factors. Here are a few things to remember if you seek an alternative to the Jeep Patriot.
First, you’ll need to determine what size vehicle you need. Consider one of the other Jeep models, like the Grand Cherokee or Wrangler, if you want something more significant. Several other compact SUVs are also available from brands like Honda, Toyota, Ford, and Subaru.
Second, consider what kind of driving you will do most often. A Patriot might be a good choice if you live in a rural area or do a lot of off-roading. It might be better to go with something else if you drive primarily on paved roads.
As a third consideration, take your budget into account. In addition to the Patriot, plenty of other SUVs will fit your budget just as well.
Last but not least, consider the features that are most important to you. For example, the Patriot is not the only vehicle on the market that meets fuel economy requirements.
Consider these things if you’re looking for a Jeep Patriot alternative. You can choose from a variety of great options. You can find the right car for you and your family using a little research.
Final Thoughts: 2015 Jeep Patriot
Despite its promise of being a good fit between the Jeep Compass and the Cherokee, the Jeep Patriot ended up with many faults and problems; in most cases, the manufacturer does not recall significant responsibilities, which puts unnecessary financial strain on owners.
Taking your Jeep Patriot to a Jeep dealer and having it checked for uncompleted recalls is the best thing you can do if you own one.
If you are looking for a used Jeep Patriot, get a complete vehicle history report and avoid any models with outstanding recalls.
Learn more about the Jeep Patriot Problem here.
Read more of our Articles here.
FAQs
Does the 2015 Jeep Patriot’s CVT pose a significant problem?
Some owners have indeed expressed concern about the CVT. Overheating, jerking, and shuddering have been reported by some drivers.
Does the 2015 Jeep Patriot have any electrical issues?
Yes, electrical problems have been reported, including problems with the radio and Uconnect system and issues with various sensors that cause warning lights to illuminate unexpectedly.
How common are suspension problems with the 2015 Jeep Patriot?
Many owners have reported clunking or squeaking noises from the suspension system and premature wear on suspension components.
Does the 2015 Jeep Patriot have any recalls?
Contact the National Highway Traffic Safety Administration (NHTSA) or the manufacturer for the most current recall information. It is possible for recalls to address safety-related issues and other concerns.
What should I do if my 2015 Jeep Patriot has transmission problems?
A qualified mechanic or Jeep service centre should be consulted if you’re experiencing transmission issues. Regular maintenance, such as fluid checks and changes, can improve transmission performance.


Are you thinking of buying a hybrid car? If so, the Ford Fusion Hybrid should be on your short list. This car has excellent fuel efficiency and improved safety features, making it a popular choice among many drivers.
However, before making your final selection, you should be aware of several concerns that have been recorded with this model. Some Ford Fusion Hybrid customers have reported seeing a “Stop Safely Now” message on their dashboard, which we will investigate in this article. We hope to offer you with all of the information you need to make an informed choice on whether the Ford Fusion Hybrid is the perfect vehicle for me. Buckle up, and let’s go!
The Rise of Hybrid Cars
With growing concerns about climate change and rising petrol prices, an increasing number of drivers are turning to hybrid vehicles as a solution. These vehicles use a hybrid of petrol and electric propulsion, resulting in improved fuel economy and lower emissions. Hybrid automobile technology has advanced dramatically over the years, making them more inexpensive and easier to maintain.
The Issue with the Ford Fusion Hybrid
Now, let’s address the elephant in the room: the “Stop Safely Now” notice that has flashed on the dashboards of some Ford Fusion Hybrids. This error message is associated with the vehicle’s safety system, which is intended to safeguard both the driver and the hybrid system.
When this warning light shines, it means that there is a problem with the hybrid system that could harm the car or endanger the driver’s safety. In response, the vehicle’s system powers down the drivetrain, momentarily disabling the vehicle to prevent additional harm.
A handful of Ford Fusion Hybrid owners have reported this problem. Some people have reported seeing this warning while travelling at high speeds, while others have reported seeing it at random, even while the car was stationary. The underlying cause of this problem varies significantly, with some blaming it on problems with the battery, coolant levels, or other hybrid system components.

Despite being a significant concern, it is vital to note that this problem does not affect all Ford Fusion Hybrids. Many owners have reported trouble-free driving for many years. However, it is a potential risk that must be examined and comprehended before to acquiring this car.
What Ford is Doing About It?
Ford has acknowledged the ‘Stop Safely Now’ problem and is working hard to find solutions for affected owners. Several service advisories and recalls have been issued by the corporation over the years to address this and other related issues.
Owners who get this warning message should contact their nearest Ford dealership or technician. In some circumstances, a software update or the replacement of a damaged component can resolve the problem.
While the “Stop Safely Now” warning can be alarming, it is part of the vehicle’s safety system and is intended to safeguard both you and your vehicle. If this notice appears, it is always preferable to have the vehicle checked by a specialist.
Meet the Ford Fusion Hybrid
The Ford Fusion Hybrid is a remarkable option in the field of hybrid vehicles. This midsize sedan has a stylish exterior, a roomy cabin, and a powerful yet efficient engine. The Fusion Hybrid has a gasoline engine as well as an electric motor, which allows it to attain outstanding fuel efficiency ratings of up to 43 mpg in the city and 41 mpg on the highway.
Advanced Safety Features
Aside with its environmental benefits, the Ford Fusion Hybrid has innovative safety measures that will keep you and your passengers safe on the road. This includes options like lane-keeping assist, blind-spot monitoring, and adaptive cruise control. Furthermore, both the National Highway Traffic Safety Administration (NHTSA) and the Insurance Institute for Highway Safety (IIHS) have given the Fusion Hybrid top safety ratings.

Stop Safely Now Technology
The Ford Fusion Hybrid’s Stop Safely Now technology is one of its distinguishing features. If the driver becomes unconscious or unresponsive, this technology can safely bring the vehicle to a complete stop. It also activates the hazards and unlocks the doors automatically, making it easier for first responders to access the vehicle in the event of an emergency.
More Features of the Stop Safely Now Technology
- The Stop Safely Now technology in the Ford Fusion Hybrid was created with safety in mind. It not only indicates a potential failure in the vehicle’s systems, but it also allows some autonomy in critical situations. If a driver becomes unresponsive while driving, the system can take over, gradually slowing the vehicle and bringing it to a safe halt on the side of the road. This reduces the likelihood of an accident and safeguards both the driver and other road users.
- Furthermore, the system is clever enough to recognise various driving scenarios. It can distinguish between a true emergency and a false alarm, preventing wasteful vehicle shutdowns. The technology is constantly updated to improve the detection of defects in hybrid system components.
- Finally, the Stop Safely Now technology is intended to instruct owners on what to do next when the warning lights appear. The infotainment system’s built-in instructions provide explicit guidance on how to address the situation, including recommendations to contact a Ford repair centre if necessary. This ensures that the driver is never left in the dark regarding how to deal with a potential vehicle problem.
- Keep in mind that the Stop Safely Now technology is more than just a warning system. It’s a safety feature meant to protect and support you in times of need, proving that the Ford Fusion Hybrid truly cares about its passengers.
Pros and Cons of the Stop Safely Now Technology
The Ford Fusion Hybrid’s Stop Safely Now technology is a two-edged sword, giving certain advantages while also posing some obstacles.
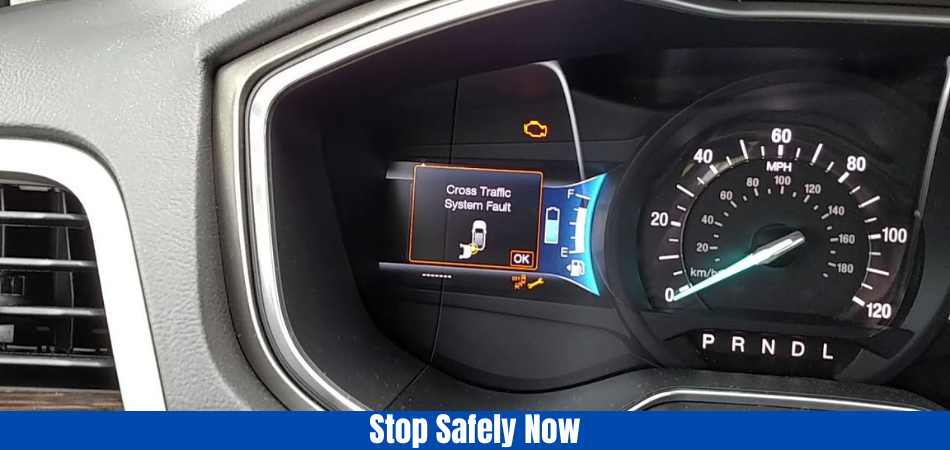
Pros:
- Enhanced Safety: The key advantage of this technology is the increased safety it provides. In the event that a driver becomes unconscious, the system can take control, safely stopping the vehicle and reducing the danger of an accident.
- Immediate Notification: When a failure occurs in the hybrid system, this technology promptly warns the driver. This enables for prompt intervention, preventing potential vehicle damage or a dangerous driving condition.
- Advice on Next Steps: When the warning light illuminates, the built-in infotainment system gives the driver clear directions on how to respond, reducing misunderstanding and panic.
Cons:
- Unexpected Shutdowns: Some drivers have reported unexpected shutdowns as a result of this technology, which can be unsettling and annoying, especially when travelling at high speeds or in congested areas.
- False Alarms: There have been cases where the system has triggered even when there is no visible malfunction. This can cause undue anxiety and confusion.
- Dependence on Professional Assistance: When the Stop Safely Now warning light illuminates, the driver is frequently required to seek professional assistance, which can be inconvenient and potentially costly.
- Despite its shortcomings, the Stop Safely Now technology represents a substantial leap in car safety. Ford is constantly attempting to minimise the cons and maximise the benefits of this feature, thereby improving the safety and experience of Fusion Hybrid owners.
Conclusion
The Ford Fusion Hybrid is a top choice for anyone looking to buy a hybrid automobile because of its combination of fuel efficiency, sophisticated safety features, and new technology. It provides a pleasant driving experience while being environmentally conscientious. So, why not include the Ford Fusion Hybrid to your list of possible vehicles? Have a safe and enjoyable drive!
FAQs
Is the “Stop Safely Now” warning sign frequent in Ford Fusion Hybrids?
While it is not a typical occurrence, some Ford Fusion Hybrid owners have reported seeing the “Stop Safely Now” message. It usually signifies a serious situation that requires rapid care.
What could cause the “Stop Safely Now” message to show in a Ford Fusion Hybrid?
This notice can be caused by a variety of issues, including battery problems, cooling system faults, or hybrid powertrain troubles. To establish the specific problem, the car must be diagnosed by a professional technician.
Can I drive my Ford Fusion Hybrid after seeing the “Stop Safely Now” message?
No, you should not drive if the “Stop Safely Now” message appears. This can result in additional damage and safety issues. It’s advisable to pull over and have the vehicle towed to a repair shop.
What should I do if I see the “Stop Safely Now” notice on my dashboard?
When you see the notification, safely pull over to the side of the road or a parking lot. Turn off the car and seek assistance and diagnostics from a qualified Ford service centre.
How much does it cost to fix the problems that are producing the “Stop Safely Now” sign in a Ford Fusion Hybrid?
The cost of repairs might vary greatly depending on the nature of the problem and whether or not the car is still under warranty. A specific estimate should be obtained from a Ford dealership or a skilled mechanic.
Is the “Stop Safely Now” issue covered under Ford Fusion Hybrid warranty?
The warranty coverage may vary depending on the vehicle’s age, mileage, and the severity of the problem. Check the terms of your vehicle’s warranty and speak with the manufacturer or dealership.