
Wheel lugs secure your Jeep’s wheels to the chassis. This wheel and axle hub has three to eight lugs evenly spread around the centre hub. A wheel’s bolt pattern describes the arrangement of bolts around its hub. Depending on the vehicle’s bolt pattern, some diameters and widths of wheels might not fit. But what is the 2015 Jeep Cherokee bolt pattern?
It’s not noticeable if you look closely at automotive wheel bolt patterns. Yes, counting lugs on a wheel is easy. However, it is not so obvious that two wheels with a four-bolt pattern might not fit the same vehicles. For vehicles of a particular size, manufacturers usually use the same bolt pattern, but not always. Bolt patterns are also different between manufacturers.
Read the article to learn more about the 2015 Jeep Cherokee bolt pattern and apply it to your vehicle.
What Is a Bolt Pattern?
A tire’s bolt pattern indicates the number of bolts or lug nuts used to secure the wheel to your vehicle and its pitch circle diameter. That’s right. There’s something confusing about that.
Let’s take a look at it in more detail. In a bolt pattern, you need to look for two numbers. For instance, 5×110. There are five bolt holes or lug holes on the wheel indicated by the first number.
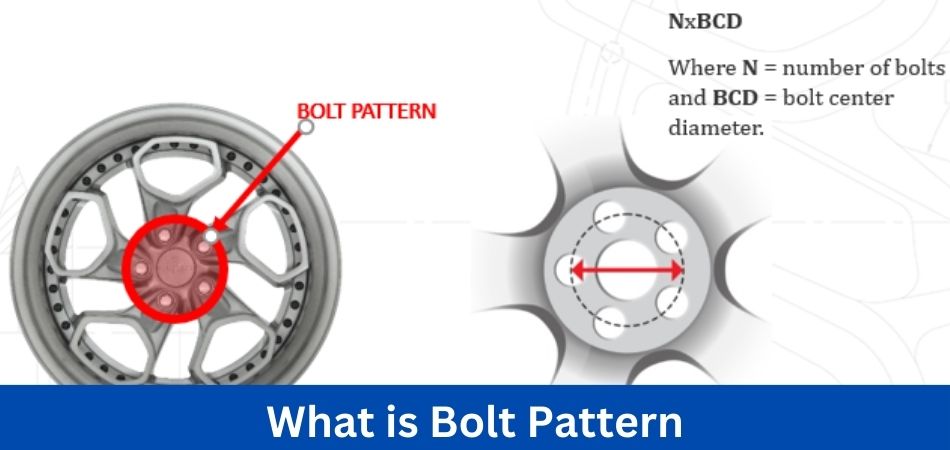
If that’s the case, what does 110 mean? An imaginary circle is formed by the boltholes at the centre of your wheel. In order to determine the second number, you need to calculate the circle’s diameter around the holes.
So This wheel has five boltholes evenly spaced around a circle with a diameter of 110 mm.
How Bolt Pattern Is Written?
An illustration of the bolt pattern is represented by a code consisting of two numbers. For example, a typical four-lug wheel has a bolt pattern of 4-4.25″. There are four lugs on the wheel, arranged around a circle 4.25 inches in diameter. Eight lugs are arranged in a circle 7.87″ in diameter on a wheel with a bolt pattern of 8-7.87″. Below is a table listing common bolt patterns for wheels with four, five, six, and eight lugs.
| 4-Lug Bolt Pattern Conversions (mm to Inches) | ||||
| 4-98mm→4-3.86” | 4-100mm→4-3.94” | 4-108mm→4-4.25” | 4-110mm→4-4.33” | 4-114.3mm→4-4.5” |
| 5-Lug Bolt Pattern Conversion (mm to Inches) | ||||
| 5-98mm→5-3.86” | 5-100mm→5-3.94” | 5-108mm→5-4.25” | 5-110mmć5-4.33” | 5-112mm→5-4.41” |
| 5-114.3mm→5-4.5” | 5-115mm→5-4.52” | 5-120mm→6-4.72” | 5-120.7mm→5-4.75” | 5-127mm→5-5” |
| 5-130mm→5-5.12” | 5-135mm→5-5.3” | 5-139.7mm→5-5.5” | 5-150mm→5-5.91” | 5-155mm→5-6.1” |
| 5-165.1mm→5-6.5” | 5-205mm→5-8.07” | |||
| 6-Lug Bolt Pattern Conversion (mm to Inches) | ||||
| 6-114.3mm→6-4.5” | 6-115mm→6-4.52” | 6-127mm→6-5” | 6-132mm→6-5.2” | 6-135mm→6-5.3” |
| 6-139.7mm→6-5.5” | ||||
| 8-Lug Bolt Pattern Conversion (mm to Inches) | ||
| 8-165.1mm→8-6.5” | 8-170mm→8-6.69” | 8-200mm→8-7.87” |
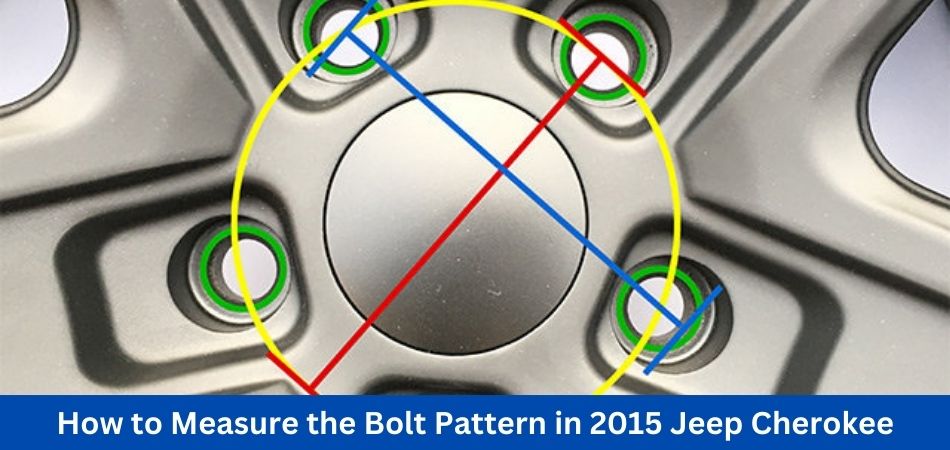
How to Measure the Bolt Pattern in 2015 Jeep Cherokee?
Aside from keeping track of your car’s bolt pattern, you must also keep track of its measurements. It is always important to know the bolt pattern’s diameter and the number of holes.
It comes in a number of different hole and size combinations, but they are all listed on a chart. Therefore, they aren’t random. Reading them while shopping is as simple as knowing what’s happening.
There are two types of bolt patterns, each classified by a different number. Suppose, for instance, your car has bolt pattern measurements of 4-4.5″. The first number indicates how many lug bolts your car has, and the second number indicates how big those five lug bolts are.
- 4 Lug Wheels
Since the 1960s, four-lug wheels have been common on compact cars. Ford Falcon and Mustang models of the 1960s used four-lug hubs and wheels on select trim levels, as well as the Ford Falcon.
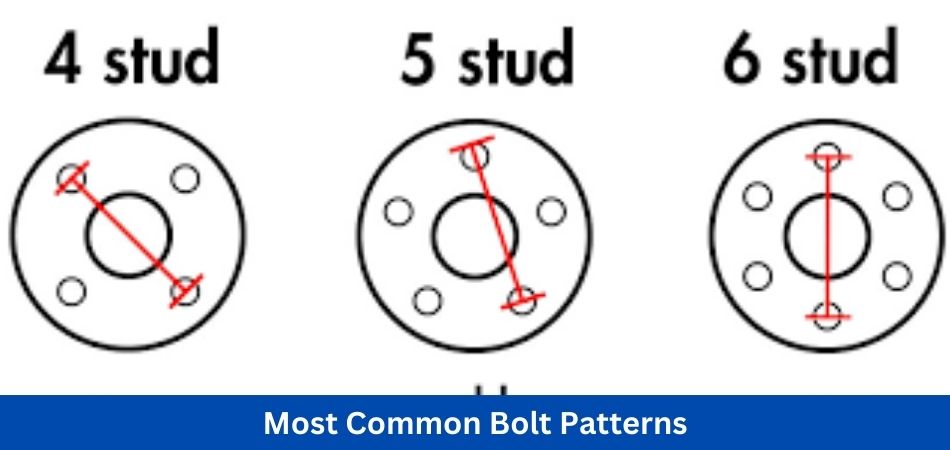
Several different bolt patterns are available for four lug wheels, including four lugs that are 4×4.5 inches and four lugs that are 4×4.25 inches. The bolt pattern of Volkswagen and other foreign cars is 4x130mm. Measuring from the center of one wheel stud to the center of the one across from it will tell you what bolt pattern you have.
Some manufacturers offer classic 4 lug wheels for many models and makes. You can also choose a Smoothie wheel (available in primer and chrome), Ford Styled Steel, and Vintage Wheel Works V48 wheels with 4 lugs. In addition to the 4×4.25 inch bolt pattern, the Smoothie wheel also includes a 4×4.5 inch bolt pattern. Classic Fords can use the other wheels because they have a single, direct fit 4×4.5-inch bolt pattern.
- 5 Lug Wheels
The most common wheel style in the collector car industry is the five-lug. Ford was the first manufacturer to use a five-lug bolt pattern in the late 1920s. Eventually, other manufacturers followed suit, designating their own bolt patterns, designating larger bolt patterns for trucks and smaller bolt patterns for passenger cars.
There are several companies that offer five-lug wheels in authentic styles to fit 5×4, 5×4.5, 5×4.75, 5×5, 5×5.5 and 5x205mm bolt patterns.
When determining the bolt pattern on a five-lug wheel, measure from the center of the stud to the edge furthest away from it. For an illustration of how it is measured, see the diagram.
- 6 Lug Wheels
This article is straightforward when it comes to the 6 lugs. Thanks to the 6 lug bolt pattern most manufacturers use, light trucks use 6 on 5.5 inches. Even though it’s important to measure, it’s the same pattern on most 1930s through 1980s 6 lug trucks. Using the stud centers as guides, measure the bolt circle from one stud to the next.
For many years, Chevrolet used 6 lug wheels on all of its trucks (and some of its cars). Before 1971, every Chevrolet 3100 and C10 (half ton) truck had six lug wheels. After 1971, Chevy and GMC trucks with four-wheel drive continued to feature six lug wheels
This is how we get the estimated diameter from a bolt pattern of five, but for a more precise reading, you will need something called a Bolt Pattern Gauge. If your vehicle has a five bolt pattern, you’ll be working mainly with estimates.
- 8 Lug Wheels
For increased load capacity, many manufacturers built heavy duty trucks with larger hubs. The result was an 8-lug wheel design that is still popular on 3/4-ton and 1-ton trucks today. There are very few differences between manufacturers when it comes to this pattern. It’s pretty common for 8 lug bolt patterns to have bolt circles of 6.5 inches. You can determine the bolt pattern by measuring from the center of one stud to the center of the one across.
Classic heavy-duty trucks can benefit from 8 lug wheels from Coker Tire. A semi gloss black powder coat or chrome finish is available on the 16-inch wheels.
What are the Most Common Bolt Patterns?
Polaris: The majority of modern and full-sized ATVs and UTVs have 4×156 wheels, except for the Turbo R and Pro R, which have 5×4.5 wheels
Can-Am: Almost all modern and full-size ATVs and UTVs have 4×137 tires
Honda: The bolt pattern on all non-sport ATVs and UTVs is 4×110 except for the Pioneer 1000 and Talon, which have 4×137 bolt patterns.
Kawasaki: The bolt pattern for ATVs with Solid Rear Axles (SRA) is 4×137. The bolt pattern on the KRX 1000 is 4×156. An independent rear suspension ATV uses a bolt pattern of 4×110. Teryx and Mule use a 4×137 bolt pattern with a 12mm stud. The Mule PRO-FXT has a bolt pattern of 4×156.
Yamaha: The 2019+ YXZ uses a 4×156 bolt pattern, which is different from the rest of the non-sport and modern ATVs & UTVs.
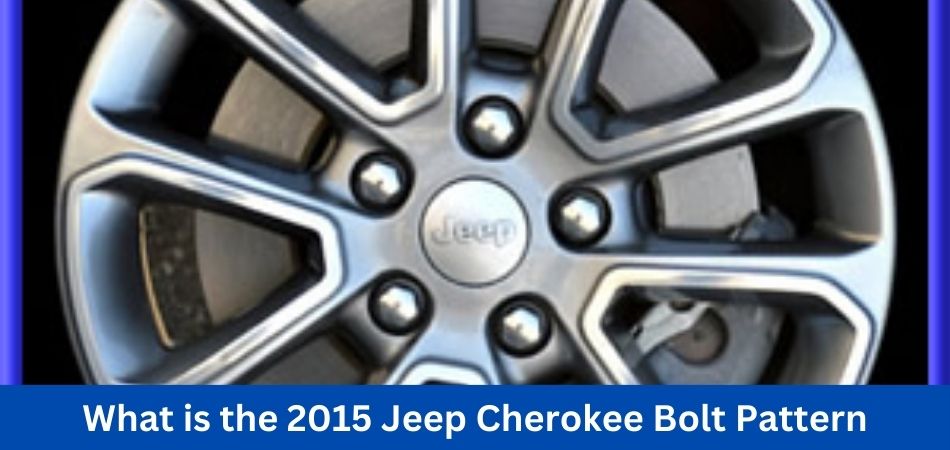
What is the 2015 Jeep Cherokee Bolt Pattern?
A set of wheels on another Wrangler might be more appealing than the wheels on your Jeep. When you were on an adventure last time, you got some ‘off-road’ rock rash and wanted to replace those wheels.
It could be a matter of time. There are times when you need to replace your wheels, and when you do, it can be confusing to determine which bolt pattern will fit your vehicle. Depending on your tires, you may know what wheel size you need, but the bolt pattern is another story.
There are different spacings between the lugs on Jeeps, so although most have five lugs, different models have different spacings. As an example, all JK Wranglers (2007-18) have a 5×5 bolt pattern – five lugs with five-inch spacing. A 5×4.5 pattern is used on earlier TJ and YJ models of the Wrangler (1997-06) and the YJ (1987-95). Below is a Jeep-specific chart that breaks down the year/model and bolt pattern of different Jeeps so you can determine which one applies to your vehicle.
2022-2021
- Jeep Grand Cherokee Bolt/Lug Pattern – PCD 5x127mm
- Center Bore (Hub Bore) 71.5 mm
- Thread Size (Lug Nut Size) – M14 x 1.5
- Tire Sizes – 245/70 R17, 265/60 R18, 265/55 R19, 265/50 R20, 275/50 R20, 295/45 R20, 295/40 R21, 305/35 R22
2020-2016
- Jeep Grand Cherokee Bolt/Lug Pattern – PCD 5x127mm
- Stock Wheel Offset – 44 to 53 mm
- Center Bore (hub bore) – 71.5 mm
- Thread Size (Lug Nut Size) – M14 x 2.00
- Stock Rim Sizes Range – 17×7.5 – 22×12.0
- Custom Rim Sizes Range – R20 – R20
- Tire Sizes – 245/70 R17, 265/60 R18, 265/55 R19, 265/50 R20, 275/50 R20, 295/45 R20, 295/40 R21, 305/35 R22
2015
- Jeep Grand Cherokee Bolt/Lug Pattern – PCD 5x127mm
- Stock Wheel Offset – 25 to 45 mm
- Center Bore (Hub Bore) – 71.5 mm
- Thread Size (Lug Nut Size) – M14 x 2.00
- Stock Rim Sizes Range – 18×7.0 – 22×10.0
- Custom Rim Sizes Range – 20×10.0 – 22×10.5
- Tire Sizes – 245/70 R17, 265/60 R18, 265/55 R19, 265/50 R20, 275/50 R20, 295/45 R20, 295/40 R21, 305/35 R22
2014-2011
- Jeep Grand Cherokee Bolt/Lug Pattern – PCD 5x127mm
- Stock Wheel Offset – 25 to 45 mm
- Custom Offset Range – 10 to 56 mm
- Center Bore (Hub Bore) – 71.5 mm
- Thread Size (Lug Nut Size) – M14 x 2.00
- Stock Rim Sizes Range – 17×7.0 – 22×10.0
- Custom Rim Sizes Range – 18×10.0 – 24×9.5
- Tire Sizes – 245/70 R17, 265/60 R18, 265/55 R19, 265/50 R20, 275/50 R20, 295/45 R20, 275/45 R21, 295/40 R21, 265/40 R22, 285/40 R22, 305/35 R22
How to Properly Torque Bolt/Lug Nuts in 2015 Jeep Cherokee?
Securing those lug nuts once the wheels are on isn’t just lip service. When driving your Jeep, it is crucial to ensure proper safety. When the wheels are on your Jeep, use a lug wrench like the Gorilla Power Lug Wrench to tighten the first lug to the correct torque (your owners manual will tell you the exact torque for your vehicle).
Next, tighten the lug nut adjacent to the one you just tightened. Continue moving across the wheel. Work back and forth across the wheel until all lug nuts have been properly torqued, following the diagram below.
Check our lug nut torque chart to determine the proper torque setting if you do not have an owner’s manual. Be careful not to torque those lug nuts over. If you over-torque the lug nuts on your Jeep, they may shear off, and you may lose control. Make sure you know the torque specs for your vehicle.
How To Change The 2015 Jeep Cherokee Bolt Pattern?
Imagine that you find a set of wheels you really want to put on your Jeep Cherokee, but it doesn’t fit your bolt pattern. However, your search doesn’t have to end there – a number of manufacturers create wheel adapters, especially for such applications.
As the name implies, wheel adapters attach to your vehicle’s axle and simulate a different bolt pattern, thus expanding your wheel options. If you want to adjust your 5×114.3mm car to fit 5x100mm wheels, a good adapter can help.
Conclusion: 2015 Jeep Cherokee Bolt Pattern
When upgrading or customizing the wheels on a 2015 Jeep Cherokee, it is vital to understand the bolt pattern. In adhering to the Jeep Cherokee’s bolt pattern, enthusiasts and owners can explore numerous wheel options, enhance the vehicle’s aesthetics, and increase its performance. The bolt pattern guarantees seamless and enjoyable driving, whether Jeep Cherokee owners are seeking off-road adventures or simply a customized touch.
FAQs
Can I use wheels with a different bolt pattern on my 2015 Jeep Cherokee?
Using wheels with a different bolt pattern may lead to improper fitment and compromise safety. Keep the bolt pattern 5×110 as specified by the manufacturer for optimal performance.
What size wheels can I install on my 2015 Jeep Cherokee with the 5×110 bolt pattern?
Jeep Cherokee wheels will fit 5×110 bolt patterns within the recommended size range. You should always consult your vehicle’s manual or a professional for guidance on the right size wheels.
How safe are wheel spacers for changing bolt patterns?
It is not recommended to use wheel spacers to achieve a different bolt pattern, as this can affect the handling and safety of the vehicle. For 2015 Jeep Cherokee wheels, stick to 5×110 bolt patterns.
Are aftermarket wheels compatible with my 2015 Jeep Cherokee?
It is possible to use aftermarket wheels as long as they have the correct 5×110 bolt pattern. Make sure the aftermarket wheels meet Jeep Cherokee’s specifications and have the necessary load capacity.
What is the best way to measure the bolt pattern on my existing wheels?
Count the lug bolts and measure the distance between two opposite bolt centres to determine the bolt pattern. In the 2015 Jeep Cherokees, the bolt pattern is 5×110.
What is the maximum size of the wheels that can be installed on my 2015 Jeep Cherokee?
Keep wheels within the recommended size range to maintain proper performance and avoid issues with speedometer accuracy, handling, and safety.

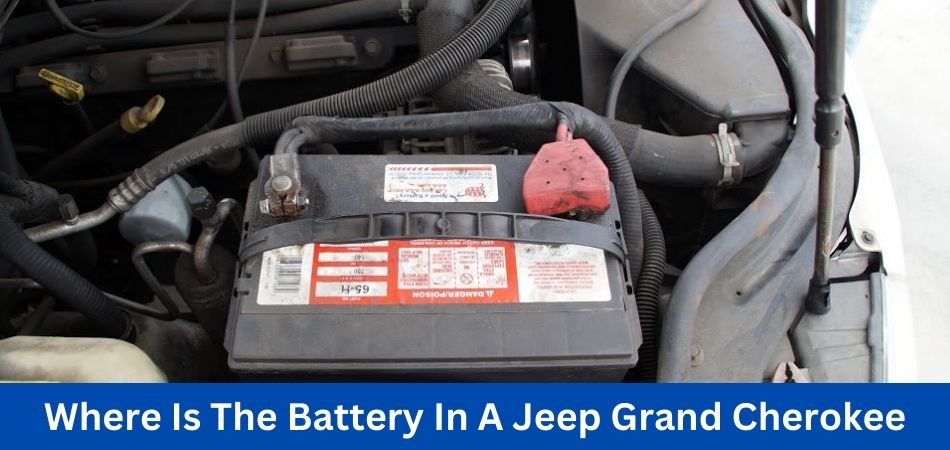
Some Jeep owners might be surprised that their car battery is not under the hood, as it is on most vehicles. A jump-start or battery replacement becomes difficult if you cannot find the battery. So,” where is the battery in a Jeep Grand Cherokee“?
Before even driving a vehicle, knowing the battery’s location is essential. The battery might be hard to track, especially if you have a Jeep Grand Cherokee. You may then wonder where is the battery in a Jeep Grand Cherokee.
Jeep Grand Cherokees are currently available in five generations. Most models with batteries under the hood have theirs in an unexpected place, while others have them under the hood.
To find the Jeep Grand Cherokee Battery conveniently, read through this article until the very end.
Jeep Grand Cherokee: Overview
The Jeep Grand Cherokee is a popular SUV with its rugged design, off-road capabilities, and luxurious features. Jeep introduced the model in 1993, and has remained a staple of its lineup ever since. With its perfect blend of style, versatility, and performance, the Grand Cherokee attracts adventure-seekers and families.
Jeep Grand Cherokee’s powerful engines are one of its standout features. You can choose from several engine options, including V6s and V8s, which provide ample power and fuel efficiency. You can rely on the Grand Cherokee to deliver a smooth, controlled ride, no matter your terrain.
There is no denying that the Jeep Grand Cherokee continues to impress when it comes to interior comfort and technology. A spacious cabin features high-quality materials, supportive seats, and an advanced infotainment system. A touchscreen display, smartphone integration, navigation system, and a premium sound system make driving an enjoyable and connected experience.
Compared to other SUVs, the Grand Cherokee is known for its outstanding off-road capabilities. The Grand Cherokee is no exception to Jeep’s reputation for producing off-road capable vehicles. Various terrain modes, advanced traction control, and advanced 4×4 systems enable the Grand Cherokee to confidently navigate rough terrain and tough conditions.
A variety of advanced driver assistance systems are available in the Grand Cherokee in terms of safety. The Grand Cherokee prioritizes your safety on the road with blind-spot monitoring, forward collision warning, and lane departure warning. Moreover, the Grand Cherokee’s excellent crash test ratings suggest its sturdy construction and robust safety features.
The Jeep Grand Cherokee is an excellent choice for style, performance, and versatility. Grand Cherokee SUVs are reliable and capable of handling every aspect of your life, whether driving to work, taking your family on vacation, or going off-road. In the SUV market, the Grand Cherokee continues to offer a wide range of features, a comfortable interior, and a rugged design.
Why is the Battery Location Of Jeep Grand Cherokee Important to Know?
If you’re a Jeep enthusiast who enjoys exploring and going on adventures, the Jeep Grand Cherokee is for you. Therefore, we all want to keep the power supply uninterrupted and in perfect condition.
It is crucial to have a good battery. As well as protecting your Jeep’s electronics, it also acts as a surge protector. The battery powers your Jeep’s lights, GPS, and stereo when the engine turns off.

In order to locate your Jeep Grand Cherokee’s battery, you must know its location. You should also know the battery location for the following reasons:
1. Easy Replacement
Your Jeep Grand Cherokee’s battery might need a replacement or changes after a while, especially if it’s a bit older. It’s a pretty simple task, but you may need to take it to a repair center since you don’t know where the battery is.
It is possible to replace the battery without additional fees if you know its location. Additionally, it simplifies your job.
2. Connectivity Error Help
The lights or stereo can have a problem, causing you to have trouble starting. In addition, it relates to the connection of the battery. Reconnecting can solve the problem completely.
You can easily access the battery if you know where it is and see if there are any connection errors!
3. Jump Start
In order to jumpstart your Jeep Grand Cherokee, you should connect the jumper cables to the battery terminal. Your engine needs a jump if it suffers a sudden power failure or you need to open the trunk without a key.
The battery must be accessed quickly in such emergencies, and you must jumpstart the vehicle as soon as possible.
4. Inspection of batteries
The battery in your Jeep Grand Cherokee will need inspection regularly if it is an older model.
5. Get Battery Fuel
Occasionally, the battery can’t supply the power you need due to a fuel crisis. The battery needs refilling with fuel, therefore. The battery location becomes quite helpful in such cases.
Without it, you can’t fill up your Jeep’s battery with fuel, and minor problems might require a trip to the shop.
Where Is The Battery In A Jeep Grand Cherokee?
The Jeep Grand Cherokee is one of the most popular and best-selling SUVs in the United States. The Jeep model combines adventure, sports, and luxury.
Because of this, all generations of the Jeep Grand Cherokee have become equally popular over the years. But, where is the battery in a Jeep Grand Cherokee?
Since 1993, the Jeep Grand Cherokee has had five generations. It is not true that all model years have a similar location for the vehicle’s battery.
Hence, you must know its exact location before interacting with it physically.
- 1st Generation Jeep Grand Cherokee Battery Location
1993 marked the beginning of the Jeep Grand Cherokee’s journey. The first generation continued until 1998. Unlike other SUVs, the under-hood engine layout remained the same.
Therefore, the first-generation Jeep Grand Cherokee battery was under the hood. Tracking the battery requires looking at the compartment left to the engine, just behind the passenger.
You simply need to pull the latch under the driver’s seat to replace the battery. Connect the negative and positive terminals after securing the hood.
Use a ten mm socket wrench and regular pliers to remove the brackets and pull off the battery.
- 2nd Generation Jeep Grand Cherokee Battery Location
After the first generation of Jeep Grand Cherokee, the second generation started in 1999. The program lasted five years and ended in 2004. Modifications and developments were few.
Accordingly, the battery is still in the exact location as in the previous generation. However, the second-generation Jeep Grand Cherokee battery location undergoes a slight alignment and shift.
During the car’s second generation, the battery locates on the extreme left side of the engine bay. Under the driver’s side dash, it is readily visible once you open the hood.
Additionally, those vehicles lack battery covers, so removing and replacing batteries requires only pliers and a wrench of a specific size.
- 3rd Generation Jeep Grand Cherokee Battery Location
Jeep Grand Cherokees were available in two segments in the third generation. Between 2005 and 2010, it received its WK and WK Facelift. This generation has seen a lot of change, especially in the engine bay.
The first thing you’ll find when you pop the hood is the battery bracket or case. Under the passenger seat, the battery location has been completely changed from under the hood.
As a result, if you plan to remove, service, or replace the battery on a third-generation Jeep Grand Cherokee, you should check directly under the front passenger’s seat.
Despite the newer arrangements, interacting with the battery was difficult. Removing the firewall allowed advanced features near the engine components without interfering with the engine bay.
- 4th Generation Jeep Grand Cherokee Battery Location
The Jeep Grand Cherokee’s fourth generation also had three sub-segments like its third generation. The fourth generation includes the WK2, WK2 Facelift, and WK2 Facelift2 models.
Since 2005, the generation has been in production. The battery location, however, did not change significantly. As in the previous generation, it was under the front passenger seat of the Jeep Grand Cherokee.
To interact with the battery, you must disassemble the entire seat. Use the seat shift switch on the right panel to elevate the seat.
Under the passenger seat, if you approach the cabin from the back, there is a small compartment. To remove it, use a flathead screwdriver. As a result, your vehicle’s battery will degrade
- 5th Generation Jeep Grand Cherokee Battery Location
Jeep Grand Cherokee’s fifth generation is the latest model in the series. Since 2022, it has been known as WL. After the fourth generation, no changes are made to the battery location.
Under the front passenger seat is your fifth-generation Jeep Grand Cherokee. Elevate it from the ground and shift it to the front. You can now remove the battery compartment cover by using a flathead screwdriver.
The whole battery is exposed for replacement as soon as the cover is removed.
| Make | Year | Model | Engine Size | Battery Group / CCA | Battery Location |
| Jeep | 2020 | Cherokee | L4-2.0L | H7 / 700 CCA | Aft of the left headlight assembly, in front of the engine compartment. |
| 2019 | Cherokee | L4-2.0L | H7 / 700 CCA | Aft of the left headlight assembly, in front of the engine compartment. | |
| 2019 | Cherokee | V6-3.2L | H7 / 700 CCA | Aft of the left headlight assembly, in front of the engine compartment. | |
| 2018 | Cherokee | L4-2.4L | H6 / 600 CCA | Aft of the left headlight assembly, in front of the engine compartment. | |
| 2017 | Cherokee | L4-2.4L | H6 / 600 CCA | Aft of the left headlight assembly, in front of the engine compartment. | |
| 2016 | Cherokee | L4-2.4L | H6 / 600 CCA | Aft of the left headlight assembly, in front of the engine compartment. | |
| 2015 | Cherokee | L4-2.4L | H6 / 600 CCA | Aft of the left headlight assembly, in front of the engine compartment. | |
| 2014 | Cherokee | L4-2.4L | H6 / 600 CCA | Aft of the left headlight assembly, in front of the engine compartment. | |
| 2013 | Grand Cherokee | V6-3.6L | H7 AGM / 700 CCA | Under the front seat of the passenger. | |
| 2012 | Grand Cherokee | V6-3.6L | H7 AGM / 700 CCA | Under the front seat of the passenger. | |
| 2011 | Grand Cherokee | V6-3.6L | H7 AGM / 700 CCA | Under the front seat of the passenger. | |
| 2010 | Grand Cherokee | V8-4.7L | H8 / 850 CCA | Aft of the left headlight assembly, in front of the engine compartment. |
Why Is The Jeep Grand Cherokee Battery Located Under The Passenger Seat?
Jeep owners are scratching their heads and blaming Jeep manufacturers for placing the battery in an inaccessible place since it’s typically easily serviced and accessed.
Several factors led the manufacturer to place the battery under the passenger seat rather than under the hood.
It’s not an innovation, especially for Jeep. Jeeps designed for WWII had batteries located under the seats beneath the floorboards. The design pays tribute to the original design and serves a practical purpose.
This may be because lead-acid batteries cannot operate above 120 degrees Fahrenheit. The radiator gets extremely hot, so keeping the battery close isn’t a good idea.
Moreover, the manufacturers may have preferred to use valuable engine compartment space for the engine and other components.
What Is The Jeep Grand Cherokee’s Battery Size?
Most Grand Cherokees use batteries with a group size of 34, or H7 or H8 batteries. In the latest model, the battery is an H7, which we call ‘DIN’ compatible. Reviewing the chart, you can find more information about Jeep Grand Cherokee’s amps and battery size.
| Battery Type | Engine | Cold Crank AMPS |
| H7-AGM | V6/3.6L | 850 |
| H8-AGM | V6/3.0L | 900 |
| H7-AGM | V8/6.2L | 850 |
| H7-AGM | V8/6.4L | 850 |
| H7-AGM | V8/5.7L | 850 |
When Should You Replace Jeep Grand Cherokee Battery?
It is essential to check the voltage drops regularly to ensure the battery works properly. Even though batteries typically last for five years, confusion arises when they begin to malfunction early. Your first question is, “When should you replace the Grand Cherokee battery?”
When starting the car, you may hear clicking sounds, indicating a battery problem. If the Grand Cherokee battery becomes corroded, it must be replaced.
If you replace a battery that has been regularly discharged, you don’t have to jump-start the car or change the lights.
How To Remove A Jeep Grand Cherokee Battery?
Removing or replacing a Jeep Grand Cherokee battery is the most challenging part. A tight fit can make moving the battery a little frustrating because you have to maneuver the passenger seat. You may find it helpful, however, to move your seat as far forward as possible.
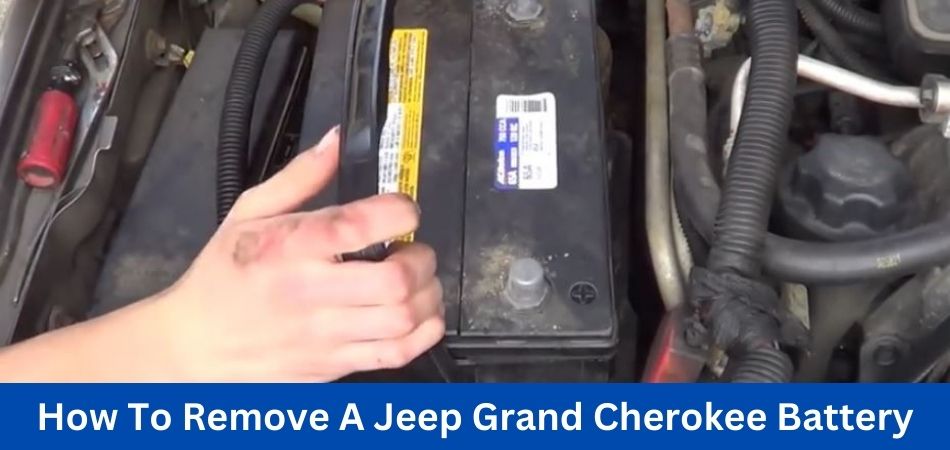
For models between 2011 and 2021, follow these steps to remove the car battery. The same applies to models with two batteries or without.
Step 1: Move The Seat
Moving the passenger seat forward is the first step. It can be difficult to move it when you’ve never done it before. The user guide for your vehicle can help you determine how to do it for the first time.
In order to move the seat forward, you typically have to raise or move knobs or levers. To move the seat, follow the instructions in the guide to locate the lever. Make sure you move it as far forward as possible.
Step 2: Lift The Carpet
You usually need to lift a panel on the vehicle to access the battery. Nevertheless, you need to lift both the panel and carpet simultaneously. It may be easier to lift the carpet first before the panel.
Step 3: Remove One Battery Cable
Lifting the panel from the floor will allow you to remove one cable at a time. You will need a wrench to loosen the fastener on the negative battery cable.
You likely already have a handy wrench for this purpose, so pull it out and use it right now. You might have to borrow one to loosen the fastener if you don’t have one. Ensure that the battery head is not damaged during this process. After loosening the cable, remove it from the negative terminal.
Step 4: Pull Out The Vent Tube
The next step is to locate the vent tube on the battery. You should find instructions in the user guide on how to find it and what it looks like.
You can find it on the battery’s side. Pull it out. Afterwards, locate the hold-down plate with the two fasteners on the battery. A wrench will be needed to loosen and remove these fasteners.
Step 5: Remove The Second Cable
The next step is to remove the positive battery cable from the positive terminal. Pull the cable off by loosening the fastener with the wrench. To avoid damaging the other cable, do this carefully.
Step 6: Lift The Battery Out Of The Car
Once all the cables are loose and off the battery, you can lift the battery out of the car. Nevertheless, because of the space issue, it may be necessary to wiggle the battery before removing it.
What are the Tips For Maintaining The Battery In Jeep Grand Cherokee?
When you are in the middle of an adventure or journey, checking the battery multiple times would be a hassle. In order to avoid such situations and issues, it is best to keep the battery in good condition. Here’s what you need to do:
1. Charge the battery and check its condition
You should check the battery charge level and current condition if you’ve used the battery for a long time.
Make sure your battery is fully charged whenever you go for a drive. Make sure the battery is regularly in good health. Your Jeep should be taken to a repair shop if something seems suspicious.
2. Clean the terminals and battery of the battery
The problem with filthy batteries is that they get unhealthy too quickly. Therefore, you won’t be able to jumpstart your Jeep Grand Cherokee without a functioning battery.
If the terminals are corroded, the connection can be hampered, and a power outage could occur. Therefore, it is best to keep the terminals and battery clean.
3. Keep your batteries in a proper storage place
When replacing a battery, we sometimes forget to place it properly. Jeep Grand Cherokees are built for off-road adventures.
In this case, the battery will be subjected to several shocks and impacts without proper placement, resulting in damage. As a result, you must store the battery correctly.
Conclusion: Where Is The Battery In A Jeep Grand Cherokee
Now you might get the answer: where is the battery in a Jeep Grand Cherokee? It is your responsibility to know everything there is to know about your Jeep as a Jeep owner. You should know the location of the battery as one of the most essential pieces of information.
No matter how often your Jeep is serviced, you should know where the battery is. Also, it can be used for minor repairs, such as tightening loose connections, jump-starting, replacing batteries, etc.
We hope that we have covered all your questions regarding the location of the Jeep Grand Cherokee battery. Have a safe drive on your adventures!
FAQs
Do Jeep Grand Cherokees have two batteries?
The engine cranking and ESS systems on some Jeep Grand Cherokees are powered by dual batteries. There is only one powerful battery in the Jeep Grand Cherokee, however.
What is the life expectancy of a Jeep Grand Cherokee car battery?
On A Jeep Grand Cherokee car battery typically lasts 3-5 years. With regular maintenance and recharging, the battery can last for 6-7 years. A vehicle’s driving style and maintenance affect the battery’s lifespan.
How Much Voltage Does A Jeep Grand Cherokee Battery Have?
For Jeep Grand Cherokees, a healthy battery is between 13.5V and 14.3V. The SOC gradually decreases over time. It is recommended to recondition or replace a battery if its SOC is below 70% or 12.6V.
What is the location of the Jeep Cherokee’s start/stop battery?
The auxiliary battery is the name given to the auto start/stop battery in Jeep Grand Cherokee. Additionally, it is located next to the main battery under the passenger seat. Jeep Grand Cherokees are not all equipped with auto start/stop batteries.


Cars generate all kinds of weird noises due to so many moving parts, fluids moving about, and different electrical components, many of which are normal and pose no cause for concern. However, sometimes you might notice that your Car makes humming noise when parked.
If you hear a humming noise when your car is parked, it could be the radiator fan, electric water pump, EVAP leak test, DPF regeneration, or a malfunctioning alternator. It’s the battery cooling system buzzing if you have an electric vehicle.
Read this comprehensive article explaining causes and solutions for why “your Car makes humming noise when parked.“
Is It Normal for Cars to Hum?
Cars create a variety of noises, and as long as you don’t hear any loud buzzing, metal grinding, whirring, clunking, or whining, there’s no need to call 911. Humming, for example, is one of the more innocuous noises you might hear in a car and is usually caused by the normal working of various components.
Humming Noise from Gas Cars When Parked
After parking in the garage for a few hours, you may notice a humming noise coming from the back of the automobile. That is the sound of the gasoline evaporation leakage test, and you should not be alarmed. The vehicle has an evaporative emission control system (EVAP), which seals the fuel system and prevents fuel vapors from escaping into the surrounding air.
When fuel vapors come into touch with air and sunshine, they produce smog, which is extremely damaging. The fuel pump is used to pressurize the vehicle system and test for leaks during the evaporation leakage test. Most cars are set to run this test after five hours of parking because every metallic will have contracted at that point, making it more straightforward to identify leaks. The check engine light on the dashboard will illuminate if the vehicle senses a leak.
Humming Noise from Electric Cars When Parked
Most individuals, including EV owners, are probably unaware that electric vehicles have a cooling system. Electric vehicles’ cooling system is needed to warm up the battery on cold days and cool it down because it is prone to overheating when in operation. The same is true for electric motors.
The cooling system employs ordinary coolant and a water pump to transfer the coolant. And the humming noise is caused by the water pump in conjunction with the coolant flow. The noise is significantly more noticeable in electric automobiles because there are no engine sounds, and what may confuse people is that the coolant does not circulate as frequently.
However, this is not cause for fear because if the battery overheated, you would receive a message, and if it were frozen, the same thing would occur. This precise explanation can also be found in your owner’s handbook; if not, it can be found on the dealer’s website.
Why Does a Car Make Humming Noise When Parked?
A car generates a humming noise when parked for various reasons, including electricity, fuel, AC system, brakes, inner CV joint, a faulty alternator, water pump bearing, transmission oil level, and tire balance.
Knowing the exact source of the buzzing sound is critical since it could indicate a serious problem that requires professional repair.
1. The electrical system
A weak or failing battery or a defective electrical component could cause a buzzing noise in your car. A buzzing sound might be produced when the alternator works harder than usual to charge a weak battery.
On the other hand, a short circuit or poor wiring in the electrical system can cause numerous components to create a buzzing noise.
2. The fuel system
When stopped, a car that makes a humming noise could indicate a significant problem with the fuel system. A faulty fuel pump could cause the noise. A buzzing sound might also be caused by debris in the fuel lines.
Other signs, such as difficulties starting your automobile or poor performance, indicate that the fuel pump needs to be changed.
3. System of air conditioning
Your car’s air conditioning system can potentially cause a buzzing noise in a parked automobile. When you switch on the air conditioner, the compressor or other system components may whine.
If your vehicle exhibits other symptoms, such as warm air from the vents or a weird stench, your AC system will likely need repair.
4. Brakes
If your parked automobile makes a grinding or droning noise, it could result from worn brake pads. A humming sound can be produced when the pads’ metal brushes against the rotors.
Other signs of worn brake pads include a pulsing sensation in the brake pedal and trouble stopping. The problem should be resolved by replacing the brake pads.
5. CV joint on the inside
If you hear a loud humming noise coming from your car, it could be due to a deteriorating inner CV joint. The inner CV joint is a component of the driveshaft that aids in the transfer of power from the transmission to the wheels.
Vibrations or unusual noises while driving are signs of a damaged CV joint. As a result, replacing the CV joint is frequently required to resolve the problem.
6. Alternator failure
A faulty alternator might also cause your vehicle to hum. The alternator is in charge of charging the battery and producing electricity for the electrical system.
If broken, it might cause shaking even when the automobile is parked. Dimming headlights or a dead battery are two other signs. The alternator must be replaced to resolve the problem.
7. Bearing for a water pump
If your car makes a constant humming noise when parked, it could be due to a faulty water pump bearing. To prevent overheating, the water pump circulates coolant through the engine.
Overheating or coolant leaks are signs of a failed water pump bearing. To resolve the problem, the water pump must be replaced.
8. Level of transmission oil
Transmission is poor. A low oil level or transmission problems might also cause the automobile to make noise when parked.
Symptoms of transmission problems include slipping gears, difficulties shifting, and a burning odor. Transmission repair or replacement may be required to resolve the issue.
9. Wheel alignment
A humming noise from your parked car could be caused by faulty wheel balancing.
This warning sign is usually more visible at highway speeds, although you may still hear it when the car is parked. Having your wheels balanced or rotated may assist to remedy the problem.
How to Identify the Source of the Humming Noise?
Understanding what’s creating a noise can help you determine where it’s coming from. Here are some measures you can take to figure out where the humming sounds are coming from:
- Pay close attention: Start your car and let it idle for a few minutes. Determine where the noise is originating from. Is it louder behind the hood, or can you hear it better inside?
- Check Your Fluids: A buzzing noise might be caused by low fluid levels in the power steering or gearbox. Check to see if these fluid levels are low.
- Examine the Alternator: If the noise becomes louder when you turn on electrical components (such as your headlights or air conditioning), the alternator may be the source of the problem. A professional inspection may be required to validate this.
If the buzzing noise starts when you switch on your air conditioning, there could be a problem with the AC compressor. Again, you may need to consult with a specialist to confirm this.
Remember that determining the source of a noise can be difficult. Having a technician look at it is always a smart idea if unsure.
How To Fix The Car Making Humming Noise When Parked Problem?
If your car makes an obnoxious noise while stopped, it could indicate a more significant problem. Here are some potential solutions to the car buzzing when turned off problem:
1. System of electricity
A defective alternator or a weak battery might cause a continual humming noise. You may need to replace or repair the faulty component to resolve this.
If there is a short circuit or defective wiring, a mechanic must diagnose and repair the problem.
2. Fuel system
A humming noise caused by a clogged fuel filter can be resolved by replacing it or by a professional.
Check the fuel system and consult a mechanic if the fuel pump is the problem.
3. Air conditioning system
A standard automobile noise from the air conditioning system can signal a compressor problem or a loose belt. Bring your vehicle to a repair shop for a diagnosis.
4. Brakes
Humming or clicking noises might be caused by worn brake pads. To correct this, you must replace the brake pads. If the rotors are damaged, they may also need to be replaced.

5. Wheel Bearings
A professional should replace worn wheel bearings if they are causing common automotive noises.
Driving with worn-out wheel bearings can cause major damage to your vehicle, so it’s critical to solve this problem as soon as possible.
6. Regular upkeep
Regular maintenance eliminates humming noises and keeps your automobile running smoothly.
Routine maintenance, including oil changes and tune-ups, can help prevent problems before they become major concerns.
7. Other elements
If none of the aforementioned alternatives work, there could be other underlying concerns. A specialist can identify the issue and advise you on the best action.
Taking your automobile to a competent mechanic and treating any faults immediately will prevent future damage and guarantee your vehicle works smoothly.
What are the Other Strange Noises from Your Car, and What Do They Mean?
1. Droning sound
The car can make droning noises when the tires are in poor condition. It gets more noticeable when doing corners or speeding. Tires are a vital component of every vehicle. A new pair of tires will always provide a smooth ride on the road.
2. Squealing Noise
The front end of the car occasionally makes a squealing sound. As soon as you start the vehicle, the sound becomes noticeable. The serpentine belt is the primary source of the squealing sound. The belt passes via several pulleys and wheels. It can even run on the compressor, alternator, or pulleys of the car.
After repeated use, the belt might become damaged, resulting in a screeching sound. So, if you hear such a noise, immediately inspect the belt. If you do not do this, the belt may fall off the compressor or alternator, causing the air conditioning to fail. The car may even halt in the middle of the road at times.
After hearing this noise, please inspect the tires. If the tires are underinflated, you must inflate them if you suspect feather tires (treads that have worn out and are no longer harmful).
3. Rattling sound
While driving over potholes or bumps, you may hear rattling sounds from the car. Several things are going on in the vehicle’s front end. Aside from the engine, the car’s front end has a suspension system with several significant components.
Worn bushings can cause a rattling noise. A bushing aims to dampen vibration, reduce noise and friction, and absorb road bumps. Rubber is used to make these bushings. However, they can be shattered with time, resulting in a rattling sound from the car.
However, other reasons may be, such as worn struts, ball bearings, or sway bar links. It’s difficult to isolate the components causing the rattling sounds. When the automobile is in the parking position, you can do a bounce test at home.
Firmly press down on the vehicle’s front end. It may not tell you which bushing is faulty, but it will tell you whether or not the suspension system is to blame for the rattling sound. Take your vehicle to a local repair if you hear the noise throughout each bounce test.
4. Whining or Squeaking Sound
Low-power steering fluid might generate squeaking, groaning, or whining when rotating the steering wheel. To function correctly, the power steering system in older vehicles requires fluid. When the fluid level drops, turning the steering wheel becomes difficult. You may also hear squeaky or whining sounds. You can resolve the issue by topping off the power steering fluid reservoir.
Other factors could exist as well. For example, if the power steering pump fails, air might enter the lines and cause squeaking or whining.
5. Growling or screeching
If you hear a screeching or growling sound when you step on the brakes, there could be a problem with the car’s brakes, which is unsafe. Brakes are an essential component of any vehicle. The brake pads have worn out if the automobile makes a lot of noise when you step on the brakes.
However, if it makes a tiny screaming or growling noise when you step on the brakes, the brake pad is deteriorating, and the caliper is grinding on the rotor. In both circumstances, the brake pad must be replaced.
6. Loud Bang
Hearing a loud blast from the back of the automobile, akin to a firecracker or gunshot, is rather alarming. In most situations, the cause is an insufficient mixing of air and fuel in the combustion chamber. More fuel and less air in the chamber can result in a loud bang sound.
There could be other factors as well. For example, there could be a problem with the sparkplug. Hearing such a loud bang implies that the engine is working well. The car’s exhaust system may be irreparably ruined if you don’t address the problem immediately. As a result, we urge that you take the car to a qualified auto repair shop immediately.
7. Rumbling
You may hear a rumbling sound and feel vibrations when the vehicle is idling. It suggests several probable explanations. An improper air-fuel combination in the combustion chamber could cause this problem. Fuel injectors might become clogged over time and no longer give adequate fuel to the combustion chamber.
Furthermore, if the air filter becomes clogged, there will be no oxygen in the chamber. You may fix it by replacing the air filter.
Occasionally, the oxygen sensors fail over time, which could explain the rumbling sound. There could be a problem with the spark plug. A rumbling sound will be heard if the sparkplug does not consistently burn the air-fuel mixture.
8. Knocking
A knocking sound may be heard from the car’s engine hood. When the fuel inside the combustion chamber burns simultaneously, the engine runs properly. However, a banging sound is produced if the fuel does not burn simultaneously. Using low-octane fuel, you may occasionally hear a knocking sound from under the hood.
Sounds like the washing machine is on high spin.
If you are on the road and hear a sound from a vehicle, such as a washing machine running at high speed, the problem is severe. The lug nut may be loose, indicating the car’s wheels are not correctly attached. So, take the vehicle to the nearest repair as quickly as possible.
9. Roaring sound
While speeding, you may hear a roaring sound. There could be several explanations for this. For example, if there is a problem with the catalytic converter, you will hear such a sound.
All the exhaust gasses are normally sent through the muffler, reducing the roaring sound. However, if there is a crack in the exhaust system, the gases will escape before reaching the muffler, resulting in a roaring sound.
When to Consult a Professional Mechanic?
While some automotive problems can be resolved at home, there are instances when you should take your vehicle to a professional technician. Here are some examples of when you should seek expert assistance:
- Unsure of the Noise Source: If you’ve tried to locate the source of the humming noise but are still unsure, a mechanic can assist you. They have the skills and experience to swiftly and reliably identify noise sources.
- Sophisticated repairs: such as changing an alternator or a transmission, necessitate using specialist tools. If this type of repair is required, leaving it to a professional is preferable.
- Persistent Noise: A mechanic can assist if you’ve attempted to resolve the issue, but the humming noise persists. Sometimes, the problem is more intricate than it appears.
Final Thought
When your automobile is parked, a humming noise can indicate various problems, ranging from power steering troubles to a broken alternator. While determining the noise source can be difficult, the problem can be identified and resolved with the appropriate methodology.
Remember, if you’re unsure about a noise your automobile is making, you should always visit an expert.
Read more of our articles here.
Read Also: Common Car Noises and What They Mean.
FAQs
Can Tires Cause Your Car to Hun?
Technically, tires produce a buzzing noise that increases in volume with speed, but it sounds similar to wind noise and does not draw your attention. Other components, such as the radiator fan, AC fan, and electric water pump, can hum under specific conditions.
How Can I Make My Electric Water Pump Quieter?
There is no method to reduce electric water pump noise as long as the engine and cooling system are operational. However, suppose the water pump becomes louder than usual. In that case, you should have your cooling system serviced because the automobile could suffer from a faulty water pump, insufficient coolant, or air trapped in the system.
What Is the Noise of a Faulty Radiator Fan?
A functioning radiator fan generates a humming or high-speed wind noise. On the other hand, a malfunctioning radiator fan can generate a grinding noise, indicating that its bearing is worn out, or a whirring noise, indicating that one of the fins is broken or vibrating owing to a damaged bearing.
What temperature causes the radiator fan to activate?
The engine determines the temperature at which the radiator activates. This can be 180°F (83°C), 200°F (95°C), or even 230°F (110°C). Keep in mind, however, that the coolant temperature at the radiator fan switch is not the same as the coolant temperature sensor, which provides data to the dashboard temperature gauge.
What Does a Failing Alternator Sound Like?
A failed alternator might produce a grinding or low-frequency humming noise, suggesting that the bearing is worn out, or a buzzing sound that increases with engine speed, indicating the faulty voltage regulator. If the alternator bearing seizes, you will frequently hear the belt screeching.

Your car’s brakes should respond quickly and effectively when you press the brake pedal to stop or slow down. If your car has an Anti-Lock Braking System (ABS), you may sometimes notice that the brake pedal goes to the floor or feels mushy. Having difficulty controlling the vehicle can be alarming and dangerous, as it can make it harder for you to avoid collisions. But Can Abs Cause Brake Pedal To Go To The Floor?
A sinking brake pedal is an extra cause for concern, considering the potential consequences of any brake problem. It is imperative to dive in and solve the issue before continuing to drive with brakes you are unsure of.
In this article, you’ll learn the four most common reasons why your brake pedal goes to the floor, along with some helpful tips. Further, we will also discuss Can Abs Cause Brake Pedal To Go To The Floor?
It’s time to get started, so let’s begin.
How Do Brakes Work?
You can prevent brake failure by understanding how your brakes work:
- By pressing on the brake pedal, you create a mechanical force that is amplified by the brake booster.
- In this case, the hydraulic pressure is converted from mechanical force to hydraulic pressure by the master cylinder.
- Your master brake cylinder then presses hydraulic brake fluid into your brake lines and hoses, which carry it to the wheels.
- As the brake fluid pressure increases, the caliper piston presses the brake pads against the brake rotors.
- In drum brake vehicles (usually the rear brake), the brake shoes, rather than pads, are pressed against the brake drum by a wheel cylinder.
What is ABS?
An Your car’s anti-lock brake system (ABS) prevents the wheels from locking up when you brake. The result can be a loss of steering control and a longer stopping distance.
Using sensors that monitor wheel speed and other factors, ABS modulates brake pressure independently for each wheel. There are valves, an electric control unit, a pump, and wheel speed sensors in this unit. Learn more at here.
How Does ABS Work?
A car without ABS experiences friction when the brake pads squeeze against the rotors, slowing down the wheels. Overbraking or braking on a slippery surface can lock up the wheels, which means they stop rotating.
As a result, the car may skid and lose control, potentially resulting in an accident. By using a computer-controlled hydraulic system to adjust the brake pressure for each wheel, ABS prevents wheels from locking up.
When a wheel slows down too rapidly, ABS reduces the brake pressure on that wheel. Skidding is reduced because the wheel continues to rotate, allowing steering control to be maintained.
What are the Benefits of ABS?
Among the benefits of ABS in braking systems and vehicles are:
1. Performance Improvements in Braking
With ABS, the driver is able to stop the vehicle more quickly and safely, reducing the stopping distance.
2. Stability enhancements for vehicles
When driving on wet or slippery roads, ABS helps the driver maintain control of the vehicle.
3. Confidence increased among drivers
The driver gains more confidence and reduces the risk of an accident with ABS, as it provides a more predictable and stable braking experience.
4. Wear and tear on tires reduced
The tires may last longer because ABS prevents the wheels from locking up and reduces skidding and sliding.
5. Improved steering control
ABS allows the driver to maintain steering control of the vehicle during hard braking, essential for avoiding obstacles.
6. An overall improvement in safety
Having ABS on your vehicle can help prevent accidents and reduce the severity of injuries in the event of a collision. Most countries now require ABS on all new vehicles.
What are the Symptoms of Brake Pedal Going to the Floor?
The following symptoms can occur when the brake pedal pressed to the floor:
1. A spongy or soft brake pedal:
Air in the brake lines can cause the brake pedal to feel soft or spongy when you press down on it. It can also be a leaking brake fluid or worn brake pads.
2. Light on the brakes:
In the event that you see a brake warning light on your dashboard, this may indicate that there is a problem with your brakes.
3. The brakes are not responding:
Whenever you press down on the brake pedal, your car does not slow down or stop as expected, this is a very dangerous situation. Your brakes may be having a serious problem if this happens.
Other Signs of Brake Trouble
Besides these problems, you may also notice other signs of brake problems that require immediate attention. A car with brake problems is never a good idea to drive. Any problem with your brake system could prevent you from stopping your vehicle. There are also other signs of brake trouble, such as-
- An ABS or brake warning light on the dashboard
- Noises such as grinding, scraping, or squealing
- A burning chemical smell or a smell coming from the carpet
- Whenever you brake, you pull to one side
- If you brake, you may feel a vibration or wobble
- The brakes are emitting smoke
When your brakes squeal, they’re overheating and on the verge of failure. You should pull over your vehicle immediately if you suspect your brakes are too hot.
Can Abs Cause Brake Pedal To Go To The Floor?
Can Abs Cause Brake Pedal To Go To The Floor? ABS does not directly affect how far your brake pedal goes to the ground. It prevents the brake pedal from going to the floor instead. Further, it releases brake pressure when it detects a wheel is about to lock up, which prevents the pedal from going to the floor.
There is, however, a possibility that a malfunction in the ABS can cause the brake pedal to go down. Having a malfunctioning ABS module or hydraulic control unit can result in your brake pedal feeling spongy or soft or even going all the way down.
What Causes the Brake Pedal Going to the Floor?
In most cases, a brake pedal that goes to the floor caused by a leak in the brake system, either externally or internally. Besides the master cylinder, brake calipers, and brake lines, external leaks can occur anywhere in the system. There is likely a problem with the master cylinder if there is an internal leak. Can Abs Cause Brake Pedal To Go To The Floor? Yes, it can.
In addition to these reasons, there are other possible causes as well. Here is a comprehensive list that includes a few tips on solutions as well. The brake pedal can go to the floor for several reasons. Here are some solutions to these problems.
1. The brake lines contain air
Brake pedal force transferred to brake calipers by hydraulic pressure in your car. Having air in the brake lines can prevent the hydraulic pressure from building up, causing the brake pedal to go all the way down.
Solutions
Breathing your brakes will remove any air that may be present in the lines.
2. Leak in brake fluid
Leaking brake fluid is another potential cause of a brake pedal going to the ground. Whenever there is a leak in the brake lines or any of the brake components, you lose a lot of brake fluid and your brake pedal will feel spongy.
Solutions
- The first step is to locate the leak’s source. The brake line may damaged, the caliper or wheel cylinder may be leaking, or the brake hose might torn.
- Secondly, replace the damaged component or repair the leak, and then bleed the brakes to remove any air.
3. Damaged brake pads
It is possible for your car’s brake pads to wear down, resulting in a spongy or soft brake pedal. As a result of worn brake pads, the brake pedal may go right to the floor if there is not enough friction.
Solutions
- Step 1. If the brake pads are worn, replace them.
- Step 2. Check the brake calipers to ensure they are working properly.
4. A defective master cylinder
In the brake system, the master cylinder is responsible for generating the hydraulic pressure that is needed to stop the car. Having a faulty master cylinder or a worn one can result in the brake pedal going down to the floor.
Solutions
- Ensure that the master cylinder replaced with a new one. The 788 inch bore master cylinder is our pick.
- Below is a video that will show you how to fix a sinking brake pedal.
How Can ABS Affect Brake Pedal Feel and Performance?
It is true that ABS can enhance braking performance in many situations. But it can also introduce some challenges that affect the feel and performance of the brake pedal. When air trapped in the brake lines or when the ABS module malfunctions, the brake pedal can feel spongy or low. A spongy brake pedal indicates that there is a delay in building up pressure in the brake system, resulting in reduced stopping power and driver confidence.
When the ABS module fails to activate or modulate the brake pressure properly, a long stopping distance or increased pedal travel may result. Many factors can contribute to this, including a faulty wheel speed sensor, damaged brake lines, worn brake pads or rotors, or a malfunctioning ABS pump or solenoid. A problem with the ABS system may indicated by the ABS warning light on the dashboard.
When Should You take Your Car in for Repair?
It’s always a good idea to have your car repaired as soon as possible if your brake pedal goes all the way down.
As your foot presses your foot onto the brake pedal, the brake fluid transfers the pressure from the pedal to the calipers, which squeeze the brakes.
In order to ensure the safety of yourself, your passengers, and other road users, you should investigate the problem right away. Basically, putting off this task until it’s too late is not a good idea!
Nevertheless, you can do it yourself if you wish. However, someone unfamiliar with brakes should not attempt this, as incorrect work can worsen the situation. You should seek professional assistance if you feel uncomfortable doing this yourself.
Can You Drive When the Brake Pedal Goes to the Floor?
You should never drive a vehicle that has a brake pedal that sinks to the floor or has difficulty achieving pressure. There is a serious brake problem here that needs to addressed and repaired as soon as possible. It would be highly dangerous to neglect doing so and pose severe safety risks.
What Should You Do If Your Brake Pedal Goes to the Floor While Driving?
Pull over as soon as possible and stop applying gas. When you are in an emergency situation, do not simply yank on the brakes.
You should downshift to use engine braking and apply your emergency brake only after you have completely stopped. You should then contact a towing company or mobile mechanic to inspect and repair your vehicle.
The risk of injury to yourself and others is too high if you continue driving if you are experiencing brake problems. Moreover, you probably won’t be able to get insurance coverage if you are negligent.
Let’s examine how your brake system works in more detail since we briefly discussed brakes.
How Much Will this Cost to Get It Fixed?
In general, a broken brake pedal can cost anywhere from $100 to $600, depending on the extent of the damage and the type of car. It is recommended, however, that you have a qualified mechanic evaluate the problem for an accurate estimate.
Therefore, it’s difficult to determine which cause would cost the most to fix. You’re probably looking at about $200 to £300 if there is brake fluid leakage from the caliper, rubber lines, or rusted brake lines.
The brake master cylinder needs to replaced, and you don’t want to go with the cheapest one. As a result, you can expect to spend about $100 to $150 for labor and $150 to $250 for the part itself.
In this case, you would only have to pay for the work of aligning the brake shoes, which could cost up to $150. The cost could quickly rise to a few hundred dollars if the brakes damaged.
Keeping in mind that these are only estimates, and the final cost can vary depending on many factors, such as location, quality of parts, and who performs the work.
What are the best ways to take care of the ABS in your car?
Keeping your anti-lock braking system (ABS) in good working order is essential for safe and efficient braking. The following tips and steps will help you maintain your ABS:
1. Performing regular inspections:
Keep an eye on the ABS warning light on your dashboard periodically. The system may be malfunctioning if it remains illuminated. You should have it checked by a professional.
2. Fluid for brakes:
Your car’s brake fluid should be at the recommended level and in good condition. It is common for brake fluid to absorb moisture over time, which can affect the performance of the ABS system. Your car’s owner’s manual should tell you how to replace the brake fluid.
3. Maintenance of tires:
Ensure that your tires are properly inflated and that their tread depth is adequate by keeping them at the recommended pressure. To function correctly, ABS relies on wheel speed sensors, so tire condition is vital.
4. Maintain clean sensors:
It is essential that the ABS system has wheel speed sensors. Make sure they are clean and free of debris and corrosion. If necessary, gently clean them with a soft brush or cloth.
5. Inspection of brake pads and rotors:
Keep your brake pads and rotors in good condition by inspecting them regularly. It is possible for worn brake components to affect ABS performance. Brake pads and rotors should replaced as needed.
6. Diagnostic scans for ABS:
When your ABS warning light comes on, have it checked by a qualified mechanic who has diagnostic equipment. To pinpoint the problem, they can retrieve error codes from the ABS control module.
7. Brake softly:
If possible, avoid slamming on the brakes. It designed to prevent wheel lockup during hard braking, but excessive use can damage the system.
8. Be cautious when driving:
To avoid activating the ABS, drive safely and maintain a safe following distance.
Final Thoughts: Can Abs Cause Brake Pedal To Go To The Floor
Now you have some idea on Can Abs Cause Brake Pedal To Go To The Floor. It’s a nightmare to find your brakes without hydraulic pressure. When this happens, you will usually be able to figure out the cause if you know the most common causes. Despite the fact that you might need a professional to fix it, it isn’t a major repair. The cost shouldn’t be anything more than a necessary expense considering the consequences.
Read more of our articles here.
FAQs
How does ABS work in a vehicle?
ABS is an acronym for Anti-lock Braking System. During hard braking, this safety feature prevents wheel lock-up. While braking, ABS modulates brake pressure to each wheel independently to maintain steering control.
Is it possible for ABS to cause the brake pedal to go to the floor?
ABS does not cause the brake pedal to go to the floor on its own. It helps maintain control during hard braking by preventing the wheels from locking up. Other brake system problems usually cause the brake pedal to go to the floor.
How can a malfunctioning ABS sensor affect the brake pedal?
There is a possibility that a malfunctioning ABS sensor can cause a brake pedal problem. The ABS system may forced to activate unnecessarily if an ABS sensor fails. This may affect brake pedal feel. It is not the primary cause of a brake pedal going to the floor, however.
If my brake pedal goes to the floor, what should I do?
For safety reasons, it is crucial to address the issue immediately if the brake pedal goes to the floor. Immediately stop driving the vehicle and take it to a qualified mechanic or repair shop for an inspection and repair. Driving with a brake issue can be extremely dangerous.
Is regular maintenance able to prevent brake pedal issues, including ABS issues?
Brake fluid flushes, brake pad inspections, and proper care of ABS sensors can help prevent brake pedal problems, including ABS problems. Your brake system can operate correctly with routine maintenance.

If you are late for work, receiving an error message from your chassis control system can be frustrating. Pressing the Start Engine button usually causes it to appear. If your car is acting up, you might wonder what’s wrong with it. So, How to fix Chassis Control System fault?
Nevertheless, it isn’t immune to problems like any other part of your vehicle. You can avoid unexpected troubles in the future by understanding these issues, their causes, and how to fix them.
Nissan Rogue and other cars with this technology commonly experience chassis control system errors. Any of the three systems can be affected by a fault or problem detected by the chassis control module. These systems include active trace control, active engine brakes, and active ride control.
This guide will give you a better understanding of How to fix Chassis Control System fault; the common problems it encounters, and, most importantly, how to fix them.
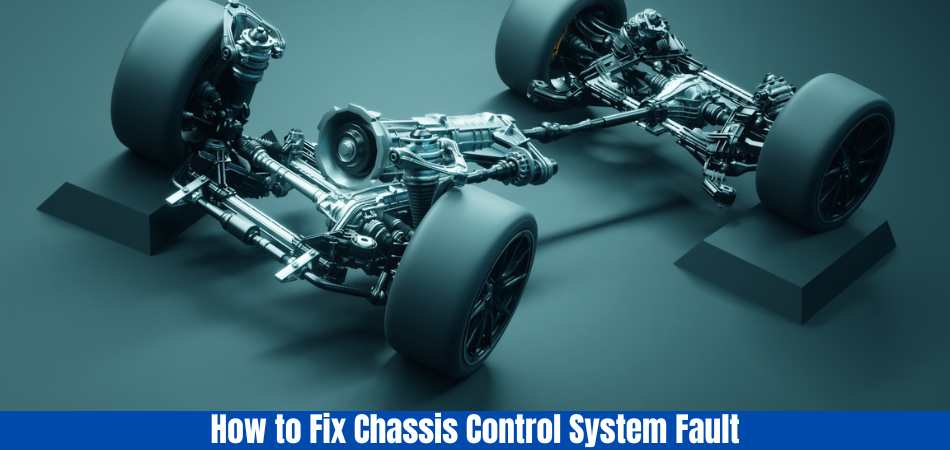
What Does Chassis Control Mean?
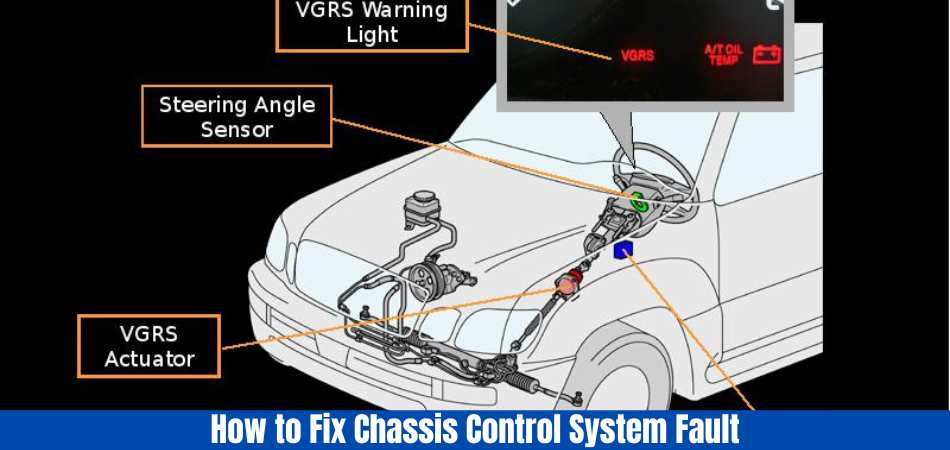
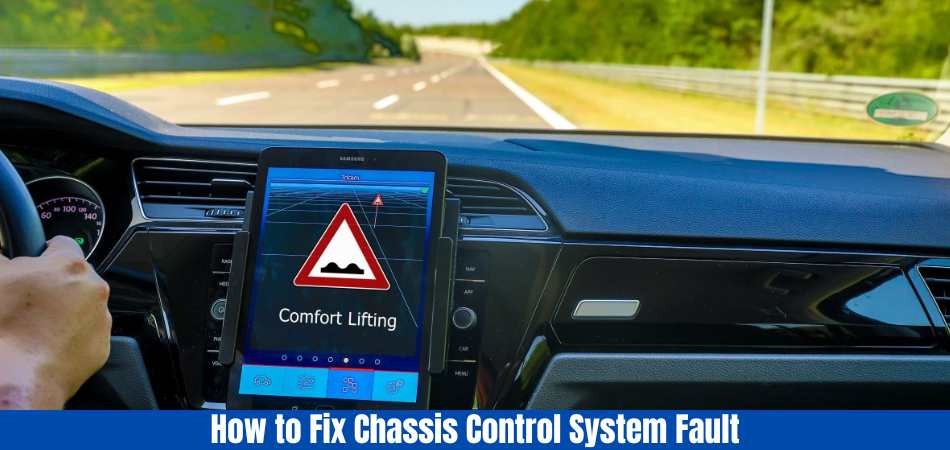
The chassis control system is one of the features that Nissan Rogue or X-Trail V-Series owners appreciate. As a result of Nissan’s research, the chassis control system is designed to provide a smooth driving experience for the driver while maintaining maximum passenger safety. How does the chassis control system work? In rough terrain, the chassis control is essential to the safety of your vehicle because it collects data about wheel speed, acceleration, G-forces, etc… which prevents too much pressure on the car.
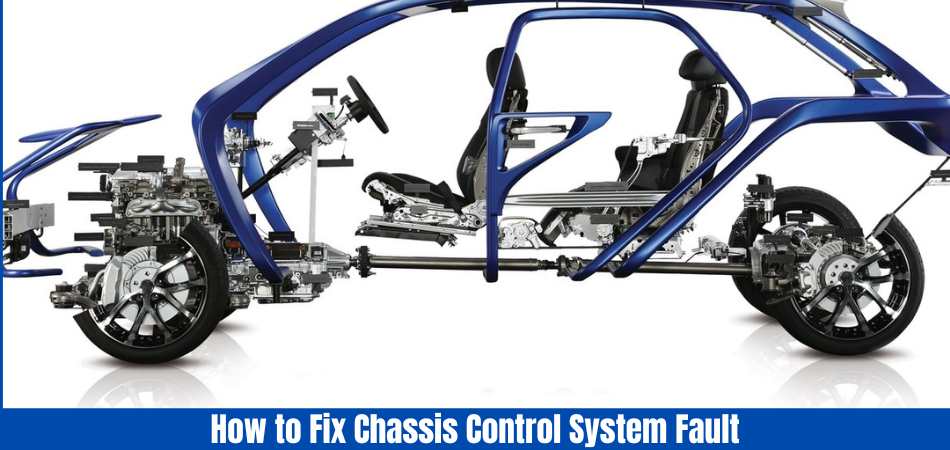
In recent years, chassis control systems have undergone much development thanks to advanced technologies. As the automotive industry advances technologically, chassis control systems are becoming increasingly sophisticated so that driving and turning can be made more smooth. Three leading technologies make up an active chassis control system:
1. Active Ride Control
Depending on the road or terrain conditions, this system will automatically brake and adjust traction to help the car drive smoothly and smoothly on uneven roads. In addition to reducing vibrations on the passengers, the brake system creates a little impact force that does not slow down the vehicle, only allowing the shock absorber to absorb the impact force faster. Additionally, the sensors detect changes in wheel speed to change the engine torque, allowing the vehicle to maintain a steady speed.
2. Active Engine Brake
When cornering or braking, this safety feature assists the driver. As a result of monitoring the vehicle’s speed, steering, and braking systems, the engine braking level will be increased or decreased according to the vehicle’s speed. A driver can reduce the force on the brake pedal with this extra support, which will help smooth driving and make it safer for everyone.
3. Active Trace Control
Using this system, the driver gains more confidence when cornering by adjusting braking force according to steering level, speed, and braking force due to emergency turns or entering or separating highway lanes. When driving the Nissan Rogue at high speeds, over 80 km/h, many Nissan Rogue owners stated that they are very confident; the car turns smoothly at high speeds every time.
The chassis control system combines these three technologies to provide a confident driving experience, as well as a comfortable ride for all passengers. Simply by reading these words, it is difficult to grasp the significance of this system.
What are the Benefits of Chassis Control System?
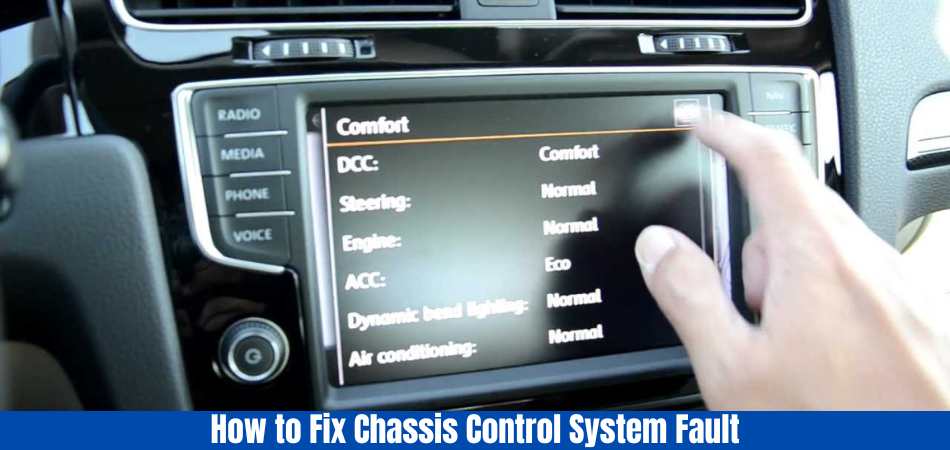
The chassis control system is a modern technology in Nissan Rogue and select Nissan cars. It has many benefits on all types of roads that improve your driving experience. When the chassis control is activated, a flash will appear on the information display. Here are some of the benefits you enjoy at that time.
1. Improved rider comfort
As a result of the chassis control system in the Nissan Rogue, passengers are able to enjoy better cabin comfort. The system reduces vibrations and up-and-down movements regardless of the road conditions. During cornering and heavy braking, the driver and passengers will not feel thrown out of their seats.
You can control the car with the chassis control system in order to make gentle movements and keep it stable.
2. Confidence among drivers
Driving on uneven country roads can be challenging because stabilizing the car can be difficult. The ability to negotiate sharp bends is also a skill that most drivers lack. You can remain confident knowing you have an assistant behind the scenes when the chassis control system is active.
3. Longer tire life
Controlling the chassis ensures the transaxle’s stability, ensuring even tire tread wear. The tire would only be able to take weight and pressure from one side, especially on rough roads. It is this unbalanced wear that leads to premature tire failure. In general, the chassis control system makes it much easier to get the most out of your tires.
What Is the Chassis Control System Fault?
In order to understand the chassis control error, we need to dig deeper into the role that this system plays in Nissan cars. A new technology specific to Nissan is the chassis control system. The system includes active engine braking, active trace control, and active ride control.
Sensors like wheel speed sensors provide data to the chassis control system. Additionally, it receives information regarding yaw rate, g-forces, and driving forces from steering, acceleration, and braking. This data is then used by the engine control unit (ECU) to control engine braking and transmission systems to improve driving performance. As a result, the technology enhances cornering, braking, and your comfort behind the wheel.
If there is a fault with the chassis control system, an error message appears on the message center. Among these are active ride control systems, active engine braking systems, and active trace control systems. Almost every Nissan Rogue or other model with this technology suffers from this problem.
What are the Common Symptoms of a Chassis Control System Error?
When there is an error with the chassis control system, your car usually won’t remain silent. In order to take early action, you need to be aware of the symptoms that it will use to communicate with you. The following are some common signs that your chassis control system may have a problem:
1. Noisy sounds
A clunking, squeaking, or knocking sound while driving, especially when turning or going over bumps, may indicate something wrong with your chassis.
2. Issues with steering
You may have a problem with your car’s chassis if you have steering problems, such as stiffness in the steering wheel or the vehicle pulling to one side.
3. The uneven wear of tires
A chassis control system ensures an even distribution of weight throughout your vehicle. You may notice uneven or rapid tire wear if there is a problem.
4. The ride quality is poor.
An issue with the suspension, which is part of the chassis system, could be causing your car ride to feel bumpier or less comfortable than usual.
5. Indications of damage
It is possible for the problem to be visually apparent at times. In some cases, the frame or suspension components of your vehicle may appear sagging or damaged.
What Are The Reasons For A Chassis Control System Error?
A chassis control system can sometimes malfunction, just like any electronic system or vehicle component. What are the reasons for this? Here are some possible solutions for how to fix the chassis control system error caused by a faulty chassis control system:
1. A loose connection between the battery and the device
There will be an effect on the current if the car terminal is loose. Having less power going to the electrical systems will lead to faulty electrical parts and sensors in the car, including the chassis control system. Your dashboard will display a warning light at that point.
This error can be resolved by tightening the battery cable if a loose battery connection is responsible. A driver who knows how to switch a wrench or screwdriver can easily tighten the positive or negative cable of their battery connection. To tighten the connection, there will usually be a nut attached to the battery terminal. You can turn this nut as needed.
2. Dead and dirty battery
Battery corrosion or dirt can build up over time, or your battery may be dying. You may also notice that your vehicle has problems starting or with electrical components, especially your chassis control system.
As a result, this system will no longer function and display a warning notification on the dashboard. Cleaning solutions (baking soda) can be applied to the car battery to remove corrosion after rinsing.
Be sure to reconnect the cables after you have cleaned your car battery after disconnecting them.
You can revive a dead battery by following these steps:
- You may be able to jumpstart your vehicle with the help of a second battery, a battery booster, or a jumper cable. Don’t shut off your car engine because the battery won’t accept a charge at that point.
- Distilled water may flood the plates completely when the electrolyte level is low and allow a slightly wider reaction area when the electrolyte level is low. The motor may be able to rev a few more times with this change. Aspirin or Epsom salt can also be used to revive a battery, in addition to distilled water.
- Having a dead car battery prevents the engine from starting, let alone the chassis control system from functioning.
There is usually a way to revive a dead car battery – at least temporarily – so that you can keep driving. Nevertheless, it is inevitable to replace your battery sometimes, even if it can be revived.
3. Failure of the ABS sensor
When you brake, your car’s ABS sensors and module work together to keep it stable. Because they measure the wheel speed, ABS sensors are also known as wheel speed sensors.
A wheel rotation and speed sensor monitors the wheels’ rotation and speed. The ABS sensor cannot provide data to your chassis if it is not functioning, so an error can occur in your chassis control system. The ABS sensor may need to be repaired or replaced to fix this problem.
4. Issues with ground lead
When the ground lead has some faults or shows an error sign, the chassis control cannot operate. Your car’s ground lead is the connection between the minus battery terminal and the chassis.
A wire like this can be easy to overlook, but it plays a crucial role in the entire electrical system of your car. The ground cable of this battery conducts all the current flowing in your vehicle.
Your car will have electrical problems if you don’t have a good ground lead, and the chassis control will malfunction. Having these issues won’t be just a minor inconvenience since they will affect the operation of your vehicle. Finding and replacing the defective ground lead with a fresh one is the best solution in this situation.
5. Wiring harness with a defect
In a wiring harness, power and information are transmitted through wires. Besides being an insulating tube, it contains cables and wires that connect various electrical and electronic components of your car.
In an organized manner, wires can pass through it. Your car will not start if the chassis fails to send commands to other components due to defective wires. The defective wires need to be found and fixed.
How to Fix Chassis Control System Fault?
As soon as you’ve diagnosed the problem, you can begin addressing it. But How to fix Chassis Control System fault? The following are some common issues you might encounter and how to fix them:
1. Fixing Suspension Issues
Problems with the suspension are some of the most common chassis control system issues. The reason for this could be worn shock absorbers, struts, or springs. These parts need to be replaced in order to fix this problem.
It is essential to replace suspension components in pairs (both front and rear) in order to maintain a balanced handling system.
2. Fixing Steering Problems
Wearing tie rods, a damaged power steering pump, or a leaking steering rack may cause the steering system to malfunction. It may be necessary to replace the faulty parts depending on the issue. It might be possible to fix the problem by topping up the power steering fluid.
3. Frame Damage
If An accident or other cause of damage to the vehicle frame requires a professional to inspect and repair it. In order to ensure the vehicle is safe to drive, specialized equipment and skills must be used to fix the frame.
4. Brake System Issues
Chassis control systems can also be affected by brake system problems. Brake pads that are worn, brake fluid that is leaking, or brake rotors that are faulty may cause this to happen. The brake pads may need to be replaced, the leak may have to be sealed, or even the entire brake assembly may need to be replaced.
5. Wheel Alignment
Uneven tire wear and poor handling can result from incorrect wheel alignment. If this is the case, you should take your car to a professional to have the wheels realigned.
It’s important to remember that every vehicle is different, even though these are general guidelines. The specific issues that your car might have will depend on its make, model, and year.
Get professional assistance if the problem is severe or complex, or refer to your vehicle’s manual for specific repair instructions.
It is always essential to put safety first. Consult a professional mechanic if you are unsure or uncomfortable performing repairs.
How to Prevent Chassis Control System Errors?
It is better to prevent than to cure, as the saying goes. Several steps can be taken to prevent issues from arising with your car’s chassis control system.
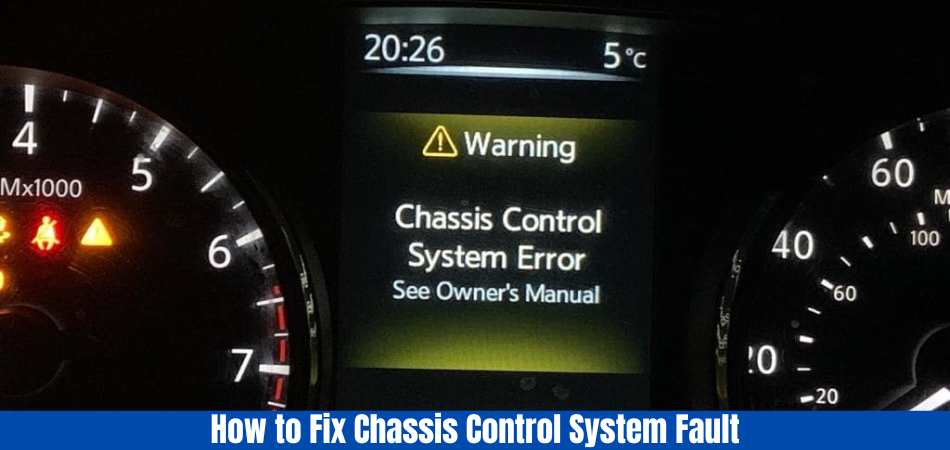
1. Maintaining regularity
Preventing issues with your car is as simple as maintaining it properly. Maintaining your vehicle means changing the oil regularly, checking the fluid levels, inspecting the brakes, and aligning the wheels regularly.
2. Tire inspection
In addition to being the only part of your vehicle that makes direct contact with the road, tires play a crucial role in chassis control. Keep an eye out for uneven tire wear, which may indicate an alignment or suspension problem.
3. Beware of overloading
The maximum weight of each vehicle is determined by its design. It is possible for the chassis to be damaged if the vehicle is consistently overloaded. Make sure your vehicle’s weight limit is within the manufacturer’s recommendations.
4. Drive carefully
The way you drive can have a significant impact on the health of your car. Be careful not to drive aggressively since this will stress the chassis and its components extra. Avoid damaging your undercarriage by being cautious when driving over speed bumps or potholes.
5. Inspecting regularly
Keep an eye out for signs of wear or damage to your vehicle on a regular basis. Among the things to check are the frame and suspension for rust or dent damage, as well as the steering for any problems.
By following these steps, you can significantly reduce your chances of running into issues with your chassis control system. Taking good care of your car is not just about saving money on repairs, and it’s about ensuring your safety and comfort.
Conclusion: How to Fix Chassis Control System Fault
Now you have some idea of, How to fix Chassis Control System fault? Knowing how your car’s chassis control system works, you can spot potential problems before they become serious.
This guide covers everything from knowing the common symptoms of chassis control system errors to understanding their causes and fixing them.
Your best bet for preventing issues and ensuring your vehicle’s long and healthy life is routine maintenance and inspections. Do not hesitate to consult a professional mechanic if you encounter a problem you are unsure of.
Read more of our articles here.
Read Also: What Is Chassis Control System?
FAQs
What is a chassis control system fault?
An electronic chassis control system fault refers to a malfunction or error in the systems that manage and control the vehicle’s chassis, such as stability control, traction control, and antilock braking.
What are the common signs of a chassis control system fault?
When a chassis control system is malfunctioning, what are the common signs ABS or traction control lights), unusual handling or braking behavior, and strange noises during driving? An investigation should be conducted if there is a sudden change in the vehicle’s stability.
How do I diagnose a chassis control system fault?
An error code can be retrieved from a vehicle’s computer using a diagnostic scanner to diagnose a chassis control system problem. These codes provide information about specific chassis control system issues.
Can I fix a chassis control system fault myself?
In some cases, DIY enthusiasts can fix some chassis control system issues, but as these systems are complex, a professional mechanic should diagnose and fix the problem. Incorrect repairs can compromise vehicle safety.
How much does it cost to repair a chassis control system fault?
In addition to the fault type, the make and model of the vehicle, as well as local labor rates, the cost varies. Sensor replacement, for instance, may be less expensive, whereas more complex problems may cost more.


Driving an RAV4 takes some getting used to. When it comes to refuelling, many people find it difficult to access the gas tank. They sometimes wonder, “How to Open Gas Tank on RAV4.” Many people experience problems simply because they are unaware of where the fuel opener lever is located.
Suppose you are having problems opening the gas tank of your Toyota RAV4. It could be a rental vehicle, a friend’s vehicle, or you’re just having trouble finding the fuel door release switch.
We will demonstrate How to Open Gas Tank on RAV4 with clear, concise steps and photos.
What are the Features of Toyota RAV4?
1. Engine, Transmission, and Performance
An engine-driven continuously variable transmission coupled with two electric motors powers the RAV4 Hybrid. All RAV4 Hybrid trims come standard with all-wheel drive, since one of the electric motors powers the rear axle.
As a result of the e-motors and the increased output, the RAV4 Hybrid is more efficient and quicker than the non-hybrid standard model. A test of the Woodland Edition trim produced a 60-mph time of 7.3 seconds, while a test of the gas-only trim took 8.0 seconds.
Taking off from a stop will be a little easier with the electric motor’s immediate torque delivery, especially around town. With its plug-in hybrid powertrain, the RAV4 Prime provides even more performance. Powered by more powerful electric motors, the Prime generates 302 horsepower in total. It took the RAV4 Prime 5.6 seconds to reach 60 mph in testing.
2. Range, Charging, and Battery Life
With an 18.1-kWh battery pack, the plug-in hybrid RAV4 Prime can travel 42 miles on electricity alone, according to the EPA. During tests, technicians drove 32 miles on electricity alone, but that was on the highway; we would expect a longer range in the city.
When plugged into a 240-volt outlet, the Toyota Prime SE and Prime XSE take just 2.5 hours to charge with their 6.6-kWh chargers. Expect charging times of about 12 hours if only a 120-volt outlet is available.
3. Fuel Economy and Real-World MPG
It is far more efficient to drive the hybrid model of the RAV4 than to drive the non-hybrid model with AWD powered by gasoline. By comparison, the regular RAV4 gets 14 mpg, 5 mpg, and 11 mpg less fuel-efficient than its hybrid counterpart.

The EPA estimates the Hybrid’s fuel efficiency to be 41 mpg city, 38 mpg highway, and 40 mpg combined. The RAV4 Hybrid delivered 37 mpg on our 200-mile highway fuel-economy test, 1 mpg less than the EPA rating. On the same route, the rugged-looking Woodland Edition Hybrid got only 32 mpg, which is 3 mpg lower than the EPA rating.
In highway fuel-economy test, the Prime plug-in hybrid achieved 73 MPGe, earning a combined EPA rating of 38 mpg and 94 MPGe.
4. Interior, Comfort, and Cargo
RAV4 Hybrid and RAV4 Prime cabins differ slightly from non-hybrid models, but they still prioritize practicality over style. It offers plenty of storage space with cubbies and bins, and all controls and buttons are easily accessible.
It even has an adjustable false floor in the cargo area, dual-zone automatic climate control, and a tilting and telescoping steering wheel. As the trim ladder climbs, the menu expands with features like heated front and rear seats, ambient interior lighting, and upgraded faux-leather upholstery.
With its larger battery, the RAV4 Prime sacrifices some cargo space compared to the regular RAV4. With the rear seat folded, the RAV4 Hybrid can accommodate 22 carry-on suitcases behind the second row.
5. Safety and Driver-Assistance Features
Across the RAV4 lineup, Toyota offers a number of driver-assistance features as standard equipment. Visit the National Highway Traffic Safety Administration’s (NHTSA) and Insurance Institute for Highway Safety’s websites for more information about the RAV4 Hybrid’s crash-test results. Among the key safety features are:
- The standard automated emergency braking system detects pedestrians
- Automatic lane-keeping assist with lane-departure warning
- Automatic cruise control as a standard feature
The Evolution of Toyota RAV4 Gas Tank Sizes
Through its five generations, the Toyota RAV4 has undergone significant changes, including the size of its gas tank. Here is an overview of the evolution of gas tank sizes across different generations of the RAV4.
1. First Generation (1996-2000)
RAV4 first appeared in the USA in 1996 with a gas tank capacity of 15.3 gallons (57.9 liters). Throughout the first generation, this capacity remained constant.
2. Second Generation (2001-2005)
Generation IInd-generation RAV4 introduced a slightly smaller gas tank size of 14.8 gallons (56.0 liters), which was maintained throughout this generation.
3. Third Generation (2006-2012)
Third-generation RAV4’s gas tank size increased to 15.9 gallons (60.2 liters) across all model years, which was consistent across all generations.
4. Fourth Generation (2013-2018)
For its gas models, the fourth-generation RAV4 used a 15.9-gallon (60.2-litre) gas tank. The Hybrid siblings introduced in 2016 featured a slightly smaller capacity tank.
5. Fifth Generation (2019-Present)
RAV4’s latest generation saw its gas tank size reduced across all models, settling at 14.5 gallons (54.9 litres) for both gas and hybrid models, streamlining fuel capacity.
As consumer preferences, technological advancements, and market competition have changed, the Toyota RAV4’s gas tank size has fluctuated throughout its history. The following sections will examine the factors behind these changes and their implications for RAV4 owners.
Where is the Gas Button on a Toyota RAV4?
It may be difficult to locate the switch opening the fuel tank door on a recent Toyota RAV4. It is difficult to spot, but the opening switch resembles the motor hood release button.
This button for opening the gas cap is located on the dashboard’s lower part, to the left of the steering column, on such a Toyota RAV4. There are two buttons with the same appearance. The gas tank cap is released by this switch on the left.
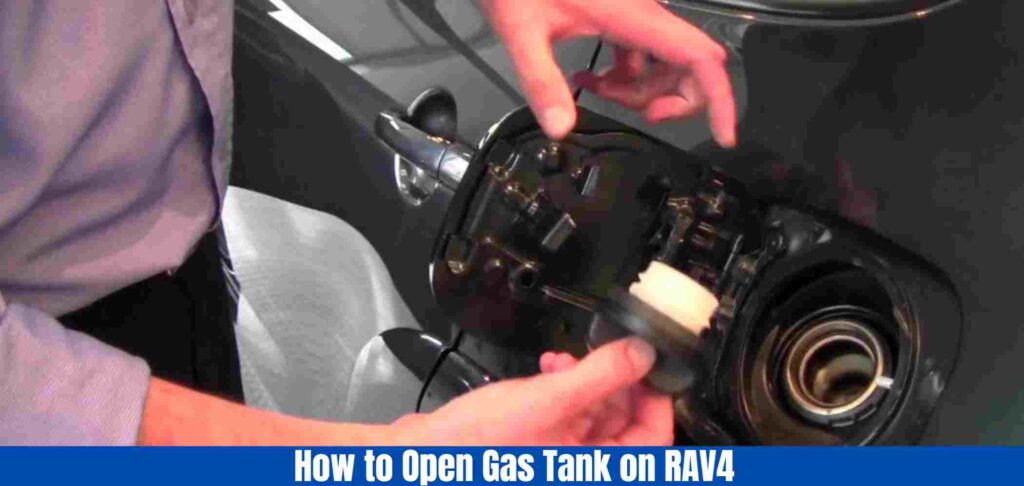
A Toyota RAV4 fuel tank switch can be found on the wooden floor on the driver’s side. The gas cap cannot be removed while doing this. The first thing you will do is enter the driver’s cabin. The gas pump icon is displayed on a button behind the steering column on the left.
You can open the fuel tank by pressing it if you’re using the electric one. There is also a mechanical option: pull a lever to open the petrol tank lid. With Toyota RAV4 users understanding how to reach the petrol tank, you may be able to drive more comfortably.
How to Open Gas Tank on RAV4?
How to Open Gas Tank on RAV4? Well there are 3 major step for each generation. So lets start-
2019-2024 TOYOTA RAV4
A newer RAV4 can be especially difficult to find the switch for releasing the gas tank door.
Located right next to the engine hood release switch, the release switch is difficult to see. There is no difference between these two switches!
A 2019-2024 Toyota RAV4 gas tank door can be opened by following these steps:
1. PRESS THE GAS CAPE RELEASE SWITCH
- Under the left side of the steering wheel, you’ll find the Toyota RAV4’s gas cap release switch.
- There are two switches that look the same. Left of the gas tank cap release switch is the gas tank cap release switch.
2. TAKE OFF THE GAS CAP
- On the left rear side of the vehicle, above the wheel, you will find the fuel door. Now that the door has been released, it has been popped open slightly. Keep opening it with your hand until it is fully opened.
- To remove the gas cap, twist it to the left and place it in the gas cap holder on the inside of the fuel door.
- Fueling your RAV4 is now possible.
3. CLOSE THE FUEL DOOR AND REPLACE THE GAS CAP
- Replacing the gas cap after fueling will result in a click when you turn it to the right.
- Closing the fuel door after you have properly replaced the gas cap is the next step.
1994-2018 TOYOTA RAV4
Toyota placed the gas tank release switch in a very common location on older RAV4 models.
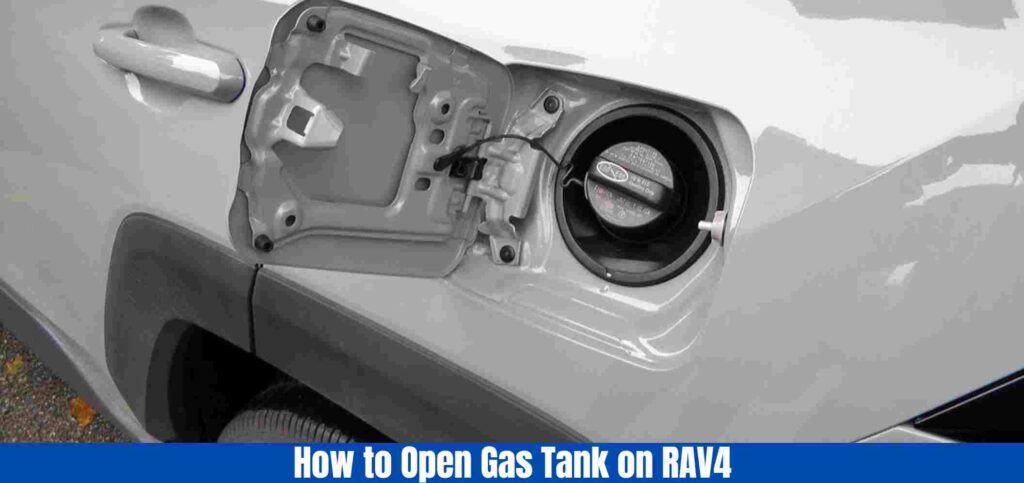
You can find and use it by following the instructions below.
1. RELEASE THE FUEL DOOR SWITCH
- The fuel door release switch is on the floor to the left of the driver’s seat.
- Release the fuel door by pulling up.
2. THE GAS CAP SHOULD BE REMOVED
- On the left rear side of the vehicle, above the wheel, you will find the fuel door. Now that the door has been released, it has been popped open slightly. With your hand, continue to open it fully.
- The gas cap can be removed by twisting it to the left and placing it in the gas cap holder inside the fuel door.
3. CLOSE THE FUEL DOOR AND REPLACE THE GAS CAP
- Replacing the gas cap after fueling will result in a click when you turn it to the right.
- When you have verified that the gas cap has been properly replaced, close the fuel door.
How Do You Manually Open a Gas Door on RAV4?
Accessing the gas tank lid may require some practice. In every car, there are several standard ways to open the gas tank lid, even if some vehicles have unique mechanisms.
- The doors should be closed after the vehicle has been turned off.
- The gasoline release lever can be found around the base of the driving seat. Find the little lever with a gas pump on it in order to engage it. You can lift it up.
- The lower portion of the driver’s door might have a lever with a petrol pump picture on it. The lid of the petrol tank can be opened by pressing the button once you’ve located it.
- If you cannot locate the release key or lever, step outside and push the gasoline tank door forward.
- The gasoline cap should be twisted counterclockwise after the opening on the gas tank.
- Make sure the petrol tank door is closed before leaving.
Why Doesn’t the Fuel Door Release on RAV4?
Gas top-up doors on cars are probably something you never think about. As soon as you realize that it isn’t working correctly, you’ll begin to think about it more. When users can’t reach the gas cap, they don’t fuel their automobiles. Fuel entrances that cannot close have a variety of simple causes.
1. The gasoline door release is defective.
There are several cars with fuel window releases. If the lock is damaged, drawing on it will have no effect, and the gasoline gate will remain closed.
2. Outside damage near the fuel entrance
Recent outside damage to your vehicle may have already compromised the gas door. Even a tiny dent in the right place can damage the hinges and prevent the door from opening.
3. Broken fuel doorway hinge
To enter and exit, your gasoline door relies on a pivot, just like all other doors. If the hinge becomes caught or the pins and bearings inside it become too loose or tight, the gasoline door may not be able to be opened or shut.
Should You Drive an RAV4 on a Low Tank of Gas?
It is not the same for all vehicles when it comes to how far they can go with the fuel light on. The reason for this can be attributed to several factors, including the specific level of fuel which triggers the warning, the vehicle’s size and weight, your driving style, etc. As such, these numbers we’re throwing out here are estimates and in no way a guarantee.

When the fuel light comes on, most people agree that the RAV4 can go somewhere between 35 and 40 miles. You may reach a greater distance or a shorter distance based on anecdotal evidence, so please keep that in mind.
Once you see the low fuel indicator, I recommend fueling up as soon as possible. It can be dangerous to drive on an empty tank. In addition to being stranded on the side of the road in the middle of nowhere, you could also sputter out in the middle of a busy highway or other traffic.
In addition, running on such low fuel, especially if you do it often, can damage the fuel pump and other components, leading to more headaches and costlier problems than if you’d stopped for fuel instead.
Ensure you have enough fuel to reach your destination safely and be aware of how much fuel you have available.
Conclusion: How to Open Gas Tank on RAV4
Now you got some idea of How to Open Gas Tank on RAV4. That’s all there is to it! All you need to do is follow a few simple steps, and you’re done.
In the 2019-2024 RAV4, the gas tank release switch looks the same as the hood release door, which can be confusing. Keep in mind that the switch for releasing the fuel door is on the left.
It is not easy to confuse the fuel door release switch on the 1994-2018 RAV4, but it can be difficult to notice on the floor to the left of the driver.
It’s time to begin fueling your vehicle after you’ve located the switch, opened the fuel door, and removed the gas from the tank.
Read more of our articles here.
Read more about RAV4.
FAQs
In my RAV4, how do I access the gas tank?
Locate the fuel door release lever inside your RAV4 after opening the gas tank. Most often, it is found on the driver’s side of the vehicle, either on the floor near the driver’s seat or on the door panel.
What is the location of the fuel door release lever on a RAV4?
A RAV4’s fuel door release lever is usually found on the driver’s side. On the driver’s side door panel or on the floor near the driver’s seat, you will find a lever. There may be an icon that resembles a gas pump on it.
Is it possible to open the gas tank from inside the car?
The fuel door release lever can be used to open the gas tank from inside the car. You can release the fuel door by pulling or pushing the lever once you’ve located it.
How do you unlock the fuel door on a RAV4?
On a RAV4, unlocking the fuel door is usually integrated with the central locking system. Open the fuel door only after the vehicle has been unlocked.
Is there a problem with the fuel door release lever?
Check if the vehicle is unlocked before trying to release the fuel door lever. It is recommended to consult the vehicle’s manual or contact a dealership for assistance if the problem persits.


Starting your lawnmower after it has been unused for a while can be difficult. You neglected some maintenance, did not properly winterize it, or there are other reasons. When a lawnmower doesn’t start, you must diagnose the problem and use starter fluid. But, Where to Spray Starter Fluid Lawn Mower?
Most of the time, the problem is caused by a blockage in an engine component. It could also be a sparkplug problem. Such an engine can be started with starter fluid, and the underlying problem can be diagnosed quickly.
This article will briefly discuss Where to Spray Starter Fluid Lawn Mower and how to use it. So let’s get started.
What is starter fluid?
An ignition starter fluid consists primarily of hydrocarbon (fuel), diethyl ether, and carbon dioxide, which are highly flammable and volatile. In most cases, starter fluid is enclosed in a pressurized spray can.
As soon as the trigger is pressed, the starter fluid atomizes in the direction of the spray. As a result, it is more likely to react with air and mix properly.
It can be harder to diagnose lawnmower engines than car engines because lawnmowers are smaller than cars. Push mowers, and most other mower types are usually powered by two-stroke or four-stroke engines with one or two cylinders.
There can be various reasons why a mower will not start, from a bad spark plug to a lack of fuel.
When to Use Starter Fluid?
As its name suggests, starter fluid starts a difficult-to-start engine. It is beneficial for cold starts in the fall and early spring when the engine is not used often.
It is possible to improve the starting of an engine in cold weather if starter fluid is used. Getting your lawnmower started can be challenging when the temperature is low.
Starter fluid can help diagnose problems with starting your lawnmower if there is an underlying cause.
You can save time by learning how to use starter fluid properly. After reading this blog, you can ask a professional for help if you still have problems.
What are the Required Tools to Spray Starter Fluid?
It is not challenging to spray starter fluid. To do it, you’ll only need a few basic tools:
- Wrench set
- Screwdriver
- Grip Pliers
- Collector Pan
- Cleaning cloth
- Starter fluid
Where to Spray Starter Fluid Lawn Mower?
A step-by-step guide Where to Spray Starter Fluid Lawn Mower:
- Step 1: Locate the air filter housing
- Step 2: Remove the air filter and clean
- Step 3: Find the carburetor chamber underneath
- Step 4: Spray the starter fluid
- Step 5: Start the engine and diagnose
- Step 6: Check, clean, and fix the part that causes the problem
Let’s get started.
Step 1: Locate the housing for the air filter
When working on a riding mower, lift the hood or remove the engine cover. If you have a push lawnmower, you will need to locate the cover’s latches, clips, and bolts. Once you have located the bolts and clasps, remove them. You will need to lift the cover.
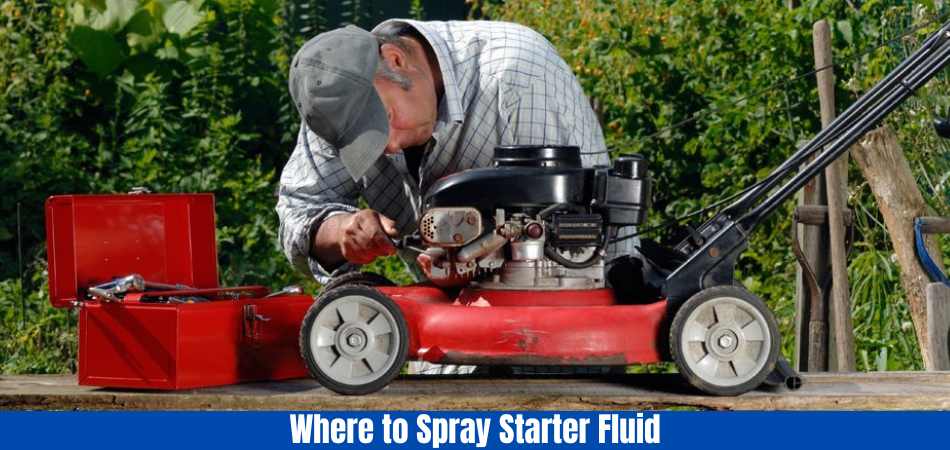
The air filter housing can be found on the front of your lawnmower engine. It has an opening shaped like a fin. There is an air intake box and an air filter in this box. The air will then be mixed with the fuel and presented to the carburetor for mixing with the fuel.
Step 2: Take off the air filter and clean it
In most cases, the black cover of the air filter housing is fixed with latches and easily removed. Keep the plastic intact by not breaking it. The cover of some mowers is fastened in place with fasteners. Using a socket wrench, you can loosen them.
You will find a mesh filter underneath the cover. Paper or foamy soft filters are used.
Normally, the filter is easy to remove. Some filters use bolts. Then, remove the air filter by unscrewing the bolt with a torque wrench. The filter is quite delicate, so be careful not to damage it.
You should clean your foam air filter if you have one. The first step is to remove any apparent debris and mud by carefully tapping it. Dry or wet cleaning is both possible for the air filter.
Using a vacuum will allow you to dry clean it quickly. Ensure that the air filter is not damaged. You can also use dishwashing soap or detergent if you have more time. Before using it, let it completely dry.
Pressurized air can also be used to clean it. Air compressors can be dangerous, so use them carefully. The air filter can be damaged quickly if exposed to vital air. You should replace your paper air filter if you have one.
The foam air filter must be replaced if it is damaged or has a paper air filter. Make sure you purchase the right type of replacement filter for your lawnmower.
Step 3: Find the carburetor
The carburetor is often located behind the backplate of the air filter housing. You can easily locate it by following the fuel line from the gas tank. The carburetor mixes the air from the air filter with the gas and sends it to the engine.
Make sure the external parts are clean: Clean the visible ports and grooves of the carburetor with some cleaning cloth if you have the time. You can start your lawnmower more easily if your carburetor is clean.
Step 4: Apply starter fluid
Having cleaned the air filter and carburetor, it is time to use the starter fluid:
Using a clean cloth and some all-purpose cleaner, clean and dry the backplate of the housing.

Identify the intake duct: The carburetor’s backplate has a cutout through which air enters. There will be a breather tube at the end of this intake duct.
The starter fluid should be sprayed into the found opening. As a result, the starter fluid is entering the carburetor chamber.
Step 5: Turn on the engine and observe
You can adjust the idle and choke by adjusting the throttle halfway if it is adjustable. The choke should be lifted to the full position. As a result, fuel intake will be significantly increased.
Turn the ignition switch or pull the starting cord to start the engine. If you add starter fluid to the engine, it should start. Pay close attention to what is happening.
It is a good sign if the mower continues to run rather than shutting down alone. There is usually a stutter accompanied by an engine stopping in most cases.
Step 6: Clean and repair the guilty part
Based on what we observed, we can diagnose the two options as follows:
Within three seconds, the engine stops. The carburetor is malfunctioning. If necessary, it should be cleaned, adjusted, and repaired.
Stalling time between 3 and 30 seconds is option 2. There is something wrong with the fuel, as indicated by this. Either the water is mixed with the fuel, the fuel is dirty, or the gas is harmful.
Fill the fuel tank and carburetor with fresh fuel to solve the problem. The fuel filter should be replaced, and fresh gas should be added.
What are the Pros of Using a Starting Fluid?
Starting the engine with starter fluid is generally beneficial, especially in the winter. As a result, you can save a lot of money by prolonging the battery life.
A lawnmower’s starting fluid must work for a longer period of time.
What are the Cons of Using a Starting Fluid?
Your gasoline engine can be damaged if you use starting fluid frequently. The engine’s cylinder can reach a high temperature when the starting fluid is used. You will likely ruin your engine if you use combustible starting fluid.
Engines with high compression rates often ignite too early due to their high compression rate.
What are the Precautionary Measures for Spray Starter Fluid Lawn Mower?
Eye protection: Wearing gloves and goggles is necessary, depending on your actions. It is possible to get sick from the starter fluid. Visit a doctor if you come into contact with your eyes.
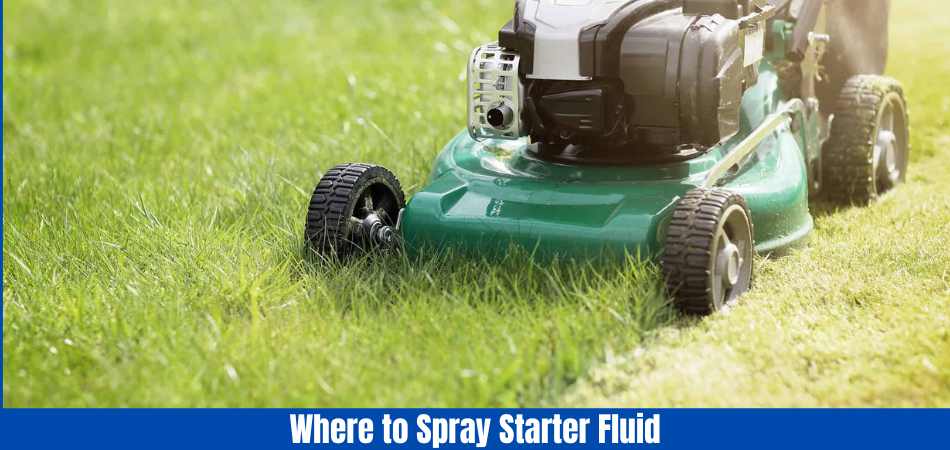
Perform this procedure in a well-ventilated area: The starter fluid is highly flammable and dangerous, so make sure you are working in an open, well-ventilated area. The fluid should not be ignited by flames or anything else. The engine should also be kept cool if it is hot.
When Is It Not Advisable To Use The Starting Fluid For The Lawnmower?
In the case of a diesel lawnmower, starting fluid should not be used as it can damage the engine. In addition, gasoline engines with two cycles are unsuitable for starting fluids.
If you notice something wrong with the lawnmower, it is best not to wait and to take it to a professional. You should change the starting fluid if the expert recommends it.
Carbureted engines work best with starting fluid since the fuel vaporizes through the little holes. As compared to starting fluid, other sprays are less effective.
In cold weather, gasoline does not vaporize, which causes problems.
It is true, however, that a starting fluid will easily ignite in the cold, aiding the engine to start and heating the fuel simultaneously.
How to Start a lawn mower with starter fluid?
You may need starter fluid the first time you use the mower in the spring. Cold weather also makes it easier to start the engine with starter fluid. The starter fluid can also be used to troubleshoot the small engine in the mower when it doesn’t start.
- You can start your lawn mower with starter fluid by following these steps:
- The lawn mower should be moved to a well-ventilated area and free of open flames.
- The air filter cover needs to be removed, and the filter should be pulled out.
- The air filter housing opening to the carburetor should be sprayed with starting fluid.
- Remove the air filter cover and reinstall it.
- Start the engine by pulling the starter rope or pressing the start button.
Can Starter Fluid Be Used On A Diesel Engine?
Diesel engines should not be started with starter fluid. Due to a different igniting method, starter fluid won’t be effective since they use a different method of igniting fuel. In addition, you should avoid using this product as it might damage your engine.
What Is Causing Your Lawn Mower Not To Start?
The process of figuring out what is causing your lawn mower not to start can be difficult. It is easier to diagnose a problem with starter fluid, however.
A carburetor or fuel pump issue will typically cause the mower to stall, and the time it takes to stall will tell you which one it is.
The process of diagnosing the problem at home should be relatively straightforward, but there are times when this may not be possible. The mower will need to be taken to a professional in this case.
How to Troubleshoot Common Lawn Mower Starting Problems?
Using starter fluid correctly can help start your lawn mower, but sometimes underlying issues need to be addressed. The following are some common problems that can prevent your lawn mower from starting:
1. Air filter that is contaminated or clogged
If your lawn mower’s air filter is dirty or clogged, it can restrict airflow to the engine, making it more difficult to start. Clean or replace the air filter using soap and water to resolve this issue.
2. An out-of-date or defective spark plug
When the spark plug in your lawn mower is worn or old, it can cause the engine not to start. The spark plug needs to be replaced, and the mower should be able to start again after that. You may need to address other issues if it still doesn’t start.

3. Gas that is stale or vacant
If your lawnmower has been sitting unused for a long time, the fuel may have gone bad and needs to be ignited properly. The old gasoline should be replaced with new gasoline, and the engine should be restarted.
4. The carburetor is incorrect.
If your lawn mower’s carburetor clogged or damaged, the engine won’t start. If your lawn mower is not working, you may need to clean or replace the carburetor.
5. Problems with electricity
Let’s say your lawn mower has an electric starter. It may not start if the battery or wiring is malfunctioning. Make sure the battery and wiring are in good condition.
How To Fix Lawn Mower Won’t Start Without Starter Fluid?
In the market, there are many known brands of amazing lawn mowers. Whether designed for professionals or homeowners, almost all lawn mowers have a similar primary mechanism. Because of this, most machines can be fixed with the same technique. Detailed instructions are provided below.
Step 1: Clean the lawn mower
A cleaning brush should used first to clean the lawn mower. Keeping things clean is good, even if it isn’t an amendatory part.
Step 2: Measure engine temperature
Keep an eye on the engine. Is it hot or cold? It’s OK if it’s at an average temperature. If not, wait until the temperature is cool; otherwise, it will damage the engine.
Step 3: Set your position
If you like, you can work on the engine in a place that suits you. You need to know where you can get every tool quickly. Fire extinguishers must also be available at the site.
Step 4: Start your work
It is now time to get down to business. In the beginning,
It is not necessary to remove the engine cover on all machines. Some have an engine cover, some don’t. Depending on the brand, it may vary. Using a 3/8-inch drive ratchet and socket, you can remove the cover.
You will find an air filter cover after removing the engine cover. Remove the cover with a Phillips head screwdriver.
It is necessary to remove the air filter: inside the sector, there is an air filter. You should take it outside.
The air filter house has been removed: An empty air filter house is now visible. Remove the House altogether with a ratchet and screwdriver.
Step 5: Take a look
Take a look at the surface now. What is the condition of the carburetor? The carburetor must first cleaned because a dirty carburetor cannot be revived by starter fluid.
Step 6: Spray Starter Fluid
Apply starter fluid directly to the carburetor by spraying for 2-3 seconds. Make sure the carburetor is in contact with the fluid.
Step 7: Start the Engine
Start the engine by pulling the starter string. See what happens. Your work is almost complete if the engine starts.
Step 8: Fix the parts
The parts need to be fixed in Step 8r house, ideally using the ratchet, then the air filter and air filter cover. Clean and dry all the parts. Once the lawnmower is covered with the machine cover, tie the screws appropriately.
Here is a step-by-step guide to help you apply starter fluid to your lawn mower.
What are the Safety Precautions when Handling Lawn Mowers?
It is important to remember that lawn mowers, despite their everyday use, can pose a safety threat if mishandled. You should wear appropriate work gloves and protective eyewear when operating a lawnmower. As a result of this equipment, accidents to the body can be prevented.
Furthermore, letting the mower engine cool off before performing any maintenance tasks recommended to avoid burns. Consumer Product Safety Commission (CPSC) guidelines provide a more comprehensive list of safety precautions.
By following these steps, you can enhance your lawn mower’s safety and functionality and reduce its environmental impact.
Whenever you face potentially risky situations, prioritize safety, adhere to proper waste disposal, maintain your equipment, and seek professional advice.
How to Properly Dispose Used Starter Fluid and Cleaning Material?
The management of waste is an integral part of any mechanical process. It is essential to dispose of used starter fluid and air filter cleaning materials in an eco-friendly manner. The incorrect disposal of waste can have a detrimental effect on the environment.
Accordingly, I recommend checking your local hazardous waste regulations or visiting the EPA’s website based on my wide experience.
It Provides comprehensive guidelines for disposing of such materials. Averting potential health risks by following these procedures reduces the environmental impact.
Safety should always be your number one priority if you are handling flammable materials like starter fluid. Mishandling this compound can result in significant harm, despite its practicality.
Be sure to work with starter fluid in a well-ventilated area away from open flames or sources of high heat. It prevents fumes from accumulating and potentially igniting, which can be extremely dangerous.
Final Remarks: Where to Spray Starter Fluid Lawn Mower?
The problem of starting is something that many gas mower owners will encounter at some point in their ownership. During periods when the lawnmower not used as often, they will occur more frequently. If the machine not maintained frequently or if it is not maintained at all.
However, you can often diagnose the problem by starting the machine using starter fluid. The carburetor is usually at fault when an engine fails to start.
The carburetor on your machine may need to cleaned, repaired, or rebuilt if it is older. Also, make sure the fuel adjustment is correct. Check the valve condition and clean them periodically if possible.
Read more of our articles here.
Read Also: Can you use starting fluid on a mower?
FAQs
Why do I need starter fluid for my lawn mower?
Internal combustion engines are started with starter fluid, which is a flammable liquid. Starter fluid may help your lawn mower start more easily if it has trouble starting.
What is the location of the carburetor on a lawn mower?
The carburetor mixes air with liquid fuel and is located near the engine. Most lawn mowers have it attached to their air filter and are easily accessible.
Do I need starter fluid for my lawn mower?
Use starter fluid if your lawn mower has trouble starting, especially after stored for a long time or in cold weather.
What is the best place to spray starter fluid on my lawn mower?
Starter fluid should sprayed directly into the air intake or carburetor. Place a small amount of starter fluid in the air filter housing, remove the air filter, and reinstall the air filter. Fuel is needed to start the engine, so this helps.
Is it safe to spray starter fluid on a hot engine?
A hot engine should not be sprayed with starter fluid, which could cause a safety hazard. Attempt to use starter fluid after the engine has cooled down.

MAP sensors are essential to the electronic control system of fuel-injected engines. By providing information about the pressure inside the intake manifold it aids the ECU in calculating the best air/fuel ratio. Many people, however, are tempted to unplug the MAP sensor due to various reasons. But What Happens If You Unplug A Map Sensor?
Unplugging the sensor is often the answer since it may make the car run smoother. Some cars don’t have a MAP sensor; instead, you’ll find an MAF (Mass Air Flow) sensor. Before unplugging your MAP sensor, you should know what will happen.
So read the article to learn- “What Happens If You Unplug A Map Sensor?”
What Does the MAP Sensor Do?
In fuel-injected engines, the Manifold Absolute Pressure sensor, also known as MAP, plays a crucial role. An ECU receives information about the pressure inside the intake manifold. Based on that data, the ECU calculates the optimal air/fuel ratio for the engine and adjusts fuel delivery accordingly.
MAP sensors work with other engine sensors to provide information about engine load at different RPMs, along with providing information about the pressure in the intake manifold. By adjusting the fuel injection system, the ECU ensures that the engine is running smoothly and efficiently and emitting minimal emissions.
What Happens If You Unplug A MAP Sensor?
There is a tendency for people to confuse the MAP sensor as a non-essential component. So, What Happens If You Unplug A Map Sensor? The system will provide excessive fluid even if it is unnecessary if the MAP sensor is unplugged. The concentration of fluid will change dramatically.
Furthermore, the combusted gas cannot escape and increases internal heat. The results are similar to those of a bad MAP sensor or a failure of the MAP sensor. The story doesn’t end there.
By measuring the manifold pressure, the MAP sensor assists in balancing the air and fuel ratios. What Happens If You Unplug A Map Sensor. If it is disconnected, the ECU will receive inaccurate information about the air-fuel ratio. The fuel will then be converted to lean or rich. As a result, the following issues will arise:
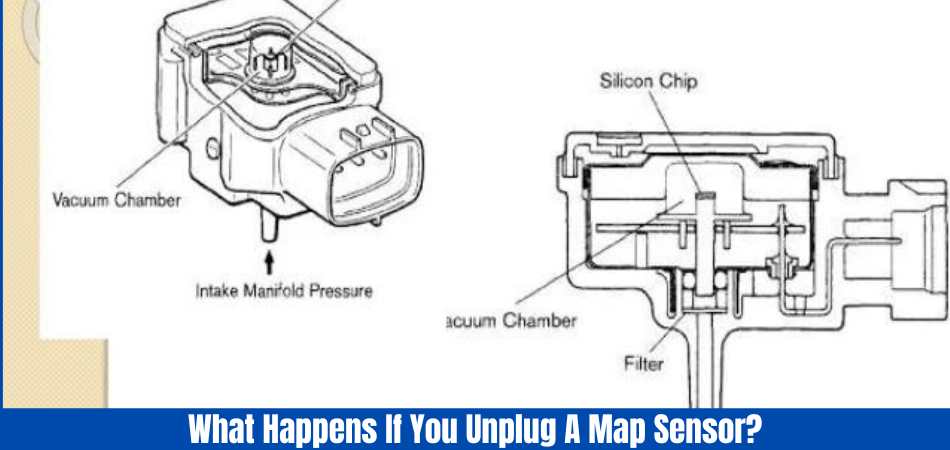
Problem 1: The fuel and air mixture is incorrect
A MAP sensor calculates fuel pressure and allows the engine to serve more fuel if necessary. Unplugged manifold absolute pressure sensors cannot count the pressure or fuel condition.
Furthermore, an incorrect mixture of air and fuel will result in uneven combustion and polluted air.
Problem 2: Mismonitoring of manifold pressure
By reading the manifold pressure, the MAP sensor supplies fuel as needed. The ECU will provide more fuel if the reading goes low. In addition, if the pressure is correct, the ECU will not allow extra fuel to be supplied.
The ECU will not get any or the wrong information if the sensor is not working or unplugged. When this happens, the ECU may supply more oil or stop supplying oil, which can result in severe engine damage or engine failure.
Problem 3: Overdelivery of fuel
The valves may have more carbon deposition as a result of excessive combustion. The engine can lose power and produce less power. The engine can also lose power due to damaged or malfunctioning spark plugs (our pick).
Problem 4: Check the engine light
An unplugged MAP sensor can be annoying and cause the check engine light to illuminate, although this is not a common fact. Even after plugging in the sensor, it may still be on. In that case
- Ensure that the engine is off.
- Make sure the sensor is clean by cleaning it
- Reset the car’s computer system
- Turn the engine on
- Start the engine after a few minutes.
This is a quick way to turn off the light. However, if the problem is not with other sensors, it could be with MAP sensors. To fix it, go to an auto repair shop.
Problem 5: Lack of fuel and clogged fuel filter
Even though the engine gets enough fluid and pressure, it will sound like there isn’t enough oil in the system or reservoir. If that is the case, you can add more oil. Due to faulty combustion, all the consequences will result in dirty oil.
In the end, these conditions will result in a damaged fuel pump and a clogged fuel filter (our recommendation). Having clogged fuel filters and a damaged power pump will result in less power and dirty oil that cannot be used.
Problem 6: Starting Problems
Starting will be difficult if the fuel is lean or rich, as it cannot lubricate properly and inhibits more power production. Oil that is too lean or too rich also performs poorly. This will result in a rough start for the engine.
Problem 7: Poor running of the car
The engine’s performance will be affected by an unplugged MAP sensor. When you unplug the MAP sensor from your vehicle, you will not be able to drive smoothly. A fluid imbalance will occur in the system, resulting in improper lubrication. As a result, the car runs rough.
Problem 8: Poor engine performance
An engine-related mismanagement directly affects the engine. A manifold with incorrect oil and air ratios will not perform well without proper pressure. In addition, dirty oil can clog the pathway.
All these problems prevent the engine from working at its maximum capacity.
Problem 9: Damage to the engine and exhaust system
By removing harmful gases from the engine, the exhaust system aids combustion. Additionally, it improves the performance of the engine. Unplugging the MAP sensor will prevent the exhaust system from removing harmful gases.
Furthermore, the fuel will not be able to eliminate the gases due to the lack of evaporation. Parts can last longer if they are fuelled with fresh fuel. Unplugged MAP sensors result in fuel and combust harmful gases, damaging the engine and exhaust system.
Furthermore, the gas that has been combusted does not go out. Consequently, it damages the entire system by mixing with the oil.
The problems listed above are all linked. The majority of problems will appear if you unplug the MAP sensor.
All of these problems can be resolved by adequately plugging the MAP sensor and replacing it if it isn’t working. Contact an automobile repair expert immediately if you continue to receive incorrect information after replacement.
Why Would a Vehicle Run Better After Unplugging the MAP Sensor?
Unplugging your MAP sensor might improve the performance of your car now that you know what it does. Your car will run poorly or have reduced power and fuel economy if there is a problem with the MAP sensor. Nevertheless, unplugging the sensor can sometimes “reset” the ECU and improve its performance. This may occur for several reasons:
1. Malfunctioning Sensor
When the MAP sensor malfunctions, it can send incorrect signals to the ECU, causing a variety of problems. It is possible to eliminate the incorrect signals by unplugging the sensor, thereby improving the efficiency of the ECU.
2. Sensor calibrated incorrectly
If the MAP sensor is not calibrated correctly, the ECU may inject too much or too little fuel, resulting in poor performance. By unplugging the sensor, the ECU can sometimes re-calibrate the sensor correctly after it has been reset.
3. Dirty or clogged sensor
In the event that the MAP sensor becomes clogged or dirty, it will send incorrect signals to the ECU, which can result in a variety of problems. A clogged or dirty sensor can be compensated for by unplugging the sensor, allowing the ECU to operate more efficiently.
4. Problems with the engine or fuel system
Unplugging the MAP sensor can mask other engine or fuel system issues that cause poor performance. It is essential to address the underlying problem as soon as possible since this is not a permanent fix.
Is it Possible to Drive with the MAP sensor unplugged?
If the MAP sensor is faulty, you can drive with it unplugged, and the car may run better as a result. The problem with that is that it can do more harm than good. With the MAP sensor unplugged, a vehicle will run too lean or too rich, which will cause the combustion area to run much hotter, causing damage to the block, pistons, catalytic converter, etc.
It would be best if you only considered running without the MAP sensor if it is so faulty that you cannot drive without it. If the sensor is unplugged, you can drive the car, but I would advise replacing it as soon as possible.
Why Does the MAP Sensor Fail?
MAP sensors are susceptible to contamination, as are most electric sensors. A map sensor that uses a hose can become clogged or leak, making it impossible to read pressure changes.
Extreme vibrations cause some cases of external damage during driving. Due to the proximity of the engine, electrical connectors can also melt or crack from overheating. It will be necessary to replace the MAP sensor in either of these scenarios.
What are the Symptoms of a Bad Map Sensor?
An engine’s air-fuel ratio will be affected by a faulty MAP sensor. An incorrect ratio will result in the engine’s ignition occurring at the wrong time in its combustion cycle. A prolonged period of severe pre-detonation will damage the internal engine parts (such as pistons, rods, and rod bearings) and eventually cause catastrophic failure. Here are some warning signs to look out for:
1. Poor Fuel Economy.
When the ECM detects low or no vacuum, it assumes the engine is under high load, so it dumps in more fuel and advances spark timing. Detonation may occur as a result of excessive fuel consumption, poor fuel economy, and poor fuel economy.
2. Power deficiency.
If When the ECM detects a high vacuum, it assumes the engine load is low, so it cuts fuel injection and retards spark timing. A decrease in fuel consumption is a good thing on the surface. In contrast, if the engine consumes too little fuel, it may be unable to accelerate and pass.
3. Inspection of emissions failed.
A broken MAP sensor increases harmful emissions because fuel injection does not correspond to engine load. Insufficient fuel may lead to higher nitrogen oxide (NOx) emissions, while excessive fuel causes higher hydrocarbon (HC) and carbon monoxide (CO) emissions.
4. Rough Idle.
An insufficient fuel injection system leads to rough idling and perhaps even random cylinder misfiring.
5. Hard Starting.
Similarly, an excessively rich or lean mixture causes the engine to have difficulty starting. You may have a problem with the MAP sensor if you can only start the engine when your foot is on the accelerator.
6. Stalling or hesitating.
A faulty MAP sensor may cause an ECM to give you a lean mixture when you are starting from a stop or attempting a passing maneuver.
7. Check Engine Light.
MAP sensor diagnostic trouble codes (DTCs) can range from simple circuit, sensor, or correlation faults to range or correlation faults, depending on your vehicle’s age. The ECM may receive false data from a failing MAP sensor, such as low engine vacuum, when the throttle position sensor (TPS) and crankshaft position sensor (CKP) both show idle.
How to Diagnose a Bad MAP Sensor?
The easiest way to confirm a faulty MAP sensor is to plug the car into an OBDII diagnostic machine and check for faults. If the check engine light is illuminated and the MAP sensor is the cause, it will be stored in the car’s fault memory. If there is no stored fault, then diagnosing a faulty MAP sensor is slightly more involved.
Here’s my method of inspecting a faulty MAP sensor:
1. Look for warning signs.
Check engine lights may indicate a faulty MAP sensor. To confirm a defective sensor, plug the car into a code reader. In some cases, there may be more than one similar fault code stored, so you may need to clear the fault codes and see which comes back on.
2. Vacuum hose for MAP sensor should be checked.
Ensure the vacuum hose connected to the MAP sensor is free of cracks, leaks, or damage. A damaged hose can cause a vacuum leak, affecting the MAP sensor’s readings. The car will usually idle rough if the vacuum hose is split.
3. Connect the MAP sensor electrically.
Connect the MAP sensor and make sure there are no damaged pins. Poor connections can cause the MAP sensor to malfunction, causing the check engine light not to illuminate or to flash erratically. Make sure the wires coming from the sensor are not damaged or disconnected.
4. MAP sensor test
The voltage output of the MAP sensor should be tested with a multimeter. Variations in voltage output should be caused by changes in engine load, e.g., revving the engine. When a vacuum is applied to a MAP sensor, you can look for a drop in voltage at specific vacuum pressures using a vacuum gauge and a multimeter.
When your engine is running rough, you can take an educated guess by simply unplugging the MAP sensor if you do not have access to a diagnostic machine. It is possible to assume the MAP sensor is the problem if the car runs smoothly without it plugged in. However, this is not a guarantee.
How To Replace A Faulty MAP Sensor?
Replacement of a failed sensor varies from vehicle to vehicle. You can use these notes below as a reference for the next replacement project, as some basic procedures are nearly identical.
If you lack experience with self-projects, consult and ask a professional about any details to ensure a smooth process.
- MAP sensors should be located on the intake manifold, either near or on top of the throttle body or on the intake manifold itself.
- Sensor screws and nuts should be removed.
- Make sure the electrical connection is disconnected. You should avoid using force to remove the connector, as it may contain a locking tab that must be removed before it can be unlatched.
- Ensure that the vacuum hose is disconnected from the sensor if necessary. Replace the suction pipe with a new one.
- Analyze the differences between the old and new sensors.
- Suction hoses may need to be reconnected if necessary.
- Connect the electrical connection to the sensor again.
- Replace any screws or nuts holding the sensor in place.
- Make sure all connections are stable before proceeding.
Conclusion: What Happens If You Unplug A Map Sensor
Now you might have some idea of What Happens If You Unplug A Map Sensor. It is essential to understand the risks and consequences of unplugging the MAP sensor, even though it might seem like a quick fix for poor performance. A malfunctioning MAP sensor can reduce fuel economy and increase emissions in your car’s engine management system.
In order to ensure your car runs smoothly and efficiently, it’s essential to diagnose and address MAP sensor problems promptly. Knowing how the MAP sensor works and the possible reasons behind poor engine performance can help you make informed decisions about maintaining and repairing your car.
Read more of our articles here.
Read Also: Unplugging your MAP sensor: What you need to know!
FAQs
What Happens If You Unplug A Map Sensor?
It disrupts the communication between a MAP sensor and an ECM when the sensor is unplugged. As a result, the engine’s performance may be affected.
If I unplug the MAP sensor, will the engine still run?
Engines may run in some cases, but they will likely operate in a default or limp mode. As a result, fuel efficiency and performance may be reduced due to pre-programmed settings.
What is the effect of unplugging the MAP sensor on fuel efficiency?
When the MAP sensor fails to provide accurate pressure data, the ECM may have difficulty adjusting the air-fuel mixture. A decrease in fuel efficiency can result from inefficient combustion.
Are there any warning lights on the dashboard if the MAP sensor is unplugged?
Most modern vehicles will display a check engine light (CEL) if the MAP sensor is unplugged. When the MAP sensor does not provide data, the ECM signals a malfunction.
Is it possible to drive temporarily without the MAP sensor plugged in?
Leaving the MAP sensor unplugged for an extended period of time is not recommended. Engines can run, but they may not perform optimally, resulting in reduced performance and increased emissions.

A rusted, rounded, or otherwise damaged lug nut can be highly frustrating to remove. When working on your car, motorcycle, snow blower, or another piece of equipment, you might encounter this problem. When you turn a nut, your sockets or pliers slip, shaving down the edges making it impossible to grip. If you do not turn the nut after this, your sockets will keep spinning. So, How to Remove a Destroyed Lug Nut?
There’s no need to worry; you’re still in luck! We’re here to answer your most common questions about getting that nut off, as well as a few handy tips and tricks.
So, In the event of a destroyed lug nut, what should you do? Never give up! Lug nuts can be removed in a variety of ways, even when they are stubborn and messed up.
This article explains How to Remove a Destroyed Lug Nut.
What Causes Lug Nuts to Be Destroyed?
Various causes can damage lug nuts, including rust, corrosion, overtightening, and impact. In order to understand these causes better, let’s examine them in more detail.
1. Rust is an issue
Water, dust, and dirt are some of the most common causes of damaged lug nuts due to rust and corrosion. Over time, lug nuts can become susceptible to decay and rust despite being coated to prevent it.
2. Tighten up
When lug nuts are overtightened, they can be damaged. If you tighten the lug nuts too much, they can strip and become difficult to remove. When tightening the lug nuts, you must be careful not to damage them.
3. Nuts of low quality
The lug nuts that come with a new car are generally of high quality. To avoid future problems, however, make sure the replacement lug nut is also high-quality when replacing a lug nut for any reason.
4. Wear and Tear
As a result of excessive use, lug nuts can wear out over time. When they are regularly loosened and tightened, the corners can round out, and eventually, the lug nut will be damaged.
5. Incorrectly sized tools
It is possible to damage a lug nut if you use the wrong tool size. Local, cheap wrenches are often not the right size or made of good material, which can result in uneven seating of the lug nut. The nut may wear out repeatedly as a result of repeated slipping.
What You’ll Need to Remove a Destroyed Lug Nut?
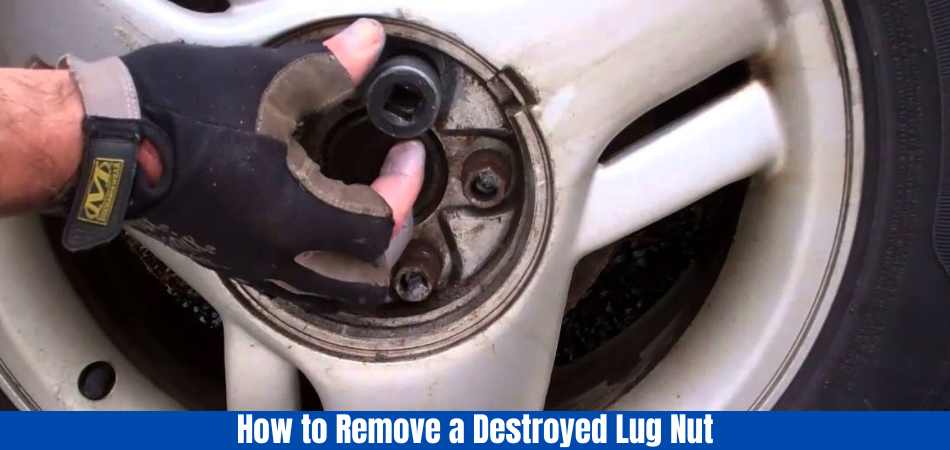
- Penetrating Oil (like WD-40 or Kano Aerokroil)
- Power drill (cordless or corded both work)
- 5/64″ and 7/64″ drill bits (cobalt bits work best)
- Drilling lubricant (ie: Three-in-One oil)
- Safety glasses
- 1/2″ drive 6-pt socket (of the correct lug nut size or slightly smaller)
- Lug nut extractor set (if needed)
- 1/2″ drive breaker bar
- Floor jack or 3-ft section of pipe (to slide over breaker bar)
10 Methods of Removing a Destroyed Lug Nut
How to Remove a Destroyed Lug Nut? Here are the methods to solve the problem.
1. Ratchet and socket
You can remove the lug nut by hand if you have a socket and ratchet that fits the nut. The socket should be attached to the ratchet and turned counterclockwise. A breaker bar may be required to loosen a rusted or frozen lug nut.
However, if the lug nut is already damaged, this could cause further damage. Loosening lug nuts should not be done with excessive force.
2. Make use of an impact wrench.
A power tool called an impact wrench can be used to remove stubborn lug nuts. Using an impact wrench is as simple as attaching the socket and turning it on. With the twist, the lug nut will be easier to remove because it will have more torque. Use an impact wrench with caution, as lug nuts can easily be stripped.
You may need to loosen the lug nut first with a pry bar or breaker bar if it is too tight. After the lug nut is loose, the impact wrench can be used to remove it altogether.
3. Use a Pry Bar
You can use a pry bar if you don’t have a socket or impact wrench. Lever up the lug nut by inserting the pry bar end into one of the holes. By applying some force, you can loosen the lug nut enough to remove it by hand eventually.
When using a pry bar, be careful not to damage the wheel. Be sure to use the end of the pry bar and not the middle to avoid damaging it.
4. Using a hammer
The lug nut can be removed with a hammer if you don’t have any tools that fit it. The head of the hammer should be placed on top of the lug nut, and it should be struck with another rock or piece of metal. You may need to strike the lug nut several times to loosen it enough to remove it by hand. When using the hammer, be careful not to damage the lug stud.
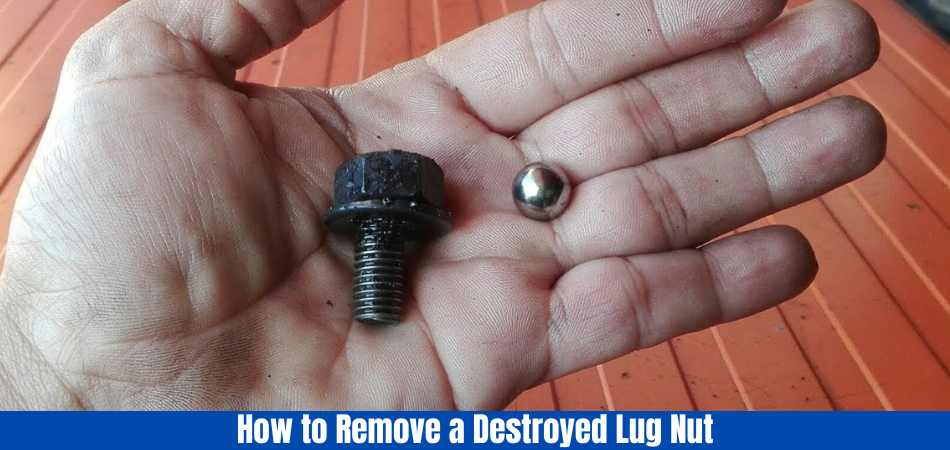
By hand, you can remove the lug nut once it is loose enough. It may be effective for removing old and rusted lug nuts, but it is not recommended for newer vehicles due to its potential to damage threads and wheel studs.
5. Make use of pliers
If possible, remove the stripped lug nut with pliers if it is denied. With the pliers, grip the lug nut and turn it counterclockwise. Wrapping the pliers in cloth or tape will improve their grip if they slip. The lug nut can also be turned counterclockwise using locking pliers.
6. Put heat to use
Heat a torch over the lugnut to remove it if it’s frozen in place. The lugnut should become hot to the touch after several minutes when the flame is aimed at it. You can remove the lugnut by hand or with a tool once it has been heated.
Make sure you don’t burn yourself. If you want to get the maximum torque when removing the lugnut, you should use a vice grip or a wrench. When the nut still won’t budge, apply more heat until it loosens.
You will need to replace the lugnut once it has been removed. To prevent it from coming off, torque the new lugnut into place. Wishing you the best!
7. Make use of cold water
You can also use cold instead of heat if the heat doesn’t work. Submerge the frozen lugnut in cold water for a few minutes or spray it with aerosolized air.
Using a tool or by hand, remove the lugnut once it has cooled. To assist in removing the nut, use a device with a built-in grip. You may need to call a mechanic if this does not work.
8. Using Thread Locker
If you have a thread locker like Loctite on hand, you can use it to loosen the lug nut. By hand or with a tool, apply the thread locker to the lug nut’s threads and then try to remove it. In the event that the nut remains stuck, you can use a more robust tool, such as an impact wrench.
Be Ensure that you read and follow all instructions on the thread locker package before using it. When working with a thread locker, wear safety gear, such as gloves and protective eyewear. Most of the time, however, you won’t need a thread locker. Only use it if all other methods have failed.
9. Put penetrating oil to use
If WD-40 or Liquid Wrench work as penetrating oils if you do not have a thread locker. Before attempting to remove the lug nut, apply penetrating oil to the threads and let it sit for several minutes. The lug nut will become more accessible to turn once it has been loosened.
If It is possible, you need to use a more powerful penetrating oil if the lug nut is still stuck. PBL (Power Bolt Loosener) is a product that may help you loosen bolts. With this powerful, industrial-strength lubricant, you can remove even the most stubborn lug nuts. If you want to remove the lug nut again, give the PBL a few minutes to penetrate.
10. Grinder an angle
If all else fails, you can use an angle grinder with a metal cutting blade to remove the destroyed lug nut. When using an angle grinder, wear eye protection and follow all safety precautions. Before removing the lug nut from the wheel, cut it in half.
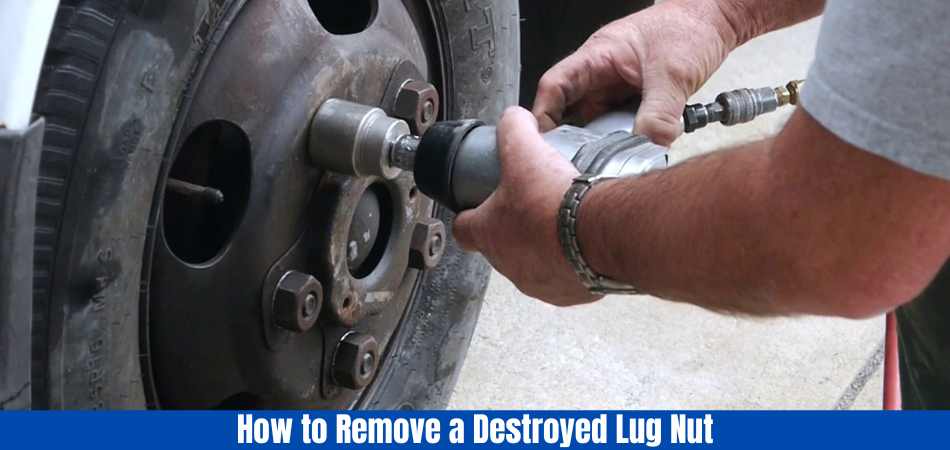
Depending on the situation, different methods may work best when dealing with a destroyed lug nut. At first, you may not succeed, so try a different approach until you find one that works for you. If you follow these tips and methods, you’ll be able to remove a destroyed lug nut fairly easily.
This guide will show you how to remove a destroyed lug nut in no time. Be patient and work carefully and methodically. It should be easy to remove the lug nut with the right tools and approach. Best of luck!
How to Remove a Stripped Lug Nut Without an Impact Wrench?
You can still remove a stripped lug nut without an impact wrench if you don’t have access to one. The following is a step-by-step guide:
1. First and foremost, safety:
Place your vehicle on sturdy car lifts or jack stands to ensure that it is supported safely. It is also recommended to wear safety goggles and gloves.
2. Penetrating Oil:
Use WD-40 or PB Blaster to penetrate the stripped lug nut. To make it easier to turn, leave it for at least 10-15 minutes to loosen the nut.
3. Increase the socket size:
Hammer the socket onto the stripped nut using a slightly smaller socket than the lug nut. Sometimes, the socket can be turned with enough grip from the hammering force.
4. Pliers or vice grips:
Use vice grips or locking pliers if you can’t grip the socket. Clamp them tightly onto the stripped lug nut and turn counterclockwise. Turn steadily and evenly.
5. Heating (optional):
If the lug nut is particularly stubborn, heat it with a propane torch. Loosen the nut with heat because metal expands when heated. Ensure that the wheel does not overheat and damage surrounding components.
6. Counterclockwise Force:
Apply steady, gradual force in a counterclockwise direction using a breaker bar or long-handled wrench. To prevent tools from breaking, make sure they are of good quality and in good condition.
7. Patience:
Be patient and persistent. The stripped lug nut may eventually be freed by applying constant, gradual pressure.
8. Impact Driver:
For stubborn lug nuts, an impact driver can be a very effective tool.
9. Help from a professional:
The best course of action is to seek professional help from a mechanic or auto shop to avoid further damage to the wheel or lug stud.
Can I Drill Out a Stripped Lug Nut?
You can do it by following these steps:
Safety: As mentioned above, ensure safety precautions are followed.
Drill Bit Selection: It is best to use a drill bit that has a slightly smaller diameter than the lug nut. Centering the drill bit accurately on the nut is essential.
Drilling: In order to repair a stripped lug nut, drill a hole in its center carefully. To avoid overheating and damaging the surrounding components, you should use low to moderate speed.
Chisel or Breaker Bar: Using a chisel or a breaker bar, you can split the nut after drilling through it. Turn the chisel or breaker bar counterclockwise in the hole you drilled. You should be able to remove the nut’s remains this way.
Replace the Lug Nut: To ensure the safety and integrity of your vehicle’s wheel, replace the stripped lug nut with a new one.
It’s always better to try other methods before drilling out a lug nut since it can be challenging.
How to Remove a Lug Nut That Is Rounded Off?
It can be challenging to remove a rounded-off lug nut, but it isn’t impossible. The following steps can be taken to resolve the problem:
- Safety: As previously mentioned, safety measures are crucial.
- Pliers or Vice Grips: Secure the rounded lug nut as tightly as you can with locking pliers or vice grips.
- Penetrating Oil: For about 15 minutes, apply penetrating oil to the rounded lug nut.
- Hammer it: To create shock and vibration, lightly tap the pliers or vice grips counterclockwise with a hammer. It may help loosen the nut if you do this.
- Slow down: Try turning the vice grips or pliers counterclockwise. Keep them locked on the lug nut by applying steady, gradual pressure.
- Heating (optional): You can use a propane torch to expand a stripped lug nut by heating the rounded nut slightly. Avoid overheating.
- Drivers: If an impact driver is available, use it to remove the rounded lug nut. To break it free, it can provide the extra torque needed.
- Help from a professional: A professional mechanic may be able to remove stubborn lug nuts with specialized tools.
Can you use a socket wrench to take off lug nuts?
It is possible to remove lug nuts with a socket wrench. In order to fit a variety of lug nut sizes and configurations, socket wrenches include interchangeable sockets. Typically, a ratchet handle is used to rotate the sockets so that they can fit onto the lug nut and be tightened or loosened.
You can remove lug nuts from tires using a socket wrench if you have the correct size and type of socket. You must use a socket with the same size and shape as the lug nut.
By doing this, you will be able to remove the lug nut more efficiently and protect it from damage while doing so. When turning lug nuts, you should also ensure that the socket handle and drive are appropriately fitted and fixed in place.
Can you use a regular drill to remove lug nuts?
You can remove lug nuts with a regular drill. Although it can cause damage to the drill, the lug nuts, and the wheels of the vehicle, it is not recommended for this purpose. A small drill or impact driver is preferred for this task because they have much more torque and can provide greater control in removing the nuts.
Furthermore, safety glasses should be worn when attempting to remove lug nuts since the drill could propel flying particles. To avoid them falling between the wheel and the frame, hold onto the nuts once they have been removed.
Will a 3/8 impact wrench remove lug nuts?
It is possible to remove lug nuts with a 3/8-inch impact wrench. Impact wrenches use a hammer and anvil mechanism to deliver a rapid burst of torque, making them ideal for loosening and tightening lug nuts on cars and trucks.
If you use a 3/8″ impact wrench, you will also need a socket that will fit over the lug nuts. You can remove and secure lug nuts quickly and safely with an impact wrench without having to use brute force or struggle with a manual tool.
As a result, it’s ideal for changing tires or doing other work on vehicles with lug nuts.
What do you spray lug nuts with?
Before installing lug nuts, apply a lubricant that prevents seizing. When exposed to moisture and extreme temperatures, anti-seize lubricants contain bolts, screws, and nuts from corroding.
When your vehicle is serviced, or tires are changed, the lubricant allows the lug nuts to slide on and off easier. Additionally, it prevents loosening and tightening of the bolts and nuts due to vibrations and shaking.
Make sure the lug nuts are clean, and the threads of the wheel studs are free of dirt, rust, or debris before applying. After applying the anti-seize lubricant to the lines of the lug nuts and wheel studs, lightly spin the lug nuts to ensure it is evenly distributed.
Should I lubricate my lug nuts?
Before tightening your lug nuts, lubricating them is generally recommended. By doing this, the nuts are prevented from becoming corroded, which can make removing them difficult. You can also tighten the nuts more easily with lubrication because it reduces friction.
If you want to lubricate your lug nuts, you should use a product made for automotive use. As a result, the brake system and wheel bearings will be less likely to become contaminated. Be sure to lubricate each lug nut’s threads as well as its underside when lubricating.
Can I spray-paint my lug nuts?
It is possible to spray paint your lug nuts, but it isn’t necessarily recommended. To avoid damaging them or your vehicle, make sure you follow a few steps before painting them.
Before applying a base coat of paint, make sure the lug nuts are clean and free of contaminants. After that, apply two to three coats of paint, letting each coat dry between coats. As a final step, apply a clear coat to protect the lug nuts and make them look glossy.
If you use high-temperature paint on your lug nuts, you may damage them due to the heat generated by the brakes during regular operation.
Furthermore, the paint could peel or chip off of the lug nut, resulting in an unfit connection between the wheel and the lug nut or an inability for the lug nut to remain tight.
How do you keep lug nuts from rusting?
In order to prevent lug nuts from rusting, you should regularly clean them and apply a quality lubricant. As not to damage the finish, it is essential to use a non-abrasive cloth or brush to clean the lug nuts.
After cleaning the lug nuts with soap and water, you should rinse them well with clean water. To remove any rust present on the lug nuts, use a quality rust remover or rust converter and then clean and inspect the area again.
After cleaning the lug nuts, apply a thin coating of lubricant or rust inhibitor and wipe off any excess. The lug nuts will be protected from moisture, and rust will be prevented. As well as checking the condition of the lug nuts periodically, cracking, rusting, or other wear and tear may decrease their effectiveness.
It is essential to maintain lug nuts properly to ensure their longevity and that they are in good working order for the tasks they are meant to perform.
What are the Methods to avoid when Removing a Destroyed Lug Nut?
There are times when people suggest methods for repairing hobby vehicles that can be dangerous. In spite of the fact that these are inexpensive and can be accomplished with tools at home, I strongly recommend against using them on your hobby car. Let’s explore these methods in more detail.
1. Punch tool or chisel with a flat surface.
Removing the rim with a punch tool or chisel may be effective, but it can also be dangerous. During the work, slipping the device could cause scratches or holes in the rim’s body, resulting in an unsatisfactory outcome. You should not use a flat punch tool or a screwdriver.
2. Method of heating
It is recommended to open up other options but not to use the wheels of the car as lug nuts. Using a torch to heat a particular area can damage the rim of a wheel.
Conclusion: How to Remove a Destroyed Lug Nut?
It’s essential to know how to remove a destroyed lug nut, whether you’re a novice or an experienced do-it-yourselfer. It doesn’t take long to remove a damaged lugnut with the right tools and some patience. That’s all there is to it!
It is now possible for you to remove a destroyed lug nut. To avoid severe vehicle damage or injury, follow these steps carefully. Don’t hesitate to consult a professional mechanic if you have any doubts.
Read More of Our Articles Here.
Learn more about Lug Nut Here.
FAQs
1. Can I replace a stripped or rounded lug nut?
You can use a lug nut extractor tool if your lug nut is stripped or rounded off. With this tool, you can remove damaged lug nuts by gripping them and turning them counterclockwise.
2. What is the best way to remove a stripped lug nut with a regular socket wrench?
In When a lug nut is stripped, a socket wrench may not provide enough grip. You can also use a lug nut socket that grips or a slightly larger socket. The use of a lug nut extractor tool is recommended if these methods fail.
3. How does a lug nut extractor tool work?
In order to extract stripped or damaged lug nuts, lug nut extractor tools are used. When turned counterclockwise, it bites into the lug nut thanks to its reverse-threaded design. To prevent further damage, follow the tool’s instructions carefully.
4. Can I use penetrating oil to loosen a stuck lug nut?
When a lug nut becomes stuck or rusted, penetrating oil can help loosen it. Penetrate and lubricate the threads of the lug nut with penetrating oil generously applied to the nut. It may be easier to turn the lug nut with a wrench if you do this.
5. If the lug nut is wholly stripped, what should I do?
It may be necessary to resort to more drastic measures, such as cutting a groove into the lug nut with a rotary tool or using a lug nut splitter if the lug nut is completely stripped. A professional mechanic should be consulted in extreme cases.
What Happens If You Unplug The Idle Air Control Valve? If the shaking car engine didn’t come with an oddly diffusing sound, driving at a stoplight would be alarming to any driver. Having a hard start at home or in the park is a regular occurrence. Every driver will inevitably experience hard starting at some point in their lives.
Idle air control valve (IACV) malfunctions when intermittent idling is accompanied by abnormally fluctuating idle speeds or the engine racing for its life.
People who don’t grease may not know the culprit yet if they don’t understand what is happening. The IACV wires might be unplugged by drivers who dare to look under the hood.
In these situations, many car owners unplugged their Idle Air Control Valves and drove their cars for a short period without experiencing fluctuating idle speeds.
How does your engine react if you unplug this component? Can you drive a car safely? Did it solve the problem? Does it pose a threat to more serious issues?
What do you think? Let’s take at look at What Happens If You Unplug The Idle Air Control Valve.
What is an Idle Air Control Valve?
If you are unfamiliar with automotive mechanics, diving into your vehicle’s intricate systems and components might seem intimidating.
Idle Air Control (IAC) Valve is the main topic at hand. In your engine’s complex layout, the IAC valve controls the engine’s idle speed. By regulating airflow around the closed throttle plate, this is achieved.
Basically, it keeps your vehicle’s engine running smoothly while you’re at a stoplight or stuck in traffic. The engine’s operation is adjusted based on the load, whether air conditioning, heaters, or headlights are on.
It is a compact, electrically controlled component near the intake manifold. By altering the position of the air passage and controlling idle speed, it adjusts the airflow. Based on engine temperature and electrical load, the car’s computer continuously regulates the IAC valve’s operation or the Engine Control Unit (ECU).
The IAC valve is, without a doubt, crucial to your vehicle’s overall performance and efficiency. Your car’s operation can be significantly affected by unplugging it, as you probably already know. How do these changes work? Those are the topics we’ll discuss in the next section.
How Does the Idle Air Control Valve Work?
The IACV bypasses the throttle plate when the engine is idling, allowing air into the engine. Adding extra air to the engine increases its speed and keeps it running smoothly. The IACV is controlled by a computer, which can adjust the air entering the engine. The engine may continue to run at a constant speed even when the load or temperature changes.
What Happens If You Unplug The Idle Air Control Valve?
A disconnected IAC valve can adversely affect your vehicle’s performance immediately and in the long term. As a general rule, it goes like this:
1. Idle speed altered
It regulates the engine’s idle speed as its primary function. Engine control units (ECUs) cannot control the idle speed when unplugged. In this case, the engine speed will fluctuate, resulting in an erratic idle.
2. Stalling of the engine
A lack of input from the IAC valve may prevent the ECU from compensating for additional loads like air conditioning or power steering. In particular, when idle or during low-speed maneuvers, this could result in the engine stalling.
3. Cold Start Difficulties
When starting the engine in cold weather, the IAC valve plays an important role. If you don’t have it, you might have trouble starting your car, and even when you do, you might have problems running it.
4. Fuel efficiency decreased
IAC valves regulate air-fuel mixtures at idle to achieve maximum fuel efficiency. This mixture can become imbalanced when unplugged, resulting in reduced fuel efficiency.
5. A potential engine damage
It can cause more severe damage to the engine over time if the IAC valve does not function properly. For example, frequent stalling can cause excessive wear on the starter motor.
Putting the vehicle’s performance and health at risk, unplugging the IAC valve forces the ECU to run the engine without all the necessary data. Next, we’ll examine some symptoms that may indicate your IAC valve is unplugged or malfunctioning.
What Are the Symptoms of a Bad or Unplugged Idle Air Control Valve?
IAC valve symptoms such as a bad or unplugged valve can save a life. Doing so lets you quickly identify and solve the issue before it escalates into a more serious one. You should be on the lookout for the following signs:
1. Idle speed error
Idle speed is most commonly affected by an unplugged IAC valve when it becomes unstable or erratic. It might be a sign that your IAC valve is malfunctioning or unplugged if your engine’s RPM fluctuates wildly when your vehicle is stationary.
2. Stalls frequently
It is also common for the engine to stall frequently, especially when it is under load. A vehicle may experience this when the air conditioning is running, the headlights are on, or when maneuvering at a low speed.
3. Start-up problems
If your vehicle is having trouble starting, especially in colder weather, an unplugged IAC valve may be to blame. The engine may eventually start, but it may run rough.
4. Engine Check Light
In modern vehicles, the engine’s performance and other components are monitored by systems. An unplugged or faulty IAC valve may cause your dashboard’s Check Engine Light to illuminate.
5. Fuel efficiency reduced
An unplugged IAC valve might be causing your vehicle to consume more fuel than usual. The IAC valve is an essential component of maintaining optimal fuel economy.
If you ever experience an IAC valve problem, you can take prompt action by knowing these symptoms.
What Should You Do if Your Idle Air Control Valve is Unplugged or Malfunctioning?
There is more to identifying a problem than just identifying it. Knowing how to address it is the next crucial step. The following steps should be followed if you suspect your IAC valve is unplugged or malfunctioning:
1. Check for symptoms
IAC valve symptoms should be confirmed as being caused by the valve. Symptoms in the previous section include an erratic idle speed, frequent stalling, difficulty starting the engine, and a lit Check Engine Light. It might be an IAC valve problem if you observe any or a combination of these symptoms.
2. Check the IAC valve.
Inspecting the IAC valve yourself is possible if you have basic mechanical skills and the right tools. Intake manifolds usually have this component.
Make sure it is plugged in and not damaged. The problem might not be evident to the naked eye, however.
3. Get professional advice
Consult a professional mechanic if you’re not confident in your mechanical skills or if the IAC valve appears plugged in and undamaged. An IAC valve diagnostic can be performed and confirmed if there is a problem.
4. Next Steps: Decide
If You need to determine whether to re-plug or replace the IAC valve if it is unplugged or faulty. If the valve is in good condition, replugging might resolve the issue. The valve must, however, be replaced if it is defective.
How To Reset Idle Air Control Valve – A Step-By-Step Guide
You must troubleshoot and check whether idle air control is causing these problems if your vehicle displays faulty IAC valve symptoms. To test if the IAC valve is working correctly, you can perform a quick test before resetting the valve.
The following steps will guide you through the IAC valve test:
Step 1
You want to hear clearly, so turn off the radio and the air conditioning.
Step 2
Next, follow these steps carefully to the car engine as it sits and idles.
Step 3
Make a note of the vehicle’s RPMs. A figure of no less than 600 and no more than 1000 should be considered.
Step 4
If the RPMs are low, there is likely to be a problem with the IAC valve or a vacuum leak in one of the vehicle’s systems.
If you find that there is an issue with the IAC valve after testing it, you can try resetting it. While resetting the valve is not a permanent fix, it may be enough to keep your IAC working until it can be repaired or replaced.
Can Your Idle Air Control Valve Make Your Car Not Start?
If It’s possible that your car isn’t starting because of a few things. Your idle air control valve may be malfunctioning. By closing the throttle, the idle air control valve regulates the air entering the engine.
Maintaining smooth idling is achieved by doing this. It can be challenging to start an engine if the valve is stuck open, allowing too much air to enter. You may also have trouble starting your car if your idle air control valve is dirty or clogged.
If you suspect your idle air control valve may be causing starting problems, have it checked out by a mechanic as soon as possible. It won’t take them long to diagnose the problem and get your car back on the road.
What are the Preventive Measures to Avoid Issues with Your Idle Air Control Valve?
The IAC valve is a component that requires preventive maintenance, just like most other vehicle components. IAC valves can be extended by following a few simple practices to avoid unplugging or damaging them. You should consider the following preventive measures:
1. Maintaining your vehicle regularly
Maintaining your vehicle regularly is crucial to its overall health. Various components, including the IAC valve, are checked, including oil changes and filter replacements.
2. Maintain a clean throttle body.
A dirty throttle body can negatively affect the performance of the IAC valve located within or near the throttle body. IAC valves can be kept functioning correctly by cleaning the throttle body regularly.
3. Gentleness is key
In terms of size and sensitivity, the IAC valve is relatively small. Ensure you don’t knock it or its electrical connector loose if you work near it.
4. Take note of the signs.
In addition to erratic idle speed, an unplugged or faulty IAC valve can cause the engine to stall. Observing and taking immediate action when you notice these symptoms can prevent further damage.
5. Inspection by a professional
If you are uncomfortable inspecting the IAC valve, having it checked by a professional can help catch potential problems early on.
The best thing you can do for your vehicle is to prevent problems from occurring in the first place. Maintaining your vehicle’s performance and longevity can be ensured by taking these preventive measures.
Cleaning and Replacing Idle Air Control Valve
1. When to Clean
A malfunction in the Idle Air Control (IAC) valve could cause your car’s idle to be rough or its RPM to fluctuate. IAC valves can become clogged with gunk over time, preventing them from functioning correctly. It is often possible to restore the functionality of the IAC valve by simply cleaning it.
For specific instructions on accessing and cleaning your IAC valve, consult your car’s owner’s manual. Before starting your vehicle, turn off the engine and let it cool. If there is any buildup on the valve, carefully remove it and use an appropriate cleaner, such as throttle body cleaner or mass air flow sensor cleaner. You can check if the issue has been resolved by reinstalling the valve and starting your car after cleaning it.
2. The right time to replace
Occasionally, cleaning the IAC valve may not be enough, especially if it is faulty or damaged. If this is the case, you should replace the IAC valve instead. Persistent stalling, difficulty starting the engine, and decreased fuel efficiency are all signs that the valve needs to be replaced.
When buying a new valve, ensure it is compatible with your car’s make and model. Replace the IAC valve according to your car’s owner’s manual instructions, or consult a professional mechanic if you’re unsure or uncomfortable. Start your vehicle to verify that the issues have been resolved and running smoothly again after installing the new IAC valve.
How To Clean Idle Air Control Valve?
The IAC valve may be dirty and needs to be cleaned and maintained to perform correctly.
IAC valves can accumulate carbon and debris during combustion if not cleaned regularly. The idle air control valve can become faulty when contamination builds up.
Removing any debris or contamination that has built up on the IAC valve can be helpful to get it working again. When you intend to clean your car’s idle air control valve, you should refer to the owner’s manual.
If the valve needs to be cleaned correctly, the owner’s manual should provide accurate instructions.
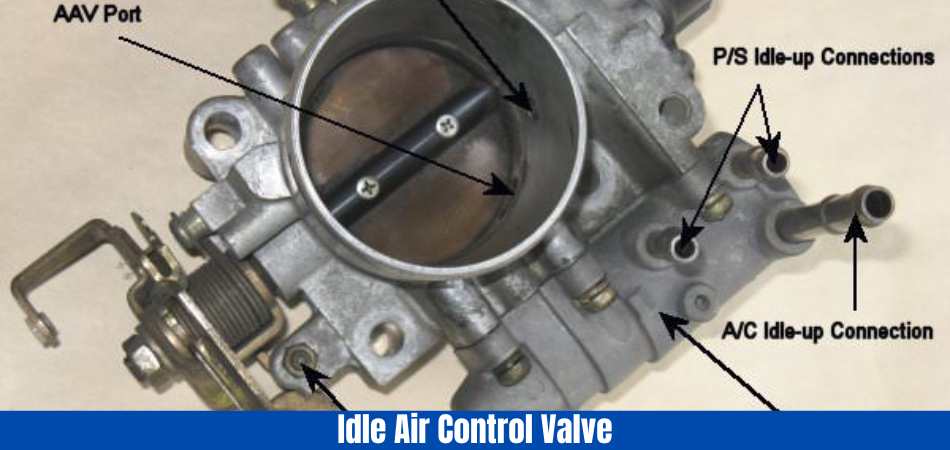
Here’s a step-by-step guide that should work with most vehicles when cleaning the IAC valve if you can’t find the relevant information.
Not all carbon cleaners are suitable for all vehicles and components, and you should only use them when you are sure they will not harm your vehicle.
Step 1-
Find the idle air control valve. Usually, the IAC is located near the engine’s air intake.
Step 2-
The next step is to remove the electric plug from the back of the IAC valve. The plug should be easy to use with a screwdriver.
Step 3-
To remove the valve, you must remove the screws and bolts.
Step 4–
You can access the downward-pointing valve once the bolts are removed.
Step 5–
Apply carburetor cleaner to the valve’s pointed end. You should avoid getting any of the cleaners into the valve’s housing.
Step 6–
You should continue spraying the valve until all the carbon and debris are removed.
Step 7–
Reassemble everything carefully, remembering to reconnect the wiring.
Step 8-
Once everything has been reinstalled correctly, you can start the car and listen to how it idles. The sound should now be improved if dirt was the problem.
The purpose of this guide is to explain how to clean the IAC valve by removing it. Several guides online explain how to clean the idle air control valve without removing it.
How To Bypass the Idle Air Control Valve?
The following instructions will guide you through bypassing the idle air control valve:
Connect the negative terminal to the battery and disconnect it.
When you open the hood, you can find the air cleaner housing on top of the engine. An idle air control valve is under the throttle body, just in front of the housing.
Removing three 10mm nuts from the housing cover is necessary to lift it off. Remove the throttle body from its mounting tabs and disconnect any electrical connectors underneath (two 10mm bolts) before removing it from the throttle body.
Three hoses are attached to the idle air control valve, including a small hose that goes into a large hose and a larger hose with a vacuum line.
Disconnect the three hoses connected to the valve and any vacuum lines (one or two) connected by loosening but not removing two 13mm nut screws on each end (one at each end).
Put the small hose into the large port of your new IACV and connect the three hoses to them. Ensure these clamps are tightened with a wrench or pliers, but do not overtighten! Next, attach any vacuum lines you need to attach here if you didn’t already; tighten those clamps firmly, but don’t overtighten them!
Attach your new IACV’s mounting bracket to the throttle body’s mounting tabs (two 10mm bolts). Be sure to position all three hoses properly around this bracket before tightening these two bolts down securely. If necessary, move things around a bit so they fit correctly. You can use your 10mm socket & ratchet/wrench or whatever combination tool you like to tighten these two bolts down securely (I use my Craftsman 1/4″ drive ratcheting wrench).
Conclusion: What Happens If You Unplug The Idle Air Control Valve
Now, you have got some clear ide that, What Happens If You Unplug The Idle Air Control Valve. Ultimately, the Idle Air Control (IAC) Valve keeps the engine’s idle speed constant. Leaving it unplugged can cause erratic idle speed, frequent stalling, difficulty starting the engine, reduced fuel efficiency, and potential long-term damage to the engine.
Your vehicle’s overall health and performance can be improved if you know the symptoms and how to address an unplugged or faulty IAC valve.
Read more of our articles here.
Learn more about this topic here.
FAQs
How does the idle air control valve (IACV) work?
An idle air control valve (IACV) controls how much air enters a vehicle’s engine when the throttle is closed, ensuring a stable idle speed.
What happens when I unplug the idle air control valve while the engine is running?
While the engine is running, unplugging the idle air control valve can disrupt the engine’s idle control system. There is a possibility that the engine will stall or idle at an erratic speed.
Can the engine be damaged by unplugging the idle air control valve?
Temporarily unplugging the idle air control valve shouldn’t damage the engine, but it can cause stalling rough idling, or poor performance.
What is the purpose of unplugging the idle air control valve?
The idle air control valve may be unplugged for diagnostic purposes. It should, however, be done with caution, and the consequences should be understood.
Can I drive with the idle air control valve unplugged?
Driving with the idle air control valve unplugged can result in poor engine performance, stalling, and other issues that could compromise safety.
What is the best way to test the operation of my idle air control valve?
You can find specific instructions on testing the idle air control valve in your vehicle’s service manual. Checking engine idle speed or using a multimeter are two standard methods.