Modern cars have an “Engine Off Power Delay” feature, which leaves some electrical parts running for about 10 minutes after the engine shuts off.
After the ignition is turned off, things like the headlights, internal lights, infotainment systems, and power windows work for a few minutes. The goal is to make getting out of the car more accessible and safer, especially at night.
It ensures enough light for people to leave their cars safely and reach their goals. It also lets electronic gadgets plugged into the car’s power source be used or charged quickly without draining the battery too much.
The power delay time is carefully managed so that the battery doesn’t drain too quickly but still has enough time for essential tasks. Power to these components is automatically shut off to conserve the vehicle’s battery once a set delay time has elapsed or when the driver opens a door.
Overall, Engine Off Power Delay is a valuable feature that improves ease and safety by keeping some electrical systems running even after the engine turns off. Keep reading if you’re interested in finding out more.
Engine Off Options
On the touchscreen, if you press Engine Off Options, the following settings will appear
Easy Entry/Exit Seat – If Equipped
Using this feature, the driver’s seat can be automatically positioned to enhance mobility while entering and exiting the vehicle. Select the “Easy Exit Seat” setting by pressing the “Easy Exit Seat” button on the touchscreen, until a checkmark appears beside it.
Engine Off Power Delay
Upon activation of this feature, power window switches, radio, Uconnect phone system (if equipped), DVD video system (if equipped), power sunroof (if equipped), and power outlets will remain active for up to 10 minutes after the ignition has been turned off. You can cancel this feature by opening either of the front doors. The Engine Off Power Delay status can be changed by pressing the “+” or “-” button. The options are “0 seconds,” “45 seconds,” “5 minutes,” and “10 minutes.”
Headlight Off Delay
The driver can select this feature so that the headlights remain on as they exit the vehicle for 0, 30, 60, or 90 seconds. On the touchscreen, press the + or – button to select the desired time interval for the Headlight Off Delay.
What Is Engine Off Power Delay?
After the engine is turned off, some vehicles have an Engine Off Power Delay feature that keeps the radio and other electrical components powered for a short period of time.
If you don’t want to run the engine while listening to music or using other vehicle features, this can be helpful.
After the engine has been turned off, the system detects and activates a timer that delays the power-off signal for a set period of time.
As a result of this delay, the radio and other components will continue to receive power from the battery, so they can continue to function normally.
How Engine Off Power Delay Works?
When the Engine Off Power Delay feature turns on, some of the car’s electrical parts will keep working for a while after the engine shuts off. These parts include the switches for the power windows, the radio, the Uconnect phone system (if it’s installed), the DVD video system (if it’s installed), the power sunroof (if it’s installed), and the power plugs.
After the ignition turns off, the Engine Off Power Delay function powers these components for 10 minutes. It’s worth noting that if you open a front door, the feature will be off immediately to prevent unnecessary power consumption.
The length of the Engine Off Power Delay can be changed if someone wants to make it fit their needs better. To do this, go to the settings menu and use the “+” and “-” buttons to move through the choices. Users can choose from “0 seconds,” “45 seconds,” “5 minutes,” or “10 minutes.” A longer delay time extends functioning when the engine is shut off, whereas a lower delay time conserves battery life.
Pros & Cons Of Engine Off Power Delay
The benefits and drawbacks of engine off-power delay are numerous. We’ll look into them and decide what fits them well.
Pros Of Engine Off Power Delay
Convenience
Engine Off Power Delay lets passengers use power windows, radios, and infotainment systems after turning off the engine. It’s a great time saver, especially when waiting in the car or running errands.
Safety
When leaving a car at night, the power delay function ensures the lights inside and out are bright enough for the occupants to see. It improves security by facilitating sight in low-light conditions, decreasing the likelihood of trips and falls.
Battery Preservation
The power delay technology was meticulously created to balance practicality and battery life extension. The battery life is prolonged, and unnecessary wear and tear are avoided by cutting power off to specific components after a set amount of time or when a door is opened.
Device Charging
Even when the engine is off, Engine Off Power Delay enables passengers to charge their phones and tablets. This function is helpful during brief stops or waiting periods in the car, keeping electronics operational.
Cons Of Engine Off Power Delay
Limited Timeframe
Depending on the car and preferences, the power delay can be anywhere from a few to 10 minutes. There may need to be more for some tasks or situations where electrical components must be used for a long time.
Battery Drainage
Even though the power delay function saves battery life, using electrical parts for a long time can still drain the battery. It’s essential to use the power delay feature carefully and only depend on it a little for long periods without running the engine.
Customization Limitations
Some cars allow you to change how long the power delay lasts, but others may have settings that can’t be changed. This lack of ways to change things may not meet the preferences or wants of each person.
System Dependencies
The power delay feature may or may not be available, depending on how the car is set up and what options are added. Not all cars have this feature, especially older ones or those with the most basic trims. It means that its benefits are only available on some car types.
Is There Any Advancement In Power Delay Technology?
Some advancements aim to enhance the functionality, efficiency, and customization options of the Engine Off Power Delay feature. Some significant progresses include:
Adjustable Delay Duration
Modern vehicles often allow users to adjust the duration of the power delay according to their preferences. Instead of having fixed time intervals, users can select a specific delay duration that suits their needs. This customization option provides greater flexibility and allows for a more tailored experience.
Smart Sensor Integration
Advanced power delay systems can utilize intelligent sensors to detect occupant presence and adjust the delay duration accordingly. For example, the power delay may be extended automatically if occupants remain inside the vehicle. On the other hand, if all occupants exit the vehicle, the power delay may be shortened or deactivated to conserve battery power.
Enhanced Energy Management
With the focus on efficient energy utilization, power delay technology has become more intelligent in managing power distribution. It can prioritize critical systems, such as lighting and safety features while reducing power to less essential components. This optimization helps prolong battery life and ensures that vital functions remain operational.
Integration with Vehicle Connectivity
As vehicles become increasingly connected, power delay systems can be integrated with vehicle connectivity platforms. This integration allows users to remotely control and customize the power delay settings through smartphone apps or vehicle infotainment systems. It provides a seamless and user-friendly experience for managing power delay preferences.
Integration with Start-Stop Systems
Start-stop systems, which automatically shut off the engine when the vehicle is stationary, can be integrated with power delay technology. This integration ensures a seamless transition between engine shutdown and power delay activation. It allows the power delay feature to engage as soon as the engine turns off, providing uninterrupted functionality to occupants.
Integration with Hybrid and Electric Vehicles
Power delay technology is also evolving to accommodate the unique characteristics of hybrid and electric vehicles. These developments provide electric vehicles with unique power management needs, enhancing power delay features for maximum efficiency and battery life.
Final Thought
The Engine Off Power Delay feature improves the driving experience by maintaining electrical system functionality while conserving battery power.
When enabled, the Engine Off Power Delay feature ensures that specific electrical components in the vehicle remain operational for up to 10 minutes after the ignition turns off.
It’s worth noting that activating this function requires closing both front doors.
Also, the power delay system strikes a good balance between usefulness and battery life. It prevents the battery from being drained to zero by turning off some components after a set delay or when a door is opened.
FAQs
Can the power delay feature be turned off?
In most cases, the power delay feature is a default setting that cannot be fully disabled. However, adjusting the duration to the shortest available option (e.g., “0 seconds”) effectively deactivates the feature, as the power to the components will be cut off immediately when the engine is turned off.
Does the power delay feature drain the vehicle’s battery?
The power delay features balance functionality with battery preservation. While it can consume some power during the delay period, it is typically programmed to automatically cut off power to the components after the specified duration to prevent excessive battery drainage.
Which electrical components remain active during the power delay?
The specific components that remain active can vary between vehicles, but common examples include power window switches, radios, infotainment systems, power outlets, and interior lighting. The availability of certain features may depend on the vehicle’s configuration.
What happens if I open the front door during the power delay?
Opening the either front door during the power delay period will automatically cancel the feature. The purpose of this is to conserve battery power when the vehicle is not in use.
When it comes to maintaining and repairing your vehicle, a few tasks can be as frustrating—like encountering a stuck socket lodged in the spark plug hole. Some owners get frustrated with how to remove socket stuck in spark plug hole.
Whether it’s due to corrosion, debris, or simply a tight fit, removing a stuck socket requires patience, precision, and the proper techniques to avoid damaging the spark plug or engine components.
You can remove a socket stuck in a spark plug hole by unscrewing the nut from the socket with a wrench. However, if the socket is rusted or stuck, you must find another way to remove the socket. If the hexagonal surfaces of the socket and nut still need to be stripped, try heating the socket with a propane torch to loosen it.
This comprehensive guide will take you through step-by-step instructions on safely and effectively removing a socket stuck in a spark plug hole.
So let’s dive in and equip ourselves with the knowledge and tools necessary to conquer this challenge!
What’s A Spark Plug?
One of the most important components of an engine’s ignition system is the spark plug. Fuel/air mixtures in cylinders are ignited by a spark created by this component.
Typical spark plugs have a metal shell, a center electrode, and a ground electrode. Metal shells are threaded and can be screwed into cylinder heads. The ground electrode is connected to the engine block, and the center electrode is connected to the ignition coil.
The center electrode receives voltage when the ignition system is activated. When this voltage is applied to the center electrode, it causes a spark to jump across the gap between it and the ground electrode. A spark ignites a mixture of fuel and air in the cylinders, causing the engine to start.
Spark plugs can have varying lives depending on the type of engine and how they are driven. Replacement of spark plugs is generally recommended every 10,000-15,000 miles. There are now many automakers who offer spark plugs with platinum or iridium tips that can last up to 50,000 miles.
Where Are Spark Plugs Located?
The spark plugs are located in the cylinder head of the engine. Covering the cylinders of the engine is the cylinder head. A spark plug ignites the mixture of fuel and air in the combustion chamber, which is where spark plugs are located.
There are various types of engines and vehicles with varying locations for spark plugs. Most engines have spark plugs located in the center of the combustion chamber. In some engines, however, spark plugs are offset, so they are centered off-center.
The majority of vehicles have four or six spark plugs. Depending on the type of engine and the type of vehicle, the number of spark plugs varies. In a V8 engine, for instance, there are eight cylinders, so there are eight spark plugs.
How to Remove Normal Spark Plug?
A spark plug socket and a ratchet are usually the best tools for removing a stuck spark plug. In order to fit over the spark plug electrode, the spark plug socket has a recess at the end.
Ratchets are tools meant for turning bolts or nuts that hold spark plugs in place. A stuck sparkplug can be removed by following these steps:
- The engine cover should be removed (if applicable).
- The ignition coil(s) must be disconnected from the spark plugs.
- From the top of the ignition coil(s), remove the wire boot.
- The spark plug socket should be threaded onto the spark plug.
- The spark plug socket should be attached to the ratchet.
- To loosen the spark plug, turn the ratchet counterclockwise.
- The spark plug should be removed from the engine.
- The spark plug can be loosen with a pipe wrench or a breaker bar if it is stubborn. The breaker bar has a longer handle than a ratchet, which makes it similar to a ratchet. Tools such as pipe wrenches are designed to grip round objects like pipes.
- It may be necessary to remove the engine head in some cases to access the spark plugs. Lift the head off if this is the case, then remove the bolts that hold it in place.
- Your repair manual will provide specific instructions on how to remove your engine’s head.
What Happens When A Spark Plug Fails?
There are several reasons why a spark plug may fail, including fouling, misfiring, and corrosion. In the event of a spark plug failure, the engine may perform poorly or will not run at all. Spark plugs that have failed can damage an engine in some cases. Fouling is one of the most common problems with spark plugs. The electrodes of the spark plug become fouled when deposits accumulate on them. When these deposits accumulate on the spark plug, they can reduce its performance and lead to poor engine performance.
Spark plugs that misfire are another common problem. A misfire occurs when the spark plug fails to produce a spark, resulting in rough engine operation or stalling.
Spark plugs are also susceptible to corrosion. Corrosion of the spark plug electrodes can cause the engine to run poorly or not at all if the electrodes become corroded.
Can A Bad Spark Plug Damage My Engine?
An engine can be damaged by a bad spark plug in some cases. An engine that misfires can run rough or stall. The engine can be damaged if this happens frequently enough.
It is also possible for corrosion to damage an engine. An engine that suffers from corrosion may not run at all or run poorly when the spark plug electrodes become corroded.
What Reason Behind The Socket Stuck In Spark Plug Hole?
It is essential to determine why a socket is stuck in a spark plug hole before attempting to remove it. Finding the root of the problem is the first step in devising a solution.
Here are some of the most common reasons a socket gets stuck:
Corrosion
Corrosion or rust can form in the spark plug hole due to prolonged exposure to moisture, dirt, and engine fluids. The socket may become permanently stuck to the metal surfaces as a result.
Pileup of Garbage
Carbon deposits and dirt often collect around the spark plug and socket, contributing to the problem. Particles like these might cement themselves to the spark plug and socket, making replacement difficult.
Over-tightening
Overtightening or using too much force during installation can sometimes cause the socket to become jammed. The threads in the spark plug hole may get deformed, making it difficult to remove the socket.
Temperature Growth
Metal engine parts might swell due to the extreme heat produced during operation. A tight fit and a stuck socket could result from not giving the spark plug and assembly enough time to cool down.
Remember that different approaches require additional resources and skill sets; proceed cautiously and pick the strategy that best fits your needs.
What Tools Do I Need To Remove The Socket Stuck In the Spark Plug Hole?
You will need specific tools to remove a socket stuck in a spark plug hole. Here are the essential tools you should gather before attempting the removal:
Socket Set
A socket set is crucial for working with spark plugs. Ensure you have a socket that matches the size of the spark plug you are dealing with. The most commonly used spark plug sockets are 5/8-inch and 13/16-inch.
Ratchet or Socket Wrench
A ratchet or socket wrench is necessary to provide the torque required to loosen and remove the stuck socket. Make sure it is compatible with the socket size you are using.
Penetrating Oil
A high-quality penetrating oil, such as WD-40 or PB Blaster, can help loosen rust or corrosion around the socket and spark plug hole. It’ll facilitate easier removal. Have a can of penetrating oil ready for use.
Pliers or Vise-Grip
Pliers or vise-grip locking pliers can help you better grip the socket or the spark plug, if necessary. These can assist in turning and extracting the stuck socket.
Rubber Mallet or Hammer
A rubber mallet or hammer can aid in gently tapping or applying light force to dislodge the stuck socket. Be cautious not to damage surrounding components or the spark plug itself.
Heat Source
In some cases, applying heat to the spark plug area can help expand the metal and loosen a stuck socket. A heat gun or propane torch, with appropriate safety precautions, can be employed for this purpose.
Spark Plug Gap Tool
While not directly involved in socket removal, a spark plug gap tool is essential for checking and adjusting the gap on the spark plug after removal or replacement.
Ensure these tools are readily available before removing a stuck socket from a spark plug hole.
How To Remove Socket Stuck In Spark Plug Hole? Step-by-step explained!
How To remove socket stuck in spark plug hole? Well there are many ways. Let’s look at several steps to get rid of a socket stuck in a spark plug hole.
The Penetrating Oil Technique
The Penetrating Oil Technique is an effective method to remove a socket stuck in a spark plug hole. Start by spraying a generous amount of penetrating oil around the socket and allow it to penetrate for a recommended duration.
Attach a socket to a ratchet or socket wrench, applying steady anti-clockwise pressure to loosen the socket. If it remains stuck, use pliers for a better grip and apply rotational force.
Gently tap the handle with a rubber mallet if needed. Repeat the process, applying more penetrating oil until the socket becomes free. Remember to exercise patience and seek professional help to prevent further damage.
The Tap and Hammer Method
The Tap and Hammer Method is another effective method for removing a socket stuck in a spark plug hole. Begin by firmly tapping the socket with a hammer to create vibrations that help loosen the socket.
Use a rubber mallet or block of wood to avoid damaging the socket. Apply rotational force with a ratchet or socket wrench while tapping to dislodge the socket. Be cautious not to exert excessive pressure or strike too hard to prevent damage.
The Gripping Tool Approach
The Gripping Tool Approach works by employing pliers or vise-grip locking pliers. Once the engine has cooled down completely, gather the necessary tools, including pliers or vise-grip locking pliers, a socket set, and a ratchet or socket wrench.
Assess the stuck socket to determine if there is sufficient space to securely grip it with the pliers or vise-grip locking pliers. Ensure the pliers are in good working condition, providing a strong grip.
Insert the pliers onto the stuck socket and apply rotational force in an anti-clockwise direction to loosen it. Exercise caution to avoid using excessive force that may damage the socket or surrounding components.
The Heat and Cold Expansion Method
If all else fails, you can use a propane torch to heat the bolt and loosen it. If the bolt remains resistant despite using the long wrench, you should employ heat to loosen it.
Fire up a propane torch and position the flame half an inch (13 mm) from the bolt. For around 15 seconds, maintain flame contact with the bolt. The socket ought presumably to enlarge due to the propane torch’s heat.
Use a long wrench to loosen the nut. To use a box-end wrench, jam its end into a hole in a solid metal bar. Grab the nut with the big pliers, then hook the wrench onto the socket.
Keep the nut in place and turn the wrench’s end. Try giving the socket a few good, hard pulls. Repeat heating the bolt with the propane torch for 10 minutes, or try another approach.
What Safety Precautions Should I Consider Removing The Socket Stuck In the Spark Plug Hole?
When removing a socket stuck in a spark plug hole, it’s essential to prioritize safety. Here are some necessary safety precautions to consider:
One of the significant safety precautions is wearing eye protection and gloves.
Ensure the engine is completely cooled down and work on a stable surface with the parking brake engaged.
Take caution when applying penetrating oil; use it in a well-ventilated area.
Apply force gradually and with control, avoiding excessive or sudden force that may cause damage.
If using a heat source, follow instructions carefully and be mindful of flammable materials.
& finally, consult the vehicle manual or seek professional assistance if you need clarification on what you’re doing. By following these safety precautions, you can minimize the risk of injuries and safely perform the socket removal process.
How To Avoid Stuck Spark Plugs?
Spark plugs can become stuck for several reasons. Here are some things you can do to avoid this. The first thing you need to do is make sure you’re using the correct type and size of spark plugs for your engine. It is possible to suffer seizures if you use the wrong type of plug.
In addition, you should check the gap between the electrodes and make sure it is set correctly. It is possible for an ignition problem to occur if the gap is too large or too small.
To conclude, make sure you use the correct fuel grade and maintain your engine properly. Clogged spark plugs can result from using low-quality or dirty fuel.
How To Solve Spark Plug Corrosion?
It can be difficult to solve the problem of spark plug corrosion. Generally, corrosion can be found deep inside the spark plug hole, which is the main reason for this. It is also often difficult to remove thick corrosion.
There are, however, a few ways that can be used to try and remove the corrosion. Using a wire brush is the first step. The corrosion on the spark plug surface can often be removed through this method.
However, the corrosion in the hole may not be removed by this method. In addition to using a drill, you can also use a saw. In this way, corrosion can be removed from the hole itself. In some cases, however, this may not be possible.
Last but not least, a chemical cleaner can also be used. Corrosion can often be effectively removed using this method. It may, however, not be available everywhere and can be expensive.
In order to find out if one of these methods will work for your spark plug corrosion, try it out and see if it does.
How To Properly Clean Spark Plugs?
To ensure that a spark plug works properly, it’s important to clean it properly. It’s a relatively simple task, but it’s important to follow the directions carefully.
The following steps should be followed when cleaning spark plugs:
- Starting the engine requires removing the spark plugs. It is possible to accomplish this by removing the top caps of the plugs after loosening the wires and plug wires. Once the plugs are removed from the engine, use a wrench to secure them.
- Following that, the plugs need to be cleaned on the exterior. Wire brushes and rags can be used for this task. To ensure that the plugs are clean, be sure to remove all of the dirt and grease from their surfaces.
- To clean the plugs’ center holes, follow the third step. You can do this by drilling or using a wire brush. Make sure that all corrosion is removed from the hole.
- In the fourth step, the electrodes of the plugs are cleaned. Alternatively, you can use a wire brush or a rag to do this. Make sure the electrodes are free of carbon deposits. The cleaning kit should be used with WD-40.
- Lastly, the spark plugs must be reattached to the engine. In order to do this, reverse the steps outlined above.
- By following these steps, you should have properly cleaned your spark plugs.
Final Thought
Now you might get an idea of how To remove socket stuck in spark plug hole. If everything else fails, use a reciprocating saw to remove the screw. If the screw extractor doesn’t work, or if the screw is too rusty, you’ll have to use some other method, such as cutting the bolt free.
To free a stuck socket, you can use a hacksaw blade in a reciprocating saw by pressing the blade’s edge on the socket’s shaft. Saw through the bolt and the shaft with the power on.
Avoid cutting your fingers or palms to free a trapped socket.
A socket jammed in a spark plug hole can be challenging to remove, but with the correct strategy and safety measures, it is possible to do it. If you run into problems or need more experience, it’s best to refer to the vehicle’s manual or get a little help.
FAQs
What size of hole do you need to take out a spark plug?
Spark plug nuts and sockets are typically 15/16″, 13/16″, and 5/8″. Most automobile parts, hardware, and tool retailers sell these tools individually or in sets.
Which tool removes spark plugs best?
A regular ratchet wrench is needed to remove the spark plug regardless of the socket. You may also need socket extensions to get those hard-to-reach places on some devices.
Can a standard socket remove spark plugs?
A standard socket can replace a spark plug. You’ll need the proper socket size with swivel handles to change spark plugs without breaking wires. Also, try a universal joint socket.
Do all spark plugs measure the same?
Not all spark plugs are universal, so buy them in sets. Spark plugs have varying diameters, spacing, and metals.
What are the three spark plug socket sizes?
Three spark plug sockets in standard sizes—5/8″, 3/4″, and 13/16″—are included in the Hyper Tough 3-Piece Spark Plug Sockets (Figure 1202).
The company’s full name was Svenska Aeroplan Aktiebolaget, also known as Saab. Saab a Swedish luxury car brand known for its sleek design and innovative technology. However, even the most advanced vehicles can encounter a common problem – losing your key. So how to start a Saab without the key?
The first step is to check if your model has a physical ignition switch or a push-button ignition system. The best thing you can do is not lose the key (key fob) because the car won’t start without it. This is because the key has a chip that does the recognizing. Important information regarding Saab vehicles’ immobilizer keys and remote controllers includes always keeping an extra key on hand.
Even though a Saab key is minor, the cost of a new one can be very high. Only spend some of your monthly money on a car key just because you need one. HMS Locksmith can save you up to 80% off the price of a key fob for your Saab at the store.
Read further to learn about how to start a Saab without the key?
What are the Different Types of Saab Car Keys?
Car keys are becoming more sophisticated as cars become more sophisticated. In addition to making car keys more convenient to use, they also became more secure, making it harder for thieves to steal cars.
Ordinary key
In older cars, traditional keys are similar to padlock keys, door keys, and are used for padlocks. They fit perfectly into the car door, boot lid, and fuel tank cap because of their special, unique design.
It is easy for any locksmith to copy the traditional key, therefore, it offers the least amount of security.
Remote controlled ordinary key
The built-in remote control on this type of key allows you to lock and unlock the door from a distance. An alarm system is also attached to the key, which helps to locate the vehicle in a crowded parking lot and deter thieves from stealing it.
Chip key
The key contains a radio frequency chip that transmits a signal to the car’s receiver. Immobilizers prevent the car from starting unless the correct signal is sent to the receiver.
Smart key
The advantage of keyless starting is available with cars that feature smart keys. A proximity sensor in the receiver in the car unlocks the door automatically when the key is brought near it, and the ignition is turned on by pressing a button.
With the smart key, you can program a variety of options. As well as switching on and off things like air conditioning and stereo systems, they can also adjust the temperature.
Digital Key
An app controls the door locks, ignition, and other features of cars equipped with a digital key. The mobile phone is used to control all the car’s features, making it the most secure type of key.
What is an Immobilizer in Saab Car?
Saab cars are renowned for their advanced security features, and one such feature that plays a vital role in preventing theft is the immobilizer system. It provides security beyond traditional keys and keyless entry systems by acting as a robust anti-theft measure.
Immobilizing the engine is a powerful deterrent to unauthorized individuals attempting to start and operate the vehicle. This advanced system employs transponder technology, utilizing a unique electronic chip embedded in the key.
How does Immobilizer work?
The immobilizer device reads the identification code from the transponder when the key is put into the ignition. The car’s immobilizer control unit (ICU) checks the code against a database of known good entries. If the codes are compatible, a signal is sent to the ECU (engine control unit) to begin the ignition process.
Saab’s immobilizer technology improves safety by avoiding theft techniques, including hot-wiring and ignition bypass.
It fits in perfectly with the rest of the car’s electronics. It’s not easy to disable or get around it, so it deters would-be burglars. Proper key programming and maintenance are crucial for optimal performance.
If problems arise, contact a professional mechanic or a Saab dealership for official help. The immobilizer system adds another layer of safety to Saab automobiles, giving their owners more peace of mind and safeguarding their investments.
What’s The Key Mechanism In The Older Version Of Saab Cars?
The good news (or bad news) for those who own Saab vehicles made before 1994 is that they do not employ an alarm system as an immobilizer based on a coded key. The older version’s key mechanisms have both upsides and downsides.
The upside is that spare replacement keys are easier to obtain; the downside is that this may make car theft more likely.
While some Saab 900 and 9000 vehicles came equipped with an anti-theft system named “Saab Guard,” it was an early, relatively “primitive” device that did not use a remote. Vehicles manufactured by Saab since 1995 have included an immobilizer alarm system and a keyless ignition remote control. This add-on was about the car using the Tech2 diagnostic tool. The classic key doesn’t have any protection features.
What Kind Of Key Used In Saab 9-3/2003-2011 Model?
However, the Saab 9-3 is by far the most popular and widely available Saab vehicle.
The model’s keys are our next topic of discussion. More cutting-edge technologies were added to the security system only with the 2003 debut of the Saab 9-3.
Unlike all primary keys, the new key fob did not require a typical metal key to access the vehicle or start the engine.
Convertible models now feature “Hello” lights and panic alarms that can be activated remotely by opening the windows or the roof. This feature depends on the model and level of equipment.
Most drivers of these Saabs have two key fobs; they are programmed using a specialized Tech2 device, and both must work appropriately for the vehicle to start.
How To Start a Saab Without The Key?
Losing both keys or encountering a situation where the car’s ignition switch can recognize neither key presents a significant challenge for Saab 3-9 owners. So how to start a Saab without the key?
In such cases, the only solution is to replace the CIM (Column Integration Module) module and acquire two new Genuine Saab keys.
This scenario emphasizes the critical role of the keys in the Saab 3-9 model, as they are essential for proper communication between the ignition switch and the car’s systems.
When faced with a complete critical loss or a failure to read the keys, replacing the CIM module and obtaining new keys becomes necessary to regain access and functionality. Reaching out to authorized Saab service providers or dealerships is crucial to facilitate this critical replacement process. It ensures compatibility and optimal performance for the Saab 3-9 model.
Other methods may include:
1.Screwdriver and hammer / drill
One of the easiest ways to start a car without a key is to use this technique. The ignition switch, however, must not be damaged during this process.
In this case, the ignition switch will be permanently disabled if you use a screwdriver and hammer to damage the lock pins.
You will need to drill almost two-thirds of an inch into the inner flaps of the ignition switch if you are using a drill.
The drill can now be removed, and a screwdriver can be inserted into the drilled hole. Now you can try to start the car.
It is even possible to start the car without a screwdriver by using a flat piece of metal. A screwdriver and hammer are excellent substitutes for a drill if you do not have one or do not want to use one. It only takes a gentle hammering to get the screwdriver through the ignition switch.
The locking pins of the ignition switch will, however, be damaged by this method. Check out these simple tricks and devices to prevent car theft.
2. Hot wiring the ignition
Older vehicles benefit from this method, called hotwiring. Bypassing the battery and ignition switch is the main feature of hotwiring.
It is first necessary to remove the plastic covering on the steering column. It typically has two small screws that you must undo in order to access the wiring terminals.
This method involves directly handling live wires, so you should wear protective gloves or insulating gloves. Batteries have red wires, which are most commonly found. In most cases, the ignition wires are brown and yellow in color.
The battery wires should be slit in the insulation. Follow the same procedure for the ignition wires. Battery wires should be connected to ignition power wires by twisting them together. The car should start as soon as you connect it.
3. Red Coil wire method
It will work for you if you believe that you possess the skills of a professional and have the knowledge of a mechanic.
Look for the red coil wire under the hood of your car. The positive terminal of the battery should be connected to the red coil wire with a jumper starter cable. It is actually the positive terminal of the ignition coil that is red.
Under the steering wheel, locate the starter solenoid by opening the plastic cover. After the battery positive terminal has been connected to the starter solenoid, the starter should be turned on. A screwdriver can be used to connect the positive terminal of the solenoid to the ignition switch wire.
From now on, you can directly connect the battery to the ignition switch. Easy starting is possible.
Situations When You May Need To Start A Car Without The Key
There may be times when starting the car without a key is necessary. This process is usually made more difficult by car manufacturers due to security concerns. Your car is just too valuable to be robbed by a thief.
One can, however, start the car without a key by using a variety of methods. Several situations can be found here:
1.The car key is lost
It is most common for a vehicle owner to try to start a car without the key when the key has been lost or misplaced. When you are away from home and do not have a spare key, it can be very inconvenient to lose your key. It is possible to use the methods listed above in this situation.
2. Faulty ignition switch
The ignition switch is the place where the majority of the electronics and wiring in the car are located. In order to start the engine, the ignition switch is activated and power flows from the battery to the starter motor.
ECU and ignition coil are also powered by the ignition switch. It is possible to start your car by hot wiring or by using the red coil wire method if the ignition switch is broken.
How Does The CIM and Key Fob Work In Saab Cars?
To unlock the steering column, turn the key in the ignition. It will activate the Column Integration Module (CIM). After passing the LOCK, the key can be turned OFF, ON, and ST. When in the LOCK position, the key is physically prevented from being removed.
While you’re at it, know that as soon as you insert your key, your ignition switch module (ISM) kicks into gear by constantly sending updates about its position to the CIM. That information gets passed along to both P-bus and I-bus systems.
Ultimately, the engine control module (ECM) gets activated when you turn your key to the ST position; at that point, it takes over responsibility for starting your vehicle by activating its starter motor.
Ignition Switch Model Tasks and Key Mechanism In Saab Cars
The ignition switch in Saab vehicles, known as the ISM (Ignition Switch Module), plays a crucial role in the overall functioning of the vehicle’s key mechanism and security systems. To ensure seamless operation, it works with other components, such as the CIM (Column Integration Module) and the SCL (Steering Column Lock).
Here’s an overview of the unique uses and functions of the ignition switch:
Transponder Code Communication
The ignition switch communicates the transponder code, unique to each key, to the CIM through a communication cable. It allows the CIM to identify and authenticate the key for starting the vehicle.
Key Position Communication
The ignition switch also sends information about the key position to the CIM through the communication cable. This information is then forwarded to the relevant buses within the vehicle’s systems, ensuring proper coordination and control.
Battery Status Monitoring
Through the communication cable, the ignition switch sends the status of the remote control battery to the CIM. It enables the CIM to display a battery warning on the SID (Saab Information Display) if the battery needs attention or replacement.
Security Measures
The ignition switch prevents the key from turning from LOCK to OFF until the SCL is unlocked and the transponder code has been approved. Similarly, it prevents the key from turning OFF to LOCK until the vehicle has stopped and the gear selector lever has been shifted to the P (Park) position.
Steering Column Lock Operation
Before locking the steering column, the ignition switch releases the SCL locking pin via a direct lead. This command is received from the CIM through the communication cable. Additionally, the ignition switch receives information from the SCL through a direct lead, confirming the unlocked and released position of the locking pin, which is then communicated back to the CIM.
Illumination of Key Positions
The ignition switch is responsible for illuminating the key positions and providing visual feedback to the driver about the current state of the ignition.
Power Distribution
Direct leads run from the ignition switch to various units within the vehicle in certain key positions. It ensures that the necessary components receive the required power for proper operation.
Saab Car Key Replacement Services
When was the last time you wondered “How can I get a replacement car key? ” Probably, rarely or only when you need this key. Knowing what to do in case of a Saab key replacement won’t hurt, since you never know when you might need one. Getting a new key can be done in two ways, each with its own advantages, disadvantages, and features, so you can select the one that works best for you.
The first thing you can do is go to your local car dealership. Getting a spare key this way is sure, but not very convenient if you need assistance immediately. The cost of this method is also higher. In contrast, the second solution is more of a one-size-fits-all approach. Whenever you call a locksmith, you can expect immediate assistance. With the help of mobile service vans, a car key locksmith will arrive quickly so that the key can be provided to you as soon as possible.
Whether you need a Saab key fob replacement or a Saab battery replacement, a skilled technician will handle the job quickly. Additionally, you will save a lot of time and money by choosing this method.
How To Get A Car Key Replacement?
Provide the following information to Sure Lock & Key, car key replacement service assistants:
- Your car’s model, year, and make
- Address and zip code of your exact location
- Your car’s VIN number
- A transponder key or a key fob will suffice.
- Provide proof of car ownership when requested
How Much Is The Replacement Cost Of Saab Key?
Saab vehicle uses a more advanced key fob or transponder key; the cost may be higher due to the need for programming or synchronization with the vehicle’s immobilizer system. A basic Saab key replacement typically ranges from $100 to $300.
Only spend some of your monthly money on a car key just because you require one. HMS Locksmith can save you up to 80% off the price of a key fob for your Saab at the store.
Final Thought
Now you might get an idea of how to start a Saab without the key. Attempting to start a Saab car without a key can be complex and challenging. Saab vehicles have advanced security systems, including immobilizers and coded keys, to prevent unauthorized access and theft.
These security measures make it extremely difficult to start a Saab car without a key. It is strongly advised not to engage in any unauthorized attempts to start the vehicle without a key, which may lead to damage or malfunctions.
Suppose you find yourself in a situation where you have lost or misplaced your key. In that case, the best action is to contact a professional automotive locksmith or authorized Saab dealership. That is how to start a Saab without the key.
FAQs
Does Saab require a key fob to start?
Don’t lose the key (key-fob), because the car won’t start without it. This is because the key has a chip that does the recognizing. Important information regarding immobilizer keys and remote controllers for Saab vehicles includes: Keep an extra key on hand at all times.
Why won’t my Saab key turn?
A Saab 9-5 key usually won’t turn because the steering column or lock is stuck, the ignition switch is broken, or the ignition key is broken. Look through our list of RepairPal Certified shops to find one near you where you can talk to a technician about your problem.
How do you start a Saab?
The key goes into the ISM, which stands for “Ignition Switch Module.” The CIM, which stands for “Column Integration Module,” is inside the steering wheel.
Can you change the Saab key?
Even though a Saab key is minor, getting a new one can be very expensive. Don’t spend all your monthly money on a car key just because you need one. HMS Locksmith can save you up to 80% off the price of a key fob for your Saab that is programmed at the store.
Why are the keys for a Saab in the middle?
It also had a rounded windshield like Saab’s fighter planes, and the key portal was on the center desk so the key wouldn’t fly at you in an accident.
One of the trickiest tasks you’ll have is removing tint from a rear window. Removal is simple and inexpensive even though the tint on your car or home windows is overly dark, damaged, discolored, or bubbling.
Now the question is, how can you fix it, and should you do it yourself? Removing the tint from the windows will likely result in a sticky mess requiring a lot of elbow grease.
Despite putting in a lot of sweat equity, you might need help to fix the back defroster.
There’s no need to waste time washing off the color and razoring away the glue. The most convenient and least destructive approach is to use a steamer. Also, it is possible to spray the windows with ammonia, wrap them in trash bags, and then peel off the tint after the sun and ammonia dissolve the glue.
Let’s get into the process of removing tint from a rear window.
What is Window Tinting?
Window tinting involves applying a thin film to a window’s glass surface. It makes it easier to control the temperature inside a building by reducing the amount of sunlight passing through the glass.
Additionally, tinted windows can reduce glare and improve privacy.
There are a variety of window tinting films available on the market, each with its own unique properties. UV rays are absorbed by some films, while others are designed to reflect them.
The right window film can provide many benefits, but it is important to choose one that meets your needs. Choosing a suitable film and ensuring it is correctly installed can be difficult without the help of a professional installer.
But suppose you need to remove window tints but are having difficulty. You can use these tricks to make your life easier!
Does Rear Defrost Mess Up Tint?
The tint on your car windows can definitely be affected by rear defrost. If the tint is not properly installed, the defrost can cause it to bubble and crack. You should take your car to a professional if you notice any signs of bubbling or cracking. For further protection, make sure the rear defrost is turned off once it has completed its job.
What are the Reasons to Remove Tint?
Tinted car windows pose three challenges, each with its own reasons for wanting to get rid of them.
Reasons related to aesthetics
Tinted windows aren’t always desirable, even if they’re in excellent condition. Due to the fact that the adhesive is likely at its strongest, this can be the most frustrating situation. When it comes to undamaged tint film, however, heat methods are effective. In addition to looking terrible, bubbled film cannot be fixed. When it bubbles, the first instinct is to peel it off, but that can leave a less attractive mess of glue and tint chunks. Positively, the bubbles are caused by a failing adhesive, making them easier to remove.
Discoloration
If your window tint turns a purplish color over time, you might want to consider replacing it. With the tint’s UV blocking ability diminishing as it turns purple, the issue goes beyond aesthetics.
This color change is caused by non-metallic dyes breaking down and cannot be repaired. The solution to this problem is again to use heat.
Removing Tint From a Rear Window: What are the Tools and Equipment Required?
Make sure you have the right tools available before you start removing window tinting from your car. This removal process will require the following tools:
- Heat gun
- Razor blade
- Scraper
- Spray bottle
- Cleaning solution
- Face mask
- Safety glasses
- Safety gloves
Before you begin the project, gather these supplies and make sure they are working properly so there aren’t any issues.
Is Removing Window Tint From Your Car Difficult?
Window tint can usually be removed from your car without too much difficulty. In order to ensure a seamless job, you should get the right tools and materials.
Besides the quality of the tint, the quality of its installation, and the length of time it has been on the vehicle, other factors determine how difficult it will be to remove the window tint.
Peeling off the tint in one piece is a fairly simple process if you can start to remove it right away. It can quickly turn from an easy job to a nightmare if the window tint peels or rips off.
Removing Tint From a Rear Window: Steps Explained!
Removing tint from a rear window is not an easy task. To get started, you can follow these two steps:
- Using The Steamer
- Using The Ammonia
1. Removing Tint From a Rear Window Using The Steamer
Preparing the Rear Window
Get in your car and open the door to peer through the tinted glass. Open your window just a bit until you can see the top edge of the shade. Since steaming generates moisture and heat, parking the car in a well-ventilated place or outside is essential.
Start with the front windows because they are more accessible, and if your back window can get frosty, do that one last. By practicing on a practice panel, you can perfect your method for removing the tint without disturbing the defrost lines.
Preparing the steamer and steaming the windows on both sides
Prepare the steamer as the manufacturer directs, typically filling it with water and letting it heat up. Adjust the steamer’s temperature to be suitable for use in automobiles.
For this task, you can use any portable garment or upholstery steamer. Start by steaming the window’s exterior, keeping the steamer a safe distance away (around 2.5 to 5.1 cm). Then, steam the inside of the glass to remove the dirt. Use lengthy, sweeping motions from the top down to heat the glass uniformly.
You can dissolve the glue by steaming the outside of the window.
Applying Steam to the Tint
Hold the steamer about 2–3 inches away from the tinted area of the rear window. Start steaming the tint vertically, working from the top of the window downwards. Apply steam to one section at a time, focusing on small areas to avoid excessive moisture buildup.
Peeling the Tint
After steaming for about 30–60 seconds, use a plastic scraper or credit card to lift the corner of the tint film gently.
Be cautious not to scratch or damage the window. Once a corner is lifted, slowly and carefully peel the tint away from the window. Apply more steam and peel if the tint doesn’t come off quickly.
Removing Adhesive Residue
After removing the tint film, adhesive residue might be left on the window. Scrape off as much residue as possible with a plastic scraper or credit card. Be gentle to avoid scratching the glass.
Alternatively, you can use a razor blade at a low angle to carefully remove stubborn residue. Be careful not to damage the glass.
Cleaning the Rear Window
Once you have removed the tint and adhesive residue, clean the rear window thoroughly using a glass cleaner and a microfiber cloth. This solution is best for removing all leftover residue on Windows.
2. Removing Tint From a Rear Window Using The Ammonia
Mask your vehicle’s door panels or window frame.
Tape tarps or plastic sheeting over the inner door panels or window frames to protect them from ammonia. Avoid using newspaper or anything else that might absorb the ammonia since it would eventually be rendered useless.
Ensure you have adequate protection for the controls and speakers in your car.
Cut black trash bags to fit windows.
Cover one of the windows with a black waste bag and sketch its shape with a metallic marker. You must cut it out and separate the bag into two pieces to use it inside and outside the window. Iterate this process for all the available windows.
Soap the windows and place rubbish bags on top.
Create a solution by combining dish soap and water in a spray bottle. It’s excellent for removing tough stains and grime. Give the bottle a good shake, then spray each window’s exterior. After that, cover the glass fully with a waste bag and set it aside.
The soapy water makes attaching the trash bag to the glass easier.
If you can’t get to the exterior of your windows, you can skip this.
Spray ammonia and cover windows with rubbish bags.
Put ammonia into a second spray bottle. Saturate the inside of a window with water, and then push a trash bag against it to seal it. The liquid’s weight should be enough to keep the plastic in place, but you may always apply masking tape to be safe. Keep doing this for each window.
Instead of ammonia, you can clean the inside of your windows with water, soap, or baby shampoo if you don’t have any on hand.
Soak in the ammonia for at least an hour.
Allow the ammonia to work its magic on the tint adhesive while the glass is still warm from the sun. Do this in the summer on a hot, sunny day.
Take off the plastic wrap and take off the tint.
To grab the window, please take off the trash bags and use a razor to peel away one of the corners of the tint. Carefully start at one side of the window and work to the other, pulling the tint away from the glass.
Take your time and avoid tearing the tint! If it does, push the razor beneath the tint’s edge to lift and remove it.
Remove window glue using ammonia and steel wool.
Once you’ve removed all the tint, respray the window with ammonia. Use fine steel wool to remove any remaining glue. Then, use the newspaper to remove the dirt and liquid.
If the adhesive doesn’t come off quickly, try to scrape it off with a razor, but be careful not to harm the window.
How To Remove Very Old Window Tint?
When removing very old window tint, the adhesive can be tricky to remove because it has become brittle over time. Using a combination of products will help you remove the tint safely. To remove as much tint as possible, first clean the glass with a glass cleaner and then use a plastic razor blade. The remaining adhesive and tint should then be broken down using a window tint dissolver. The tint and adhesive residue can then be completely removed using a microfiber cloth. You should be left with clean, fresh windows if this is done properly.
In the creation of window films, there are some that are flawless and some that are not, and some will go well before others. The best way to save money or avoid having to replace the tint for several years is to have a professional install it for you. A window tint must be removed both from the film and from the adhesive. When window film is removed, the adhesive is broken down with heat.
Window tint can be removed in several ways, and it is often thought to be the most convenient. The window must be thoroughly cleaned after the film and adhesive have been removed. After a window has been scratched, it must be replaced. Your home or business can benefit from Window Film Depot’s window tint removal services. It is strongly recommended that you hire a professional to install window tint due to its
importance to its longevity.
Are there Any Other Solutions?
Window tint can be tedious to remove from a car window, but you don’t have to. A fabric steamer or ammonia can be used to remove the tint from window film, or you can spray ammonia or 70% or 91% isopropyl alcohol directly on the film.
The solution can be applied directly to the tint using ammonia or isopropyl alcohol solutions. The chemical seeps in and loosens the adhesive, so the tint remains untinted. It is important to wear proper personal protective equipment (PPE) when handling ammonia, since it is toxic.
It is also possible to steam one corner of the tint. This technique should allow you to peel off the film. In spite of the fact that the film should be completely removed, a sticky layer of adhesive will remain on the surface. Use a razor to scrape away the adhesive layer if you’re having trouble removing it.
Regardless of which method you choose, removing tint from a window can be challenging. When you are patient and follow the proper precautions, you can effectively remove the tint from your car’s windows.
How to Remove Window Tint Glue Residue?
Once the tint itself is gone, you’ll need to know how to remove window tint glue. Unfortunately, this doesn’t always happen as efficiently as one would hope. All of these methods are effective in removing any remaining gunk.
Alcohol
A bottle of 90 percent isopropyl alcohol makes quick work of leftover glue, and it’s one of the most affordable and effective solvents on the market.
For smaller spots, use a rag and spray bottle, while for larger surfaces, use a spray bottle and rag. As you work, make sure the area is well ventilated and avoid breathing in the fumes.
In addition to removing oily residue from the inside of a windshield, you can also use isopropyl alcohol.
Goo Gone
Removing leftover tint glue is easy with this popular glue remover. You won’t be able to remove the tint itself with this method.
Nail Polish Remover
A microfiber cloth, nail polish remover, and elbow grease are all you need to remove glue. Even though this method requires a little extra effort, the results will be worth it.
Scrubbing
To remove glue residue, use hot, soapy water (we recommend Dawn) and a car ice scraper on a warm day. In addition to being a safe method, it also gives you an excuse to clean the interior of your car.
How To Remove Rear Window Defroster?
Using the right tools and following the correct steps can make removing a rear window defroster easy. The defroster needs to be unplugged or flipped off by first turning off the power. The next step is to carefully remove the defroster strips from the glass using a putty knife or screwdriver. Make sure you take your time when removing the adhesive, since it can be very sticky. To get rid of any residue left behind after removing the strips, use a glass cleaner to clean the glass. The defroster can then be powered back up after the strips have been replaced. In the end, you should have a rear window defroster that can be removed and replaced after following these steps.
How to Replace Your Film?
Old window tint is typically removed so that a newer, higher-quality film can be installed. A quality window tint offers a wide range of benefits, and once you’ve used it, it’s hard to go back!
We offer professional window tint installation services, as well as a large selection of high-quality films, to help our customers remove their old window tint.
The Tint Guy’s professional technicians can help you upgrade your car’s current window tint if it’s worn out or otherwise in need of replacement. Choosing the right film is key to ensuring that it looks great and lasts for years (unlike previous solutions). We can help you make sure it is installed correctly according to your preferences and needs.
Will Removing Window Tint Damage the Defroster?
When removing window tint with a defroster, you need to be very careful since it’s generally a pretty straightforward process. Damage to the defroster lines on the vehicle is very easy.
The scraper is the most common tool used to damage defroster lines during the removal process. The defroster lines are easily nicked or lifted when you push down to get behind the tint. Those lines will not function properly even if they have a small cut.
When people remove window tint, they usually damage the defroster lines by pulling up the defroster lines with the adhesive of the tint. The glue must be loosened up a bit before being removed from the window.
Removing Tint From a Rear Window: What is the Cost?
You may be wondering how much it costs to remove your car’s window tint if you are considering hiring a window tint service. Window tint removal costs typically range from $60 for all four side windows to $85 for the windshield and rear windows, depending on your vehicle.
A service station worker cuts extra PPF from the edge of the installation area with a focused gaze.
Professional Window Tint Removal
It is understandable if when you read this guide, all you can think about is that this is a job that you don’t want to do. If you want to do it yourself, however, you’ll need to hire a pro.
Depending on how many windows you need to remove tint from and where you take it, you can expect to spend between $100 and $250 on this method.
Compared to a small shop in Iowa, a professional window tint shop in southern California will charge much more to remove window tint.
The good news is that removing window tint on your own isn’t all that hard, and you’re unlikely to mess anything up if the price is higher than you would like to spend. Wouldn’t it be great if you tried it first?
Final Thought
Finally, you have got some idea of removing tint from a rear window. It’s manageable removing tint from your rear window. Just follow the steps or tweak it here and there. Most importantly, be careful about safety cautions, especially when working with Ammonia.
Please choose a suitable method for your specific situation, whether using a steamer, heat gun, or seeking professional help. Whichever method you choose, remember that patience is key.
Take time and work slowly to avoid damaging the window or any surrounding components. Once the tint is removed, remember to clean and maintain the rear window to ensure a clear and pristine result.
FAQs
How long does it take to take the tint off the back window?
As a general rule, a four-door car takes about two hours. Because of the defrosters, removing the tint from the large back window takes the most time. It’s best to let a professional remove window tint.
Do windows get damaged if the tint is removed?
If you try to remove the window tint on your own, you could damage your car in a way that can’t be fixed.
Is it easy to take off the tint?
To put it simply, the film will come off with little trouble. To help it move, use a sharp blade and some soapy water.
Can a hair dryer be used to take off window tint?
Drop the window about half an inch to get to the edge of the tint film. Put the exterior and inside of the window under the heat of the hair dryer or gun. Use the razor blade to peel away an edge carefully. Remove the film carefully by heating it and working slowly along the leading edge.
Can you remove the tint from the back window defroster?
Use a heat gun to warm the tint, then peel it off. Remove a corner of the tint from the top with a razor blade. Don’t touch the lines with a sharp blade if you don’t want to damage them. Use long, strong movements to pull the film and plastic from the window.


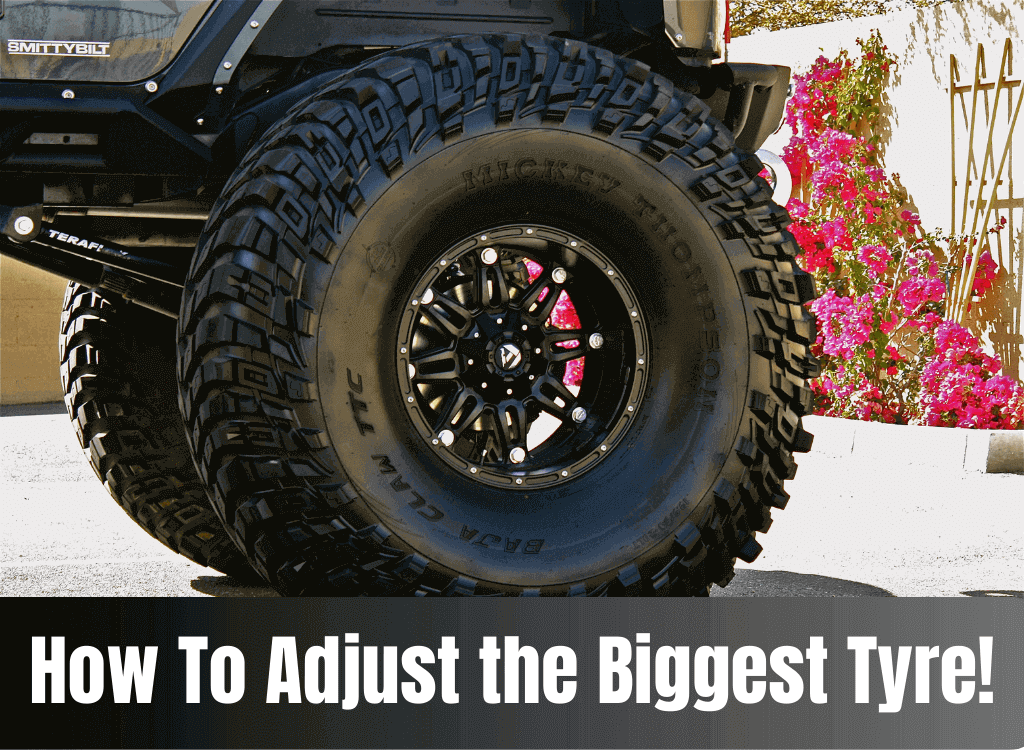
The Jeep Patriot is a compact SUV that the Jeep brand Chrysler manufactured from 2007 to 2017. This vehicle is known for its off-road capabilities and rugged design. The tires are one of the most critical components of any car, and the Jeep Patriot is no exception. Regarding the list of the best tires for Jeep Patriot, we included models that fit the owners of that car. Also, The Biggest Tires You Can Put On a Jeep Patriot!
You can choose from the following versions of the Patriot:
Limited 4-2, Limited 4×4, Sport, Sport 4×4, Inclination 42°, Quadrant 4°4′, Coordinates (longitude by 42), Longitude multiplied by fourscore, Exalted Latitude, 75th Anniversary Edition, etc.
Depending on the model, these vehicles roll off the assembly line with factory-installed 16- or 17-inch tires. Many Jeep Patriot drivers want to know if they can upgrade their cars with larger tires. We’ll examine both the possibilities with the vehicle’s original suspension and after adding a raise to get to the bottom of this.
All-terrain tires are perhaps the most excellent option for those who want to explore the wild. These tires are not too uncomfortable and maintain valuable on-road traction in both dry and wet situations.
However, They increase off-road traction, which is practical, especially on hard ground, mud, and rocks. Properly maintaining and selecting the right tires for your Patriot can significantly affect your vehicle’s performance and safety.
The Tire Size: The Biggest Tires You Can Put On a Jeep Patriot!
There were numerous tire sizes available for the Jeep Patriot. According to the year, trim level, and option set. The following tire sizes are typical for the Patriot:
P215/65R17
This is the standard tire size for the Patriot, common on base and Sports models.
P225/60R17
This Patriot tire size is an optional one that is common on Latitude and Limited variants.
P225/55R18
This is an optional tire size for the Patriot, typically found on the Trail Rated edition.
To make sure the tires are the right size for a certain Patriot model, it is always advisable to read the owner’s manual or speak with a Jeep store.
What Are The Best Tires For Jeep Patriot?
When selecting tires for your Patriot, it’s important to consider your driving conditions and needs. If you plan on doing a lot of off-roading, you’ll want to look for tires with a deep tread depth and a more aggressive tread pattern. This will help provide better traction and stability on loose or uneven surfaces.
The Biggest Tires You Can Put On a Jeep Patriot! If you primarily drive on pavement, you’ll want to look for tires with a smoother tread pattern. These tires will provide a more comfortable ride and better fuel efficiency. It’s also important to consider the type of weather you’ll be driving in. If you live in an area with a lot of snow or rain, you’ll want to look for tires designed for those conditions.
Goodyear Assurance MaxLife
Goodyear Assurance MaxLife tires are a type of all-season tire used on passenger cars, SUVs, and minivans. They are famous for their long-lasting tread life, good traction in wet and dry conditions, and comfortable ride quality. They feature an optimized tread pattern and symmetric tread design that provide good traction in wet and dry conditions. The tires have a tread life warranty of 65,000 miles for T and H Speed-rated tires and 55,000 miles for V and W Speed-rated Tires.
Also, have a 30-day satisfaction guarantee. If you are not completely satisfied with the performance you can return them within 30 days of purchase for a full refund or exchange. Goodyear Assurance MaxLife Tires are a great option for Jeep patriot tires. And for drivers who are looking for a long-lasting, dependable tire in a variety of weather conditions.
Michelin Premier A/S
The Michelin Premier A/S is a top-notch all-season tire for drivers. It provides responsive handling, improved cornering, and stronger braking for your Jeep Patriot. Additionally, the tire excels in wet conditions with excellent traction and short braking distances. Thanks to EverTread Technology, it wears down. The Premier A/S offers a smooth and quiet ride over bumps. As a limited 60,000-mile treadwear warranty. This is short for its premium price compared to other competitors.
These Jeep patriot tires are famous for the shortest braking distances on wet and dry surfaces of any grand-touring tire, Excellent cornering grip and traction on dry roads, Very responsive and direct steering feel, Smooth ride, and well-suppressed road noise.
Cooper CS5 Grand Touring
The Cooper CS5 Grand Touring proves that you don’t need to break the bank for quality tires. This American touring all-season tire excels in several categories, with its exceptional durability standing out. Its tread life is superb, backed by an 80,000-mile warranty from Cooper Tire.
Although the handling feel isn’t top-notch, the CS5 Grand Touring provides a good cornering grip and brakes well for a budget tire. Its hydroplaning resistance is excellent, ensuring a secure drive in the rain. Comfort is also impressive with the tire being very quiet on the road and offering a smooth ride over bumps. However, it’s not ideal for severe winter conditions.
Continental VikingContact 7
The Continental VikingContact 7 is a top winter tire with strong on-road performance and weather handling. On dry and wet roads, it offers good cornering grip, responsive handling, and decent wet braking. It’s especially good in the corners, where it provides the driver with an excellent grip.
However, it feels good behind the wheel, too, and brakes well. In snowy and icy conditions, the tire excels, providing excellent snow handling and braking to the leading Blizzak WS90. The only downside is added road noise and no treadwear warranty from Continental.
General AltiMAX RT43
The General AltiMAX RT43 is a popular budget-friendly grand-touring tire in North America. While it may not match premium models, it offers similar performance and longer tread life at a lower cost, with a generous warranty of 75,000 miles for T-rated models and 65,000 miles for H & V-rated models.
The AltiMAX RT43 performs well on the road with responsive handling, safe grip and traction, good hydroplaning resistance, and a comfortable, quiet ride. For snowy or icy conditions, it is not recommended.
The use of General AltiMAX RT43 in a Jeep Patriot has been advantageous to the drivers. Excellent dry weather responsiveness, superior traction, comfort over irregular surfaces, extreme quietness at higher speeds, good tread life, and an excellent tread wear warranty for the cost.
Continental TrueContact Tour
The newest tire in the lineup of celebrated touring tires is the Continental TrueContact Tour. Despite having limited snow traction, it quickly became one of the best tires in most categories. With its quick steering, excellent grip and traction, and short stopping distances, the TrueContact Tour excels in daily driving.
With excellent traction, hydroplaning resistance, and quietness, it also functions well in wet conditions. Even at very high speeds, the ride quality is impressive because there is no road noise. It has budget-friendly pricing.
For T & H-speed rated models, Continental also provides a sizable 80,000-mile treadwear warranty. This makes it a fantastic value for a high-end tire.
Michelin Defender T+H
The Michelin Defender T+H is a top-performing all-season touring tire, but it costs more than average. Even though it might cost more than some grand-touring tires, it has superior driving qualities. The Defender T+H is hard to beat for durability, boasting exceptional tread life and an 80,000-mile warranty from Michelin.
On the road, it offers responsive handling and strong wet traction. The ride is smooth and quiet, with good cornering ability. Although it can provide some traction in snowfall, it cannot replace a winter tire.
Capacity of tires
The model year, trim level, and tire size all play a role in determining the maximum load capacity for tires on the Jeep Patriot. Additionally, the tire’s speed rating and load capacity should be considered.
The Biggest Tires You Can Put On a Jeep Patriot! The maximum weight a tire can safely support is indicated by its load capacity, and its top speed is indicated by its speed rating. Make sure the tires you choose are rated for the weight of your car and the speeds you typically drive.
When Should I Get New Tires For My Jeep Patriot?
Replacement tires depend on two things. The tread depth is the first. The tires won’t be able to give the driver good traction on slick surfaces and won’t be able to prevent hydroplaning if they don’t have enough depth.
Tire tread wear, age, and driving conditions are just a few of the variables that affect when it’s best to replace your Jeep Patriot tires. When the tread depth reaches 2/32 inches or less, it is typically advised to replace the tires. if the sidewalls of the tires exhibit aging symptoms like cracks or cuts.
Moreover, Tires should be replaced every ten years, regardless of tread depth, because wear can affect a tire’s performance. It is best to have a professional inspect your tires to determine when to replace them.
How to Upgrade to Larger Tires Without Muscle Strain?
You may upgrade your Patriot’s suspension and wheels without raising the vehicle. You’ll need to make a few adjustments in the car’s undercarriage, where the tires are stored.
Some components are unnecessary to the vehicle’s operation and can be deleted. In addition, you can cut away excess material, hammer it down, or use an angle grinder to make more area for the wheel to travel.
If you don’t feel confident in your abilities and expertise, having a professional handle it is preferable.
Lifting Your Jeep Patriot to Adjust the Biggest Tyre!
Getting your Jeep elevated is the safest option to install larger tires. Your tires will be able to travel around without squeezing into anything. Lifting can cause the car to lose stability and grip when driving up steep inclines. Axle failure and increased vehicle wear are two more problems people have experienced.
The conventional wisdom holds that you shouldn’t bother lifting your Patriot if you won’t be regularly driving it in off-road conditions.
If you’re only concerned with appearances, going down to 15-inch tires can raise your car’s appearance without any more work. Ensure the lift is manageable if you’re set on installing a lift kit. Charges of up to four inches are not uncommon, but most people find two inches sufficient.
The problem with raising is that it alters the angles and functionality of your Jeep’s components. After installation, proper tuning and alignment must be performed, and only a trained expert can do so. Tyre sizes up to 29 inches can be installed on a lifted Patriot.
Conclusion: The Biggest Tires You Can Put On a Jeep Patriot!
In summary, when it comes to selecting tires for your Jeep Patriot, consider your driving conditions, needs, and specific tire size. That is advised for your specific model and year. The performance and safety of your Patriot can be greatly impacted by maintaining it properly and choosing the appropriate tires.
Always keep in mind that cheap tires aren’t worth it because they’re not safe to drive and don’t last very long.
FAQs
What size tires will fit my Jeep Patriot?
Tyre specifications for the Jeep Patriot. Different Jeep Patriot models and trim levels come standard with different tire sizes. These include 205/70R16 tires, 216/60R17 tires, 215/65R17 tires, and 225/60R17 tires.
How big of wheels can I put on a Jeep Patriot?
The wheels that come standard on a Jeep Patriot can range from 16 to 17 inches in diameter, depending on the model year and the vehicle’s trim level. That means you can pick from a wide variety of highly high-quality wheels.
Can I upgrade my Jeep to larger tires?
Those 35s should fit fine on the newer JL Wranglers, but a 2- to 2.5-inch lift system is required on the older JKs to make comfortable use of them off-road. For vehicles older than a TJ, a 4-inch lift kit is necessary for those tires.
What is the maximum size tire I may use?
Replacement tires should have a diameter (height) within 3% of the diameter of the tires they are replacing, presuming the tires being replaced are those recommended by the vehicle’s owner’s handbook.
Do larger tires make a difference?
Greater wheel diameters have several practical and cosmetic benefits, including enhanced grip, handling, cornering, and braking. The larger the wheel, the more rubber there is, translating to a firm hold on the road. Regarding cornering and handling, larger tires are superior to smaller ones.


Orien Motors is an emerging company offering genuine multi-use vehicles, and the company states that these vehicles were designed for all-terrain usage. Specifically, the Oreion Reeper series is designed for various conditions and terrain. Whether the voyage is on or off-road, these ATVs remain ready to provide a seamless, relaxed, and safe ride. However, there are some Oreion Reeper Problems you should be aware of.
An Oreion quad enables you to experience unforgettable off-road adventures for many years. However, like every other ATV, the Oreion Reeper is susceptible to damage. Moreover, you may also need to address various problems at some point. Problems include wiring issues, starting problems, clutch problems, etc.
When this occurs, it may be pretty aggravating. But in most cases, the problems are straightforward to resolve if you have fundamental repair knowledge.
Oreion Reeper Overview
The Oreion reaper has a durable chassis, a potent engine, and a suspension system capable of traversing even the most challenging terrains. In addition, the Reeper has several functions that make driving it enjoyable and practical, including 4WD, a customizable suspension, and an electrical winch.
The engine is one of the most significant aspects of the Reeper. A 1100cc, four-cylinder, water-cooled engine produces up to 83 horsepower.
Moreover, the vehicle offers several gearbox choices, such as a five-speed manual transmission and an automatic transmission with a continuously variable transmission (CVT).
Furthermore, the design of the Reeper is both fashionable and functional. It has a robust exterior and a streamlined, aerodynamic structure meant for maximal off-road safety and agility.
Oreion Reeper Key Features
The Oreion Reeper is a fun off-road car that combines the characteristics of a street-legal car and a classic off-road buggy. Although the features may differ depending on the particular model and year, the Oreion Reeper typically has the following features:
Design and Construction
For strength and durability, the Reeper has typically a sturdy tubular steel frame. It might feature an open-top style with roll bars and the choice of a hardtop or softtop.
Engine and Performance
The Reeper frequently has a potent engine, such as a 4-cylinder inline gasoline engine, which has enough power for both on- and off-road operation. The engine can be coupled with either a manual or automatic transmission, providing a compromise between usability and performance.
Suspension
The Reeper’s off-road suspension system is made to handle rugged terrain. It might include independent front and rear suspensions with telescoping shocks, giving it excellent off-road clearance and a smooth ride. Some models might also have selectable 2WD/4WD or 4WD options for improved traction.
Seating and Interior
With bucket seats and safety straps for the driver and passenger, the Reeper generally has two seats. The interior may have adjustable seating and tough upholstery for comfort during long travels.
Utility and Storage
Some Reeper models provide cargo bed options for transporting supplies, gear, or machinery. There may be tie-down points for securing loads and a carrying capacity for the cargo bed. There may also be additional storage areas or mounting options for accessories.
Most Common Oreion Reeper Problems and Solutions
The most common problems associated with the Oreion Reeper include:
- Starting Issue
- Clutch Problems
- Over-Heating Problems
- Wiring Problem
- Stability Issue
- Seatbelts and Speed Limiter Problem
- Dead Battery
Let’s look at some of the most prevalent Oreion Reeper Problems and how to resolve them.
Starting Issue of Oreion Reeper
A battery problem is among the significant causes of the Oreion Reaper’s slow startup. The issues could be caused by the electrical system or by faulty circuitry.
If the battery does not charge properly or contains a dead cell, it can prevent the ignition from functioning. In this case, the engine will not start, leaving the driver helpless. Moreover, wiring defects in the vehicle are another issue. This may result in the starter being unable to function appropriately.
Solution
Checking the battery for an accumulation of oxides is the easiest method to address the oxide problem. If you discover any, you must begin reducing the thickness of the oxide layer.
Clutch Problems of Oreion Reeper
Due to the Oreion Reeper’s frequent exposure to rigorous off-road conditions, the clutch may wear out rapidly. In addition, the clutch component wears out faster, yet it will also hinder acceleration and make shifting ratios more difficult.
Solution
If your vehicle’s clutch is experiencing problems, you may swap it by purchasing a new pair. Otherwise, have it fixed by your mechanic or an authorized Oreion dealer.
Stability Issue of Oreion Reeper
The most frequent issue is the vehicle’s excessive bounding or swaying at high velocities, particularly when driving off-road. This might be attributed to various factors, including deteriorated suspension systems and improper tyre inflation.
Solution
If you observe that the tires are beginning to exhibit evidence of deterioration, it is time to replace them. In addition, ensure that the tires you purchase match the measurement of your vehicle’s diameter.
Over-Heating Problems of Oreion Reeper
The engine of the Oreion Reaper heating is yet another summertime issue. The vehicle’s quattro provides some red indicators, indicating that something is amiss with the engine.
Solution
If your vehicle begins to overheat, you should inspect the radiator and coolant levels. The engine overheats due to insufficient refrigerant levels and a defective radiator.
Wiring Problem of Oreion Reeper
Badly attached wiring or incorrect placement of electrical parts involving wires, connecting terminals, or cables can result in several wiring issues. Those include engine stalling, idling, and starting problems.
Solution: It can be repaired by removing the bonnet and changing the panel located beneath the steering wheel.
Seatbelts and Speed Limiter Problem of Oreion Reeper
A few off-roading drivers claimed that their vehicles lacked speed limiters and red reflectors. It’s blocking them from achieving their utmost speed. Additionally, it has been noted that some 2011 and 2013 models have defective seatbelts that impede off-road performance.
Solution
If you suspect a problem with your side-by-side’s seat belts, red reflectors, or speed limiters, it is best to contact the manufacturer before having them repaired by a simple mechanic.
Dead Battery of Oreion Reeper
If you own an Oreion Reeper, you have likely encountered the problem of a depleted battery in your vehicle.
Solution
Using a multimeter, you can work with a deceased vehicle battery. Check the meter reading after connecting the multimeter to the battery.
Oreion Reeper Maintenance Tips
Proper maintenance is essential for your Oreion Reeper to remain in top shape. Here are some general maintenance suggestions to assist you in maintaining your vehicle, while particular maintenance requirements may vary depending on the type and year:
- Perform routine visual inspections to spot any indications of wear, damage, or missing parts.
- For oil and filter changes, according to the manufacturer’s instructions. The engine’s longevity is increased by routinely replacing the engine oil and filters, which contribute to maintaining appropriate lubrication.
- As advised, clean or swap out the air filter. Engine performance may suffer from a clogged air filter.
- Examine the hoses and connectors for leaks or damage, and check the coolant level.
- Regularly check the battery for corrosion or loose connections.
- Examine the drive belt’s state and tension. If there are indications of excessive wear, fraying, or cracking, replace it.
- According to the owner’s manual, grease the pivot points, suspension parts, and other places.
- Check the braking system frequently for wear and proper operation. If necessary, replace the brake pads, and make any required adjustments to the hydraulic system or brake lines.
- Wash the Reeper’s exterior frequently to remove any mud, grime, and debris. Clean the undercarriage and engine area to avoid accumulation that could lead to damage or rust.
Is it legal to drive the Oreion Reeper on the road?
A definition of “street legal” is in order, though. A vehicle must have all the necessary safety features, equipment, lighting, etc., in order to be lawfully driven on public highways. You can take it wherever you choose after it does that.
The Oreion Reeper is a fantastic LSV that meets the NHTSA safety criteria from 1998, making it a reliable and secure option.
The Oreion Reeper, to be street-legal, must, therefore, have four wheels, a maximum speed of 25 miles per hour, and a weight of less than 3000 pounds. In addition, it must be equipped with the standard array of turn signals, brake lights, backup lights, parking brakes, safety belts, and windscreen.
Once you’ve confirmed that your LSV satisfies all the requisite criteria, you may be required to register it with your state’s DMV, depending on your residence. It’s essential to remember that not all states mandate this step. LSVs are typically utilized for brief excursions to complete errands, participate in social or recreational events within retirement communities, or traverse golf courses in planned neighborhoods.
Alaska is the only state that prohibits using side-by-side LSV vehicles on public roads. However, if you encounter public roads or bridges, you may cross them. Despite meeting NHTSA standards, it is critical to comply with your state’s regulations concerning vehicles on public roads when using the Oreion Reeper.
Before making a purchase, contact your local DMV office to ensure you have all the necessary steps covered.
What Engine Powers Oreion Reeper?
The larger engine allows you to legally navigate the public roads in states that ban other LSVs. According to the manufacturer, the Reeper has an 812-cc engine, while the Reeper4, the Reeper Sport, and different variants include a larger 1100-cc motor.
All variants will be equipped with a 4-stroke motor built by the prestigious Chinese automaker Chery. These slow-moving vehicles are believed to have sufficient power to easily traverse dirt hills and other difficulties despite the engine’s origin.
The engine has a 9.5:1 compression ratio and an electronic starter. The ability to shift into low proportions with a manual 5-speed gearbox provides the grip necessary to escape any sticky situation.
What’s The Top Speed Of Oreion Reeper?
We checked four variants of the Oreion Reeper, and their website still needs to show the mph in its specs. The 812 cc engine is a 3-cylinder motor that can achieve 45-50 mph. However, this is just hearsay.
However, your actual velocity will rely on both your driving ability and the vehicle you’re in. Even though NADA does not include the top speed in its list of specifications, this car may be exempt from LSV regulations in many jurisdictions.
Some have stated that the speedometer stops at 55 mph, while others have said that they reached a top speed of only 25 mph. We have yet to verify that all cited numbers come from a reliable source.
Make sure your Reeper has no extra elements that act as limiters, which would significantly reduce your speed.
What’s the MPG of the Oreion Reeper?
This is just another way the Oreion Reeper site has let us down. We looked over the site but needed help finding something that says how many miles per gallon you can expect to get in one of their cars.
Other reports put the low end of the range at 36 mpg, the high end at 45 mpg, and a third in the high 40s as their average when driving this vehicle. However, you won’t travel very far since the business claims the fuel tank holds only about 6 gallons at total capacity.
Your fuel economy is also affected by how and where you drive and the sort of fuel you use. If you go with a heavy foot, you should settle for a fuel economy in the low to mid-30s.
Customer Feedback on Oreaion Reeper
Recently, the Oreion Reeper line of side-by-side vehicles has garnered considerable attention. The Oreion Reeper is made in China but is now assembled in the United States, so the quality of construction is quite high.
Some individuals have experienced a few troubles with the Oreion Reaper, ranging from minor mechanical issues to the failures. The majority of problems, however, have been negligible. The vast majority of Oreion Reeper users has reported no significant vehicle issues.
Furthermore, the Oreion Reeper’s cost-effectiveness has pleased consumers. Compared to other side-by-side vehicles, it offers plenty of advantages and efficiency for a low price.
The Oreion Reaper has received predominantly positive comments. Consumers have found it dependable, with features, and an excellent value. Consider the Oreion Reeper if you are in the market for a side-by-side vehicle.
Final Thought
The Oreion Reeper ATV is an exceptional off-road vehicle and a reliable machine. However, specific typical issues may develop if they are not addressed.
It is crucial to be aware of these problems and take the appropriate steps to avoid them. Adhering to the manufacturer’s guidelines makes it easy to extend the vehicle’s life and experience many years of dependable enjoyment.
FAQ
What are the most frequent issues with Oreion Reaper vehicles?
Common issues reported by Oreion Reeper owners include electrical system malfunctions, suspension issues, gearbox problems, overheating, and brake system issues.
How can I repair Oreion Reaper electrical system malfunctions?
If your electrical system is malfunctioning, you should inspect the wiring connections and fuses for loose or broken components. In addition, it is recommended to consult a professional mechanic or contact Oreion Reeper’s customer support for specific troubleshooting steps and direction.
What should I do if the suspension on my Oreion Reaper is malfunctioning?
Vehicles with Oreion Reeper suspension issues may exhibit excessive swaying, irregular ride height, or sagging. It is advised to have a qualified mechanic examine the suspension components for signs of fatigue, damage, or misalignment. Then, they can recommend the necessary repairs or replacements.
How do I resolve gearbox problems with my Oreion Reeper?
If you are experiencing gearbox issues, such as difficulty adjusting or slipping ratios, you should have the gearbox system inspected by a professional mechanic. They are able to conduct diagnostic tests, inspect fluid levels and quality, and identify any required restorations and adjustments.
What steps should I take if my Oreion Reeper overheats?
Inspect the coolant levels and guarantee there are no breaches if your Oreion Reeper is overheating. Check that the radiator and cooling fins are free of debris and spotless. Inspect the operation of the ventilation fan and water pump as well. Employ a mechanic or contact Oreion Reeper’s support team for further assistance if the problem persists.
RELATED:


The Honda Talon is a reliable and versatile UTV among many other models. Yet you should be aware of some of the most common Honda Talon Problems.
The Honda Talon has gained popularity among those looking for a durable and trustworthy UTV. However, the Honda Talon has rapidly become famous. Thanks to its robust construction, enhanced features, various models, and two special editions.
For example, the gearbox of the Honda Talon off-road vehicle is superior. In addition, it has a powerful engine that allows it to operate for hours. Its ergonomic design will alleviate any tiredness you may experience from the arduous voyage. And it’ll also excite you for a swift but seamless ride on rough roads.
Nevertheless, despite the remarkable performance of these UTVs, a few users still encounter a few common issues.
Honda Talon Specs
Let’s take a look at the most common specs of the Honda Talon-
- Engine: Unicam liquid-cooled four-stroke parallel twin; 4 valves/cyl.
- Compression Ratio: 10.0:1
- Bore x Stroke: 92.0 x 75.1mm
- Displacement: 999cc
- Front Brakes: Dual 250mm hydraulic discs
- Rear Brakes: Dual 250mm hydraulic discs
- Transmission: 6-speed dual-clutch
Frequent Honda Talon Problems
Even though the Honda Talon series has a stylish look, excellent features, and robust build quality, long-term use may cause some issues.
Before you purchase a Honda Talon, let’s take a look at some of the most common Honda Talon problems.
Engine Malfunction
Failure of the engine is a frequent but severe event. When the engine of your UTV fails, it will become immobilized and immobile.
Typically, this occurs when a stray bolt was inadvertently left in the intake during vehicle assembly at the factory. The bolt could break from the cam mechanism and infiltrate the engine, resulting in engine failure.
Solution
Replacement of the engine is the remedy to engine failure. If it occurs within the specified warranty period, you will receive free service from the manufacturer.
Shifting Issue
Sometimes, you will be unable to employ the low gear. A shift issue arises when the shift lever collides with the shift gate in the rear. If the shift cables are improperly positioned, this issue may still arise.
Solution
To resolve the shifting issue, a replacement shift gate must be installed.
Overheating Problem
When the brake indicator on a Honda Talon UTV becomes overheated, the driver can promptly stop driving. Moreover, it can occur when driving quickly on uneven roads.
Solution
When the clutch of your Honda Talon is hot, transfer it into neutral or park to chill it. This will result in the engine pumping oil-cooled air and cooling the clutches.
Reverse Fan Mode
Whenever your Honda Talon UTV fan starts producing hot air instead of cold air, the engine gets highly overheated. In addition, moving forward inhibits air from traveling across the radiator, leading the engine to heat up. However, this occurs due to improper wiring implementation in internal engine components.
Solution
To resolve the engine combustion issue caused by the fan rotating in the incorrect direction, remove the UTV’s canopy and search for the fan connector. Decide next which color is attached to the R/W wire on the loom side. The precise connections are coloured blue. Join the blue wire to the R/W wire on the side of the loom.
Turbo Kit Problem
Owners of the Honda Talon maintain outstanding handling on various terrains by installing the Jackson Racing Turbo package. On the other hand, the turbocharger system is vulnerable to flash glitches, which might affect the tune.
Solution
By updating the firmware and flashing the engine control unit (ECU), you can only fix the flash problems.
A-arm Issue
Your Honda Talon develops spots after driving on a wet, sandy road. And if excessive rocks or stones are in the driving region, it develops arm problems. In addition, the issue could also arise from using bigger or smaller tires.
Solution
Installing a frame stiffener kit will resolve the problem with the Honda Talon.
Stiff Suspension
The shift suspension may be problematic if you experience abruptly severe and jerking rides. This issue also arises when the clickers are incorrectly configured.
Solution
You can repair this issue yourself if you purchase a set of rear actuator springs and install them per the instructions in the service manual.
Irremovable Spot
It is common for your UTV to become difficult to clean after a muddied and rocky journey. Furthermore, the issue becomes significant, when the stain cannot be removed without removing the ceramic coating and reapplying the colour.
Solution
There is no perfect solution for this issue, but if you clean your vehicle immediately after using it for the day, the stains will not become difficult to remove.
Live Valve Problem
Honda Talon UTV have a Live Valve that detects and analyses steer angles, pitch motion, and brake pressure to ensure smooth rides on various terrains. However, a suspension warning light will appear on the dash if the Live Valve malfunctions.
Solution
This may be fixed by turning off the engine and moving the steering wheel.
Clogged airbox
Although the air filter in the Honda Talon is intended to eliminate all dirt and debris, some particles are too adhesive to be eliminated. And when this occurs, the overall efficacy and effectiveness of the filtering system is compromised.
Solution
Always ensure that the filters are kept clean after use. It might be required to substitute the filter depending on the extent of the deterioration.
Four-wheeler Malfunction
A limited percentage of the Honda Talon vehicles have this unusual issue. When you select I4WD instead of 2WD or 4IWD, a flashing light can appear, and you might also lose power to the front wheels.
Solution
Honda may not offer a suitable fix if you report this issue to them; they may only advise against using four-wheel drive.
Read More Most Common Problems With HONDA PIONEER 700
Tips to Solve Your Honda Talon Problems
Regular maintenance is necessary for the Honda Talon to last a long time and function at its best. Here are some tips and strategies to keep your Honda Talon in excellent operating order:
- Perform routine visual checks of your Honda Talon, paying close attention to components such as the tires, brakes, suspension, and fluids.
- According to the manufacturer’s instructions, the engine’s oil and oil filter should be changed regularly.
- Replace or wash the air filter on a regular basis, mainly if you regularly ride in rough or dirty conditions.
- Examine the tires for any nicks, holes, or symptoms of wear. Periodically rotate your tires for even deterioration.
- Regularly inspect the brake pads, rotors, and brake fluid levels. Verify that the braking system is in working order and that there are no holes in it.
- Examine the suspension parts for leakage, deterioration, and loose fasteners.
- Inspect and, if necessary, sanitize the battery terminals for corrosion.
- Clean your Honda Talon frequently, particularly after riding in marshy or powdery conditions.
Accessories For Minimizing Issues with Honda Talon
Honda Talon Bumper
The bumper on your Honda Talon is a crucial component that protects the front end of your vehicle from impacts and collisions.
Honda Talon Tree Kickers
Also known as rock sliders or Nerf bars. Aftermarket accessories are designed to protect your vehicle’s side panels and rocker panels from tree stumps, rocks, and other obstacles.
Honda Talon Wheels
The Honda Talon typically comes equipped with stock wheels. However, different types of wheels are available for customization or replacement, such as Steel Wheels, Aluminum Alloy Wheels, and Beadlock Wheels.
Honda Talon Windshield
When it comes to windshield options for the Honda Talon, there are typically two main types to consider, Full Windshield and Half Windshield.
Honda Talon Problems: Still A Good UTV?
Six exceptional models and two special editions comprise the Honda Talon sports UTV lineup for a seamless, comfortable, thrilling voyage. Most Talon series owners acknowledge that Honda filled a tonne with innovative features into its fun-to-drive Talon UTV lineup.
According to several professionals, the Honda Talon has the most advanced transmission on the market. Furthermore, numerous evaluations indicate that each Talon UTV performs exceptionally well in every condition, including on complex racing surfaces and in adverse weather. Compared to other brands, their outstanding efficiency and handling make them particularly advantageous for racing in tropical mud conditions.
Although it is an exceptional vehicle, there are a few prevalent Honda Talon Problems and complaints about it. But most importantly, the majority of consumers believe the Talon is worth the price tag.
Conclusion
The Honda Talon sports UTV series comprises six incredible models and two special editions for a seamless, relaxed, and thrilling riding experience. You can choose between two-seater and four-seater Honda Talon UTV models and from various unique colour options.
Additionally, consumers can choose between the manually-adjustable FOX Q3S suspension and Talon’s innovative FOX Live Valve suspension. However, everybody should also consider the previously mentioned frequent problems and be prepared to deal with them.
FAQ
What are the most frequently reported Honda Talon problems?
Transmission issues, premature suspension component degradation, electrical problems, overheating, and clutch-related issues are among the most frequently reported issues with the Honda Talon.
Does the Honda Talon have any recalls or known manufacturing defects?
The Honda Talon had no widespread recalls or known manufacturing defects. For the most up-to-date information, visiting the official Honda website or contacting a Honda dealer is always a good idea.
How do I resolve gearbox issues with my Honda Talon?
If you experience gearbox problems with your Honda Talon, such as shifting difficulties or gear sliding, you should consult with an authorised Honda dealer or a qualified mechanic. They can diagnose the issue and provide the necessary solutions or remedies.
What steps should I take if the engine of my Honda Talon overheats?
If your Honda Talon’s engine is overheating, you should immediately cease riding and let the engine calm down. Verify that the coolant level is at the appropriate level. Inspect the cooling system and radiator for leakage. If the problem persists, you should have a Honda dealer or a certified mechanic inspect and repair it.
How can I prevent suspension component premature wear?
To prevent premature deterioration of your Honda Talon’s suspension components, it is essential to adhere to the manufacturer’s recommended maintenance schedule. Regularly inspect the suspension components for signs of damage or deterioration, and address any problems immediately. In addition, avoid subjecting your vehicle to excessive burdens or harsh off-road conditions, which may strain the suspension system.
RELATED:
Numerous side-by-side are available in both Tracker and Ranger lineups. The Tracker 800SX and Polaris Ranger are the two base models of these lineups designed especially for off-road. So comparing Tracker 800SX vs Polaris Ranger might give a decent idea that which one is best suited for you.
The Tracker 800SX provides an experience that is unmatched by rivals. The 50HP engine has enhanced intake and exhaust systems for maximum performance. While the Polaris Ranger is a famous utility vehicle (UTV). That design with a wide range of applications, including work, recreation, and utility purposes.
A Comprehensive Comparison of Tracker 800SX vs Polaris Ranger is the engine, horsepower, cargo box, payload, towing, bed dimensions, warranty, and price.
Tracker 800SX vs Polaris Ranger: Quick Comparison
To understand their advantages and disadvantages, we will examine the common features of these two ATVs.
Tracker 800SX vs Polaris Ranger: Engine
The Tracker 800SX has a powerful and reliable engine designed to handle demanding tasks and off-road adventures. In comparison to most of the current ATVs on the market, the Tracker 800SX is powered by a three-cylinder 812cc engine. The engine has electronic fuel injection (EFI) technology.
On the other hand, various engine options are available for Polaris Ranger models. Customers can choose a powertrain based on their needs. Gasoline-powered Ranger models often incorporate electronic fuel injection (EFI) technology. A single-cylinder, four-stroke Polaris Ranger engine powers the vehicle.
In terms of engine, the Tracker 800SX clearly wins.
Tracker 800SX vs Polaris Ranger: Horsepower
There is more horsepower available in the Tracker 800SX thanks to its more powerful engine, 50 horsepower in fact.
In spite of this, Polaris Ranger is still catching up. The horsepower ratings for Polaris Ranger models range from 40 to 100 horsepower. Specific models, engine sizes, and trim levels have special horsepower.
So, the Tracker 800SX has an advantage in this segment as well.
Tracker 800SX vs Polaris Ranger: Fuel & Oil Capacity
Tracker 800SX models can hold 10 gallons of fuel. While the fuel capacity on the Polaris Ranger is 9.5 gallons.
These two ATVs have similar fuel capacities. So, Tracker 800SX oil capacity ranges from approximately 2.1 to 2.5 quarts (around 2 to 2.4 liters). For Polaris Ranger, The oil capacity is around 2.5 to 2.75 quarts (around 2.4 to 2.6 liters).
Tracker 800SX vs Polaris Ranger: Cargo Box Capacity
The Tracker 800SX’s cargo box has a weight restriction of 1000 pounds. Due to its powerful engine, it is able to carry more items.
On the contrary, the Polaris Ranger model’s cargo box capacity varies according to its trim level and model. The cargo box capacity for most Polaris Ranger models ranges from approximately 500 to 1,000 pounds (227 to 454 kilograms).
However, some higher-performance or specialized models may offer even greater cargo box capacities. Overall, Tracker 800SX has a larger cargo box than Polaris Ranger. There is no surprise as to who wins.
Tracker 800SX vs Polaris Ranger: Towing Capacity
The Tracker 800SX offers a towing capacity of around 2,000 pounds (907 kilograms). This means it is capable of towing trailers, equipment, or other loads weighing up to that limit.
The Polaris Ranger models have different towing capacities varying the versions.
- Polaris Ranger XP 1000: The towing capacity can range from 2,500 to 2,500 pounds (1,134 to 1,134 kilograms)
- Polaris Ranger 570: The towing capacity for this model ranges from 1,500 to 1,500 pounds (680 to 680 kilograms).
- Polaris Ranger 1000: The towing capacity for this model can vary between 2,500 to 2,500 pounds (1,134 to 1,134 kilograms),
Tracker 800SX vs Polaris Ranger: Windshield
The Tracker 800SX windshield offers both full and half windshields. Here are some key features:
- Full Windshields: Full windshields for the Tracker 800SX are made of durable materials. They provide full coverage and protection from wind, dust, debris, and the elements.
- Half Windshields: Half windshields, also known as “flip windshields”. They are available as an alternative option for the Tracker 800SX.
- Accessories: There may be various accessories available for the Tracker 800SX windshields. These accessories can enhance visibility and convenience in different weather conditions.
The Polaris Ranger lineup also offers the same range of windshield options.
Tracker 800SX vs Polaris Ranger: Bed Dimensions
Tracker 800SX’s cargo bed measures 40.5 x 54 x 11.5 inches. While 33.3 x 48.7 x 12.3 inches is the size of the Polaris Ranger’s bed.
The Tracker 800SX has a larger and broader bed, as can be seen.
Oil Change kit
Tracker Off-Road offers oil change kits for their vehicles. The Tracker 800sx oil change kit comes with all the necessary parts such as motor oil, oil filter, and other essential supplies.
For their UTV models, Polaris Ranger also offers oil-change kits. These kits are created for Polaris Ranger automobiles.
Polaris Ranger and Tracker 800SX Performance Upgrades
If you’re ready to invest more money, you can add specific gear to either of these ATVs. Some common performance upgrades that enthusiasts and owners often consider:
- Exhaust System: Upgrading the exhaust system can enhance the engine’s performance by improving exhaust flow and increasing power output. Aftermarket exhaust systems from companies like Yoshimura, FMF, or HMF Engineering are popular choices.
- Performance Air Intake: A high-performance air intake system can boost airflow to the engine, resulting in more horsepower and torque. Brands like K&N, Uni Filter, and S&B Filters offer aftermarket air intake systems for UTVs.
- ECU Tuning: Custom ECU (Engine Control Unit) tuning or remapping can optimize the engine’s performance by adjusting fuel and ignition maps. This can enhance throttle response, power delivery, and overall performance. Companies like Dynojet and SuperATV offer ECU tuning solutions.
Which Option is Better For You: Polaris Ranger vs Tracker 800SX
If you’re ready to spend less, you’ll receive less capacity and less power. So, the best ATV for you depends on your requirements.
If you’re only buying the ATV for your own enjoyment. Riding the Polaris Ranger is an option. It provides just enough for your personal use thanks to its strength and capacity.
However, if you intend to utilize the ATV professionally or for work. By raising your budget, you can choose the Tracker 800SX. The power and capacity of the Tracker 800SX are best for working situations.
Pros and Cons of Tracker 800SX and Polaris Ranger
Finally, you will talk about the Pros and Cons of both vehicles. This will give you the insight to take a better decision for yourself.
Tracker 800sx Pros
There are plenty of features that make the Tracker 800sx an excellent offroad choice, such as;
- Major storage components,
- Comfortable three-person seating,
- LED taillights,
- 812cc liquid-cooled three-cylinder engine,
- Tons of modern safety features.
- A whisper-quiet engine that provides plenty of power without making unnecessary noise.
- Provides excellent stopping power,
- The Tracker 800sx is mainly famous for its high braking force.
Tracker 800sx Cons
Tracker 800sx users often complain about its difficulty maneuvering tight trails.
Moreover, this model has also suffered from utility problems. One of the most prominent issues is faulty regulators. This can lead to charging problems.
Polaris Ranger Pros
The Polaris Ranger is one of the best off-road vehicles on the market. There is a good reason why Polaris has a large following. As it manufactures some of the highest-quality UTVs on the market.
- Incredible traction,
- Rugged design, and
- 2,500 pounds of towing capacity, the Polaris Ranger is ideal for farm work.
- Excellent electronic power steering system and variable assist.
- Your friends and equipment will have plenty of room in the full cab model.
Polaris Ranger Cons
While the Polaris Ranger is an excellent workhorse vehicle, the Polaris Tracker 800sx is perfect for trail running.
In uneven trails at high speeds, the Tracker 800sx suspension feels better than the Polaris Ranger’s suspension.
The Tracker 800sx has a higher ground clearance, making it more vulnerable to damage in muddy conditions.
Conclusion
In terms of its rivals, the 800SX is stronger and has more fundamental features. Due to its electronic power management, it is a strong, stylish standout. If you have the funds, you can definitely go for it.
However, you might also want to consider the Polaris Ranger. It is also tough regarding engine choices, towing, payload limits, available add-ons, and price. But which one you like is entirely up to you.
FAQ
The Tracker 800SX and Polaris Ranger differ primarily in what ways?
They have variations in engine options, towing, and payload capacities, available accessories, and pricing.
Which is better for off-roading, the Tracker 800SX or the Polaris Ranger?
Both the Tracker 800SX and Polaris Ranger are designed for off-roading. Factors such as suspension, ground clearance, and traction control systems can affect off-road performance. Research specific models read reviews, and consider which one suits you better.
Can I customize the Tracker 800SX and Polaris Ranger with accessories?
Yes. Both UTVs come with a variety of accessories that enable customization. These can include windshields, roofs, winches, lighting kits, sound systems, cargo, and more.
Does the Tracker 800sx meet street legal requirements?
It is illegal to use the Tracker 800sx on the street because it is designed as an off-road vehicle. Follow the rules and guidelines of your state, however, and you can make it street-legal.
Are the Tracker 800SX and Polaris Ranger suitable for work applications?
Yes. Both the Tracker 800SX and Polaris Ranger are popular choices for work applications. They offer utility-focused features. Cargo boxes, towing capacities, and the ability to carry tools for instance.
Can the Tracker 800SX and Polaris Ranger seat multiple passengers?
Yes. The Tracker 800SX and Polaris Ranger offer to seat, multiple passengers. Some models may have a bench seat that accommodates two or three passengers.

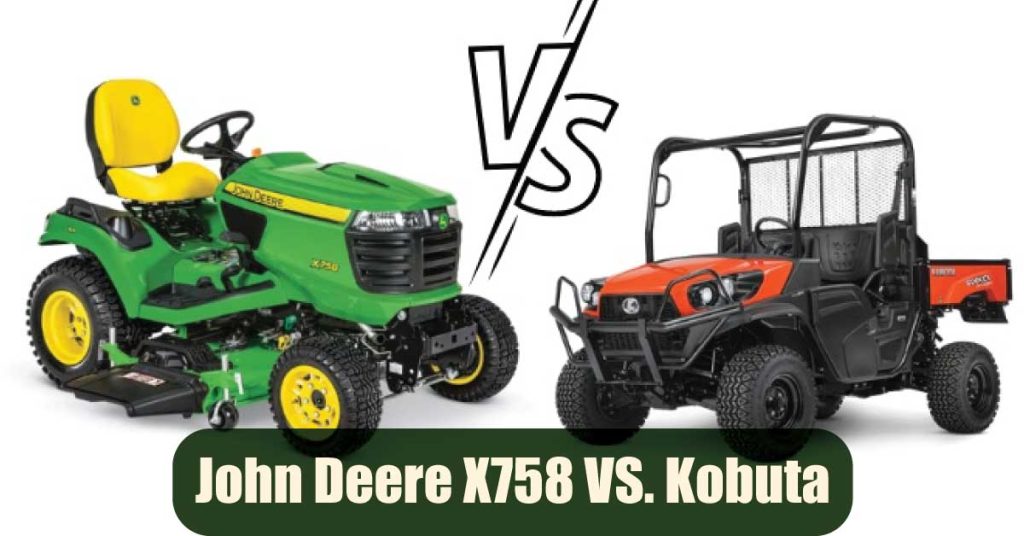
Would you prefer a tractor that can mow or a mower that can do multiple things? Well, here we will discuss John Deere X758 vs Kubota key differences. And let you ultimately decide which one suits you better.
Although the Kobuta is good at mowing and snow removal, the X758 offers a significant advantage over the X758 John Deere.
They have similar power, but the X758 is better suited to mowing and snow blowing, while the Kobuta would shine if you need a loader. While both can run 3pt implements, the X758 John Deere will have less lift capacity and height travel.
As you got some insights, dig into the main discussion over key differences.
John Deere X758: Key Features!
The John Deere X758 is a top-of-the-line lawn tractor with exceptional power and performance.
Some key features are:
Engine
A liquid-cooled, 3-cylinder, 24-horsepower diesel engine powers the X758 John Deere, which provides ample power for mowing large lawns and tackling challenging terrain.
Four-Wheel Drive (4WD)
Its hydrostatic transmission ensures smooth acceleration and precise control over your speed, while the four-wheel drive system allows you to navigate through hills easily, rough patches of grass, or mud.
AutoConnect Deck System
The X758 features the AutoConnect deck system, enabling convenient attachment and mower deck removal without needing tools. It simplifies maintenance and makes switching between implements quick and effortless.
Electronic Fuel Injection System
One of the standout features of the John Deere X758 is its advanced electronic fuel injection system. This technology optimizes fuel efficiency while reducing emissions, providing an eco-friendly solution.
Hydraulic Power Steering
With hydraulic power steering, the X758 ensures smooth and effortless maneuverability, reducing operator fatigue and increasing productivity.
Comfortable Operator Station
Operators can adjust the tractor’s seat, use ergonomic controls, and enjoy excellent visibility from the operator’s station. As a result, it promotes an ergonomic and pleasant work environment.
Mulch Control System
The X758 offers the optional Mulch Control System, allowing you to easily switch between mulching and side-discharging modes without additional tools. It provides flexibility in handling grass clippings.
Power Lift System
The X758 has a power lift system, enabling precise and effortless mower deck height adjustment. It allows you to achieve the desired cutting height for different lawn conditions.
Compatible Attachments
Front loaders, rear-mounted implements, snow blowers, and more. It enhances the versatility of the machine for multiple tasks throughout the year.
Electronic Instrument Cluster
The X758 features an electronic instrument cluster that provides essential information at a glance. It displays metrics like fuel level, engine temperature, operating hours, and diagnostic indicators for easy monitoring.
Twin Touch Foot Pedals
The tractor utilizes Twin Touch foot pedals for smooth and effortless speed and direction control, providing precise and intuitive operation.
High-capacity Mower Decks
The X758 offers high-capacity mower decks with a wide cutting width, ensuring efficient and even cutting of more extensive areas in less time.
Integrated Differential Lock
The integrated differential lock enhances traction in slippery conditions, allowing the tractor to maintain control and work effectively.
Learn More Used John Deere X758 For Sale
John Deere X758: Key Specification!
Engine
- Type: Liquid-cooled, 3-cylinder diesel
- Power: 24.8 horsepower (18.5 kW)
- Displacement: 898 cc
- Fuel Capacity: 6.1 gallons (23.1 liters)
Transmission
- Type: Hydrostatic transmission with Twin Touch pedals
- Speed Range: Infinite forward and reverse
Four-Wheel Drive (4WD)
- Full-time 4WD system
Steering
- Hydraulic power steering for smooth and effortless maneuverability
Mower Deck
- Cutting Width Options: 48 inches (122 cm), 54 inches (137 cm), or 60 inches (152 cm)
- Attachment Method: AutoConnect deck system for tool-free attachment and removal
- Cutting Height: Adjustable in 0.25-inch (0.64 cm) increments
Lift System
- Hydraulic power lift for precise adjustment of the mower deck height.
Dimensions
- Length: 86.6 inches (220 cm)
- Width: 47.9 inches (121.7 cm) without mower deck
- Height: 54.6 inches (138.7 cm) with ROPS up
Weight
- Approximate Weight: 1,315 pounds (596 kg) without attachments
Tires
- Front Tires: 18×8.50-10 turf
- Rear Tires: 26×12.00-12 turf
Fuel System
- Fuel Delivery: Direct injection
Operator Station
- Comfortable high-back seat with adjustable position
- Ergonomic controls and excellent visibility
- Electronic instrument cluster for monitoring important metrics
Attachments and Implements
Compatible with various attachments, such as,
- Front-loaders
- Rear-mounted implements
- Snow blowers and more!
Pros & Cons of John Deere X758
Pros
- Powerful engine and performance.
- Four-wheel drive for excellent traction.
- Comfortable and user-friendly design.
- Durable and reliable construction.
Cons
- Higher cost compared to similar models.
- Larger sizes may limit maneuverability in tight spaces.
- Noise and vibrations during operation.
- Maintenance costs may be higher.
Kobuta: Key Features!

Engine
The Kubota RTV-X features a robust Kubota D1105 OHV engine, boasting a displacement of 1123 cc and delivering a maximum horsepower of 24.8. With its durable and long-lasting design, the overhead valve (OHV) engine ensures reliable performance. Navigating challenging terrains becomes effortless with Kubota’s dependable X-series vehicles.
Transmission
The Kubota offers a maximum travel speed of 29 mph.
Durability and Reliability
Kubota products are built to withstand demanding conditions and offer long-lasting durability.
Versatility
Kubota equipment often offers a range of attachments and implements, allowing for versatility and the ability to tackle different tasks.
Operator Comfort
Kubota machines are designed with ergonomic operator stations and comfortable seating to enhance operator comfort during long hours of operation.
Easy Maintenance
Kubota emphasizes ease of maintenance, with accessible service points and user-friendly design features that simplify routine maintenance tasks.
Advanced Technology
Many Kubota models feature advanced technology, such as electronic controls, precision guidance systems, and telematics, to improve efficiency and productivity.
Safety Features
Kubota prioritizes safety and often includes features like ROPS (Roll-Over Protective Structure) and operator presence systems to ensure operator safety during operation.
Read More About The Most Common John Deere X758 Problems!
Kobuta: Key Specifications!
- Engine Type: 3-cylinders, 4-cycle, diesel, OHV
- Horsepower HP (kW) /rpm: 24.8 (18.5) @3000
- Displacement cu. in. (cc): 68.5 (1123)
- Cargo Bed Load lbs. (kg): Long 1102 (500) / Short 661 (300)
- Towing Capacity Ibs. (kg): 1300 (590)
- Length in. (mm): 142.1 (3610)
- Width in. (mm): 63.2 (1605)
- Height, Overall in. (mm): 79.7 (2025)
- Drive System: 4WD Standard
- Transmission / Transmission Type: Variable Hydro Transmission (VHT-X)
- Differential Lock: Standard
- Fuel Tank Capacity US gal (L): 7.9 (30)
- Max. Traveling Speed mph (km/h): 0-25 (0-40)
Pros & Cons of Kobuta!
Pros
- Its rear cargo bed makes it easy to unload.
- Comfortable back-seat
- A serious workhorse
Cons
- Its price is getting higher on every model.
John Deere X758 vs Kubota : Main Differences!
Watch Here
Engine Power and Performance
- John Deere X758: Equipped with a 24-horsepower diesel engine.
- Kubota X1140: Powered by a 24.8 horsepower diesel engine.
Seating Capacity
John Deere X758: Typically designed for a single operator.
Kubota X1140: Offers seating for up to four passengers, making it suitable for hauling a larger crew.
Cargo Capacity
John Deere X758: Offers a cargo capacity of around 14.1 cubic feet.
Kubota X1140: Provides a larger cargo bed with approximately 18.6 cubic feet capacity, allowing for greater hauling capacity.
Bed Versatility
John Deere X758: Primarily designed for mowing and lawn care tasks, with limited bed functionality.
Kubota X1140: Features a versatile hydraulic dump cargo bed, enabling easy loading and unloading of materials.
Transmission
John Deere X758: Equipped with a hydrostatic transmission for smooth speed and direction control.
Kubota X1140: Utilizes a continuously variable transmission (CVT) for seamless shifting and efficient power delivery.
Weight and Size
John Deere X758: Weighs around 1,700-1,900 pounds (770-860 kg), depending on attachments and configurations.
Kubota X1140: Typically weighs approximately 1,795-1,929 pounds (815-875 kg), depending on specifications.
Final Thought: Which one is better?
Essentially, if you need a pure workhorse, the John Deere X758 has a slight advantage in towing capacity and haul capacity. On the other hand, a Kubota has a hydraulic dumping mechanism that makes unloading a thousand pounds of material much easier than it would be if you had to do it by hand.
The continuously variable transmission gets a lot of criticism for its subpar performance, so Kubota offers a better warranty and a more reliable transmission.
Ultimately, fans of either brand will not notice a difference in their favorites.
Those on the fence will find Kubota’s top-of-the-line UTV carries the slight edge for a nearly insignificant price difference. What you do next is up to you!
FAQs of John Deere X758 vs. Kubota
Is John Deere better than Kubota?
Well, yes. John Deere X758 has more cutting-edge features than Kubota. But both are versatile & durable.
Which one is considered a rotary mower?
Kubota is a rotary mower. Vertically rotating blades or discs cut the grass. In addition to requiring little maintenance, they are usually cheaper and lighter than, for instance, a cylinder lawn mower.
What’s the towing capacity of John Deere X758?
The towing capacity of John Deere equipment varies depending on the specific model and type of equipment. It can range from approximately 1,000 to 10,000 pounds or more, depending on the size and capabilities of the equipment.
Is John Deere X758 & Kubota electric?
No. Though, an electric-powered mower offers several benefits over a gas one. Maintenance is easy & hassle-free. They are even better for the environment.

Car battery blanket, also known as battery warmers, keep batteries warm during the cold winter. It uses electricity to generate heat, which helps keep the battery’s internal temperature stable. It prevents it from freezing and losing its ability to start the car.
While many car battery blankets are available on the market, the best ones typically have several key features, including high-quality insulation, durable construction, and a reliable heating mechanism.
They should also be easy to install and use, with simple controls that allow you to adjust the temperature as needed.
The best car battery blankets include Kats Battery Blanket, Design Engineering Cell Saver Insulation Battery Blanket, and Thermo Tec Battery Blanket.
These models are all highly rated by users and are known for their effectiveness in keeping car batteries warm in even the coldest weather conditions.
So, let’s dig in and find out the best car battery blanket of all time and what they can offer!
Kats Battery Thermal Blanket!
A car battery thermal blanket is an indispensable accessory for all drivers. However, they are especially important in colder regions, where temperatures regularly fall below zero during the winter. Kats Battery Blanket is one of them.
Kat’s Battery Heater is a really handy item for winter weather. It’s designed to kick in when outdoor temperatures dip to zero degrees. This helps to keep your car battery at peak performance and extend lifespan.
In addition to that, it generates a whopping 80 watts of heating power. Wrapping the heater around your battery and plugging it in allows you to continue to enjoy the same effortless cranking power.
In addition, it can only be used when the temperature is 0 degrees or below, or lower than that. It gets warm but not quickly or immediately raises the battery’s temperature. This warmer is not the one that gets the most heated. It’s made of vinyl, which is resistant to oil and acids.
Pros
- Provide great installation
- Easily removable.
- Oil & acid-resistant.
Cons
- It doesn’t get secure onto the battery.
- Doesn’t produce the highest heat.
Design Engineering Cell Saver Battery Insulation Kit!
A car battery insulation blanket, also known as a battery thermal wrap or battery insulation sleeve, is a protective covering to regulate and maintain the temperature of a car’s battery.
It is typically made of insulating materials such as fiberglass or ceramic fibers with a metal mix to fit around the battery.
The Design Engineering Cell Saver Battery Insulation Kit is an incredibly resilient product. Its construction features titanium in its material mix, and the wrap is stronger than other offerings for optimal durability and heat evacuation. It can withstand up to 2,000 degrees to work safely in your engine bay.
What’s more?! It’s flexible, allowing tight wrapping over the battery, providing airflow for improved performance, and dampening harmful vibrations. When talking about longevity, this item excels. It traps and neutralizes dangerous battery acid fumes and won’t degrade with use or oil exposure.
Put the battery warmer down below the terminals and connectors of your battery. Electricity can flow through the foil side of the insulation material if there is any chance of contact.
Pros
- Heat resistance up to 2,000 degrees.
- Adaptable to any battery size.
- Excellent resistance to acids, oils, and abrasions.
- It’s secure!
Cons
- An improper installation may cause it to arc or spark.
Thermo Tec Car Battery Blanket!
The Thermo-Tec Heat Management Battery Heat Barrier is the U.S. Military’s preferred choice for insulation, and it is easy to see why. This product does not generate electric heat but instead acts as a buffer to protect it from external damage, such as corrosion, battery acids, and temperature fluctuations.
Furthermore, it is made from Thermo-Tec’s leading insulation material, which is tough enough to cope with whatever conditions come up on the road.
To top it off, this product is also environmentally friendly since you can recycle the barrier when you no longer need it.
Ensure this insulating battery warmer fits tightly and is spark- and arc-free by comparing the size with your existing battery.
Pros
- Easy Installation
- Covers the battery fully
- Corrosion-free
Cons
- Not compatible with all battery sizes.
Electric Battery Blanket For Car!
An electric battery blanket for the car is a must-have accessory for those in cold climates. It’s designed to keep the engine warm and prevent the battery from freezing, which can result in starting problems during the winter months.
It’s easy to install and plugs directly into the car’s battery, so there are no extra wires or cords to worry about. After being connected, it produces heat immediately and keeps a constant temperature throughout the night.
This eliminates the need to get up early to start your automobile before heading to work. The best part? Electric battery blankets come in different sizes and shapes that fit most cars, so you don’t have to worry about compatibility issues.
Whether going on a road trip or simply commuting daily, an electric battery blanket can make all the difference when starting your car smoothly during harsh winters.
Pros
- It fits easily.
- Installation is easy.
- Maintains a consistent temperature.
Cons
- Risk of fire, safety hazards.
What to Consider Before Buying an Insulation Blanket For Car Battery?
Compatibility
Ensure the insulation blanket is compatible with your car battery model and size. Check the blanket’s dimensions and specifications to ensure it will fit securely around your battery.
Insulation Quality
Look for blankets that are crafted from materials that are both high-quality and long-lasting. These materials provide effective insulation and resist heat, cold, abrasions, and corrosive substances. Ensure the blanket has good insulating properties to maintain the battery’s ideal temperature.
Ease of Installation
Ensure that the blanket is easy to install and remove. It should have a design that allows for a secure fit around the battery without obstructing any electrical connections or venting areas. User-friendly installation features, such as adjustable straps or fasteners, can simplify the process. Read more about Jeep Battery Protection Mode
Safety Features
Consider any safety features of the insulation blanket, such as built-in thermostats or temperature sensors. These features help regulate the temperature and prevent overheating. It also ensures the safety of the battery and the vehicle.
Oil and Wear-Resistant
Beyond heating your battery, your car’s battery warmer must withstand the range of fluids and potential hazards beneath the hood. Choose an oil-resistant product because oil is a common pollutant. You should also go for something abrasion-resistant and sturdy if you remove your warmer frequently since this increases the risk of snags, abrasions, and tears.
Prices for Car Battery Blanket
A car battery warmer’s cost equals the number of included features. Non-electric warmers that raise the temperature of your battery through insulation alone can be purchased for $20 to $50. To warm your car’s battery with an electric heater, you may expect to pay anywhere from $50 to $100, with some models costing as much as $150.
What is the function of a battery blanket?
Lead-acid batteries have a shorter lifespan in colder climates. Thus, battery blankets are used to keep them from discharging too quickly.
Standard blankets do not have heating capabilities. However, other coverings do.
Electricity is required to run the heating core in battery blankets. Thus, they can’t be used to warm your battery manually. You should prepare your battery if you live in a cold area.
Having a brand-new lead-acid battery, you may expect its lifespan to be significantly extended by winterizing it.
You may have to drive your car early in the morning in the dead of winter when it is below freezing. You know that cold weather and automobile batteries don’t mix. A battery blanket is an option to keep your automobile running smoothly.
What’s occurring is that batteries can’t keep their charge in subfreezing temperatures, so the automobile soon loses power.
If you leave your car unattended overnight without disconnecting the battery, you may find it won’t start in the morning. If this keeps happening, your battery won’t hold a charge for very long.
Invest in a friendly, warm battery blanket to prevent this from happening.
Is it worth investing in battery blankets?
Battery blankets are worth the investment since they generate enough heat to keep the battery from discharging, even when temperatures drop below freezing.
Preserving the health of your battery, regardless of what kind it is, will keep you from having to buy a new one as often. You can only guess the cost of constant battery replacement.
The reliability of batteries is essential during the colder months. Suppose you want to go to work on time, but your car doesn’t start in the morning. That cozy blanket over your battery would have saved you a lot of hassle and money.
A battery blanket is well worth the investment when cold outside, particularly in winter. I think this is different. Many people already use this product because it does what it should.
You can get an electric battery blanket with a heater and a conventional battery blanket there.
These items have my unqualified endorsement. You won’t have to stress over your car not starting, your battery will last longer, and your investment will be worthwhile.
Conclusion: Car Battery Blanket
In conclusion, a car battery blanket is a valuable accessory that can help optimize battery performance and increase reliability, especially in extreme temperatures.
By providing insulation and maintaining a stable temperature, the blanket safeguards the battery from the adverse effects of cold weather and excessive heat. Choosing a compatible and durable blanket is crucial, considering factors such as size, material, temperature range, and ease of installation.
Investing in a car battery blanket is a smart choice; its ability to preserve battery health and improve starting power offers peace of mind. It also enhances the overall driving experience, particularly in challenging weather conditions.
FAQs
Is investing in a car battery blanket worthwhile?
Absolutely. When temperatures drop, batteries can freeze, significantly reducing their ability to deliver sufficient power for starting and operating a vehicle. A high-quality battery blanket can effectively insulate. It can warm your battery during chilly nights, especially when plugged in.
How much temperature of car battery warmers get?
Well, it depends. If your warmer has an electric heating element, it can raise the temperature to between 60 and 70 degrees Fahrenheit.
When should I plug my car battery blanket?
To ensure effective performance, plug in your car battery warmer before cold weather or when temperatures approach freezing. Connect it a few hours before starting the vehicle to raise the battery’s temperature and provide adequate insulation.
Can I leave it on my car battery blanket overnight?
It’s generally safe to leave a car battery blanket on overnight.
Is a 12v blanket drain car batteries?
No, an electric blanket requires a much higher AC voltage than what a 12v DC car battery can provide.
Related:
Burning Smell From Car But Not Overheating: Causes & Solutions!
How To Change The Battery In The Jeep Key Fob? Ways Explained!