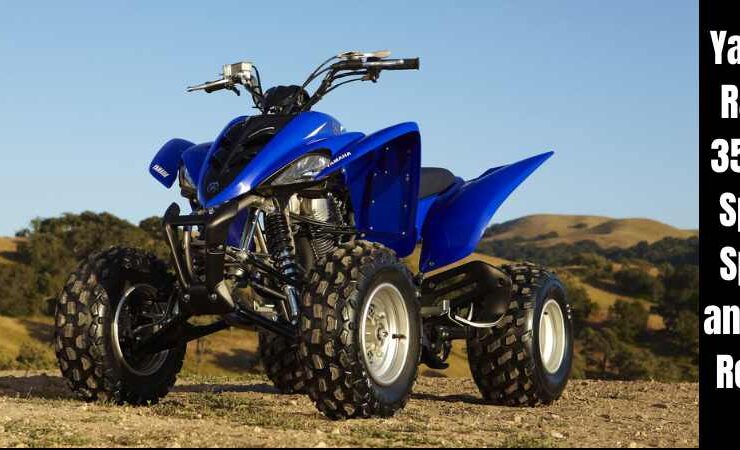

The Yamaha Raptor 350 was sold in great numbers during the 2000s, which was also true for ATVs. As a mid-bore quad, it competed effectively in terms of speed and handling in 2004. The Yamaha Raptor 350 Top Speed is around 63 mph. While not a crowd-pleaser, it was one spectacular car for Raptor owners.
Between 2004 and 2013, Yamaha produced the Raptor 350 as a sport and recreational ATV. Power was low to midrange, handling was excellent, and appearance was racy. Four-wheelers like this are perfect for off-road trails and are fun to ride.
As a 4×4 sporty vehicle, it remained unmatched in performance, acceptance, and design throughout its production. Unlike its big-bore sibling, the Raptor 350 had a successful 10-year production run before being discontinued due to the popularity of the Raptor 250.
Other than specs and known issues, the Yamaha Raptor 350 has so much more to offer. Let’s have a look at the Yamaha Raptor 350 Top Speed, specs, and its user review.
Yamaha Raptor 350 Overview?
ATVs (all-terrain vehicles) like the Yamaha Raptor 350 were first introduced in 2004. So here is the Yamaha Raptor 350 Overview. With its four-stroke, single-cylinder engine, and five-speed manual transmission, it is powered by a four-stroke, single-cylinder engine.
You can choose between two Yamaha models: the R model and the base model. Base models come with aluminum wheels, while R models have cast aluminum wheels.
Yamaha’s dimensions are 71.3 inches (1,815 mm), 44.7 inches (1,136 mm), and 43.9 inches (1,118 mm). There is a 50.6 inch (1,286 mm) wheelbase and 346 pounds (157 kg) weight. There are two seats in the Raptor 350, and its fuel capacity is 3.4 gallons (12.9 liters). You will feel very comfortable riding the Yamaha because of its smooth ride.
Yamaha Raptor 350 Specs
1. Dimensions:
The overall dimensions of this model are 69.7 x 43.1 x 42.5 inches (1,770 x 1,095 x 1,080 mm). The vehicle’s wheelbase is 47.6 inches (1,210 mm) and its ground clearance is 4.53 inches (115 mm). 180 kg/397 lbs is the curb weight.
There is a 32.3-inch/840-mm height difference between the seat and the backrest.
2. Engine:
An air-cooled, four-stroke SOHC engine powers the Raptor 350. A forward-inclined power mill with 83 by 64.5 mm bore-stroke ratio (3.27 by 2.54 inches).
There is a 349 cm3 displacement engine, a 9.20:1 compression ratio, and a wet-sump lubrication system. Wet-type air filtration and a 36-mm Mikuni BSR36 carburetor handle the air-fuel mixture.

The maximum power output is 16.4 kW (22.3 PS) on the Yamaha Raptor 350. It takes 2.38 US gal/9 liters of unleaded gasoline with an Octane number of 87+ at the pump and 91+ at the research station to fill the vehicle’s tank.
3. Lubrication:
Raptors have an oil capacity of 2.64 US quarts/2.5 liters at draining. The disassembled volume is 3.38 US quarts/3.2 liters. Additionally, it has a capacity of 2.75 quarts/2.6 liters when it’s time to change the oil filter.
To prevent clutch slippage, you can use Yamalube 4 4-stroke oil with an API grade of at least SJ (and no anti-friction modifiers or additives) depending on ambient temperature.
4. Drivetrain:
Wet, centrifugal automatic clutches power the wheels with a six-speed constant mesh shaft drive. It has a reduction ratio of 76/24 (3.167) on its primary spur gear. There are two gear ratios on this transmission: 36/16 (2.685) and 23/29 (0.946). The turning radius is 10.2 feet, which allows for smoother handling.
5. Ignition:
With a DC-CDI ignition and an electric start system as well as a mechanical recoil backup, the Raptor 350 uses a DC-CDI ignition system.
A Mitsubishi AC-magneto generator powers electronic accessories on the F4T466, which is manufactured by F4T466. A YTZ10S battery with an assembled size of 6.00 x 3.44 x 3.69 inches (150 x 87 x 93 mm – L x W x H) will be needed, along with a 15-Amp main fuse. Your battery will stay in tip-top shape if you use a Battery Tender with Smart BMS (view on Amazon).
There is a 0.6–0.7 mm (0.024–0.028 in) gap requirement for all models released in the U.S., Europe, Canada, and Oceania.
6. Tires:
The Dunlop KT851B AT21 x 7-10 front tires and the Dunlop KT877A AT20 x 10-9 rear tires are tubeless. The pressure should be 25 kPa (0.25 kg/cm2, 3.6 psi) in both the front and rear tires.
Whenever airing tires, do not exceed the 3.2 psi/22 kPa (0.22 kg/cm2) and 4.1 psi/28 kPa (0.28 kg/cm2). For seating tire beads, 36 psi/250 kPa (2.5 kg/cm2) is the maximum pressure. When rear tires become worn out, replace them with ITP Holeshot XCR 6 Ply ATV Tires (see on Amazon).
7. Brakes:
An engine braking system comprised of a two-cylinder hydraulic disc brake operated by the right hand and a single disc brake operated by the right foot powers the Yamaha Raptor 350.
8. Suspension:
The vehicle’s steel frame supports coil spring shocks at the front and swingarm link shock absorbers at the rear. There is a 200 mm (7.87 inch) and 210 mm (8.27 inch) wheel travel for the front and rear wheels, respectively.
9. Exterior:
With a caster angle of 6° and a trail of 26 mm, the Raptor 350 is made from steel tube-frame construction and plastic body material. The bike comes equipped with hand grips, footpegs, and front and rear fenders as standard.
On the front fenders are two 30-watt headlights, a 21-watt taillight, and 1.7-watt indicator lights. Improve visibility while wheeling at night by converting these to LED lights.
Yamaha Raptor 350 Special Editions
In 2006, Yamaha released a limited-edition Raptor 350 Special Edition. The Yamaha Raptor 350 Special Editions are based on the standard Raptor 350, but it features several upgrades that increase its off-road abilities. The suspension is beefier, the tires are taller, and the engine is more powerful.
As a result, the ATV can handle just about anything you throw at it. The Yamaha Special Edition is the ATV you’re looking for if you want to go anywhere and do anything. In order to power up the electronic accessories, the F4T466/MITSUBISHI AC-magneto generator system is used.
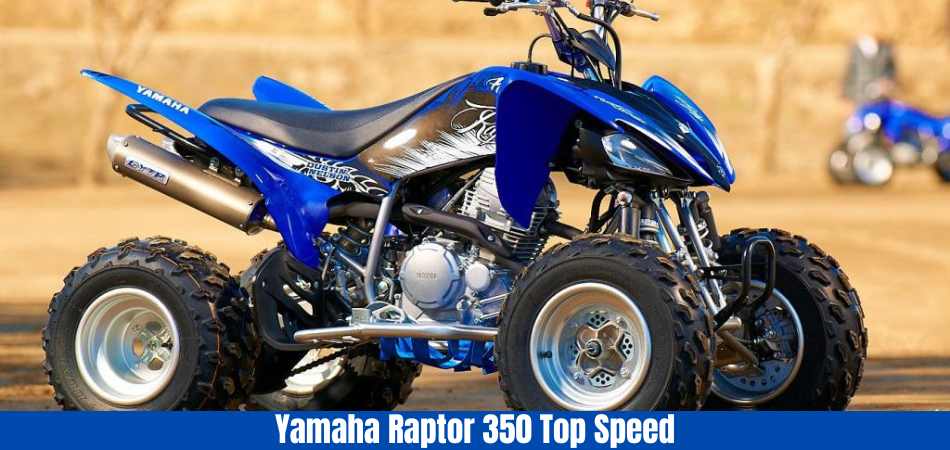
Yamaha Raptor 350 Top Speed
The Yamaha Raptor has an exceptional top speed. 63 mph (101 kmph) is the maximum Yamaha Raptor 350 Top Speed. The engine has a bore and stroke of 83×64.5mm, but the weight is around 375 pounds. Significantly reducing speed capabilities is the weight. Due to this, light-weight dirt bikes reach speeds of more than 70-80 mph even with low engine capacities.
When you want to increase this beast’s speed range, you won’t need to go through a lot of mods. When it comes to better speed, some little tricks work like magic. The Raptor 350 is no different.
How To Increase the Yamaha Raptor 350 Top Speed?
1. Loosen up the speed limit
It is simply a matter of loosening the speed limiter on the quad bike in order to increase its speed. What is the process for doing that? As you may have noticed, there is a tight screw beside the thumb throttle.
There is a screw on the throttle that limits its travel distance. As a result, you are not allowed to go over a certain speed limit. There’s a reason for that, we know.
You can, however, remove the nut using an appropriate screwdriver. You can increase the speed level by loosening it up a little or a lot. The thumb throttle’s travel distance increases significantly when the nut is removed. Higher rpm results from covering more distance.
Revolving at a rate of one revolution every minute is called RPM. Basically, it represents how many times the crankshafts of an engine turn per minute. That’s the idea, right? Speed increases with higher rpm. Your job is to do just that.
2. Make use of better-quality fluids
Engine performance depends on using high-quality fluids. The same is true for every other bike out there. You should use transmission fluids that are formulated for this purpose. Running the quad at higher rpms all the time will cause the engine oil to lose its viscosity faster.
Therefore, you will need to change your fluid sooner than expected. In the manual, it states that the bike (with lower rpm) can travel 3000 miles without losing oil. A bike that runs at a higher rpm and speed needs an oil change every 1000 miles if you increase the speed and rpm.
It is important to keep the inner chambers lubricated, and the speed will increase without much effort.
3. Gear Ratio Change
Does that sound tough? You don’t need to worry; it’s easy. To change the gear ratio, you simply increase or decrease the number of sprockets in the front and rear gears. If you want to change the gear ratio, you have to know how to do it.
In the front gear, there are 10 sprockets, while in the rear gear, there are 30 sprockets. We will have a gear ratio of (30/10)=3. It is necessary to increase the gear ratio on this bike in order to get more speed.
Is there a way to accomplish that? Increasing the rear gear’s sprockets or reducing the front gear’s sprockets is the only option. According to experts, the rear gear should have 2 or 3 sprockets, while the front gear should have .

You should keep in mind that changing the sprocket number only affects the speed or acceleration. The engine doesn’t get any more power from it.
Yamaha Raptor 350 Pros And Cons
The features of this ATV are already clear to you after reading the features and their details in the earlier section. To help you understand what to look out for while buying this unit, we decided to list the Yamaha Raptor 350 Pros And Cons. Let’s get started!
Pros
- In comparison to the other 350 quads, the suspension is better.
- With the throttle, you have more control over the vehicle.
- The engine compression ratio is medium, unlike fast dirt bikes. You don’t have to worry about overheating.
- A four-stroke engine and a one-cylinder engine produce more power at a lower speed.
- Brakes with double discs provide smoother braking every time.
Cons
- There is only low-range power available from this ATV. In comparison to the Raptor 400/600, the Raptor 400/600 has a higher cc engine and greater power.
- There is only low-range power available from this ATV. In comparison to the Raptor 400/600, the Raptor 400/600 has a higher cc engine and greater power.
- Despite its name, this isn’t a racer’s bike.
- Those who ride in front don’t appreciate plastic frames. There is a tendency for them to get floppy very quickly.
- We should revise some “facts” and be on the “bright” side before we wrap up this article.
Major Problems of Yamaha Raptor 350
Among its many great features is its reliability. There are, however, some problems it faces as well. The following are some of the Major Problems of Yamaha Raptor 350, and the various ways to solve them-
1. Difficult starting
This challenge could indicate that you need to check your carburetor and change or adjust your valves on your Yamaha Raptor 350.
A carburetor or valve may need some attention, and it can be tricky to determine.
The good news is that you can perform a test quickly to identify the problem or fix it.
If the fuel does not flow, turn the petcock on the Yamaha Raptor 350 to reserve. When fuel is flowing from the tank, there is a plugged screen in the tank.
2. Electronic and Engine Problems
How does your quad machine perform when you go extra hard? It may have some real problems when you leave it.
As you enjoy your ride in the Yamaha Raptor, wear and tear will catch up with it, and before long, you’ll have engine problems and other problems.
A frustrating situation like this is something everyone has experienced at some point in their lives.
You may also be clueless about the real cause of the problem when you notice your machine with such dysfunction. Is there a way you handle such issues? In order to rectify the situation, you may take the following steps;
If the quad won’t start, check if there is a spark. It may be necessary to replace your spark plug.
- Make sure the carburetor is clean.
- Make sure the fuel flow is not stale or clogging the fuel filter.
- You can trickle-charge your battery by doing this
- Compression checks are important both dry and wet.
- Cylinder re-honed.
3. Weak frames
The Yamaha Raptor 350 may also have weak frames, especially at the front, in addition to the two problems mentioned earlier. Plastic is after all what they are made of.
As a result, they become floppy very quickly. Second-hand 4-wheelers are particularly susceptible to this problem.
Perhaps the previous owners didn’t take good care of the wheelers when they owned them.
You should always ensure that the previous owner of a Yamaha Raptor, even a second-hand one, hasn’t damaged it too much before purchasing it. Is it possible to tell? Look at the frame of the front wheel. Do you know if it’s broken?

Alternatively, you can check the subframe. If it is crooked or bent, you should know how poorly your vehicle was maintained. As a result, weak frames are an indication that you should negotiate more on price.
Why You Need Yamaha Raptor 350 in 2024?
Among ATVs, the Yamaha Raptor 350 is one of the best. So Why Do You Need Yamaha Raptor 350 in 2024? Though it isn’t as fierce as some competitors, it excels in some areas. Among its best uses are-
1. Fun rides:
If The Yamaha Raptor 350 is the go-to four-wheeler for those long recreational and sporty rides.
For stability, the Yamaha 350 is the best choice. On the terrain, the Yamaha Raptor 350 is more stable than other fierce dirt bikes that focus primarily on speed.
2. Off-road trails:
Its strong engine makes Yamaha 350 ATVs stable, reliable, and safe to ride over rough terrain, as well as on tracks.
Tips for Maintaining the Yamaha Raptor 350
Off-road enthusiasts will love the Raptor 350’s lightweight, nimble performance. Here are some of the Tips for Maintaining the Yamaha Raptor 350-
- Be sure to check the oil level regularly and change it when necessary. You should top up the Raptor’s oil as necessary since it burns through it quickly.
- You should clean or replace your air filter regularly. It is possible for a dirty air filter to restrict airflow and damage an engine.
- Make sure the valves are checked and adjusted every few thousand miles. To prevent premature valve wear, Raptor 350 valves must be adjusted.
- Ensure that the tire pressure is correct and the tread depth is adequate. When riding off-road, you should check your tire pressure regularly and inspect the treads for excessive wear.
- Maintain your chain by cleaning and lubricating it regularly. You can extend the life of your drivetrain components by keeping your chain clean and lubricated properly.
Conclusion: Yamaha Raptor 350 Top Speed
Yamaha Raptor 350 Top Speed is quite high. So, It’s best to start with quads because they look so cool and are perfect for learning. Additionally, they tend to be heavier and provide a better grip. Thus, you have a very low chance of flipping over after trying a stunt.
However, we wouldn’t recommend becoming aggressive with the Raptor 350. Remember that this ATV was built for recreational use. Take this beauty out on the trails and have as much fun as you want, but be kind to it.
Taking a look at the Raptor 350 specs and review, we have reached the bottom of the page. Thank you for reading. I hope you found it enjoyable.
Read more of our articles here.
Read Also: Yamaha Raptor Specs, and Features
FAQs
1. Is the Raptor 350 automatic?
This off-road machine comes equipped with a wide-ratio 6-speed manual gearbox and reverses so riders of all riding styles can get the most out of it.
2. How many gears does a Raptor 350 have?
Besides its soft clutch, the Raptor 350 has a transmission with six forward gears and a reverse lever that can be reached easily.
3. What is the top speed of a Raptor 350?
A 686cc engine powers the Raptor, which has a top speed of 65 mph. An electric start is also included and the transmission is five speeds.
4. What engine is in the Yamaha Raptor 350?
Powered by a 348cc, air-cooled, SOHC, single-cylinder, four-stroke engine, the Yamaha Raptor® 350 features a six-speed transmission.
5. Is a Raptor a 4-stroke?
Designed for ATV riders ages 10 and up, the Raptor 110 is built to provide maximum fun. An air-cooled, fuel-injected 112cc SOHC 4-stroke engine is tuned to provide excellent low- and mid-range performance.

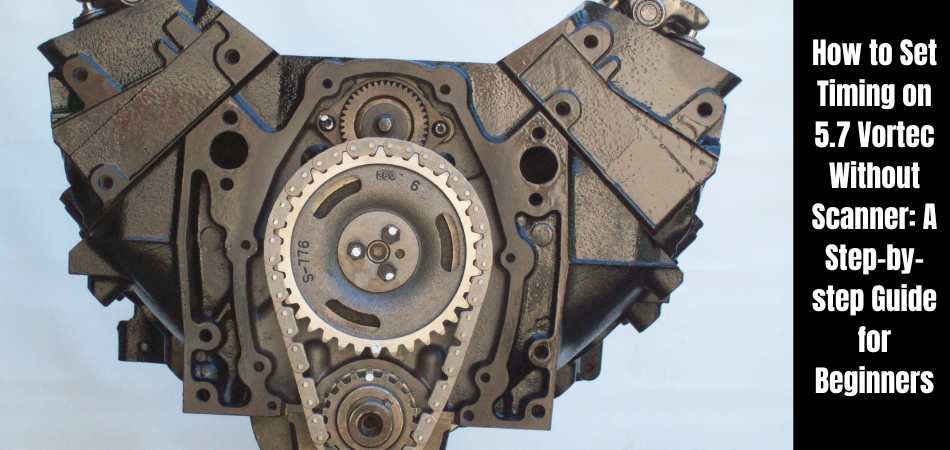
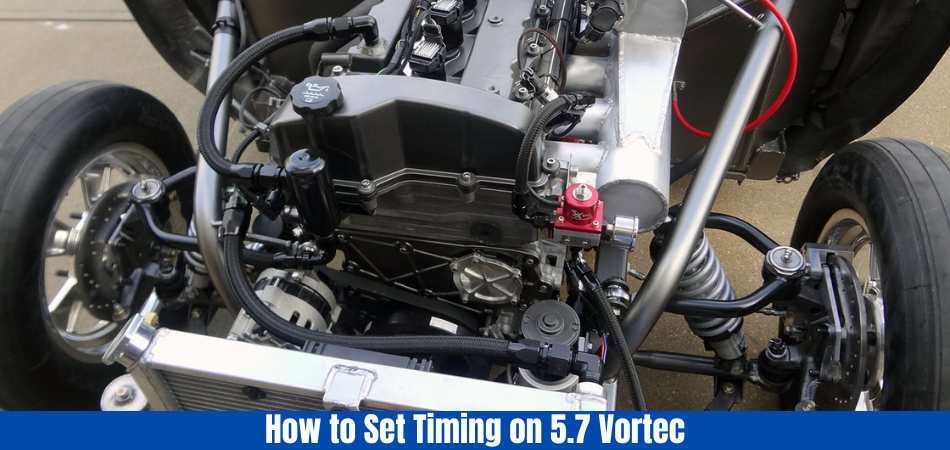
The 5.7 Vortec engine is a powerful piece of machinery. Timing is critical for peak performance. The engine might not operate to its maximum potential if the timing is not precise. But How to set timing on 5.7 Vortec without scanner? The catch is that you don’t need a scanner to modify the timing.
You read that correctly. Even without a scanner, you can get the time precisely correct. It’s a skill worth learning. You may wonder why timing is so critical. It is, after all, the key to efficient combustion, fuel efficiency, and power production.
Do you want your engine to be as efficient as possible? Don’t worry if you don’t have a scanner; we’ll walk you through the procedure. So buckle up and prepare to learn “How to Set Timing on 5.7 Vortec Without Scanner.”
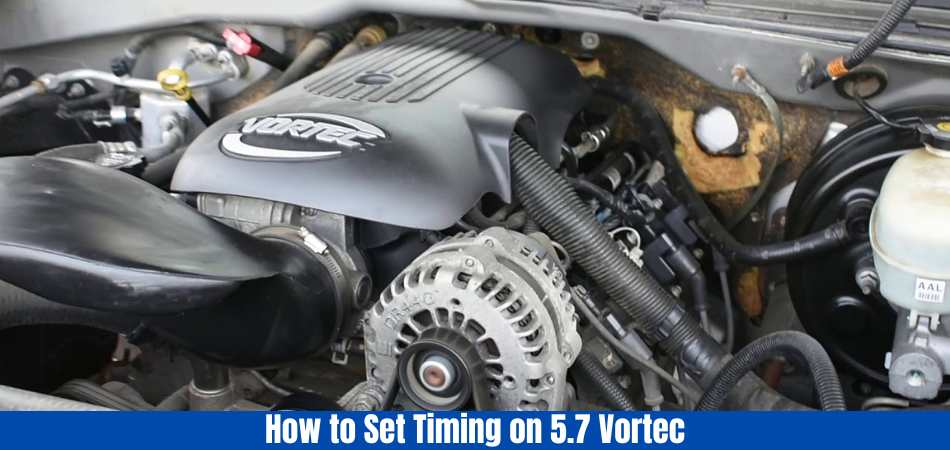
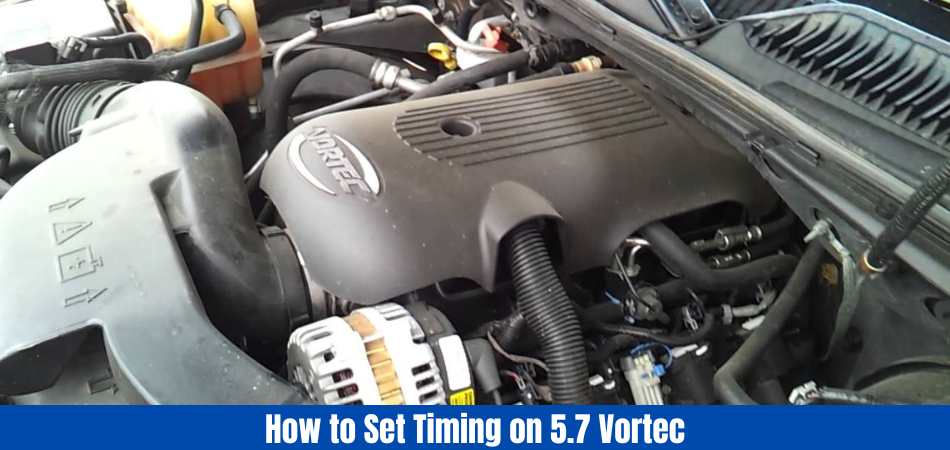
What is a 5.7 Vortec Engine?
General Motors initially designed the Chevrolet 5.7L Vortec engine. It was primarily designed for heavy-duty trucks. The engine is powered by liquid propane gas and compressed natural gas. It can, however, be utilized in both standard and alternative vehicles.
The Vortec engine’s intake system is designed to create swirling pressure in the combustion chamber. This spinning pressure resembles a small tornado. The goal is to produce more power while improving fuel efficiency.
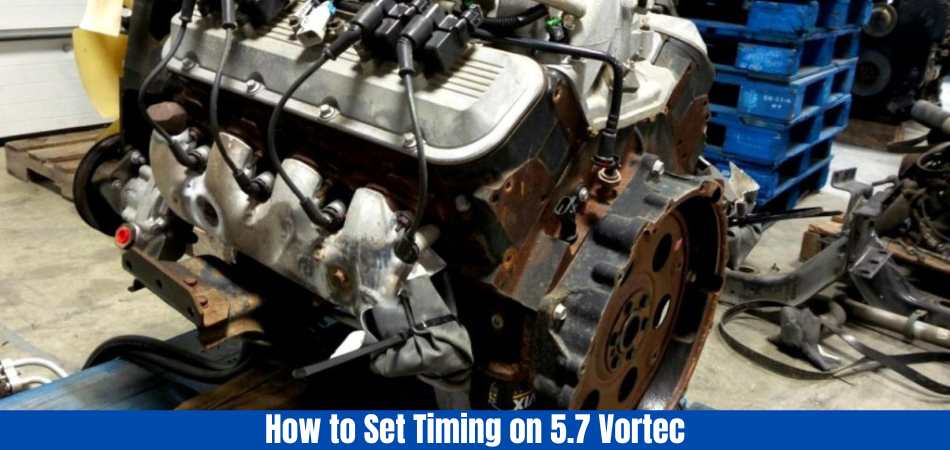
The enhanced efficiency results from increasing the amount of oxygen entering each cylinder. Despite the increased power, the petrol ratio stays unchanged. The Chevy 5.7L Vortec engine is a modern engine design. It has more torque, horsepower, and engine response.
Fuel efficiency is also increased. The engine has overhead valves. Each cylinder contains two valves. The intake manifold is a four-bolt affair. When compared to prior engines, it features a shorter stroke and larger bores. The shorter stroke allows for more airflow.
These design elements contribute to better power output and improved performance.
What are the Features of a 5.7 Vortec Engine?
1. Smoother driving and more horsepower
The 5.7-liter Vortec produces between 310 and 314 hp in all recent variants. It generates a lot of horsepower, which helps with speed and truck stability. Its older models have a horsepower rating of over 249 hp. Furthermore, its higher horsepower implies an excellent rating from the Environmental Protection Agency (EPA).
However, the older models had an EPA rating of roughly 15 mph on city roads and around 19 mph on highways. Its horsepower varies depending on the pickup truck’s type and design.
But few models may provide the most horsepower (369 hp). More horsepower shows that the motor’s spinning components are performing consistently. Because the power flow is continuous, it provides smooth driving conditions. The more power flows to the truck’s components, the more efficient it is.
The axles, gearbox, suspension, and exhaust systems all function correctly. The greater the power flow, the lower the pressure over the exhaust system. It reduces emissions while improving fuel performance.
2. High mileage
It is one of the best engines because of its efficient and one-of-a-kind cylinder head. The cylinder head’s adaptable design improves the motor’s internal ventilation. It produces more horsepower, which improves the pickup truck’s gas mileage. The oxygen flow inside the cylinders can be controlled and monitored via the cylinder head.
Furthermore, it regulates the fuel flow outside of these cylinders. It controls the operation of valves and injectors. Their performance improves, and they can increase combustions. The 5.7-liter Vortec V8 engine has more spinning elements than conventional engines.
The motor is more durable due to the efficient layout of the cylinder head. In these cases, the miles per gallon increase. Throttle response helps to stabilize and enhance motor efficiency. The intake bolt angle on the 5.7 Vortec is unique.
The bolt angle is 72 degrees, which improves engine breathing and lowers temperature levels. It also boosts the durability and longevity of the valves. Because of the precise angle of the valves, it has a greater fuel flow. Increases their lifespan. It has a better fuel flow through the valves because they have a specific angle.
3. Affordable parts
It is a reliable and powerful V8 engine. It is a good engine since it has more stability and less foot injury. Replacement 5.7 L Vortec spare parts are reasonably priced. Because these parts are rarely commonly required, their prices are modest. These are not stock components, and no brand markings are on them. They do, however, have low pricing and moderate durability.
Furthermore, they are less expensive due to decreased demand. Surface cracks and component failures do not occur in the 5.7-litre Vortec. It has a longer lifespan than many other motors. The lower demand for its spare parts lowers its costs. You may get them at low prices and change them on the motor. However, repairs and replacements on this motor are uncommon.
The market for spare parts for this engine has little competition. As a result, the vendor maintains low prices.
4. Appealing acceleration
The 5.7 Vortec is an economical V8 with one of the best acceleration rates for pickup trucks. It has a more efficient throttle. You can briefly depress the accelerator pedal. In such cases, it displays the reaction to accelerator pedal signals.

Because of its horsepower, it has a quick throttle response. As a result, the built-in sensors now perform better. The camshaft and crankshaft sensors are in good working order. Furthermore, they are long-lasting and efficient.
These sensors are capable of controlling the valves and pistons. They also recognise accelerator pedal signals and send them to the combustion chambers. It has improved combustion, which increases acceleration. This extremely efficient powertrain allows for enticing acceleration on a variety of roads.
5. Computer regulated engine
The 5.7L Vortec engine is controlled by the pickup truck’s engine control module. Because ECM regulates it, it has higher efficiency and performance. The control module manages and monitors the spark and strokes. Furthermore, ECM manages its fuses and maintains power flow stability.
Because of its computer-regulated performance, it is a dependable and excellent engine. The pickup truck’s ECM controls the fuel and air ratio. The ECM sensors transmit signals to the motor to blend oxygen and fuel. They manage the fuel-to-oxygen ratio in truck exhaust.
The ECM sensors regulate the revolutions of a 5.7-liter V8 engine. The ECM controls the fuel injectors and the valve action. The computer manages the ignition, allowing you to start the truck with maximum force. The truck ECM is in charge of the throttle position sensor.
The throttle then controls the mixing of fuel and oxygen. Through the sensors, the ECM monitors and stabilizes the coolant system. It keeps the coolant volume constant, which protects the engine from abrupt malfunctions and damage.
6. Distinct towing support
This engine can tow more than most other engines. However, its towing capacity ranges from 12000 to 14000 pounds on average. It has a payload capacity of over 3000 pounds and a torque of nearly 429 lb-feet. The pickup truck can be driven at different speeds while the motor supports the chassis for pulling huge loads.
It allows for a maximum towing capacity of around 13000 to 15000 pounds. Furthermore, because of its higher torque, it provides greater towing capacity and dependability. Torque is measured in rotations per minute (RPM) of the 5.7 Vortec. Higher torque suggests that the engine has more hauling capacity.
According to its revolutions and performance, the 5.7-liter Vortec may provide more torque. When the torque is high, you can drive the pickup truck smoothly. When the torque is high, the large load has little effect on motor performance. It increases the pickup truck’s overall towing capacity.
7. Mileage and speed
The very efficient and dependable 5.7-liter Vortec achieves 18 to 19 miles per gallon. It can accelerate from zero to sixty miles per hour in 3 to 4 seconds. Furthermore, it has a larger throttle body and improved performance. Moreover, It can provide additional horsepower for improved wheel and component efficiency.
Furthermore, it has increased torque (rotations per minute), which boosts truck speed. The engine spins faster and provides greater power for acceleration. When the truck has more torque, you can move faster. It’s a big V8 with efficient combustion chambers.
It can consume more fuel and produce more horsepower. Large engines deliver peak speeds due to their higher rotations per minute (RPMs). With a 5.7-liter Vortec engine, they can haul huge loads at high truck speeds.
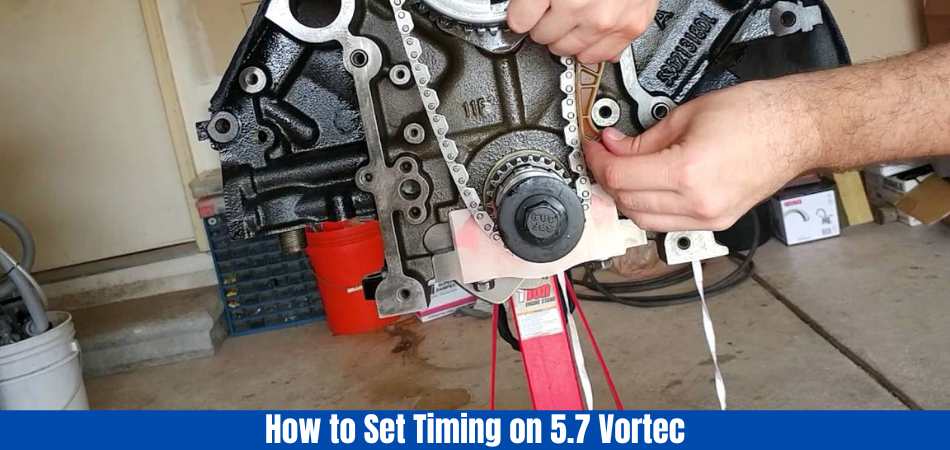
How To Set Timing On 5.7 Vortec With Timing Light?
Timing is essential for an engine’s effective operation. Let’s break it down:
A timing light is a useful instrument that can help you establish time on a 5.7 more efficiently. If you have a timing light, you can proceed as follows:
- Make sure you have a timing light, a socket set, and a wrench on hand.
- Check that the engine is turned off and adequately cooled before starting the process.
- Locate the critical timing markers, which are often the timing tab and the harmonic balancer.
- Connect the timing light by connecting the power clip to the battery’s positive terminal and the signal clip to the spark plug wire.
- Start the engine and let it idle smoothly.
- Direct the timing light precisely at the timing marks.
- When adjusting the timing, gently and gradually rotate the distributor.
- After each adjustment, recheck the time with the timing light.
- Once you’ve obtained the desired timing, carefully lock the distributor in place.
- To confirm the precision and consistency of your modification, rev the engine and attentively listen for any inconsistencies or abnormalities in its functioning.
How do you set distributor timing on 5.7 Vortec?
It’s critical to be well-prepared and safe before plunging into timing adjustments. What you must do is as follows:
1. Collect Tools and Equipment:
Gather your equipment, including a timing light, wrenches, and a socket set. Check that you have the right tools for your engine model.
2. Precautions for Safety:
Wear protective equipment such as gloves and safety glasses to prioritize safety. Before beginning, ensure that the engine is switched off and cool.
3. Determine Key Components:
Familiarise yourself with the timing adjustment components, such as the harmonic balancer, timing tab, and any other timing indicators on the engine.
How To Set Timing On 5.7 Vortec Without Scanner?
It takes precision and patience to set the timing on a 5.7 Vortec engine without a scanner. You should verify the timing accuracy at various RPM levels by taking your time, making small adjustments, and making minor adjustments. The following steps will guide you through the process:
1. Set up the necessary equipment and tools
- If your engine model requires additional tools, gather a timing light, a socket set, and a wrench.
- It is important to have adequate lighting in your workspace.
2. Find the timing markers
- On the crankshaft, you can find the harmonic balancer.
- Find the timing tab near the harmonic balancer on the engine block.
- Timing degree markings can be found on the timing tab.
3. Adjust the timing of the engine
- Make sure the engine is turned off and cooled.
- Avoid electrical mishaps by disconnecting the negative terminal of the battery.
- Access to the timing components should be made as easy as possible by removing any obstructions.
4. Make sure the engine is set to Top Dead Center (TDC)
- Get rid of the spark plug in the number one cylinder by finding it and removing it.
- Ensure the piston in the number one cylinder reaches its highest point by rotating the crankshaft wit. h a socket wrench.
- To verify the piston’s TDC position, use a piston stop tool or a long screwdriver.
5. Make sure the timing light is connected
- The timing light’s power clip should be attached to the battery’s positive terminal.
- Wire the number one spark plug to the timing light’s signal clip.
6. Turn on the engine.
- Allow the engine to idle after starting it.
7. Use the timing light to aim
- Aim the timing light at the timing tab and harmonic balancer.
- It is essential to ensure that you can see the balancer’s timing marks as they pass over the timing tab.
8. Make adjustments to the timing.
- You will see the timing marks aligned as you align the timing marks with the timing tab.
- Loosen the distributor hold-down bolt if the timing is not aligned correctly.
9. Distribute the product in rotation
- Adjust the timing gradually by rotating the distributor.
- To advance the timing, turn it clockwise, and to retard it, turn it counterclockwise.
- If you make any changes to the timing, check it with the light after each change.
10. Distributor lock
- Tighten the distributor hold-down bolt once the desired timing has been achieved.
- During the tightening process, verify that the timing has not shifted.
11. Verify and test
- Observe the engine’s response a few times and revise it as necessary.
- If you hear or feel anything abnormal, pay attention.
- When the engine is running at a higher RPM, use the timing light to recheck the timing marks.
Expert Tips About 5.7 Vortec Distributor Adjustment
- Clean the harmonic balancer’s timing mark index.
- To improve visibility, use a white or yellow paint marker to designate the top dead centre (TDC).
- Before reinstalling pieces that have been removed, clean them and inspect them for wear.
- Ensure you’re working beneath the hood with the engine turned on or off.
- Wear safety precautions such as closed-toed shoes and gloves.
- Wearing clothing that is too loose may get stuck in moving engine parts.
Conclusion: How to Set Timing on 5.7 Vortec Without Scanner
That’s how to set timing on a 5.7 Vortec without a scanner to get the most outstanding performance out of this fantastic engine. You will have improved mileage and more responsive engine performance as the relevant issues are resolved. Even without the scanner, you can complete the timing correction task, but it will need dedication and patience to attain the optimum results.
Read more of our articles here.
Read also: 5.3 vs 5.7 Vortec Engine.
FAQs
Why Is It Necessary To Set 5.7 Vortec Timing?
Engine timing is critical for avoiding engine difficulties. Timing is critical for optimal combustion, optimum power, and low emissions. It impacts how the engine fires and performs; therefore, adhering to manufacturer-specific/correct timing criteria is critical.
What Happens If You Choose the Wrong Timing?
Wrong engine timing can result in lousy mileage, difficult engine starts, decreased power, and overheating. It is critical to adjust the time correctly to avoid these complications.
How Would I Know If My Engine Timing Is Wrong?
Incorrect timing in an engine can cause “ticking” noises, an illuminated Check Engine Light (CEL), and random/periodic misfires. If you detect any of these problems, it’s time to alter the engine timing yourself or with the assistance of a specialist.
How Much Spark Advance Should A 5.7 Vortec Engine Have?
The spark advance on a 5.7 Vortec engine can vary depending on factors like as gasoline quality, driving conditions, engine setup, and so on. At idle, the spark advance is typically around 10-15 degrees before the top dead centre (BTDC). The precise degree requires additional consulting with a handbook or experts.
What Is The Difference Between TDC And Distributor Cap On A 97 Chevy Silverado?
When establishing ignition timing on a 1997 Chevy Silverado, the distributor cap and Top Dead Centre (TDC) are inextricably intertwined. TDC denotes the piston’s pinnacle position within the cylinder and is the essential reference point for timing changes.
Meanwhile, the distributor cap is critical because it houses the spark plug wires that convey the spark required to ignite the air-fuel mixture.

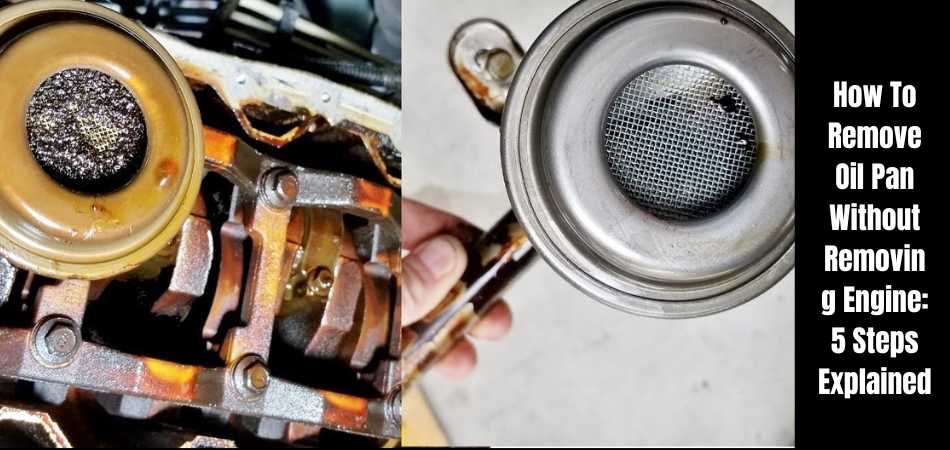
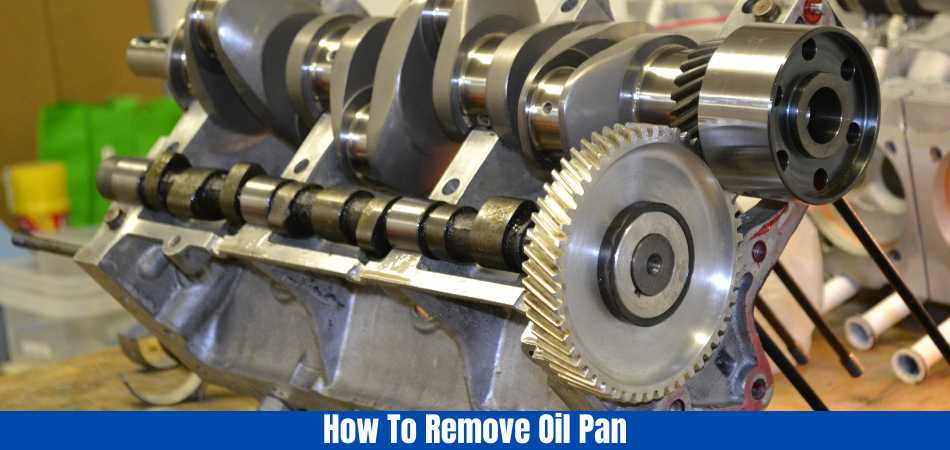
If you’re struggling with how to remove oil pan without removing the engine, it may seem impossible. Oil pans can sometimes be removed without removing engines in some cases, however.
Since removing the engine can be difficult and expensive, this method can save you time and money.
We will guide you through removing the oil pan without removing the engine. Keep reading to learn how to remove an oil pan without removing the engine, whether you are a seasoned mechanic or an enthusiast seeking to reduce repair costs.
Now read the article to learn more about- “how to remove oil pan without removing engine”
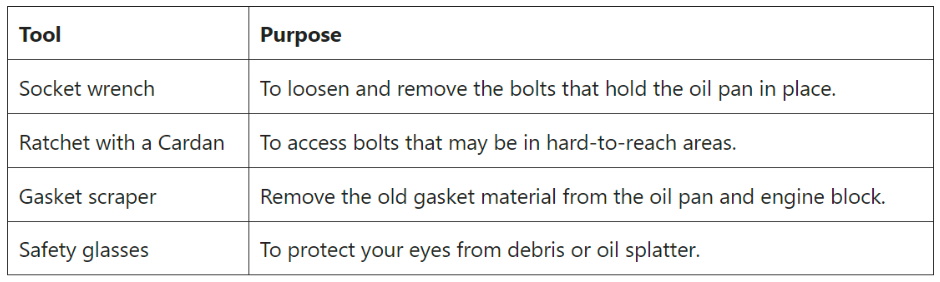
What are the Tools and Materials Needed for Removing Oil?
The removal of an oil pan without removing the engine requires a few tools and materials. You will need the following items:
- Jack stands or ramps to raise the car
- A socket wrench set with various sizes of sockets
- A torque wrench
- A scraper or putty knife to remove the old gasket material
- A new oil pan gasket
- A drain pan to catch the old oil
- A funnel to pour in the new oil
- New oil and oil filter
Before you begin your project, you should have all these tools and materials. Check that the sockets you have for the bolts holding the oil pan are the correct size. To ensure that the bolts are tightened to specifications, a torque wrench is also essential.
Preparation for Removing Oil Pan Without Removing Engine
It can be difficult to remove an oil pan without removing the engine, but it is possible with the right tools and preparation. The following steps will help you prepare:
- Ensure you have enough space to work on the car’s underside. A jack can be used to raise and secure the car if necessary.
- Exhaust systems or transmission cross members that may be blocking access to the oil pan should be removed.
- Oil filter and oil drain should be done after the engine has been drained of oil.
- The oil pan should be disconnected from any electrical connections or hoses.
- The oil pan is held in place by bolts. Remove them. As some bolts may be different sizes or lengths, be sure to keep track of their locations and sizes.
- Making the job easier requires having the right tools on hand. You may need the following tools:
If you follow these steps and have the right tools on hand, you can successfully remove the oil pan without removing the engine.
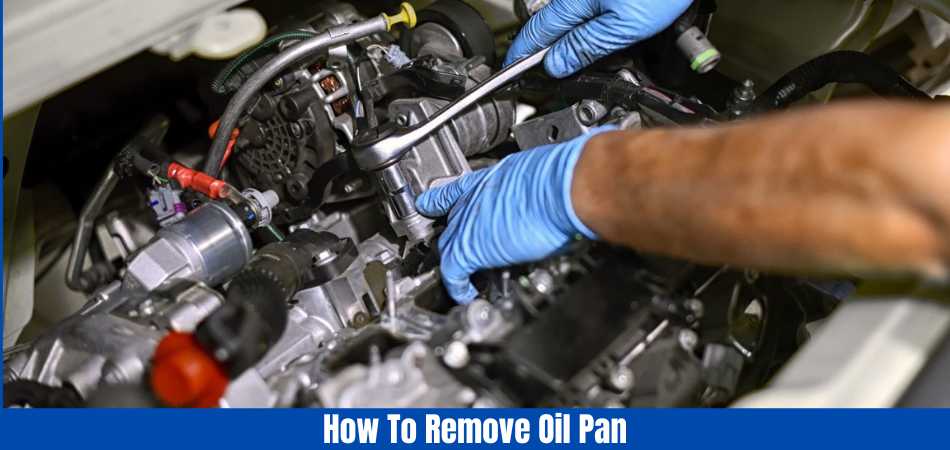
How To Remove Oil Pan Without Removing Engine
It takes some patience and attention to detail to remove the oil pan without removing the engine. The steps are as follows:
Step 1: Access the oil pan first
Accessing the oil pan is the first step in this process. The hood of your car should able to be lifted off, and you should be able to see underneath if it has an open engine bay. Other components within the engine bay that block it from view, such as the air filter or radiator, must be removed.
Step 2: Drain the oil from the oil pan by removing the mounts
You can begin removing the oil pan as soon as you have access. All bolts around the edges of the pan should unbolted and separated from their mounts. As a result, you will be able to tilt or lift out the pan itself. Pour all of the oil out of the pan before you do this to prevent spills on the driveway or garage floor. When you detach the oil pan, place a tray underneath it to collect any remaining oil.
Step 3: Remove the Oil Pump from the block by unscrewing it
You can now begin to remove the pan from the housing now that it is loose. Take the oil pump out of the engine block by unscrewing it and removing it. The bolts attaching it to the bottom of the pan are usually unscrewed, and then it is extracted. If there are any hoses or wires connected to the oil pump, pay attention to them as you remove them.

Step 4: Clean the oil pan by removing it from its housing
It is now possible to remove the oil pan itself after you have removed the oil pump. The remaining bolts can unscrewed using a ratchet and sockets. Put the pan aside after gently lifting it out of its housing. After removing the pan, clean it thoroughly with a degreaser or soap and water before reinstalling it.
Step 5: Fill the Oil Pump with oil and reinstall it
As soon as your oil pan cleaned, it can be placed back into its housing and the oil pump can be reattached. Once all of the bolts been tightened, make sure to refill your engine with oil. Check that all the necessary components, such as hoses and other wiring, properly attached after refilling.
You have a clean oil pan
Here’s a quick, easy guide to removing the oil pan without having to remove the engine. Any automotive enthusiast can easily access their motor’s oil pan for maintenance or replacement with a little know-how and elbow grease. Wishing you the best!
How To Install the Oil Pan?
Now that you’ve successfully removed the oil pan, you need to put it back in place. The oil pan can installed by following the steps below:
- Ensure that the engine block surface and the pan where the gasket will be placed are clean.
- On the oil pan, install a new gasket. Check that the gasket is aligned correctly with the bolt holes.
- The oil pan should be placed back onto the engine block. Ensure the gasket is not slipping out of place and that it is properly aligned with the bolt holes.
- Ensure that the oil pan is securely mounted by hand-tightening the bolts. In order to prevent damage to the oil pan or gasket, do not overtighten the bolts.
- To ensure even tightening, tighten the bolts in a criss-cross pattern. To determine the appropriate torque settings for your specific vehicle, refer to the torque specifications.
- Ensure that all parts that were removed earlier, such as the starter, the distributor cap, and the exhaust Y-pipe, are replaced.
- In order to check for leaks, fill the engine with the recommended amount of oil and start it.
It is essential to ensure that the oil pan installed properly to prevent leaks. For specific instructions and torque specifications, refer to the manual of your vehicle. You should seek the help of a professional mechanic if you have any questions about any step.
What are the Issues When Removing an Oil Pan Without Removing the Engine?
Some common challenges people encounter when removing an oil pan without removing the engine can be challenging. When removing an oil pan without removing the engine, people often encounter the following issues, along with tips for overcoming them:
Issue 1: Oil pan bolts are difficult to access
Removing an oil pan without removing the engine can be challenging due to the oil pan bolts being difficult to reach. Vehicles with low clearance are especially vulnerable to this.
Solution: Make use of specialized tools
The solution to this problem is to use specialized tools like universal joints and long extensions to reach the bolts. Swivel sockets and wrenches with universal joint attachments are other options.
Issue 2: Pan stuck in oil
It is also common for the oil pan to become stuck to the engine block when it removed without removing the engine. As a result of age, heat, or other factors, the gasket can become fused to the engine block.
Solution: Make use of a gasket scraper
With a gasket scraper, you can carefully pry the stuck oil pan away from the engine block. Ensure that the mating surfaces not damaged, which may lead to leaks. Using a heat gun may be necessary if the gasket is particularly stubborn.
Issue 3: Oil pan damaged
There are times when people have trouble removing or reinstalling their oil pans due to damage or corrosion.
Solution: Replace or repair the oil pan
If your oil pan is damaged, you must either repair or replace it. If it is only a minor issue, you may be able to repair it with a patch or a weld. However, if the damage is severe, it recommended that you replace the entire oil pan.
What are the Tips and Tricks for Removing an Oil Pan Without Removing the Engine?
Oil pan removal without removing the engine can be tricky, but there are a few tips and tricks that can help:
Tip 1: Make sure you use a quality gasket
It is important to use a high-quality gasket to remove an oil pan without removing the engine. By doing this, you will be able to ensure a tight seal and prevent leaks.
Tip 2: Make use of a torque wrench
To ensure that the bolts tightened to the correct specification, you should use a torque wrench when reinstalling the oil pan. Leaks can occur if the screws overtightened or under-tightened.
Trick 1: Make use of a mirror
Using a mirror will help you see what you’re doing when you try to access the oil pan bolts. You may find this especially helpful if you are working on a vehicle that has limited clearance.
Trick 2: Make use of a magnet
Using a magnet will prevent you from losing any bolts or small parts while working on your vehicle. Working in a tight space where dropping a bolt can be a problem can make this especially useful.
What are the Safety Precautions for Removing Oil Pan Without Removing Engine?
- If any spilled oil occurs during the removal of the oil pan, place an oil pan beneath the engine.
- Be sure to wear safety glasses, gloves, and other protective gear before starting any work on a vehicle.
- To prevent the engine from dropping once the oil pan is removed, place jack stands under it and support it with a jack. Be sure to disconnect the negative battery cable from the battery before working on it.
- During the oil pan replacement, you should remove any obstructions, including plastic covers, brackets, and wiring harnesses.
- Take care not to strip the bolts around the perimeter of the oil pan as you remove them.
- The old oil pan should be carefully removed and disposed of responsibly.
- Install the new oil pan and clean the mounting surface of the engine block before installing the new oil pan gasket.
- In addition to replacing the oil pan, make sure all connections are secure and that it is filled with fresh motor oil according to the manufacturer’s instructions.
- For the engine to start, reconnect the negative battery cable after installing the new oil pan.
When working on a vehicle, safety should always be a priority, so when removing an oil pan without removing the engine, follow these steps carefully. In this way, you can prevent potential hazards or damage to your car.
Conclusion
It can be challenging to remove an oil pan without removing the engine, but it’s not impossible. To make the process easier and more efficient, use quality tools and a high-quality gasket, and follow the tips and tricks in this article. Maintaining your oil pan regularly prevents costly engine damage and keeps your vehicle running smoothly. Maintaining your engine and addressing issues promptly will ensure a long and healthy life. It is possible to remove and reinstall an oil pan without removing the engine if you follow the right approach and have some know-how.
Read more of our Articles here
Read Also: What does an oil pan do?
FAQs
Do I have to drain the oil before removing an oil pan?
A draining of the oil is recommended before removing an oil pan. You will likely end up with oil all over the place if you attempt to do so, which can be dangerous and messy.
Is it necessary to remove the engine to change the oil pan gasket?
In order to replace the oil pan gasket, the engine does not need to be removed. There are, however, some specialized tools and knowledge that are needed in this process.
What are the signs that my oil pan needs to be replaced?
If Oil leaks from the oil pan or visible damage, such as cracks or corrosion, may indicate that the pan needs to be replaced. Your oil pressure warning light may also be on if your oil level is consistently low. The best thing you can do is to have a professional mechanic examine your vehicle if you are unsure.
If my oil pan is damaged, can I still drive my car?
When your oil pan is damaged, driving your car can cause significant engine damage due to oil loss. Your oil pan should be inspected, repaired, or replaced immediately if you suspect that it has been damaged.
Is it necessary to replace the oil pan gasket regularly?
Your vehicle’s make and model, as well as your driving habits, will determine how frequently you should replace your oil pan gasket. If you notice any signs of leakage or replace the oil pan, it’s recommended to replace the gasket.
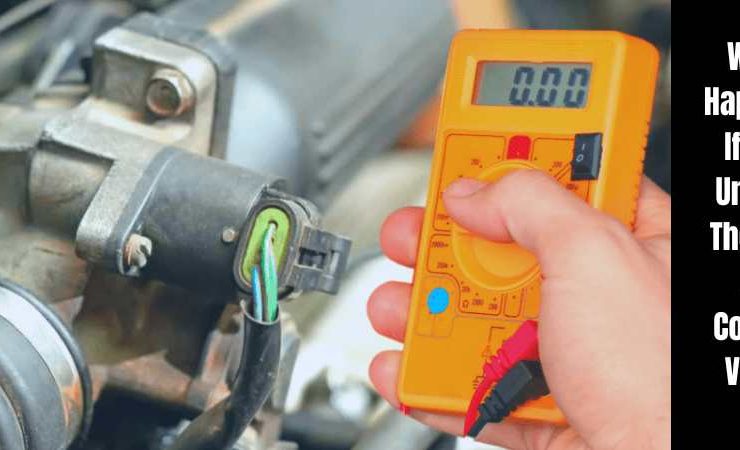
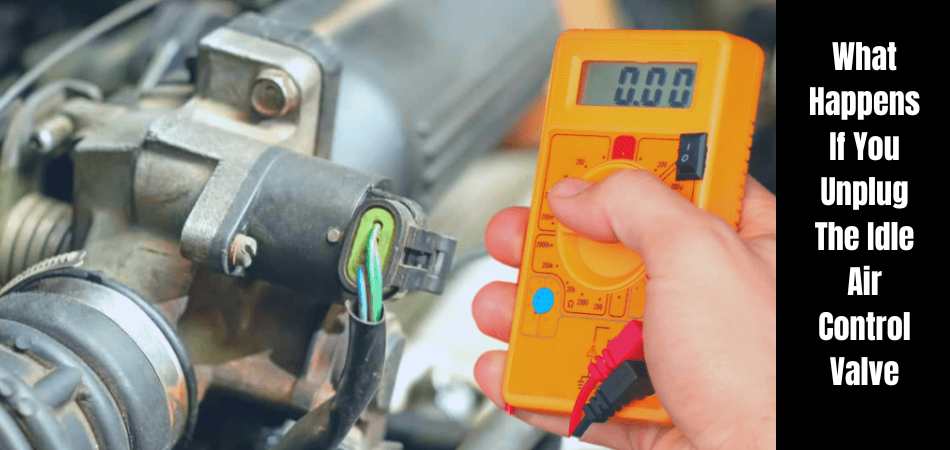
What Happens If You Unplug The Idle Air Control Valve? If the shaking car engine didn’t come with an oddly diffusing sound, driving at a stoplight would be alarming to any driver. Having a hard start at home or in the park is a regular occurrence. Every driver will inevitably experience hard starting at some point in their lives.
Idle air control valve (IACV) malfunctions when intermittent idling is accompanied by abnormally fluctuating idle speeds or the engine racing for its life.
People who don’t grease may not know the culprit yet if they don’t understand what is happening. The IACV wires might be unplugged by drivers who dare to look under the hood.
In these situations, many car owners unplugged their Idle Air Control Valves and drove their cars for a short period without experiencing fluctuating idle speeds.
How does your engine react if you unplug this component? Can you drive a car safely? Did it solve the problem? Does it pose a threat to more serious issues?
What do you think? Let’s take at look at What Happens If You Unplug The Idle Air Control Valve.
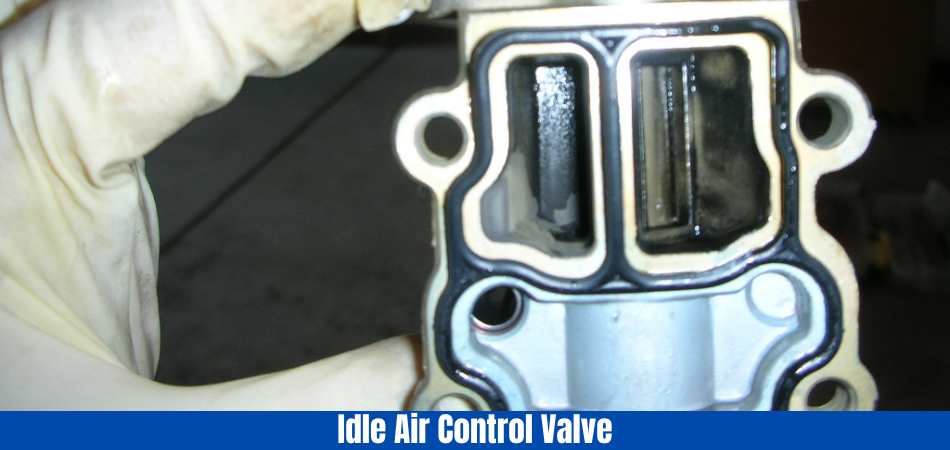
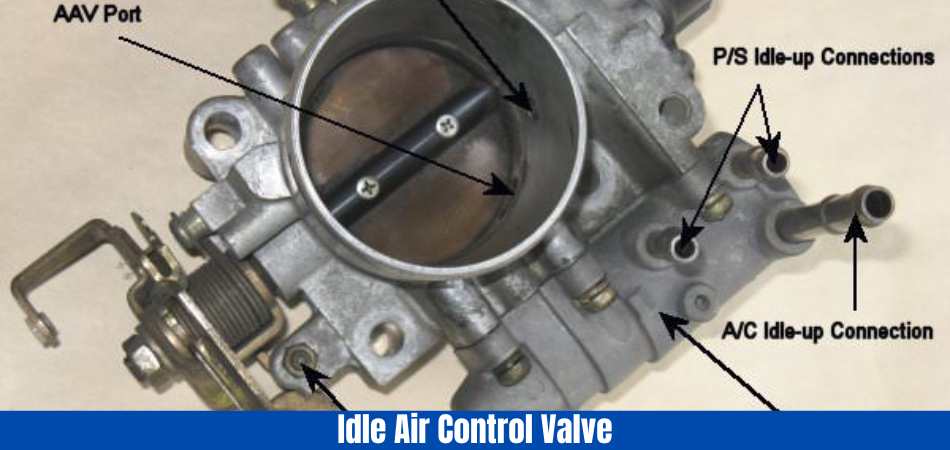
What is an Idle Air Control Valve?
If you are unfamiliar with automotive mechanics, diving into your vehicle’s intricate systems and components might seem intimidating.
Idle Air Control (IAC) Valve is the main topic at hand. In your engine’s complex layout, the IAC valve controls the engine’s idle speed. By regulating airflow around the closed throttle plate, this is achieved.
Basically, it keeps your vehicle’s engine running smoothly while you’re at a stoplight or stuck in traffic. The engine’s operation is adjusted based on the load, whether air conditioning, heaters, or headlights are on.
It is a compact, electrically controlled component near the intake manifold. By altering the position of the air passage and controlling idle speed, it adjusts the airflow. Based on engine temperature and electrical load, the car’s computer continuously regulates the IAC valve’s operation or the Engine Control Unit (ECU).
The IAC valve is, without a doubt, crucial to your vehicle’s overall performance and efficiency. Your car’s operation can be significantly affected by unplugging it, as you probably already know. How do these changes work? Those are the topics we’ll discuss in the next section.
How Does the Idle Air Control Valve Work?
The IACV bypasses the throttle plate when the engine is idling, allowing air into the engine. Adding extra air to the engine increases its speed and keeps it running smoothly. The IACV is controlled by a computer, which can adjust the air entering the engine. The engine may continue to run at a constant speed even when the load or temperature changes.
What Happens If You Unplug The Idle Air Control Valve?
A disconnected IAC valve can adversely affect your vehicle’s performance immediately and in the long term. As a general rule, it goes like this:
1. Idle speed altered
It regulates the engine’s idle speed as its primary function. Engine control units (ECUs) cannot control the idle speed when unplugged. In this case, the engine speed will fluctuate, resulting in an erratic idle.
2. Stalling of the engine
A lack of input from the IAC valve may prevent the ECU from compensating for additional loads like air conditioning or power steering. In particular, when idle or during low-speed maneuvers, this could result in the engine stalling.
3. Cold Start Difficulties
When starting the engine in cold weather, the IAC valve plays an important role. If you don’t have it, you might have trouble starting your car, and even when you do, you might have problems running it.
4. Fuel efficiency decreased
IAC valves regulate air-fuel mixtures at idle to achieve maximum fuel efficiency. This mixture can become imbalanced when unplugged, resulting in reduced fuel efficiency.
5. A potential engine damage
It can cause more severe damage to the engine over time if the IAC valve does not function properly. For example, frequent stalling can cause excessive wear on the starter motor.
Putting the vehicle’s performance and health at risk, unplugging the IAC valve forces the ECU to run the engine without all the necessary data. Next, we’ll examine some symptoms that may indicate your IAC valve is unplugged or malfunctioning.
What Are the Symptoms of a Bad or Unplugged Idle Air Control Valve?
IAC valve symptoms such as a bad or unplugged valve can save a life. Doing so lets you quickly identify and solve the issue before it escalates into a more serious one. You should be on the lookout for the following signs:
1. Idle speed error
Idle speed is most commonly affected by an unplugged IAC valve when it becomes unstable or erratic. It might be a sign that your IAC valve is malfunctioning or unplugged if your engine’s RPM fluctuates wildly when your vehicle is stationary.
2. Stalls frequently
It is also common for the engine to stall frequently, especially when it is under load. A vehicle may experience this when the air conditioning is running, the headlights are on, or when maneuvering at a low speed.
3. Start-up problems
If your vehicle is having trouble starting, especially in colder weather, an unplugged IAC valve may be to blame. The engine may eventually start, but it may run rough.
4. Engine Check Light
In modern vehicles, the engine’s performance and other components are monitored by systems. An unplugged or faulty IAC valve may cause your dashboard’s Check Engine Light to illuminate.
5. Fuel efficiency reduced
An unplugged IAC valve might be causing your vehicle to consume more fuel than usual. The IAC valve is an essential component of maintaining optimal fuel economy.
If you ever experience an IAC valve problem, you can take prompt action by knowing these symptoms.
What Should You Do if Your Idle Air Control Valve is Unplugged or Malfunctioning?
There is more to identifying a problem than just identifying it. Knowing how to address it is the next crucial step. The following steps should be followed if you suspect your IAC valve is unplugged or malfunctioning:
1. Check for symptoms
IAC valve symptoms should be confirmed as being caused by the valve. Symptoms in the previous section include an erratic idle speed, frequent stalling, difficulty starting the engine, and a lit Check Engine Light. It might be an IAC valve problem if you observe any or a combination of these symptoms.
2. Check the IAC valve.
Inspecting the IAC valve yourself is possible if you have basic mechanical skills and the right tools. Intake manifolds usually have this component.
Make sure it is plugged in and not damaged. The problem might not be evident to the naked eye, however.
3. Get professional advice
Consult a professional mechanic if you’re not confident in your mechanical skills or if the IAC valve appears plugged in and undamaged. An IAC valve diagnostic can be performed and confirmed if there is a problem.
4. Next Steps: Decide
If You need to determine whether to re-plug or replace the IAC valve if it is unplugged or faulty. If the valve is in good condition, replugging might resolve the issue. The valve must, however, be replaced if it is defective.
How To Reset Idle Air Control Valve – A Step-By-Step Guide
You must troubleshoot and check whether idle air control is causing these problems if your vehicle displays faulty IAC valve symptoms. To test if the IAC valve is working correctly, you can perform a quick test before resetting the valve.
The following steps will guide you through the IAC valve test:
Step 1
You want to hear clearly, so turn off the radio and the air conditioning.
Step 2
Next, follow these steps carefully to the car engine as it sits and idles.
Step 3
Make a note of the vehicle’s RPMs. A figure of no less than 600 and no more than 1000 should be considered.
Step 4
If the RPMs are low, there is likely to be a problem with the IAC valve or a vacuum leak in one of the vehicle’s systems.
If you find that there is an issue with the IAC valve after testing it, you can try resetting it. While resetting the valve is not a permanent fix, it may be enough to keep your IAC working until it can be repaired or replaced.
Can Your Idle Air Control Valve Make Your Car Not Start?
If It’s possible that your car isn’t starting because of a few things. Your idle air control valve may be malfunctioning. By closing the throttle, the idle air control valve regulates the air entering the engine.
Maintaining smooth idling is achieved by doing this. It can be challenging to start an engine if the valve is stuck open, allowing too much air to enter. You may also have trouble starting your car if your idle air control valve is dirty or clogged.
If you suspect your idle air control valve may be causing starting problems, have it checked out by a mechanic as soon as possible. It won’t take them long to diagnose the problem and get your car back on the road.
What are the Preventive Measures to Avoid Issues with Your Idle Air Control Valve?
The IAC valve is a component that requires preventive maintenance, just like most other vehicle components. IAC valves can be extended by following a few simple practices to avoid unplugging or damaging them. You should consider the following preventive measures:
1. Maintaining your vehicle regularly
Maintaining your vehicle regularly is crucial to its overall health. Various components, including the IAC valve, are checked, including oil changes and filter replacements.
2. Maintain a clean throttle body.
A dirty throttle body can negatively affect the performance of the IAC valve located within or near the throttle body. IAC valves can be kept functioning correctly by cleaning the throttle body regularly.
3. Gentleness is key
In terms of size and sensitivity, the IAC valve is relatively small. Ensure you don’t knock it or its electrical connector loose if you work near it.
4. Take note of the signs.
In addition to erratic idle speed, an unplugged or faulty IAC valve can cause the engine to stall. Observing and taking immediate action when you notice these symptoms can prevent further damage.
5. Inspection by a professional
If you are uncomfortable inspecting the IAC valve, having it checked by a professional can help catch potential problems early on.
The best thing you can do for your vehicle is to prevent problems from occurring in the first place. Maintaining your vehicle’s performance and longevity can be ensured by taking these preventive measures.
Cleaning and Replacing Idle Air Control Valve
1. When to Clean
A malfunction in the Idle Air Control (IAC) valve could cause your car’s idle to be rough or its RPM to fluctuate. IAC valves can become clogged with gunk over time, preventing them from functioning correctly. It is often possible to restore the functionality of the IAC valve by simply cleaning it.
For specific instructions on accessing and cleaning your IAC valve, consult your car’s owner’s manual. Before starting your vehicle, turn off the engine and let it cool. If there is any buildup on the valve, carefully remove it and use an appropriate cleaner, such as throttle body cleaner or mass air flow sensor cleaner. You can check if the issue has been resolved by reinstalling the valve and starting your car after cleaning it.
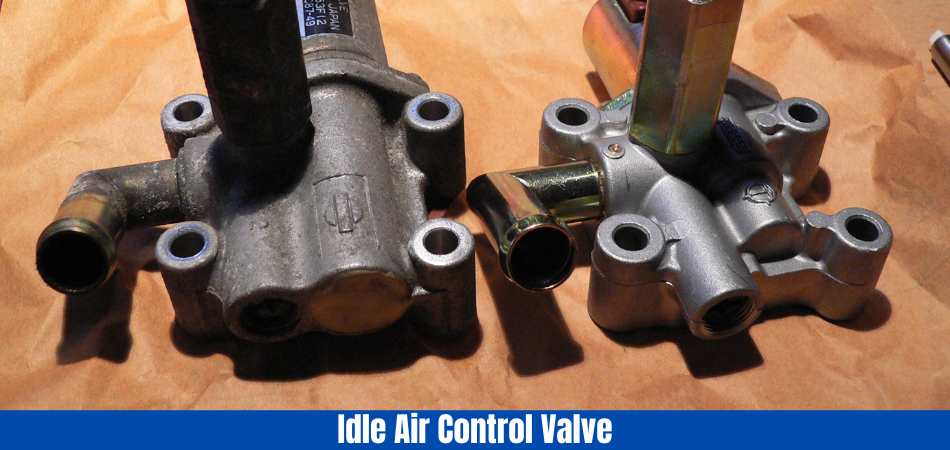
2. The right time to replace
Occasionally, cleaning the IAC valve may not be enough, especially if it is faulty or damaged. If this is the case, you should replace the IAC valve instead. Persistent stalling, difficulty starting the engine, and decreased fuel efficiency are all signs that the valve needs to be replaced.
When buying a new valve, ensure it is compatible with your car’s make and model. Replace the IAC valve according to your car’s owner’s manual instructions, or consult a professional mechanic if you’re unsure or uncomfortable. Start your vehicle to verify that the issues have been resolved and running smoothly again after installing the new IAC valve.
How To Clean Idle Air Control Valve?
The IAC valve may be dirty and needs to be cleaned and maintained to perform correctly.
IAC valves can accumulate carbon and debris during combustion if not cleaned regularly. The idle air control valve can become faulty when contamination builds up.
Removing any debris or contamination that has built up on the IAC valve can be helpful to get it working again. When you intend to clean your car’s idle air control valve, you should refer to the owner’s manual.
If the valve needs to be cleaned correctly, the owner’s manual should provide accurate instructions.
Here’s a step-by-step guide that should work with most vehicles when cleaning the IAC valve if you can’t find the relevant information.
Not all carbon cleaners are suitable for all vehicles and components, and you should only use them when you are sure they will not harm your vehicle.
Step 1-
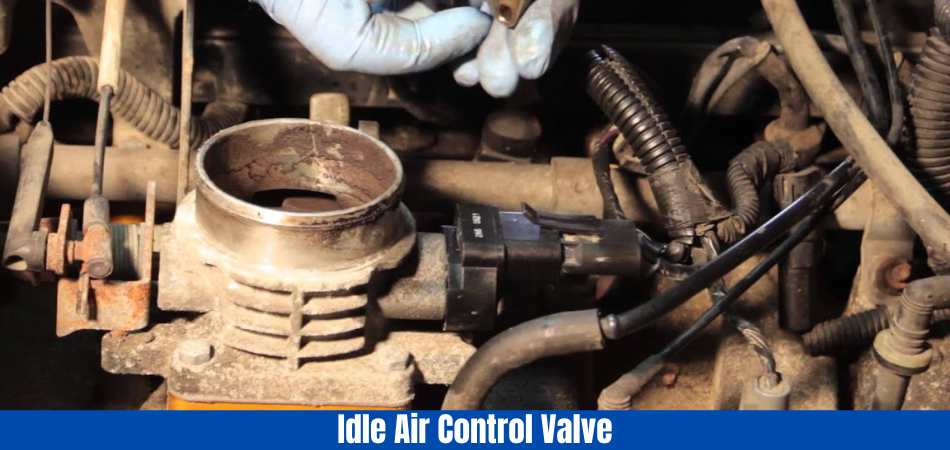
Find the idle air control valve. Usually, the IAC is located near the engine’s air intake.
Step 2-
The next step is to remove the electric plug from the back of the IAC valve. The plug should be easy to use with a screwdriver.
Step 3-
To remove the valve, you must remove the screws and bolts.
Step 4–
You can access the downward-pointing valve once the bolts are removed.
Step 5–
Apply carburetor cleaner to the valve’s pointed end. You should avoid getting any of the cleaners into the valve’s housing.
Step 6–
You should continue spraying the valve until all the carbon and debris are removed.
Step 7–
Reassemble everything carefully, remembering to reconnect the wiring.
Step 8-
Once everything has been reinstalled correctly, you can start the car and listen to how it idles. The sound should now be improved if dirt was the problem.
The purpose of this guide is to explain how to clean the IAC valve by removing it. Several guides online explain how to clean the idle air control valve without removing it.
How To Bypass the Idle Air Control Valve?
The following instructions will guide you through bypassing the idle air control valve:
Connect the negative terminal to the battery and disconnect it.
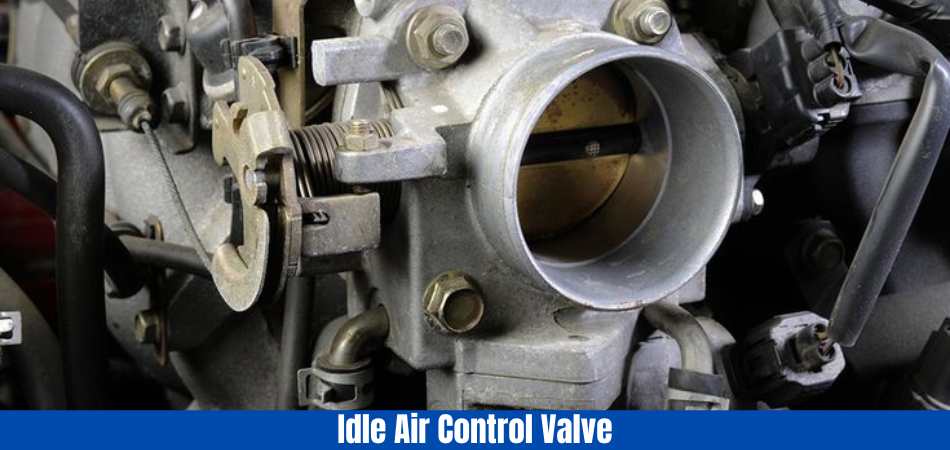
When you open the hood, you can find the air cleaner housing on top of the engine. An idle air control valve is under the throttle body, just in front of the housing.
Removing three 10mm nuts from the housing cover is necessary to lift it off. Remove the throttle body from its mounting tabs and disconnect any electrical connectors underneath (two 10mm bolts) before removing it from the throttle body.
Three hoses are attached to the idle air control valve, including a small hose that goes into a large hose and a larger hose with a vacuum line.
Disconnect the three hoses connected to the valve and any vacuum lines (one or two) connected by loosening but not removing two 13mm nut screws on each end (one at each end).
Put the small hose into the large port of your new IACV and connect the three hoses to them. Ensure these clamps are tightened with a wrench or pliers, but do not overtighten! Next, attach any vacuum lines you need to attach here if you didn’t already; tighten those clamps firmly, but don’t overtighten them!
Attach your new IACV’s mounting bracket to the throttle body’s mounting tabs (two 10mm bolts). Be sure to position all three hoses properly around this bracket before tightening these two bolts down securely. If necessary, move things around a bit so they fit correctly. You can use your 10mm socket & ratchet/wrench or whatever combination tool you like to tighten these two bolts down securely (I use my Craftsman 1/4″ drive ratcheting wrench).
Conclusion: What Happens If You Unplug The Idle Air Control Valve
Now, you have got some clear ide that, What Happens If You Unplug The Idle Air Control Valve. Ultimately, the Idle Air Control (IAC) Valve keeps the engine’s idle speed constant. Leaving it unplugged can cause erratic idle speed, frequent stalling, difficulty starting the engine, reduced fuel efficiency, and potential long-term damage to the engine.
Your vehicle’s overall health and performance can be improved if you know the symptoms and how to address an unplugged or faulty IAC valve.
Read more of our articles here.
Learn more about this topic here.
FAQs
How does the idle air control valve (IACV) work?
An idle air control valve (IACV) controls how much air enters a vehicle’s engine when the throttle is closed, ensuring a stable idle speed.
What happens when I unplug the idle air control valve while the engine is running?
While the engine is running, unplugging the idle air control valve can disrupt the engine’s idle control system. There is a possibility that the engine will stall or idle at an erratic speed.
Can the engine be damaged by unplugging the idle air control valve?
Temporarily unplugging the idle air control valve shouldn’t damage the engine, but it can cause stalling rough idling, or poor performance.
What is the purpose of unplugging the idle air control valve?
The idle air control valve may be unplugged for diagnostic purposes. It should, however, be done with caution, and the consequences should be understood.
Can I drive with the idle air control valve unplugged?
Driving with the idle air control valve unplugged can result in poor engine performance, stalling, and other issues that could compromise safety.
What is the best way to test the operation of my idle air control valve?
You can find specific instructions on testing the idle air control valve in your vehicle’s service manual. Checking engine idle speed or using a multimeter are two standard methods.
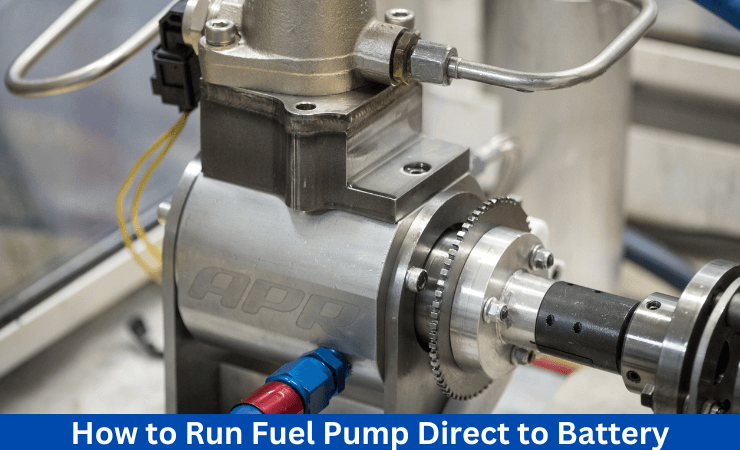
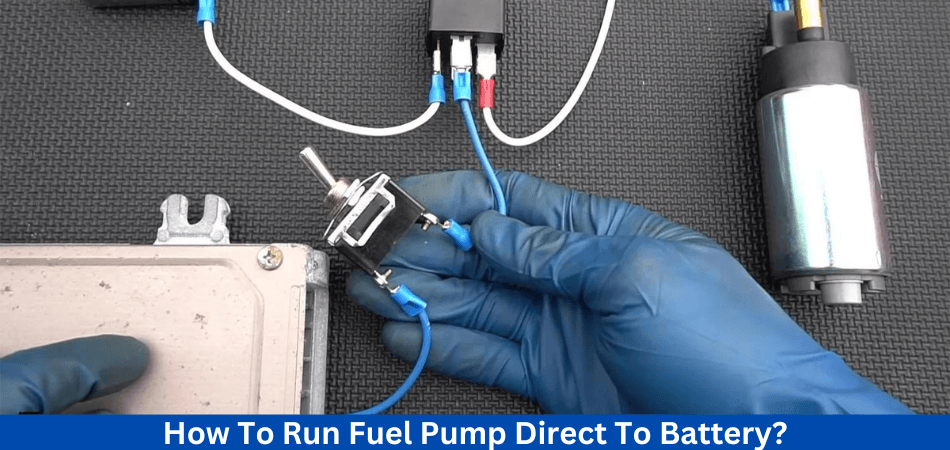
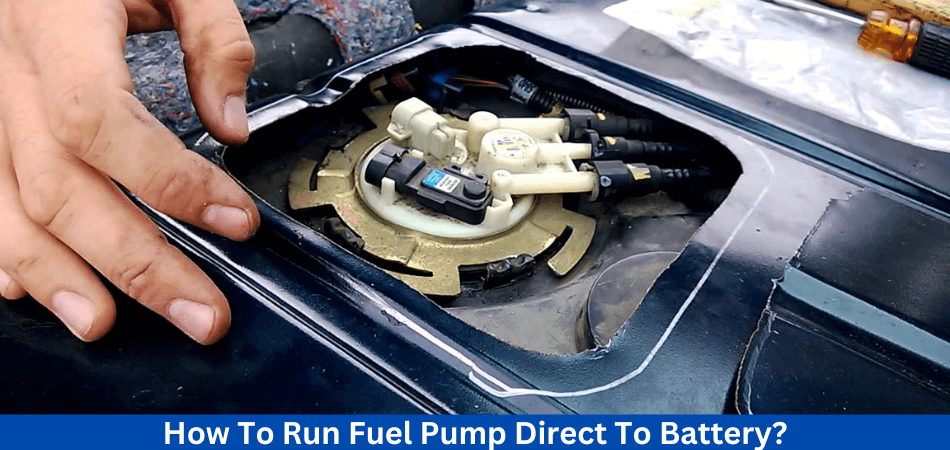
You can improve fuel economy and performance on your vehicle by running a fuel pump directly to a battery. By passing the fuel pump relay, you can send more voltage directly to the fuel pump, resulting in greater pressure and more consistent gasoline flow. But, how to run fuel pump direct to battery?
It is possible to run a fuel pump directly to a battery in a few different ways. You can do it yourself, and we will show you how to run fuel pump direct to battery in this blog post. Additionally, we’ll discuss some of the benefits and applications of running a direct wire.
So let’s learn about “How to run fuel pump direct to battery”
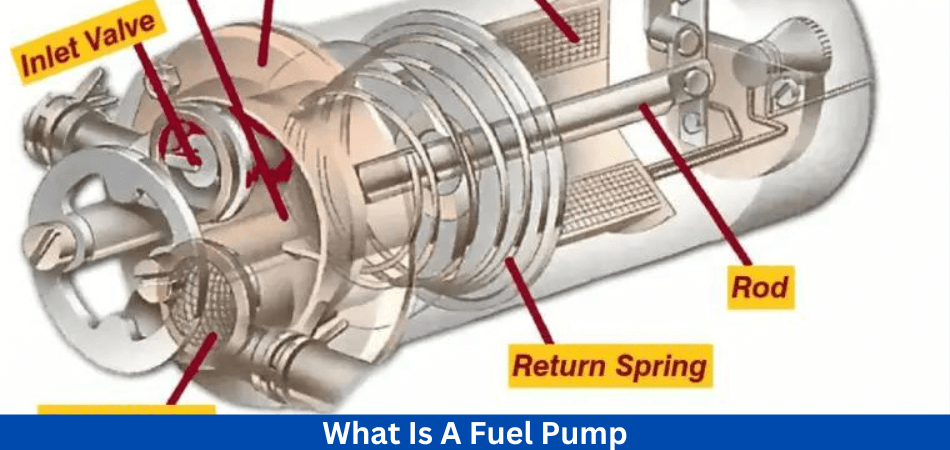
What Is A Fuel Pump And What Does It Do?
An engine’s fuel pump regulates the flow of fuel from the tank to the carburetor. Modern cars and motorcycles usually have their fuel pumps located inside their fuel tanks. To meet the engine’s demands, it delivers the correct amount of fuel at the right pressure.
Fuel pumps play a vital role in a vehicle’s operation. The engine would not be able to receive fuel without it. To direct wire the pump, all connections must be secure and the stranding must be correct. The pump must receive enough power from a heavier gauge wire in automotive applications.
The fuel pump plays an important role in delivering stable fuel flow to an engine, whether you’re running a lawn mower or a large carbureted block.
In general, carbureted engines use a low-pressure mechanical fuel pump located outside the fuel tank, while fuel injector engines use electric fuel pumps.
The electric fuel pump transfers fuel from the fuel tank to the fuel injector in engines equipped with fuel injectors. In order for the fuel injector to inject fuel inside the engine, these pumps must supply fuel at high pressures (typically 30-85 psi).
The pressure of the fuel must match the engine’s requirements for normal operation. Low pressure causes the engine to run out of fuel, causing it to stall, hesitate, misfire, or run lean. A high fuel pressure will cause the engine to fail, waste fuel, and produce contamination in the fuel. Read more about fuel pump here.
What are the Types of Fuel Pumps?
Fuel pumps can be divided into two types:
- Mechanical Fuel Pumps
- Electrical Fuel Pumps
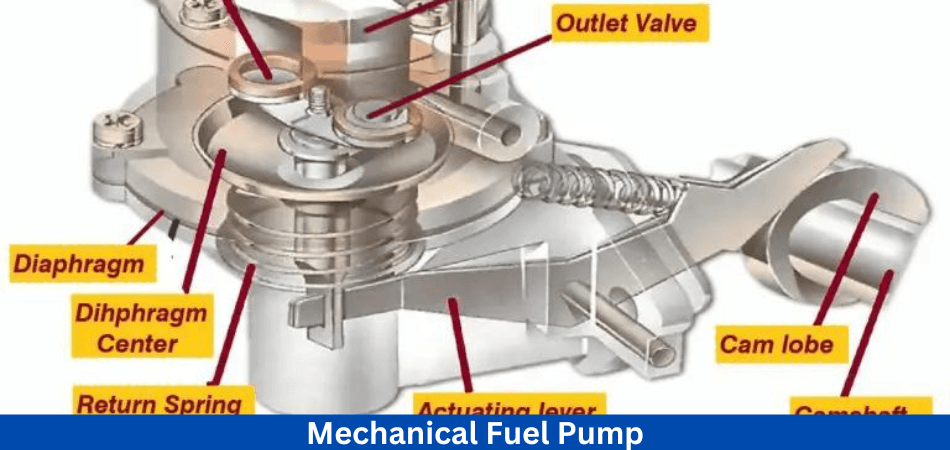
1) Mechanical Fuel Pump
Prior to the widespread adoption of electronic fuel injection, gasoline engines often used mechanical fuel pumps to transfer fuel from the tank to the carburetor bowl.
The eccentricity of the engine’s camshaft drives the mechanical fuel pumps. An in-line cylinder block engine has a mechanical fuel pump mounted on the side.
There are two types of mechanical fuel pumps: plunger-type pumps and diaphragm pumps. One of the most famous positive displacement pumps is the diaphragm pump. In this pump, the volume of the pump chamber increases and decreases as the flexible membrane deflects, as in a piston pump.
2) Electric Fuel Pump
The fuel tank filled with fuel by electric fuel pumps, which transport it to the engine via the fuel line. An electric fuel pump transfers fuel with the help of an electric motor, which rotates a piston or diaphragm.
In the fuel tanks, there are electric fuel pumps. A high-pressure pump pushes gasoline/petrol into the engine by creating high pressure in the fuel pipes. Gasoline boils at a higher temperature under higher pressure.
Fuel pumps of this type operate continuously while the engine is running. Powertrain control modules (PCMs) in your vehicle control the pump’s operation. To ensure the correct amount of fuel delivered to the engine, the computer monitors the fuel pressure and adjusts the pump operation accordingly.
The main advantage of installing electric fuel transfer pumps inside fuel chambers is that they are less prone to catching fire. Liquid fuel does not explode, but electric parts (like fuel pumps) generate sparks and ignite fuel vapors. Therefore, immersing the pump in a fuel chamber is crucial.
By switching from a mechanical fuel pump to an electric fuel pump, the engine’s parts will be less stressed, as well as its fuel consumption will be reduced. If the pump runs continuously, you can turn off the engine with a signal to save fuel. A fast start is still possible with the required fuel pressure.
What Are The Benefits of Running a Fuel Pump Directly to A Battery?
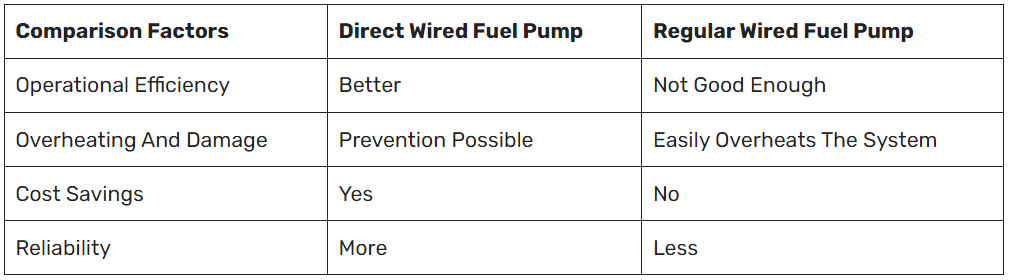
Many people try running their fuel pumps directly to their batteries. While wiring your fuel pump directly to your battery can be a short-term fix, it is not recommended as a long-term solution. The reason is that some fuel pumps can wired directly, while others cannot.
Creating a worse problem than the one you attempted to solve is the last thing you want.
Let’s look at why you might want to do this modification in the first place. Fuel pumps running directly to batteries bypass the fuel pump relay, as we discussed previously. There are a few benefits to this pump modification:
- Increased Pressure
You can increase the fuel pressure of your engine by sending more volts directly to the fuel pump. In addition to improving performance, this can also improve fuel economy.
- More Consistent Flow
Direct battery connections also ensure a more consistent flow of gasoline to your engine because of their increased pressure. In addition to avoiding fluctuations in performance, this can make your car more reliable.
- Better Lighting
If Direct battery connections can provide the additional amperage you need to avoid dimming or flickering lights if you’re upgrading your headlights or electrical system.
- Prevent Corrosion
Battery terminals can corrode sometimes, both positive and negative. If you live in an area with high humidity, this is especially likely to happen, but it can also occur elsewhere. Connecting the fuel pump directly to the battery can help prevent corrosion.
- Improve Performance
In general, a direct battery connection improves your car’s performance. Because of this, if the fuel pump wires damaged, a direct wire to the battery can bypass the problem and fix the performance problems.
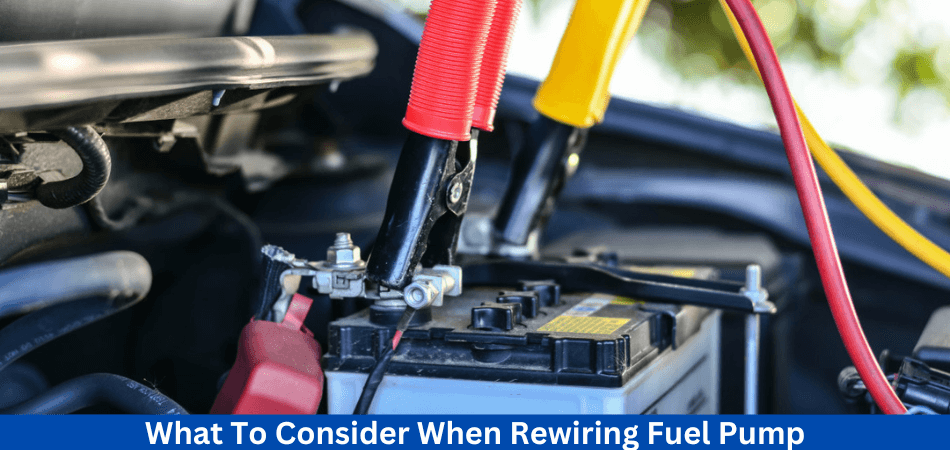
What To Consider When Rewiring Fuel Pump?
Here’s how to run a fuel pump directly to a battery, now that we’ve covered some of the benefits.
To keep in mind there are a few things to consider.
- Use a wire with a heavy gauge
The first thing you need to consider is the thickness of your wire. When connecting the battery to the fuel pump, you should use thick gauge wire to prevent voltage drop. The wire should able to handle the load and the pump should receive enough power.
- Make Use Of Wiring Harnesses
It is also necessary to protect the gauge wires that you are rewiring by using a wiring harness. If you don’t use a wiring harness, your battery connection to the fuel pump could be compromised.
- Don’t drive without testing
Before you hit the road, you’ll want to make sure all the wiring hooked up and working. Wiring mistakes can leave you stranded on the side of the road with a car that won’t start.
- Verify the fuel pressure in your car
Check your fuel pressure as soon as you have your new wiring installed. Overinflated engines can damage themselves.
If you ever have any questions, please consult a professional mechanic before making any changes. In most cases, he or she will know what you need to do.
What are the Tools Required for Rewiring Fuel Pump Direct to Battery?
Here’s what parts you’ll need to connect a fuel pump directly to a battery, in addition to some of the benefits of doing so.
It may be necessary for you to have the following:
- Your car battery
- Your fuel pump
- A jumper wire
- A wiring harness
- Electrical tape
- Wire cutters/stripper
- Needle nose pliers
- Solder
- Soldering iron
- Clamps
- 30 amp fuse
- Fuse holder
- Cable
- Safety goggles
Checklist Before Directing Fuel Pump To Battery
There should be a few conditions within a rewiring scenario that meet the needs. Ensure the battery functions are not reducing engine power before going into the checklist.
A good rewiring may be able to prevent this issue from occurring. Here are the things you need to keep in mind when dealing with logical allocations:
- Make sure the fuel pump voltage is compatible with the battery voltage
- Check the grounding outlet to see if it is sturdy enough
- It is important that the power distribution is effective and sufficient. In order to achieve better results, you may want to introduce heavier gauge wire.
- Providing these requirements met, rewiring shouldn’t be problematic.
How To Run Fuel Pump Direct To Battery?
Here is the step-by-step guide on how to run fuel pump direct to battery. Please keep in mind that vehicles and processes can sometimes differ. Please note that we are giving a general overview here and that your experience may differ from ours.
Step 1: Connect A Fuse To The Battery
Connecting a fuse to the battery is the first step. By doing this, you will be protecting the battery from potential damage.
The first thing you need to do is locate your car’s battery. Make a short wire connection to the battery’s positive terminal with a clamp or pin. After that, solder a fuse holder to the wire’s other end.
Step 2: Connect The Battery To The Fuel Relay
Now that you’ve connected the battery to the fuel relay, you’ll need to connect the fuel relay to the battery. Providing power to the fuel pump is the function of the fuel relay.
Locate your fuel relay in the engine bay. Connect the battery terminal to the fuel relay with a cable long enough to reach it.
Next, strip both ends of the wire and attach them to the battery terminal and fuel relay. If you have any exposed wires, cover them with electrical tape.
Step 3: Attach The Ground Wire
It is now time to connect the ground wire. Power flows to the fuel pump through the ground wire, which completes the circuit.
The best way to do this is to find a metal ground point near the fuel pump on your vehicle. There may be a bolt or screw attached to the frame of the car.
Ground the relay by attaching a jumper wire.
Step 4: Cut The Fuel Pump Wires And Attach
It is now necessary to cut the fuel pump wires and connect the trigger wire to the fuel pump. Power supplied to the fuel pump by the trigger wire when the engine started.
Your fuel pump has a wire harness, so locate it there. One wire will be the power wire, and the other will be the trigger wire. You will then need to connect the trigger wire (which is black and white with blue stripes) from the fuel pump to a relay terminal.
Step 5: Attach The Power Wire To The Fuel Pump
The next step is to connect the power wire to the fuel pump. When the engine is running, the power wire supplies power to the fuel pump.
Connect the power wire from the fuel pump to the other terminal on the relay by soldering it together.
Step 6: Test It Out!
Having completed all of the steps, it’s time to put it to the test! As soon as you have finished soldering, add the 30 amp fuse to the fuse holder by the battery.
Let your car idle for a few minutes after you turn it on. After starting the car and revving the engine, check to see if the fuel system has enough pressure (PSI, pounds per square inch).
If it isn’t working, check the circuit with a multimeter. You should always consult a professional mechanic if you run into trouble or a wiring diagram for your particular vehicle.
What are the Common Mistakes When Directing Fuel Pump To Battery?
Direct wiring a fuel pump can lead to problems down the road if you make some common mistakes. You don’t need to worry though, we have some solutions that will help you avoid these pitfalls.
1. Incorrect Gauge Wire:
Wires of the wrong gauge are one of the most common mistakes. As a result, your fuel pump may overheat and become damaged. Ensure you are using the correct gauge wire by checking the manufacturer’s specifications.
2. Poor Grounding:
It is also common to have poor grounding issues. As a result, the pump can operate in an erratic manner and even damage itself. It is important to secure the ground wire to a clean, rusted-free metal surface.
3. Not Using A Relay:
When you do not use a relay, you risk overloading the ignition switch and it may fail. It is always a good idea to use a relay when directly wiring a fuel pump.
4. Ignoring The Fuse:
Another common mistake is ignoring the fuse. The fuse protects your fuel pump and the electrical system of your vehicle. Fuse installation should always follow the specifications provided by the manufacturer.
5. Improper Installation:
Last but not least, improper installation can result in a number of problems. Ensure that you follow the instructions provided by the manufacturer when installing the product. Don’t hesitate to seek professional assistance if you are unsure.
You Can Save Yourself A Lot Of Trouble If You Avoid These Common Mistakes. The next sections provide some tips to keep in mind when it comes to direct wiring your fuel pump.
What are the Safety Measures Required for Directing Fuel Pump To Battery?
Having confidence in your work can ensure your safety 100%. It will be easier to accomplish things if you work with professionals. There is no possibility that anything bad could happen.
Be sure to wear protective gear, including goggles and gloves.
A few other important factors should considered in your work. There is a major focus on preventing negative outcomes, such as a fire outbreak.
You can find them here:
- When rewiring, make sure the pump is not stressed
- It is also important to recognize that the right fuel pump is used, which is specifically designed for direct wiring
- Be sure to follow the instructions provided by mechanics regarding the storage and charging of batteries. These things should not kept in a hot environment.
In the end, all the issues will resolved naturally, and your work output will be satisfactory.
What You Can Do To Make Fuel Pumps Last Longer?
To prevent the fuel pump from dying down sooner, there are many things you can do. On the other hand, some good implications will assist in improving the lifespan.
- Fuel should always be kept full, don’t wait until the fuel gauge reads zero before refueling
- Install a high-quality fuel pump from a reputable manufacturer
- It is also important to use durable and high-quality materials for the wiring
- Fuel filters should be replaced every year
- Ensure that dirt and debris do not get into the pump
- Maintain your vehicle regularly and take it to the service center more often
In spite of how much you love your car, you can also enjoy the maintenance scenario. Besides extending the lifespan of the parts, it will also extend the life of your car.
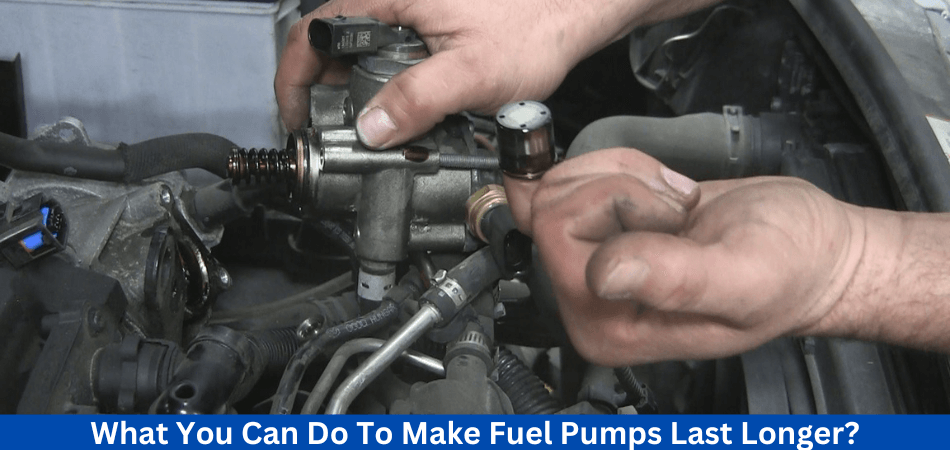
How to Get Rid of the Present Fuel Pump for Upgrade?
By unscrewing the screws, you can remove the hanger from the fuel pump. Unplug the harness-equipped fuel pump. Pull out the fuel pump nozzle from the causing unit. Remove the pump.
Find the stovepipe that is causing the problem. The stovepipe’s positive/red wire needs to be opened.
On the sending unit, remove the screw that holds the bottom wire. It is connected to the causing unit with a screw at the bottom (from the pump). Remove the screw from the bottom wire.
In order to replace the part, drill a hole. Next, install a hoop terminal on another wire.
Use a flathead screwdriver to remove the rubber fastening factor from the fuel pump.
You can install a brass bolt through the hole and then attach the fuel pump relay with a brass nut and washer under the hat. On the top of the bolt head face, connect a wire with a hoop terminal.
Connect the fuel pump to the relay unit via the hole/opening.
It is now time to wire up the fuel pump. It is possible to bolt the bottom wire inside the sending unit. Run a direct wire from the pump to the relay unit while installing new pumps. It is also possible to cut the fat finish on the sending unit tube. To connect the pump to the sending unit, use a rubber pipage hose.
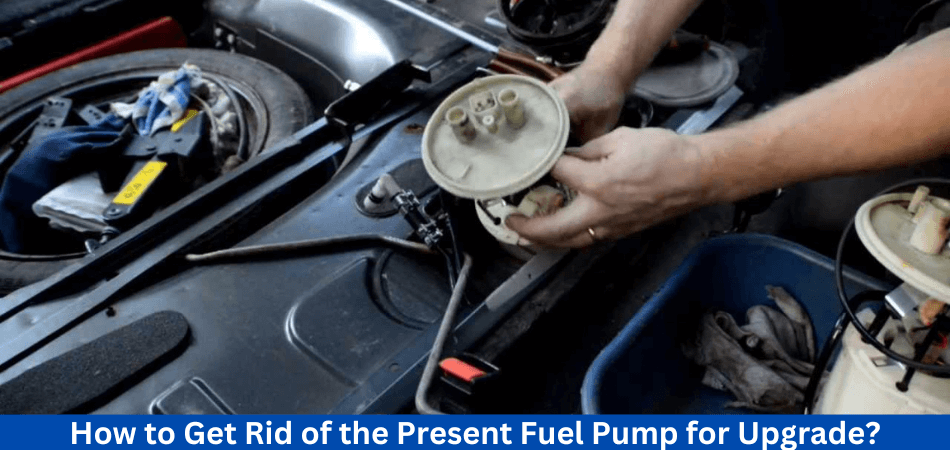
Conclusion: How to run fuel pump direct to battery?
Now you have a clear idea on how to run fuel pump direct to battery. Directing a fuel pump is an essential skill that can enhance your vehicle’s reliability and performance. This is a task that requires careful attention to detail, but it can certainly be accomplished with the right tools and guidance. In case you need a refresher on the process, feel free to revisit this guide.
Make safety your top priority at all times. You should seek professional assistance if you are unsure or uncomfortable performing this task. Would you like to learn more about vehicle maintenance and improvements? Take a look at our other guides and resources here.
FAQs
Is it possible to hardwire my fuel pump?
In the case of fuel pumps that are going out, hardwiring them will not make any difference. There will be a problem if they do not receive sufficient current. As the FP runs, will the flow vary or will it remain constant throughout as well as the further it gets to the tank? Vacuum is used to control fuel pressure in the manifold.
What color is the power wire on a fuel pump?
On On the other hand, the facility to the pump is sort of grey, grey, a shade of flash black, no matter how you look at it. The gasoline pledge is purple, lavender, lilac, mauve, periwinkle, plum, violet, or something like that. People are what the gram schematic calls them.
If we reverse the wiring of the fuel pump, what will happen?
In all likelihood, it would have killed the pump if it had been running backward. Pumps that use fuel to chill themselves typically die pretty quickly if they dry out.
Is a relay necessary for an electrical fuel pump?
Depending on the wire length, the wire thickness, the amount of current the pump attracts, and the type of controls you desire for the pump circuit. There are no fancy management requirements, low current pump, and short serious wire, so you won’t need a relay.
How thick should a fuel pump wire be?
The fuel pump power wire is 15 feet long and is 12 gauge. The power wire for the relay is 12 gauge. 5 feet of 14 gauge ground and trigger wire for relays. Hardware for mounting and terminals are included.

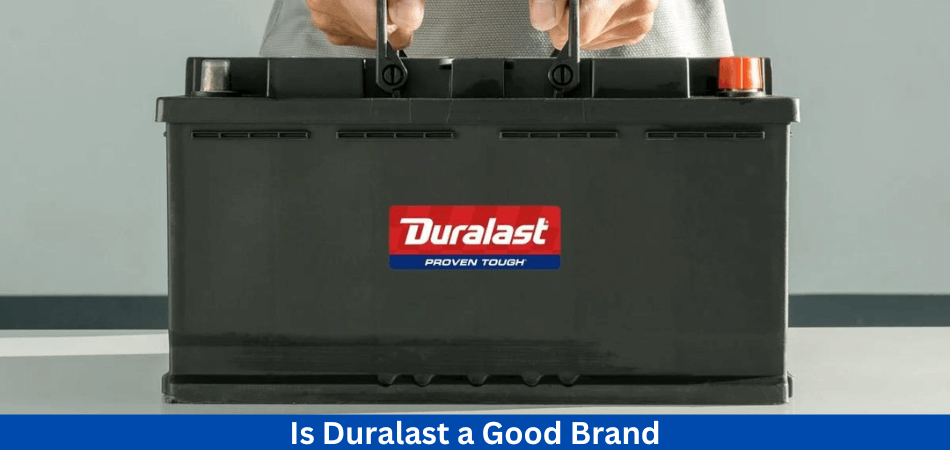
Duralast offers a variety of automotive parts and accessories, including brakes, batteries, and engine parts. The brand is owned by AutoZone, a leading retailer of automotive parts and accessories in the United States. For many makes and models, Duralast products meet or exceed the quality of original equipment manufacturer (OEM) parts. Duralast sells replacement parts and accessories for non-warranty vehicles in the automotive aftermarket. But the question is Is Duralast a Good Brand?
Duralast products are known for their high quality and affordability. There are, however, those who criticize it and those who support it. Duralast products may be reliable to some people, but they may be inferior to others who have had negative experiences with the brand. To provide a balanced view of the pros and cons of using Duralast products, this blog post examines the various factors that may influence Duralast’s reputation as a good brand.
An Overview Of Duralast’s History
AutoZone, a leading retailer of automotive parts and accessories in the United States, founded Duralast. In 1979, AutoZone was founded by J.R. “Pitt” Hyde III in Forrest City, Arkansas. As a single store, the company quickly expanded to multiple locations across the country selling automotive parts and accessories. During the 1990s, AutoZone started selling private-label Duralast products. In addition to meeting or exceeding OEM quality standards, these products were available at a lower price point than many OEM parts.
Duralast has evolved and expanded its product portfolio over time. In addition to brakes, batteries, engine parts, and more, the brand offers a variety of automotive parts and accessories. A popular choice among DIY mechanics and professional technicians alike, the brand focuses on quality and affordability.
The Duralast Gold line of products was launched in 2002, marking an important milestone in the brand’s history. With a limited lifetime warranty, these products are designed to offer the highest level of quality and reliability. Through the Duralast Gold line, the brand established itself as a reliable source of automotive parts and accessories.
In Due to changing consumer preferences and market trends, Duralast has undergone some changes and updates in recent years. A range of products are now available for purchase on the brand’s website and in its retail stores, for example. As well, Duralast has introduced numerous new product lines and categories, including Duralast Elite, which features high-performance parts for racing. While maintaining its focus on quality and affordability, Duralast has evolved and adapted to the changing needs of its customers.
Where Are Duralast Parts Made?
With parts manufactured all over the world, including Mexico, India, and beyond, Duralast offers a wide selection of automotive parts. We have everything you need, whether you’re looking for a reliable replacement part or something to keep your car running smoothly. Their reputation can attributed to the following factors:
- They offer affordable parts that are ideal for budget-conscious consumers.
- The materials they use are of high quality and can withstand wear and tear for a long time.
- It has been operating since the 1920s and is a trusted shop for all types of automotive repairs.
When shopping for new or replacement parts for your vehicle, Duralast is an ideal choice because they offer quality parts at competitive prices. One of the most popular names in automotive repair and maintenance today is because of their wide selection and easy-to-find locations.
With Duralast, consumers can rest assured that they’ll get dependable parts from a reputable source no matter what their budget is. It’s clear why so many people choose Duralast when considering which brand to buy for auto repairs or replacements based on this information.
Is Duralast a brand of Autozone?
AutoZone’s Duralast brand offers reliable parts at affordable prices that meet or exceed OE specifications. Private label parts feature a lifetime warranty and an internal regulator to ensure they work in hot and cold temperatures.
Furthermore, Duralast’s competitive prices allow customers to shop around and find the best deal for their buck on its wide variety of auto parts. A Duralast part manual isn’t always necessary when buying one, but it can provide additional peace of mind as it contains detailed instructions on how to properly install and use it.
Duralast parts have proven to stand the test of time when tested under real-world conditions. A trusted name in automotive retailing, this AutoZone brand consistently delivers quality products from batteries to brakes and alternators. Thus, it is an excellent choice for those seeking quality and durable aftermarket auto parts at great prices.
What are the Products Offered By Duralast?
Duralast offers an extensive selection of automotive parts and accessories, such as brakes, batteries, engine parts, and more. Duralast products offer the following benefits and features:
Quality: Quality products are designed to meet or exceed the quality of OEM parts and are tested to ensure they meet the highest performance and reliability standards.
Affordability: For those looking to save money on automotive repairs and maintenance, Duralast products are often more affordable than OEM parts.
Wide range of products: There is a wide range of Duralast products available for vehicles of all makes and models, including domestic and imported ones.
Limited lifetime warranty: A limited lifetime warranty is included with many Duralast products, offering customers additional peace of mind and protection.
Duralast Gold line: In addition to offering the best quality and reliability, Duralast Gold products also come with a limited lifetime warranty.
Duralast Elite line: In addition to racing brakes and suspension components, Duralast Elite products designed for high-performance applications.
Automotive aftermarket products manufactured by Duralast for vehicles that are no longer covered by a manufacturer’s warranty. Its products are popular with DIY mechanics and professionals alike and are suitable for use in a variety of industries and markets, including automotive repair and maintenance, racing, and performance.
What is the Quality of Duralast parts?
Known for their superior quality and exceptional performance, Duralast parts are tough and reliable. Its quality control protocols, rigorous materials, and industry-leading manufacturers make Duralast a good brand for affordable automotive products that perform as well or better than original equipment.
It has been reported that Duralast products last longer than other brands, rebuild better than expected, and come with a lifetime warranty. Ford parts have been my go-to brand for years without any issues and I’m confident they’re not junk. When combined with AutoZone’s excellent customer service, Duralast offers customers a great value proposition when it comes to automotive repairs.
With our products, customers are assured they are getting top-quality parts that won’t break the bank. Although there are some negative reviews about Duralast out there, overall the consensus is that it is a great option for car owners seeking high-quality parts at a reasonable price.
Is Duralast A Good Brand?
Is Duralast a Good Brand? Duralast is undoubtedly one of the most reliable and reputable brands on the market, making it a good brand. In the continental United States and some international markets, Duralast manufactures and distributes everything from engines to tie-rods.
Both consumers and large professional institutions respect Duralast in the auto parts market. You should definitely consider Duralast if you’re looking for a brand backed by professionals. You can consider them a safe choice for your auto parts needs because of their respectable business practices and fair and equitable warranty agreements.
Is Duralast A Good Brand Cost-Wise?
Duralast is pretty middle of the park in terms of their actual cost breakdown, even though their overview painted them as an optimal choice. Parts provided by them are generally durable and good quality. So cost-wise Is Duralast a Good Brand?
Most people, however, find them too expensive. This is especially true when comparing alternative manufacturers or alternative marketplaces. The quality-to-cost ratio that Duralast uses may only fit a small window of people whose budget matches it.
Many people tend to either choose something cheaper that is somewhat poorer in quality or something a little more expensive that is quite a bit better in quality. Towards the end of the article, we’ll discuss which manufacturers or marketplaces are a little pricey but quite good.
Is Duralast A Good Brand Reliability-Wise?
Whenever you choose Duralast, you can assured that you are getting a part that will stand the test of time if you find that what they have to offer meets your needs. While they offer a decent warranty on some of their parts, they are vastly inferior to other sellers like AutoZone. So Is Duralast A Good Brand Reliability-Wise?
For example, AutoZone (for example) offers a lifetime warranty on axles, which Duralast might give you a multi-year warranty on. What are your thoughts on Duralast parts 10 years from now, even if you felt inclined to believe they were slightly better? Duralast axles that are 10 years old will they still perform as well as a brand new free replacement axle? It might be possible, who knows? Probably not, though.
Is Duralast Ignition Coils a Good Product?
Duralast ignition coils provide reliable, durable performance, allowing you to hit the road with ease and peace of mind. A brand like Duralast offers high-quality auto parts at an affordable price. Their ignition coils guaranteed for a lifetime and meet or exceed OE standards.
Duralast products have received positive reviews from many users, suggesting they’re worth considering for certain vehicles. Some users, however, have reported negative experiences, suggesting OEM parts may be better suited to certain applications.
It depends on the specific product and vehicle application whether Duralast ignition coils work well. Before making a purchase decision, do your research and speak with a professional mechanic to ensure that you’re getting the best possible product.
You should compare both brands before choosing one before choosing one. Napa also offers similar products at competitive prices.
How Good Are Duralast Suspension Parts?
Are you looking for durable suspension parts? Duralast suspension parts are like sturdy anchors, ensuring smooth and comfortable rides for years to come. With heavy-gauge steel and resilient components, they meet or exceed OE performance standards.
Duralast manufactures durable parts with high-quality materials, making them accessible to the market. There are a range of positive and negative reviews for this product, suggesting it may be a better option for certain vehicles than OEM parts or other aftermarket brands like Moog. Purchasing a product, however, requires research.
How Good are Duralast Brake Pads?
The Duralast brake pads are a great choice if you concerned about your safety. There are several options available from the brand, such as Duralast Gold brake pads and standard brake pads. AutoZone offers lifetime warranties on both items. For reliable braking power at an affordable price, our products meet or exceed OE quality, performance, and durability standards.
Besides being compatible with most vehicles, their high-quality products provide excellent stability as well. According to users, Duralast’s brake pads produce less dust and have a five-year lifespan.
Is Duralast a Good Car Battery?
Duralast known for its long-lasting power and reliable performance when it comes to car batteries. AutoZone’s website has an average rating of 4.7 out of 5 stars from customers. Also, Consumer Reports rated the 51R-DLG model as a recommended battery with excellent cold cranking and life ratings. There are several models offered by the company, such as the Gold and Platinum series, which provide optimal performance in all types of vehicles. In addition to offering a lifetime warranty, Duralast also offers a wide range of car battery options. Is Duralast A Good Brand Reliability-Wise?
In light of all these factors, Duralast is clearly a good brand of car batteries. You can replace or exchange your battery if something goes wrong with it, even if you’ve been using it for years. Having an AutoZone nearby can be a great idea in an emergency. With Duralast’s lifetime warranty, even if your battery dies after a while, you’ll protected.
Can Duralast Wheel Bearings be trusted?
You can count on Duralast to provide a reliable wheel bearing at a reasonable price! Wheel bearings offered by AutoZone under the Duralast brand as well as the Duralast Gold brand. Durability and reliability are excellent features of the Gold option for those seeking superior performance.
Besides being factory-sealed and lubricated for life, their products come with lifetime warranties. Wheel bearings from Duralast tend to receive positive reviews from users. While some have found them to be an affordable alternative to more expensive OEM parts, others have experienced excellent quality and performance. Nevertheless, some say Timken may be a better choice for certain vehicles than other brands.
Take all of this information into consideration when deciding whether Duralast is the right brand for you. You can get the most bang for your buck without compromising safety or quality by researching FAQs and similar posts from other consumers before making a decision.
What is the lifespan of Duralast rotors?
Rotor life expectancy for Duralast rotors will range from 25,000 to 85,000 miles. A number of factors can affect the lifespan of automotive parts. Rotor longevity can affected by your driving habits, your vehicle’s condition, and how well you maintain it.
In general, rotors designed to last a long time, but eventually, they will wear down and need replacing. As a result of their quality and their usage, rotors can wear down at different rates. A well-maintained and high-quality rotor may last longer than a poorly maintained or lower-quality rotor.
Rotors should maintained according to the manufacturer’s recommendations and replaced when worn. It is important to check the condition of your rotors on a regular basis and to replace them when necessary to ensure the safety and performance of your vehicle.
What is Duralast’s warranty period?
Specific Duralast warranty terms will vary based on the product that you have purchased. To find out more about the warranty for a specific Duralast product, you can refer to the product documentation or contact AutoZone directly. Most Duralast products covered by a limited lifetime warranty at AutoZone, which means that they are covered for as long as you own them. Please read the warranty carefully and understand its terms and conditions, as some exclusions and limitations may apply.
Is Duralast a good brand compared to Autopartswarehouse and Autozone?
As these three marketplaces are highly comparable, they tend to appear in the same conversations. It should noted that each of them offers different benefits and is quite different from the others. As an example, Duralast built to last, whereas Autozone built to be decent, but also reasonably inexpensive to replace. Is Duralast A Good Brand?
In comparison to Duralast, Auto Parts Warehouse offers a nice blend between the two, though they don’t always have as many items in stock. It likely depends on what part you are looking to replace and what offers the three brands have if you are in a competition between them.
Unless it is a super niche part that they don’t carry or manufacture, it is always a good idea to browse all three of them. Here is what you should probably consider as your best option in the next section. It’s even better than Duralast.
How Do Duralast Parts Compare To OEM Parts?
No, not really. Duralast is not a bad brand by any means. Duralast’s problem is that their prices are so close to OEM parts that you might as well go with OEM parts since they’re more likely to be better and you already KNOW they’re compatible.
As your mechanic already knows the parts they are working with quite well, they can sometimes fix or replace parts more easily and solve problems more quickly. It’s true that Duralast offers a few % off of the price, but for the sake of (usually) a few bucks, you may as well go with the original manufacturer’s parts.
If you want to purchase parts, a good flowchart would be to buy from OEM unless they don’t carry the part you want for some reason or Duralast is more than 10% cheaper.
Duralast Vs Carquest
Both Duralast and Carquest have their advantages and disadvantages – so which is best for you? With over 60 years of experience in the industry, Duralast is a great choice for affordability and reliability.
When comparing the two, keep these points in mind:
- There are two types of brake pads offered by Duralast: Gold and standard. Both options praised for being stable when braking, producing less dust, and having a long service life.
- The alternators from both brands have received mixed reviews, with no clear winner.
- The quality of a product may vary depending on the type of vehicle and its application. It is important to research thoroughly before making a decision.
After considering all the factors, you should choose an auto part that meets your specific needs as well as your budget. Before investing in either Duralast or Carquest, make sure you read reviews and compare products carefully.
The next step is to compare Duralast Gold with standard Duralast products.
Duralast Vs Duralast Gold
Selecting automotive parts requires considering the differences between Duralast and Duralast Gold – they offer different levels of quality and performance.
Compared to standard Duralast parts, Duralast Gold components engineered to meet or exceed OE quality, ensuring better performance and durability.
Standard Duralast brake pads provide similar performance in normal driving conditions, but Duralast Gold brake pads provide higher quality control and a refined production process. As a result, Duralast Gold batteries offer greater vibration resistance and power, making them ideal for heavy vehicles with high demands, such as those with heated seats or infotainment systems.
In order to ensure you get the best quality and performance for your specific vehicle needs, you should research and compare products from both lines. All of these factors will help you make an informed buying decision that meets your needs.
Duralast Vs Diehard
As both Diehard and Duralast automotive batteries come with their own advantages and disadvantages, comparing them can be tricky. It well known that Duralast batteries are affordable, made with high-quality materials, and have reliable performance. Conversely, Diehard batteries’ cold-cranking amps (CCA) range from 550A to 900A, making them renowned for their exceptional longevity.
There are similar reserve capacity ratings between both brands, but Diehard provides a longer warranty of three years compared to Duralast’s two years. In the end, the right choice depends on your specific needs and what kind of vehicle you are looking for.
To ensure you get the best quality and performance for your car or truck, it is imperative to research and compare both brands’ products before making a purchase decision It is also important to consider factors such as cost, CCA ratings, reserve capacity ratings, and warranties offered by each brand when choosing between Duralast and ACDelco batteries.
Learn more at here.
Duralast Vs Acdelco
Both Duralast and ACDelco automotive parts offer unique benefits and drawbacks, making it tricky to choose between them. Duralast offers great options with its Gold and Platinum battery lines, which highly regarded. Known for their affordability and reliability, they provide reliable performance.
As well as having a good reputation, ACDelco batteries offer a variety of CCA ratings. The Duralast models have reported to last longer by some users. There are viable options for both brands when it comes to brake pads. There limited information available about ACDelco’s offerings in comparison to Duralast’s, but Duralast’s Gold and standard brakes offer solid performance.
Overall, you should research both brands’ specifications and how they fit your vehicle needs before choosing between them. To ensure your car or truck has the best quality and performance, you should consider all aspects before buying. It’s important to compare before making a decision – what works best depends on individual requirements.
Duralast Vs Valucraft
There are two brands that offer different levels of quality and performance when it comes to automotive parts: Duralast and Valucraft. Because Duralast parts made of high-quality materials, they provide reliable performance while remaining affordable.
In contrast, Valucraft parts are cheaper, but they may not perform as well. Valucraft brake pads and rotors may not perform as well or last as long as Duralast brake pads and rotors. A Duralast part also comes with a longer warranty than a Valucraft part.
Duralast Vs Wagner Brake Pads
Choose between Duralast and Wagner brake pads, two brands with different levels of performance and quality. Duralast’s reliability and affordability make it a popular product. Duralast Gold and Standard brake pads are affordable options that made with high-quality materials and known for their reliable performance.
Conversely, Wagner offers ThermoQuiet brake pads, known for their excellent stopping power and quiet operation. It has reported that they provide better wear and service life than other brands. Prior to making a purchase decision, you should research the best option for your vehicle’s needs, as both Duralast and Wagner brake pads offer good quality and performance. There are a number of benefits to each option, so you can find the one that suits your needs best.
Duralast Vs Everstart
A comparison of Duralast and uralast and Everstart automotive batteries? Considering the pros and cons of each will help you decide which is best for you. In addition to its affordability and quality materials, Duralast known for its reliable performance. Performance and reliability are highly regarded when it comes to their gold and platinum options.
Conversely, Everstart batteries also considered durable and reliable, with a lifespan of 2- 5 years. They’re sold at Walmart made by a company that produces some of the more premium brands too, offering up to 800 CCA ratings for better cold-cranking performance in some cases.
Despite the fact that both brands offer good quality, you should research each product carefully to ensure that it meets your specific vehicle needs. Depending on your situation, either could be the right choice. Therefore, weigh both equally before choosing which is best for you. Be sure to keep these considerations in mind as you research Duralast vs. OEM.
Do Duralast products have any common issues or complaints?
Customers have reported a range of problems with Duralast products. There are serious quality concerns for some drivers, from wiper blade fitment issues to defective parts such as radiators and battery chargers within a short time period of use.
A remanufactured part, such as an alternator, may not meet the same standards as a new one due to the rebuilding process. Wheel bearings and suspension parts can differ in terms of performance between different vehicles, causing some users to choose other brands such as Moog or Timken.
It is important to do your research and compare products before making a purchase in order to get the best value for your vehicle needs, even if these complaints don’t reflect the brand’s overall quality. If Duralast is right for you, you can make an informed decision. In the coming weeks, we’ll examine Duralast’s quality and reliability in comparison with other automotive brands.
Conclusion: Is Duralast A Good Brand?
Now that you know more about Duralast, you should have a better idea of whether the company is right for you. The brand provides high-quality products that built to last and are certainly reputable. It is clear that Duralast is on par with its closest competitors Autozone and Auto Parts Warehouse. However, Duralast isn’t competitive with most OEM options. You might as well invest a little more in OEM parts.
Read more of our articles here.
FAQs
Is Duralast a reputable brand?
Automotive professionals generally consider Duralast to be a reputable brand. Several auto parts stores and retailers carry their products, and they have been in business for many years.
What is the reliability of Duralast products?
The Duralast brand is known for its reliability. Batteries and brake parts are essential auto parts that many consumers trust for their durability and performance.
What kind of warranty does Duralast offer?
Warranty coverage varies from product to product with Duralast products. If you purchase an item, you should read the warranty details to understand how it is covered.
Compared to other automotive brands, how does Duralast fare?
A number of well-known automotive brands compete with Duralast. Individual preferences and product categories may influence the comparison. Make an informed decision by researching and reading reviews.
Can you tell me where I can buy Duralast products?
Duralast products are available at auto parts stores, online retailers, and even some large general merchandise stores. To find the closest location, check the Duralast website or contact a local retailer.

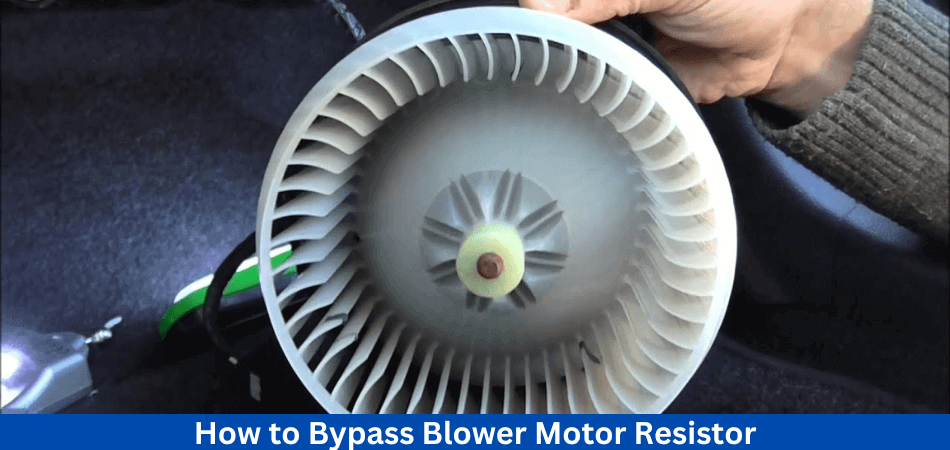
Have you been having problems with the blower motor on your car? You may need to bypass the blower motor resistor if this is the case. Our goal in this article is to provide step-by-step instructions on how to bypass blower motor resistor in order to get it working again.
The wiring harness needs to be unplugged from the blower motor resistor in order to bypass a blower motor resistor. In this way, the fan motor will be able to run at full power without being constrained by the resistor. You can learn more about the process on how to bypass blower motor resistor and what you need to do to ensure a successful bypass by reading on.
What Is a Blower Motor Resistor?
An actual blower motor switch is the switch or button on the dash that you use to boost or decrease the blower motor’s speed. A fan is the only one that powers the blower motor. Rather than simply stopping and restarting, the blower motor can operate at a variety of speeds thanks to the resistor. The blower motor cannot regulate the fan speed when a resistor fails in the blower motor. In this case, the fan will only operate at its maximum speed, and it will not allow the air to escape.
Blower motor problems can indicated by fluctuating fan speed or running out blower motor resistors. An HVAC system uses a blower motor resistor to control the speed of the blower motor and prevent overheating. Replacing the resistor is not necessary if you know the problem is not due to the resistor. It is best to replace the resistor if you notice any of the above symptoms.
What Does The Blower Motor Resistor Connect To?
It is traditional to ground and wire the resistor in series with the blower motor assembly when using blower motors. Controlled by a resistor that differs in resistance from blower motor to blower motor. This controls the current flowing through the blower motor.
Resistors located close to the air cabin filter are easy to replace because they are simple to replace. If the resistor is faulty, the blower will only run at one speed with the HVAC controls and not at any other speed. There is a blower motor resistor behind the glove compartment or at the bottom of the HVAC housing. It may be necessary to use tools to remove the glove box on some vehicles, but it may not be necessary in others.
To remove the resistor, the wiring harness must disconnected and the screws removed. The garage is a good place to store your blower motor if it is not functioning in the middle of summer. If you don’t want to invest in new equipment, here are some easy steps to replace a blower motor. By using the FIXD Sensor and app, you can monitor the health of your car at all times.
It may caused by corrosion or overheating when your blower motor resistor fails. Motor current controlled by the resistor, which is a mechanical device. Overheating and failure of the resistor may result if the resistor is overrun. During certain conditions, the fuse on the resistor board may blow, resulting in a reduction in blower speed. In the event that the resistor fuse blows, your car will continue to run at high speeds, but it will need to replaced.
Where Is The Resistor Located In Blower Motor?
Usually, the heater blower motor resistor located underneath the dashboard. Within the compartments of the heater and air conditioner, it can found. An air conditioning system device controls the blower motor fan.
An electrical component resistor (also called a blower motor resistor) can prevent current flow into the blower fan. Fans can sped up or slowed down using this feature. Slower rotation of the fan causes less air to circulate throughout the cabin, which reduces resistance. A faulty blower motor resistor will result in heat loss and air loss in your automotive HVAC system. To replace a good one, here are some suggestions.
In the open circuit, the Ohmmeter registers infinity, which indicates the blower resistor needs to be replaced. In this way, the system will remain more uniform, and a cause may even be discovered.
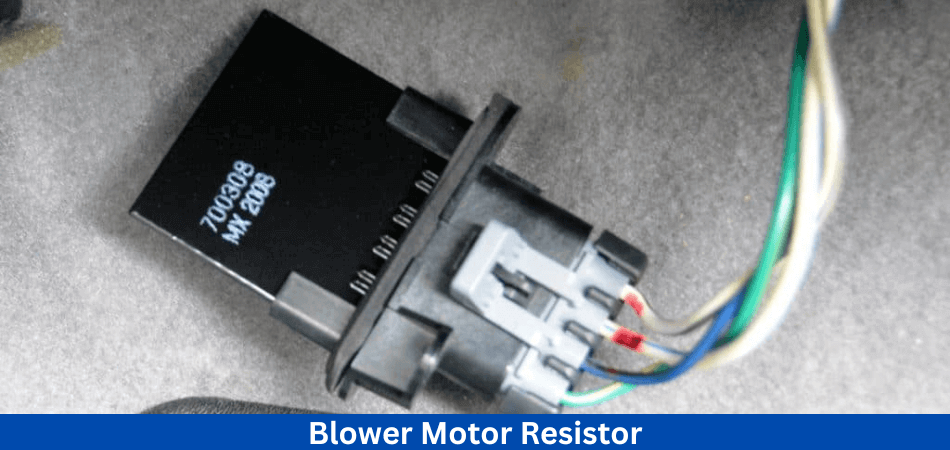
Can You Bypass A Blower Motor Resistor?
An electronic blower motor resistor regulates the motor’s speed through an electronic control system. As well as the blower motor and the control switch, the resistor connected in series with them. Control switches control the voltage applied to blower motors. By changing the resistance in the circuit, the blower motor resistor controls the speed of the blower motor. In most cases, the resistor locates near the blower motor in the air duct.
So how to bypass blower motor resistor? Actually it won’t be difficult to bypass the blower motor resistor. There are a few steps involved in replacing the resistor, in addition to finding and disconnecting it. It is important to have a resistor in the cooling system. The amount of current flowing through the motor can control its speed. An automobile’s climate control system includes a blower motor resistor. A blower motor’s speed is controlled by this device by controlling the flow of current through it. Additionally to regulating the air temperature in the vehicle, it determines the speed at which it circulates.
What are the Signs of a Bad Blower Motor Resistor?
Although they are pretty darn reliable, blower motor resistors can go bad without much warning. The good news is that a blower motor resistor can diagnosed fairly easily.
A bad blower motor resistor can identified by some of the following signs:
- Inability to control HVAC fans (all or certain speeds)
- Only the highest speed setting works on the fan
- There is no air coming from the vents
- A fan that runs intermittently or inconsistently
According to our story above, you’ll likely first notice the problem when the passenger cabin in your vehicle doesn’t cool down or heat up as it normally would-which brings us to an important point. In addition to affecting your HVAC system’s ability to heat up and cool down, a bad blower motor resistor directly affects airflow.
How to Bypass Blower Motor Resistor?
Resistors on blower motors can fail and need to replaced in some cases. The blower motor can become noisy and cause reduced air flow. It is necessary to bypass the blower motor resistor in order to solve this problem. So how to bypass blower motor resistor?
Finding the blower motor resistor is the first step in bypassing it. The rectangular shape of this component can identified on the firewall of a vehicle. The rectangular shape of this component can identified on the firewall of a vehicle.
After installing the bypass wire, the next step is to connect it to the power supply. The positive terminal of this wire should be connected to the positive terminal of the blower motor, and the negative terminal should connected to the negative terminal. When this done, the blower motor will be able to operate at its full speed since the resistor will bypassed. Lets learn all the method on how to bypass blower motor resistor.
Method 1: Direct Wiring
Bypassing the blower motor resistor, direct wiring connects the blower motor directly to the power source. Manually adjusting the power supply to the motor allows you to control the fan speed.
Step-by-step guide
Follow these steps to bypass the blower motor resistor using direct wiring:
- Remove the wiring harness: Carefully remove what found near the blower motor itself or in the HVAC system’s ductwork.
- Disconnect the wiring harness: Disconnect the wires connecting the blower motor to the resistor.
- Power and ground wires: Locate the power and ground wires connected to the blower motor. If necessary, refer to the wiring diagram for your vehicle.
- Cutting and stripping the wires: Use wire cutters/strippers to cut the wires leading to the blower motor resistor. To expose the wire conductors, remove a small portion of insulation from the cut ends.
- Connect the power and ground wires: Connect a 12V power source directly to the blower motor’s power wire, such as the battery’s positive terminal. A suitable ground point, such as the vehicle chassis, should connected to the ground wire.
- Insulate the connections: Cover each wire connection with electrical tape as a short-circuit protection measure.
Pros and cons of the direct wiring method
The advantages and limitations of direct wiring are as follows:
Pros:
- Bypass method that is simple
- Directly controls the speed of the blower motor
- Resistor replacement is a cost-effective alternative
Cons:
- For desired fan speed, the power supply may need to be manually adjusted
- If operated at high speeds for extended periods, it can strain the blower motor
- It does not provide the original functionality of the blower motor resistor, such as automatic speed adjustment based on temperature
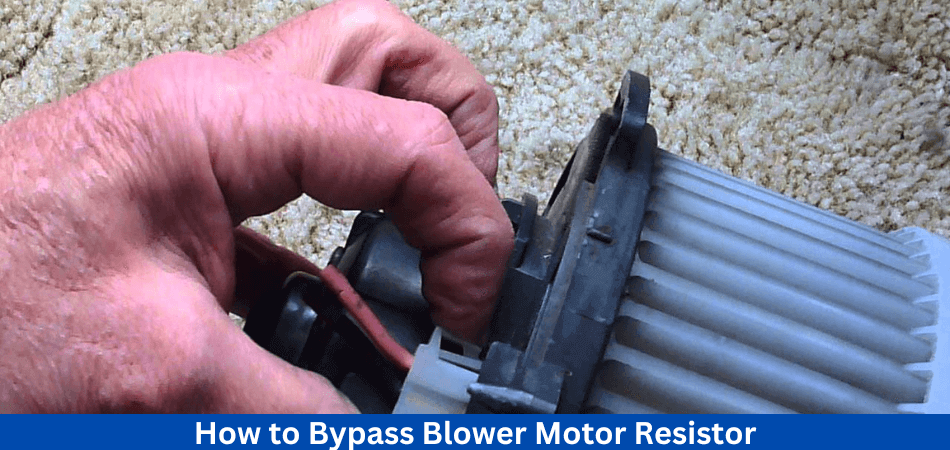
Method 2: Using a Bypass Harness
Using a bypass harness, the blower motor is directly connected to the power source, bypassing the blower motor resistor. As a result, the bypass process has simplified, and the connection has been made more organized and secure.
Installation process
You can bypass the blower motor resistor by installing a bypass harness as follows:
- Make sure you purchase a bypass harness that is compatible with the make and model of your vehicle.
- To prevent any electrical mishaps during installation, disconnect the vehicle’s battery.
- Identify the blower motor resistor. The blower motor resistor is usually located near the blower motor or inside the ductwork of the HVAC system.
- Carefully disconnect the wiring harness that connects the blower motor resistor to the vehicle’s electrical system.
- Through the wiring harness previously attached to the resistor, connect the bypass harness to the blower motor.
- Make sure all connections are secure and properly seated. Any additional steps or recommendations should followed according to the manufacturer’s instructions.
- To restore power to the vehicle’s electrical system, reconnect the vehicle’s battery once the bypass harness has installed.
Pros and cons of using a bypass harness
There are several benefits and considerations to using a bypass harness:
Pros:
- Provides a plug-and-play bypass solution that simplifies the bypass process
- Minimizes the risk of electrical problems by ensuring secure and reliable connections
- Makes it easier to remove and reinstall if necessary
- Ensures that the electrical system of the vehicle maintains its original integrity
Cons:
- For your specific vehicle, you will need to purchase a compatible bypass harness
- Compared to other bypass methods, this may be a more expensive solution
- Specific vehicle models may not have harnesses readily available
Method 3: Installing a Resistor Pack
You can also bypass the blower motor resistor by installing a resistor pack. A new group of resistors substituted for the faulty one, providing a fixed resistance value. By using the resistor pack, the speed of the blower motor can be properly regulated.
Locate the resistor in the blower motor of the HVAC system to begin. Identify the faulty resistor and disconnect the wiring harness. Removing the resistor from its mounting location and noting its original location is the first step.
The new resistor pack should now aligned correctly in the mounting location. Make sure the connections on the pack match those on the wiring harness. Be careful not to damage any surrounding components when installing the resistor pack.
Connect the wiring harness to the resistor pack once the resistor pack has been securely installed. Make sure the blower motor is working as it should. With the new resistor pack installed, the blower motor speed should be effectively controlled.
There are pros and cons to using a Resistor Pack to bypass a faulty blower motor resistor. Let’s examine them in more detail:
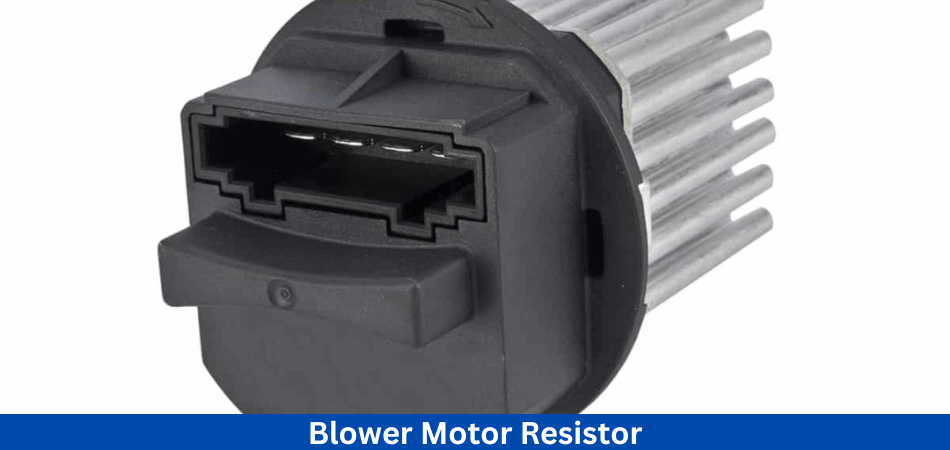
Pros and Cons of Installing a Resistor Pack
Pros:
- The resistor pack ensures adequate regulation of the blower motor speed by providing a fixed resistance value. In this way, the cabin airflow can maintained.
- Specific vehicle models are compatible with resistor packs, which ensure a seamless fit and electrical compatibility. As a result, compatibility issues during installation reduced.
- Compared to more complex methods such as modifying the wiring harness, installing a resistor pack is relatively straightforward. Many vehicle owners can do this project themselves with basic automotive knowledge and the right instructions.
- By removing the resistor pack and reinstalling the original resistor, you can return to the original blower motor resistor configuration. By doing this, flexibility provided as well as the ability to switch back if necessary.
Cons:
- Specific vehicle models may require different resistor packs, so they may not be universally applicable. To avoid compatibility issues, make sure the resistor packs you purchase are compatible with your vehicle’s make and model.
- In spite of the fact that a resistor pack regulates blower motor speed, it does not entirely bypass the resistor. There is still some resistance in the circuit due to the pack acting as a resistor. It may affect the blower motor’s overall functionality in some cases.
- A resistor pack costs more than a jumper wire, which is a more straightforward method. There can be a wide range of prices for resistor packs based on their brand and quality, as they are typically aftermarket components.
- If a resistor pack installed on the vehicle, the warranty provided by the manufacturer may voided. Check the warranty terms and conditions before proceeding with this method to avoid potential problems.
Method 4: Installing a Variable Speed Controller
A Variable speed controllers allow you to adjust and control the speed of the blower motor. The fan speed can be precisely controlled by installing a variable speed controller instead of bypassing the blower motor resistor.
Step-by-step instructions
Here are the steps to bypass the blower motor resistor with a variable speed controller:
- Your vehicle’s blower motor and electrical system should fitted with the appropriate variable speed controller. Take into account factors like compatibility, installation ease, and features available.
- Before installing the battery, disconnect it as a precautionary measure to avoid electrical accidents.
- You can find the blower motor resistor inside the HVAC system’s ductwork or near the motor.
- Carefully disconnect the wiring harness that connects the blower motor resistor to the vehicle’s electrical system.
- The variable speed controller must connected according to the manufacturer’s instructions. In most cases, the controller connected to the blower motor via the wiring harness that was previously attached to the resistor.
- Make sure all connections are properly seated and secured. Make sure to check the manufacturer’s instructions for any additional steps or recommendations.
- Connect the vehicle’s battery after installing the variable speed controller to restore power to the electrical system.
Pros and Cons
There are several benefits and considerations to using a variable speed controller:
Pros:
- It allows you to adjust the fan speed precisely according to your comfort needs
- Maintains the original wiring integrity of the vehicle’s electrical system
- Reduces blower motor strain by allowing gradual speed adjustments
- Provides automatic fan speed adjustment based on temperature settings, if supported by the controller
Cons:
- This requires the purchase of a variable speed controller compatible with the blower motor on your vehicle
- A controller’s features and specifications may require additional wiring and adjustments during installation
- Variable speed control adds functionality to this bypass method, making it more expensive than other bypass methods
When you understand the precautions, methods, and considerations involved with bypassing the blower motor resistor, you will be confident in using these techniques to regain control over your vehicle’s HVAC system. Always prioritize safety, follow the manufacturer’s instructions, and seek professional assistance if you have any questions. Bypassing the blower motor resistor will provide you with a comfortable and efficient ventilation experience.
How to Troubleshoot a Blower Motor Resistor Bypass?
Several steps can be taken in order to troubleshoot the bypass if it does not seem to work correctly. Check the connections to make sure they are all properly connected. As soon as the connections made, the fuse should checked. For the blower motor to work again, the fuse must replaced if it has blown.
What are the Benefits of Bypassing the Blower Motor Resistor?
- There are several advantages to bypassing the blower motor resistor. It allows you to regain control over the fan speed, ensuring optimal comfort inside your vehicle.
- In addition, it eliminates the need for a potentially expensive resistor replacement.
- Furthermore, bypassing the resistor can provide a temporary fix if a replacement part is unavailable.
Replacing the Blower Motor Resistor
In the event that the bypass is not successful, the blower motor resistor may need to replaced. A new resistor can installed in place of the old one after the old one has removed. Ensure that the new resistor is the same type and size as the old one so that it will fit correctly.
How Do You Replace Your Blower Motor Resistor?
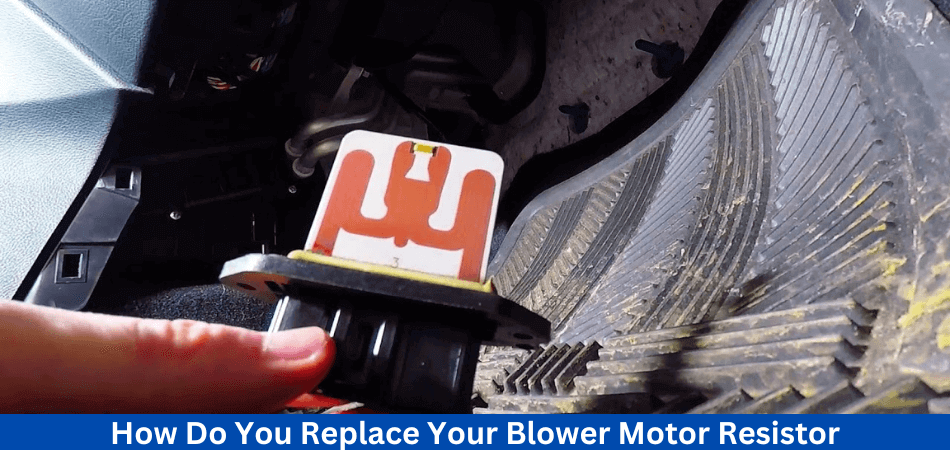
This guide outlines how to replace a faulty blower motor resistor.
- Identify the blower motor resistor
Find out where the resistor for the blower motor is located. The battery is usually found beneath the dash or in the engine compartment on the passenger side. The blower motor is close to it.
- Remove the motor resistor from the blower
Make sure the AC pigtail and cooling duct are disconnected from the components surrounding the blower motor resistor. The blower motor resistor can removed by ratcheting loose the bolts holding it in place. Removing the blower motor resistor is as easy as removing the bolts.
- Remove all wires from the device
The wires attached to the blower motor resistor should cut once the resistor has been removed. Wire strippers or scissors can used to cut the wires.
- Remove the old blower motor resistor and install the new one
Before continuing installation, apply dielectric grease to the housing of the blower motor resistor. By doing this, you will keep water out, a problem that is common when driving off-road. To protect the component, apply a coating to the plastic.
Put the blower motor resistor back where it belongs. Finish the job by tightening the screws and connecting the pigtail.
A pigtail may also worn out if it has already used for some time. If this is the case, proceed to the next step.
- Attach the pigtail to the wire
Reconnect the new wires after disconnecting the worn-out ones. This should be relatively straightforward since most cables are color-coded. The new wires should connected to the connections. You have completed the task by returning the pigtail to its original position.
Preventing Further Damage
Following the replacement or bypass of the blower motor resistor, steps must taken to prevent further damage. It is possible to do this by checking the air filter and replacing it if necessary. Moreover, the wiring may need to checked for damage or corrosion and repaired or replaced if necessary.
Conclusion: How to bypass blower motor resistor?
Now you have some idea on how to bypass blower motor resistor. A viable solution to restoring HVAC system functionality is to bypass the blower motor resistor. The long-term effects on the blower motor’s performance should be considered when weighing the benefits and limitations of each method. It is crucial that installation be done properly, safety precautions are adhered to, and legal regulations are followed.
Read more of our articles here.
FAQs
How safe is it to bypass the blower motor resistor?
Bypassing the resistor can provide a temporary solution, but long-term use is not recommended. When left unchecked, this can lead to overheating or damage to the blower motor.
Is it possible to bypass the blower motor resistor?
By bypassing the resistor, the power source is usually directly connected to the blower motor. Wires can be connected or a resistor bypass harness can be used if available.
Do I need any tools or materials to bypass the resistor?
There may be a need for wire cutters, wire strippers, electrical tape, and a jumper wire as a power source. It depends on the make and model of your vehicle what tools you will need.
If the resistor fails, can I replace it with a higher-rated resistor?
The use of a resistor with a higher rating isn’t recommended since it may affect your HVAC system’s performance and cause overheating.
Is it safe to drive with a bypassed blower motor resistor?
Until the faulty resistor can be replaced, bypassing the resistor should only be considered as a temporary solution. It is not recommended to use the bypass for an extended period of time as it can lead to other issues.
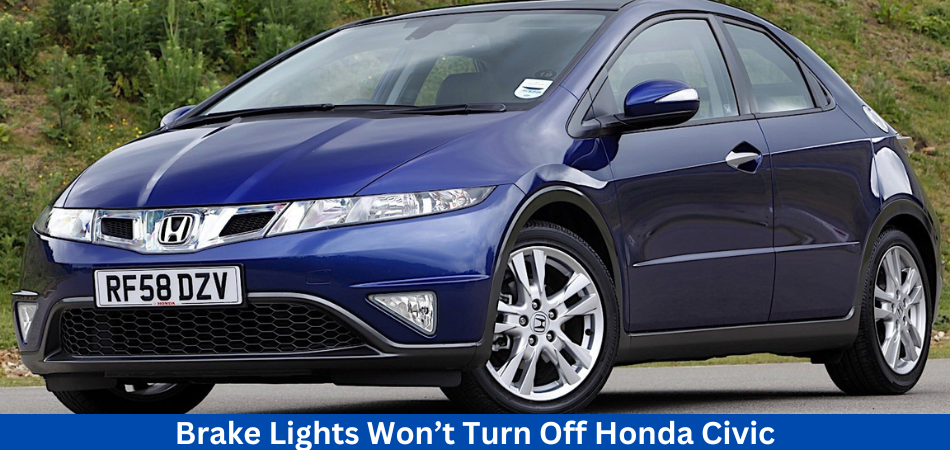
Having trouble turning off the brake lights on your Honda Civic? Read this article to find out why Brake Lights Won’t Turn Off Honda Civic. The brake system is one of the most important parts of a vehicle. It is possible to cause an accident or receive a ticket due to a faulty brake.
It is important that you keep track of the condition of your brakes if you drive a car that uses brakes. Ensure that the brake fluid and engine oil are at the proper levels. Check either of them if you notice they are not in proper condition before they cause more damage.
Lights are another aspect of your brake system that you need to take into account. Brake lights can be difficult to turn off, which is one of their most common problems.
Drivers may wonder whether they need to turn off their vehicles if their Brake Lights Won’t Turn Off Honda Civic. If this occurs, it is a sign that there is a problem somewhere, and you need to have it diagnosed. Check out this post about how to fix if Brake Lights Won’t Turn Off Honda Civic.
Why Do The Brake Lights Stay On The Honda?
In a Honda Civic, brake lights indicate that you’re braking; therefore, other drivers should do the same. If the brake lights won’t turn off, you and your passengers, as well as motorists behind you, could be at risk.
It is common for people to confuse tail lights with brake lights and vice versa. A tail light will turn on when either the headlights or parking brake activated. In order to indicate that the driver is braking, the brake lights will illuminate.
After pressing the brake pedal, the stoplight switch completes the circuit, turning on the brake lights. A faulty brake light or circuit error most likely caused the brake lights not to go off. You can confirm this by checking the fuse and the brake switch located under the dashboard.
Why Do Brake Lights Stay On When Car Is Turned Off?
Turning off the car can cause the brake lights to come on. It can happen if the brake switch malfunctions or if the brake pedal is stuck. The brake switch might need to repaired or replaced. Depending on the extent of its damage, you will decide what to do. One of the most common reasons why the brake light continues to illuminate even when the car turned off is a faulty brake switch.
A stuck brake pedal is another reason for this. Because the pedal isn’t closing the switch properly, the brake lights won’t turn off. There will be no solution until the problem resolved.
How Do You Deal With Brake Lights That Stay On?
It may drain your battery if your brake lights don’t go off. Until you find a solution, you will need to turn off the car and disconnect the battery. In the case that your Honda civic’s brake lights won’t turn off, it is very likely that the brake light switch is faulty and needs to repaired.
Check if the lights will go off by removing the brake light switch plug. When you remove it, the brake light switch will turn off, and you will need to replace it. Honda Civic brake lights won’t turn off when the brake pedal is stuck, which is another reason. It won’t work unless the connection between the switch and pedal fixed.
How To Disconnect The Brake Light Switch?
First, you need to remove the battery from your car before you can disconnect the brake switch. The purpose of this is to prevent electric shock while you are fixing it. In order to stop the current flowing in the vehicle, you must remove the negative terminal. You can find the switch above the brake pedal once you have done that. There are wires connected to the box. The last step is to remove the connector from this switch. For the connector to come out, you only need to press the plastic tabs.
If your switch is older, you might need a wrench to loosen the nut before unscrewing it. New switches, however, must rotated counterclockwise to removed. It is not difficult to disconnect the switch.
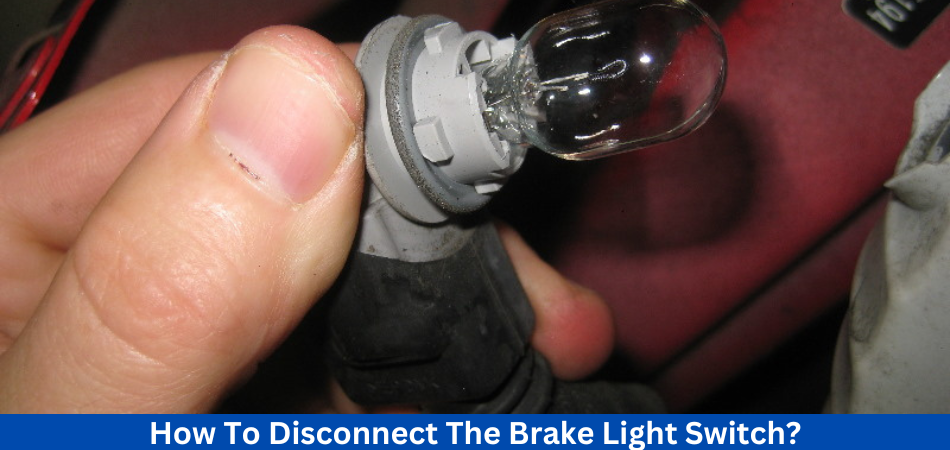
Why Brake Lights Won’t Turn Off Honda Civic? 7 Key Reasons
Are you wondering why Brake Lights Won’t Turn Off Honda Civic. Let’s learn the reasons.
1. Defective Brake Switch:
If It is a common problem for brake lights to stay on when the switch is not working properly. To avoid accidents, it is necessary to fix or replace an ineffective brake switch. A new Honda Civic brake light switch should installed if the brake switch becomes old. It is highly compatible with Honda Civic 2001 to 2013 so I prefer to use the HERCOO Brake Stop Light Switch.
2. Stuck Brake Pedal Spring:
The lights won’t go off when the brake pedal is stuck and not close enough to switch. This is primarily due to the spring losing power when it returns to its default position.
As long as the pedal and switch are not connected, the brake lights will remain on. A professional service can assist you in resolving this issue.
3. Faulty Wiring:
In some cases, brake lights won’t turn off due to faulty wiring. It may be a big problem if you’ve tried every basic method to fix the brake lights, but they’re still on. A professional technician should consulted in this situation.
4. Switch stopper issue:
Having a problem with the brake light switch stopper on your Honda Civic is another reason your brake lights won’t turn off. You should check the floor of your car if your stopper is missing. It needs to replaced if you can’t find it.
5. Bad Electric system:
Another significant problem is a poor electric system. All electric lines should checked and everything should be working properly.
6. Faulty fuse diagram:
ThiDiagram with faulty fuses on the lid of the box will assist you in locating the brake fuse. Check if it has blown out if you find it. In this case, you must replace it with a Genuine Honda Multi Block Fuse for Honda Civic brake lights.
7. Socket Issue:
If In the event that none of the above points work, the last option is to check whether the socket is dirty or corroded. A middle link responsible for turning on the brake lights may also worn out in the wiring.
How To Fix if Brake Lights Won’t Turn Off Honda Civic?
There are some common issues you can fix yourself when your Honda Civic brake lights won’t turn off, making your problem a solution at first glance.
Here are six simple ways to fix the problems:
Solution 1: Repair The Brake Lights Switch
- To avoid shock, disconnect the battery before working on the car’s electric system.
- Remove the cable and tuck it into the side of the battery. Disconnect the negative terminal from the positive terminal.
- Locate and detach the damaged terminal.
- To get the cable to the battery terminal, use a socket jerk to lose the nut.
- Disconnect the wiring pigtail from the brake pedal switch
- Make sure it is not damaged now
- Ensure that the switch’s return is working properly.
Solution 2: Replace New Brake Lights Switch
- Near the brake pedal are the brake light switches, which are two-way switches. A defective light circuit in the car’s electric system can completed with it. What is the installation process?
- If you wish to reuse the same pigtail hitch later, disconnect it and tuck it away for safety before removing the brake lights switch
- From the pedal linkage, remove the brake switch.
- You can reuse it and install a new brake light switch (remember to keep the top hardware).
- You can use electrical tape to hold the harness in place while it is being installed if it is accidentally released.
Solution 3: Replace Blown Fuses
- The manual guide will help you find the fuse boxes. Under the hood and on the driver’s side of the cabin, there are fuses that need to replaced.
- To access your fuse box, remove the interior trim parts of your car. In addition, if you have a brake light that has blown, you must check more than one fuse.
Solution 4: Disengage The Car Battery
- If You need to drain the battery if the Honda Civic parking brake light stays on or does not work. When you encounter this problem, detach the battery while your car is off.
- It Not only does it prevent the brake light from trapped, but it also prevents the battery from running out of power while the issue is being resolved.
- If the hood latch is electric, ensure it disconnected before disconnecting the negative terminal. Make sure to test the brake as soon as possible if the brake lights still don’t turn off.
Solution 5: Clean the Brake Socket and pedal
- Your Honda Civic brake light does not turn off because of a dirty connection or worn wiring. So make sure the brake lights don’t get trapped in the sockets by cleaning them out.
- If the sockets do not work after cleaning, replace them by snipping the older wires or linking them to a new unit like the Dorman Honda Civic brake light socket.
- There is also a possibility that your 2005 Honda Civic brake lights will not turn off due to a dirty brake pedal. Possibly there is a defective rubber stopper between the switch and the pedal or there is rust between the switch and the pedal.
- To Protect the brake pedal from it, keep it clean, and keep it corrosion-free. Contact a professional service if the cleaning process isn’t working.
Solution 6: Replace Honda Civic Brake Lights
This video shows how to replace the brake light bulb on a Honda Civic from 2006 to 2012 and how to turn off the brake lights on the Honda Civic.
- The two screws can opened with a flathead screwdriver.
- The brake light held by a counterclockwise screw. You can take it out with a plier, even though it’s pretty tough.
- You can now easily remove the light from the housing with two hands.
- Make sure you know the size and features of the bulb so you can replace it with one with similar features. My recommendation here is to pick new brake lights for the Honda Civic. Double flare lights should used if there are three wires.
- Additionally, you can download and install the upgraded version of Alla Lighting. The AUTOONE brand also offers alternative Brake Light Bulb.
- Connect the new bulb and remove it the same way you removed the cable. The light needs to linked properly by simply pushing here.
- Go You can use a screwdriver or your hands to fix the clips again. That’s all there is to it. The procedure for changing another brake light is the same. Save your car from any accidents with your new brake lights.
Why Honda Civic Parking Lights Won’t Turn Off?
If you press the brake, the parking lights will come on and should turn off as soon as you release the brake. It is an indication that there is a problem with the system if the parking lights are still on after parking. Battery drain resulting from parking lights is not as great as that caused by headlights, but it is still significant.
It is common for switches to fail when this happens. After the handle has jiggled, confirm that it is down. It is safe to assume that the switch is responsible for the light going off. For the parking lights to function normally, the switch needs to replaced.
If There has been a slight delay in lowering the brake handle, which causes the parking lights to stay on. If the parking brake is engaged, the lights will come on if the handle is not down and the parking brake is not disengaged.
Why Honda Civic Airbag Lights Won’t Turn Off?
Your car’s airbag lights may be on for a long time if a sensor is faulty. A mechanic can fix this by resetting the computer system and checking the sensors, which fail sometimes without reason.
It is also possible that the airbag backup battery has depleted. It is possible for the car battery to drain the backup battery, just like the airbag’s light does. The problem should automatically resolve after completely recharging the battery, but if it doesn’t, you should recharge the backup battery and reset the sensors.
There is also a possibility that the airbag module is wet. It probably got wet when the car parked outside during heavy rain, and rainwater got into the car. Another possibility is that you accidentally poured water into the car, which reached the module. Water may corrode the airbag module located under the passenger’s or driver’s seat, impairing its performance.
In addition to protecting the electrical wiring of the car, the airbag clock spring maintains continuity between the airbag on the driver’s side and the airbag on the passenger’s side. Additionally, they coil when the steering wheel turned. As a result, the airbag’s lights may not work if these springs damaged.
Why Honda Civic Interior Lights Won’t Turn Off?
Several switches control the interior lights, which controlled by a fuse that covers several items. Try adjusting the interior light switch when the switch refuses to turn off. The brightness of the dashboard display controlled by this switch. When the switch is at its highest level, the lights can turned on. Try reducing the switch to its lowest point to see if the problem resolved.
To hear a clicking sound, open each door, locate the door switch, and press each switch. A clicking sound indicates that the switch has turned off. The switch may need to replaced or repaired if you do not hear a clicking sound, or if you have been adjusting the button for a long time.
Why Honda Civic Hazard Lights Won’t Turn Off?
The hazards on your Honda Civic alert other drivers that your vehicle is stationary. After an accident or if the car breaks down, you may be in a dangerous situation on the road. By staying away from these hazards, other drivers can prevent accidents from occurring.
There is a possibility that your hazard lights are not turning off due to a broken connector on the hazard switch. It may be that the switch is experiencing a short. Make sure a mechanic tests the control to determine whether it needs to repaired or replaced. The hazard lights can turned off by pressing the reset button under the dash.
Why Honda Civic Tail Lights Won’t Turn Off?
When the vehicle is off, the brake light switch can still engaged, leaving the brake lights on. Most cars have a stopper that disconnects the switch when the brake pedal is not depressed.
Stoppers are normally plastic and can shift or break, leaving the switch connected and the brake lights on. The brake pedal stopper located on top of the pedal, and you should always keep it in place.
To fix this, press the brake pedal to gain access to the switch and press the brake light switch button. The switch needs to replaced if it doesn’t work.
In addition to removing the battery, you can also remove the charger. A stopper that does not engage the switch is causing the tail lights to turn off; therefore, it needs to replaced. If you need a temporary fix, you can improvise an object the same size as the stopper and fix it there. Up until you replace the stopper, which shouldn’t take long, this should keep you going.
Why Honda Civic Dome Lights Won’t Turn Off?
The dome lights in your Honda Civic should turn on when the door is opened and off when the door closed when they are properly installed. There may be a problem with the switch if the dome lights don’t turn off.
Each door has multiple switches for operating the dome lights. The main knob located on the dashboard, to the left of the steering wheel. Make sure you remove the bulb to prevent the battery from drained. As long as the car inspected by a mechanic, this should last.
To loosen the screws, remove the bulb, then use a screwdriver (most require a Phillip’s head, but some require a flathead). There may be a clip you can slide a flathead under; pry it off gently, set the faceplate to the side, and unscrew the bulbs. During this process, make sure your car is off.
Conclusion: Brake Lights Won’t Turn Off Honda Civic!
A vehicle’s brake light is an important component, and any issue with it should not ignored. This post explains why brake lights remain on after a car has turned off.
You should remove the battery from your car if your brake lights won’t turn off as a car owner or driver. Due to the issue, the battery is being protected from drained.
Learn more of our article here.
FAQs
How can I turn off the brake lights on my Honda Civic?
The brake lights on your Honda Civic may not turn off for several reasons. To help you troubleshoot the problem, let’s examine some common FAQs.
Why won’t my Honda Civic’s brake lights turn off?
To diagnose and possibly fix this issue, you can take several steps. Troubleshooting FAQs include the following:
Are the brake lights on because of a stuck brake pedal?
The brake lights can stay on if the brake pedal is stuck or misaligned. The brake light switch may remain engaged if the brake pedal does not return to its resting position properly.
Is the brake pedal stuck or misaligned?
Make sure the brake pedal returns to its normal position after you release it. It might be stuck or misaligned if it doesn’t. It may be necessary to inspect the pedal and the mechanisms surrounding it for obstructions or problems.
Could a faulty brake light switch be the problem?
Brake lights that will not turn off are often caused by a malfunctioning brake light switch. Pressing and releasing the brake pedal turns on and off the brake lights.

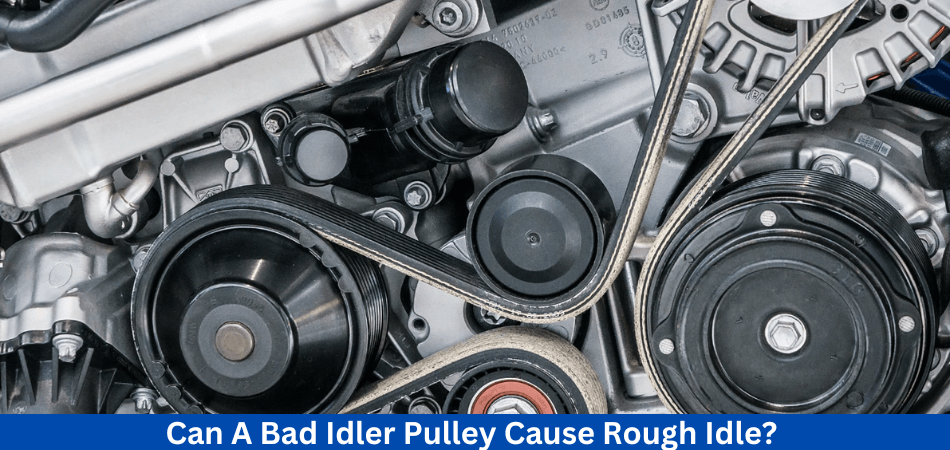
A vehicle’s engine drive belts depend on idler pulleys or engine pulleys. Engine drive belts are guided by idler pulleys through different major components. But Can A Bad Idler Pulley Cause Rough Idle?
Having idler pulleys makes it easier for the engine belt to loop around all the components in the correct direction. Thus, a bad idler pulley will affect the AC compressor, water pump, alternator, and power steering pump of your vehicle.
Over time, idler pulleys tend to fail and should be replaced as soon as possible. But how do you know if you have a bad idler pulley and Can a bad idler pulley cause rough idle? Here are the symptoms that indicate a faulty idler pulley so you can take proactive measures.
Where is the Idler Pulley Located?
Idler pulleys and belts are located near the front of the engine. The belt will rotate along with the engine. If you look at the serpentine belt moving on the engine, you can see the idler pulley.
Most vehicles have one idler pulley, but some have more depending on the configuration. The idler pulley’s tension is set by its position on the rail-type mount that tightens it. Some idler pulleys, however, use spring tension instead.
What are the Functions of an Idler Pulley?
You have several drive belts or a serpentine belt on your car engine that run all of its accessories. A/C compressor, water pump, alternator, water pump, and power steering pump are some of these accessories. These belts can, however, interfere with other parts if not kept in place.
All drive belts guided by the idler tensioner pulley. All of the accessories must routed around the belts. The idler pulley ensures a smooth rotation of the belts, ensuring the proper operation of your vehicle.
It is likely that the idler pulley will operate normally for many years – even for the life of the vehicle – but if it has been abused for many years, it will eventually wear out. It will cause strange noises and other issues with the drive belts if the idler pulley becomes too damaged.
Should The Idler Pulley Spin Freely?
There should be no restriction on the idler pulley’s rotation. Often, idler pulleys used in drive systems to provide tension to belts, chains, and cables. This allows the belt/chain/cable tension to remain uniform and consistent during operation when the idler pulley is able to spin freely.
As a result of the idler pulley not spinning freely, the tension can be uneven, resulting in premature belt/chain/cable failure. A non-spinning idler pulley should addressed immediately as it could lead to serious damage if left unattended.
It is crucial to inspect the pulley regularly and replace any worn or damaged parts as needed.
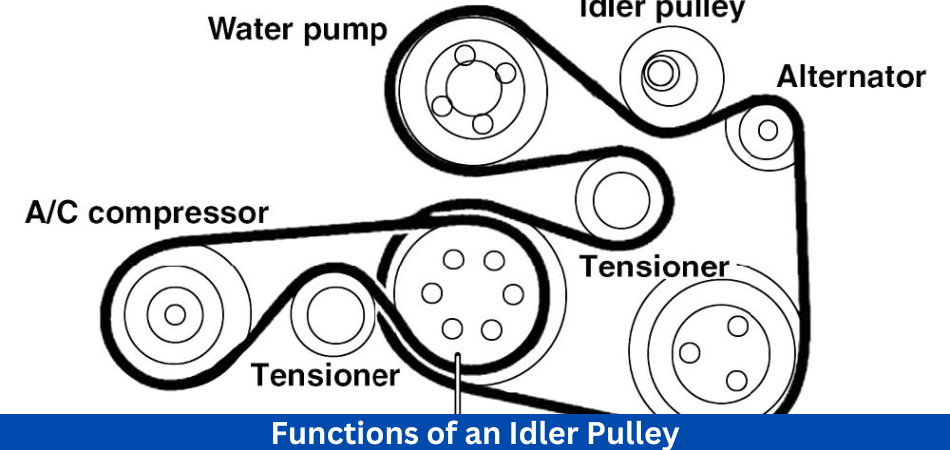
How Many Pulleys Does An Engine Have?
In this article, we have covered the basics of pulleys and idler pulleys. Idler pulleys hold tension on the drive belt and transfer rotational energy from the crankshaft to other accessories. As a result, idler pulleys do not produce or waste energy. Through the different components, it simply transfers energy.
Have you ever wondered how many pulleys and idler pulleys are inside the engine bay? These terms can sometimes be confusing for people, so let’s go into more detail about them.
Crankshaft pulleys are the biggest pulleys inside engines. On most blocks, this pulley can found in the center.
Alternators are the second most important component. It powers the alternator, which is the component that generates electricity and charges the battery and powers the cabin’s accessories.
Lastly, there is the AC pulley that powers the air conditioning system in the car. The power steering system is also powered by a pulley. The last is probably the water pump. There are pulleys on all of these components. However, the crankshaft, which centered in the engine, is the main power source.
We mentioned pulleys that create energy, and some components use this rotational energy by using these pulleys.
How Long Do Idler Pulleys Last?
Let’s move on to more specific stuff like how long these components last under normal conditions now that we’ve covered the basics.
Because idler pulleys are constantly exposed to attrition, they wear out over time as well. Approximately 50,000 to 100,000 miles pass before they fail and break down.
Despite these wide margins, their life spans depend on your driving skills and maintenance habits. Furthermore, you need to account for the fact that idler pulleys don’t wear out immediately, but rather gradually lose performance over time.
What are the Symptoms of a Faulty Idler Pulley?
It is not surprising that these pulleys wear after prolonged use since they are either metal or plastic. If the idler pulley is faulty, you may notice some of these signs.
1. Squealing
The fact that this is not an easy symptom to ignore may be a good thing. The squealing noise coming from under the hood is enough to make you change your morning plans and drive to the mechanic right away.
When the surface of the pulley worn and not smooth, squealing will occur. It is generally caused by too much, unwanted friction on a surface where things should move smoothly. Due to the continued movement of the belt, it repeatedly rubs against the surface.
It is also possible that the noise caused by faulty idler pulley bearings. The base of the pulley supported by bearings that allow it to rotate smoothly. This may lead to other noises like rumbling and cluttering.
2. Visible wear
Whenever a pulley used over time, especially when it makes squealing noises, there are always visible signs of wear on its surface.
Nevertheless, you would only be able to identify this symptom if you regularly inspect parts of your engine even when nothing is wrong. It is important to know where the idler pulley located first. As a second step, you would need to know how its surface looked when it was brand new or relatively good condition. By doing so, you will be able to tell when it needs to replaced. The surface of the pulley should be free of scuff marks or scorching. It is likely that the belt will also show visible wear.
3. Frozen pulley
The idler pulleys rotate smoothly on their shafts thanks to ball bearings. A problem with these bearings could cause the pulley to stop rotating altogether or to continue rotating but with rough resistance. Pulleys like this frozen.
The belt needs to removed from the idler pulley if the pulley is frozen. To prevent anyone from turning on the engine, make sure the engine is off and the keys are not in the ignition before starting. Spin the pulley a few times with your hand without the belt on and observe how it moves. The spin should be smooth. The pulley probably needs to replaced if it doesn’t.
4. Belt travel
If The belt moves smoothly along the system when the car is at idle. In the event of significant deterioration of pulley hardware, the belt will move from side to side. If you move it, you’ll notice that it wobbles or shakes. There is a loss of tension in the belt, which prevents it from maintaining the required tension. It can partially or fully push the belt off the pulley if belt wobbling continues for some time.
There are times when the middle groove on the pulley’s surface widens. In spite of the fact that the belt continues to move, it destabilized.
5. Damaged bracket
An idler pulley mounted on a bracket. Sometimes, the idler pulley and bearings are fine, but the bracket on which it mounted is warped or has come loose. A bracket can come loose due to excessive vibration, which loosens the bolt holding it in place.
For the idler pulley to function properly, it needs a stable mount. The belt could fall off the pulley if the mount is unstable. It is easy and quick to tighten a loose bracket bolt.
6. Power steering problems
Power transmitted from the engine to other components via the idler pulley. The power steering pump is one of them. When there is a problem with the pulley and belt, steering your car may be challenging. It may be difficult to move the steering wheel from side to side, and in some cases it may be impossible.
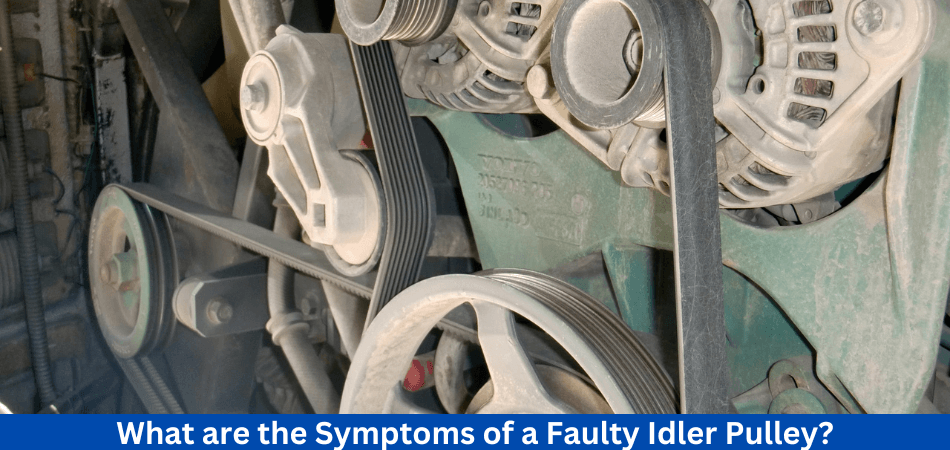
What Does It Sound Like When A Tensioner Pulley Is Bad?
There are several different noises that can produced by a bad tensioner pulley. Squealing sounds, high-pitched whines, or ticking sounds may heard depending on the degree of damage. It may also make a grinding or rattling noise if the pulley is completely worn out.
The pulley may also whine if the bearing inside it fails. The tensioner pulley is essential for the serpentine belt to transfer power to other parts of the engine, so it should diagnosed and replaced if necessary.
A bad pulley can cause further damage to the belt and other components if it is not replaced.
How To Diagnose A Bad Idler Pulley?
We learned what an idler pulley is, why it fails, and the symptoms of its failure in What Are The Signs Ofything. A pulley problem can cause a number of symptoms, as we noted earlier.
Often, when these pulleys worn out or broken, they make a whining noise. When you press on the gas, they like to wobble and play.
As a result, this is a good test to determine if a pulley is bad. Put the gas pedal to the floor and start the car. See if any pulleys move the belt in and out when under heavy load. You can use this method to determine if a pulley broken. Another way is to perform a visual inspection.
You can also pull it off in another way. The screwdriver used for this purpose. You will need a plastic bottle and a long screwdriver to accomplish this.
With the screwdriver, connect the threads of the plastic bottle by cutting it in half. Next, start the engine and follow the following steps for a successful operation.
It is necessary to stick the screwdriver against all of these components with pulleys. Don’t put it on the belt, you don’t want to hurt yourself.
If An unpleasant sound will created by a bad pulley. This plastic bottle simply amplifies the sound produced by the pulleys. As a result, you may hear some strange noises if they are bad. What is the best way to replace one?
How To Replace An Idler Pulley?
Idler pulleys can replaced in half an hour and are dead easy to replace. If you have already diagnosed the problem, it is not a difficult task. To remove the idler pulley, you will need a ratchet or a wrench with a proper socket, a new idler pulley, and a pulley tensioner bar.
If you want to remove the pulley, you will need to remove the belt tension. Next, you replace the pulley, which is the next step.
The new part mounted after this and the tension restored to the belt. In general, it was a simple task. We have attached a video that shows how this process done correctly in a few minutes. How much will this job cost in total? The next chapter will elaborate on this.
What are the Replacement Cost of Idler Pulley?
The average cost of replacing an idler pulley varies between $70 and $250, depending on the car model and labor costs. The idler pulley will cost you $40 to $100, and the labor will cost you $30 to $150.
Prices will vary depending on the type of vehicle you drive, how easy it is to install, and local labor rates. Additionally, auto repair shops may charge different taxes and fees.
It is possible to save on labor costs by replacing the idler pulley yourself. Replacing an idler pulley doesn’t require specialized tools and isn’t difficult.
Even though replacing an idler pulley is not an expensive job, some people put it off. Ignoring this low-cost replacement is a bad idea because it could lead to something much worse. The idler pulley is responsible for driving the engine drive belts. The longer you wait, the more likely you are to encounter future problems.
Under the hood, you should always listen for noises. It is important that you resolve the issues before the sounds become louder and worse. You can avoid costly repairs if you replace the idler pulley at the first sign of wear.
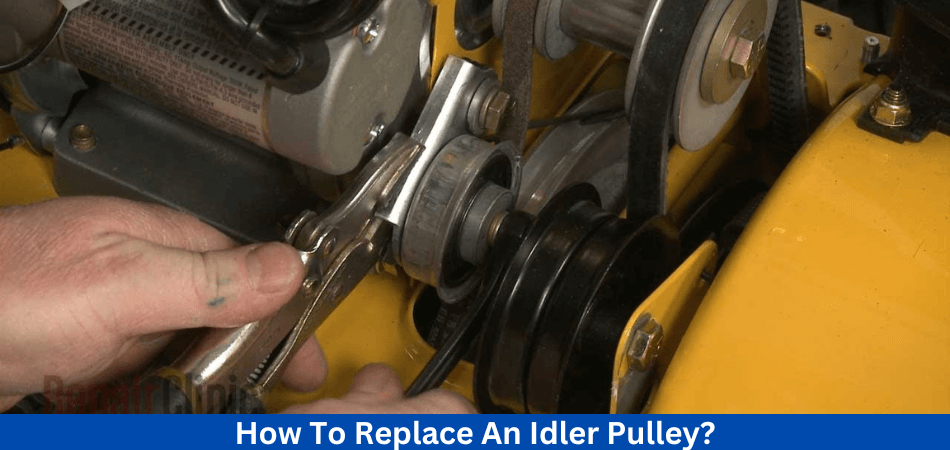
How Long You Are Safe To Drive If The Idler Pulley Is Failing?
Now that we know the symptoms, Let’s see how long you can drive your car with a bad idler pulley.
Since we are talking about a very long period of time and a margin of almost 50,000 miles, this is a tricky question. However, one thing is clear. A 100% damaged pulley will prevent the belts from moving and the car will stop or not be able to start.
There is a gray area between the time you notice the first signs of attrition and when you need to drive your car to a mechanic.
The general recommendation is to replace the broken parts as soon as possible if not immediately. Certain components, like clutches, degrade more predictably and don’t cause problems that bring the vehicle to a complete halt. Although it’s annoying to have to release the clutch pedal a bit more before the engine catches up, it’s not dangerous.
There is a completely different story when it comes to idler pulleys. In some cases, you can safely drive for tens of thousands of miles before performance drops. One slip of the belt is all it takes for the engine to lose momentum and for you to lose control.
Therefore, extreme caution is more than recommended.
Can A Bad Idler Pulley Cause Rough Idle?
Can a bad idler pulley cause rough idle? The answer is “No”. An idler pulley maintains the tension on a serpentine belt only. Other than having a similar name, idler pulleys, and loose tensioner arms have nothing in common with engine idling.
When your idler pulley fails, your car can experience a number of problems. In order to keep your car’s accessories running properly, the pulley maintains tension on the serpentine belt.
If the pulley is malfunctioning, the belt can start to slip, preventing the accessories from functioning properly. As a result of the slipping, the belt itself can damaged and worn.
In general, a squealing sound coming from the idler pulley when the car is running is a sign of a bad pulley. The idler pulley may also be gritty or rough in parts if it is going bad, which can detected visually.
Regardless of the case, it is important to replace the idler pulley as soon as possible to prevent any further damage to the belt or the accessories it drives.
Does A Bad Idler Pulley Affect Performance?
It is true that a bad idler pulley can affect performance. As a result, the idler pulley controls the amount of effort other components (such as the alternator and water pump) must exert to rotate the serpentine belt.
If A worn or broken idler pulley is unable to provide the correct tension, the rest of the system will have to work harder. Additional strain can cause components to work inefficiently, resulting in a reduction in performance and fuel economy.
In addition, if the idler pulley is not functioning properly, the serpentine belt may eventually slip off, leading to expensive repair costs.
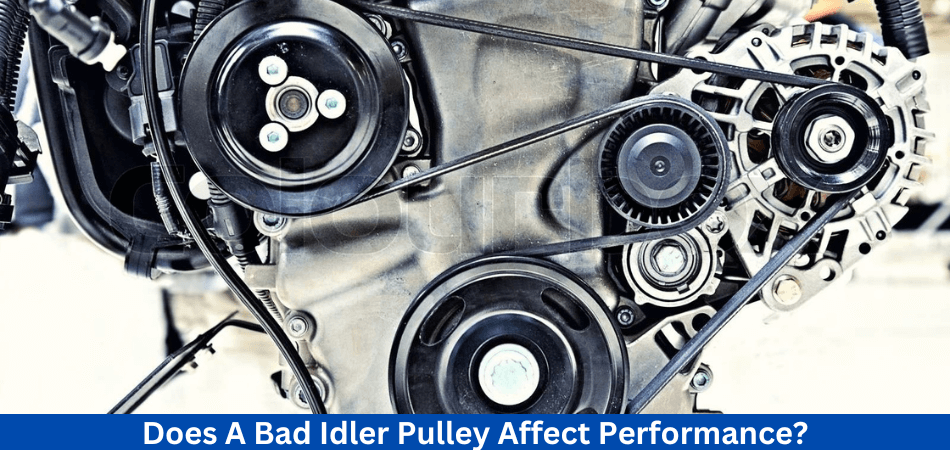
Can A Bad Idler Pulley Drain the Battery?
Bad idler pulleys can drain batteries. Insufficient voltage and current can result from a bad idler pulley, causing the alternator to fail. A charging system with insufficient voltage can increase the battery’s electrical draw, resulting in a drained battery.
As well as keeping a vehicle running efficiently, idler pulleys are also important for battery maintenance. An idler pulley that squeals or grinds should replaced, and the battery should tested for charge if it shows signs of wear and tear.
A drained battery should replaced as soon as possible to ensure the vehicle’s electrical system is properly charged and powered.
Can A Bad Pulley Cause Acceleration Problems?
You can experience acceleration problems if you have a bad pulley. Pulleys play a vital role in the performance of the vehicle’s engine, so a faulty one may result in a lack of acceleration.
When a pulley malfunctions, the belt it guides can slip off, which reduces ignition timing, resulting in less power produced by the engine. Alternators, power steering pumps, and air conditioning compressors can also be negatively affected by slipping and skipping belts.
As a result, if a pulley worn out, it may not line up with other components, causing the belt or other components to move out of place or travel at different speeds or angles, resulting in an inefficient belt and slow acceleration.
It may be necessary to replace the pulley in some cases to resolve the problem.
Conclusion: Can a bad idler pulley cause rough idle?
Now you can answer the question “Can a bad idler pulley cause rough idle” The idler pulley may not be one of the most well-known car components or the most common source of headaches for drivers. However, they are essential for smooth engine performance, and if one fails, the vehicle will not start.
It is indeed the devil in the details, and you should leave nothing to chance. Be on the lookout for the signs of attrition we gave you and act as soon as possible. The squealing noise under the hood is a definitive sign that you should stop driving around and replace the broken pulley if you cannot repair it right away.
Find more of our blogs here.
FAQs
How does an idler pulley relate to a vehicle’s engine?
An The idler pulley plays an important role in maintaining proper tension on a vehicle’s serpentine belt or drive belt. Rather than powering any accessories, it guides and maintains tension in the belt that drives the alternator, power steering pump, and air conditioning compressor.
Why is a rough idle in a car a problem?
When a vehicle is at a standstill, rough idle refers to an irregular or uneven engine idle speed. Symptoms include engine vibrations or fluctuations in RPM (revolutions per minute). In addition to being a symptom of various underlying problems, rough idle may indicate a problem with an engine’s performance or other components.
Is it possible for a bad idler pulley to cause a rough idle in a vehicle?
A bad idler pulley can cause a rough idle in a vehicle. Serpentine belt tension can be improper if the idler pulley fails or malfunctions. In turn, this may affect the performance of engine-driven accessories, such as the alternator and power steering pump.
What are the Symptoms of a bad idler pulley?
Bad idler pulleys are often characterized by unusual engine noises, visible damage or wear on the pulley itself, and irregular belt wear. The idler pulley may need to be replaced if these symptoms occur.
Is my vehicle’s idle rough because of a bad idler pulley?
The idler pulley can be the source of a rough idle for a variety of reasons. It is possible to test an idler pulley for damage or wear by inspecting it and listening for unusual noises coming from the engine area. If the problem cannot be accurately diagnosed, it’s best to consult a mechanic.
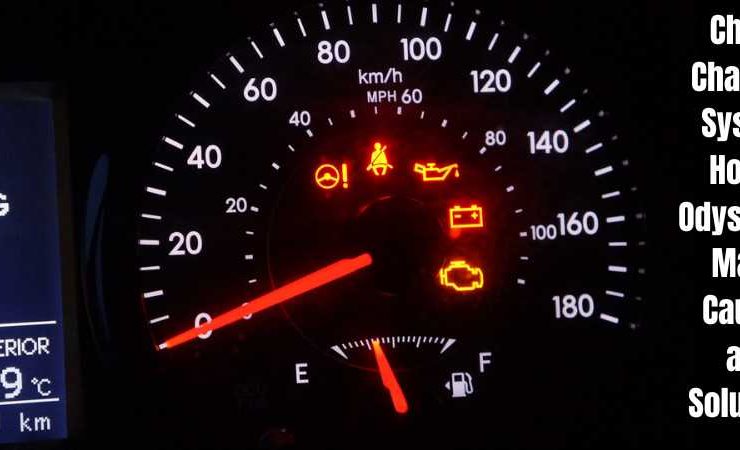
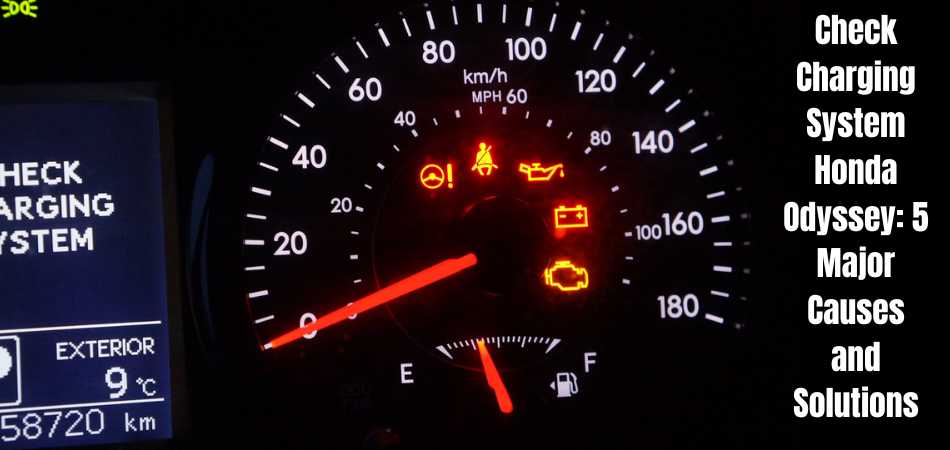
A popular minivan with family-friendly features, the Honda Odyssey is known for its reliability. It is, however, prone to specific issues, including the check charging system Honda Odyssey, which may require the driver’s attention.
Honda Odyssey owners may be concerned about the “Check Charge System” warning that may appear on their dashboard.
The warning message may be confusing or alarming for drivers who are unsure what it means.
In this guide, we’ll examine the possible causes of this check charging system Honda Odyssey, making it easier for you to find a solution.
Honda Odyssey Overview
Throughout five generations, the Honda Odyssey has undergone numerous updates and improvements. In contrast with the original model, which had hinged doors and low horsepower, the current version offers many conveniences and comforts for passengers and drivers.
There are five generations of the Odyssey currently on the market. New for the 2018 model year was the option of a nine-speed automatic transmission or a ten-speed automatic transmission. Ten-speed transmissions were available on higher trim levels such as Touring and Elite. Its 3.5-liter six-cylinder engine produced 280 horsepower, more than previous generations. Five trim levels are available on the current Odyssey, just like in previous generations.

Honda Odyssey has undergone many changes over its five generations, but one thing remains the same – it is a well-designed vehicle built for comfort, safety, and convenience.
Learn more about the Honda Odyssey.
What Does the Honda Odyssey Check Charge System Mean?
Honda Odyssey’s “Check Charging System” warning means your battery might malfunction. If you need further vehicle inspection, take it immediately to a repair shop.
If your Honda Odyssey’s warning message says “CHECK CHARGE SYSTEM” or “CHECK CHARGING SYSTEM,” your battery may not hold a charge or need to be replaced.
Along with the engine, the electrical system plays a vital role in keeping your Honda Odyssey running smoothly.
In your Honda Odyssey, the alternator charges the battery while driving, but if there is a problem with the charging system, you may experience some complications.
Your Honda Odyssey Check Charging System light and error message can lead to costly repairs. Take a look at this guide to learn how to fix them.
What happens when the check charging system light comes on?
The vehicle runs solely on battery power whenever this light is illuminated. Battery charge failure will lead to the battery being unable to recharge, soon running out, leaving you with a dead battery. The most frustrating thing is a dead battery, so if you see this light, have your vehicle checked out by your trusted mechanic.
You may have a battery light and a check charging system light, depending on your vehicle. For more information about your car’s warning lights, consult your owner’s manual.
How Do You Know If There Is A Check Charge System Warning On My Honda Odyssey?
In your Honda Odyssey, if there is a problem with the charging system, a battery-shaped warning indicator will illuminate on the instrument panel.
Depending on your vehicle model, one of two error messages may accompany the battery-shaped light.
If the charging system malfunctions in your Honda Odyssey Touring, you will see a warning message that reads “CHECK CHARGING SYSTEM” on the vehicle’s multimedia display.
Your vehicle’s information display will display the warning message “CHECK CHARGE SYSTEM” if there is a problem with the charging system.
What are the Common Causes Of Honda Odyssey Charging System Problems?
Your Honda Odyssey may display the “Check Charging/Charge System” message for several reasons, including the following.
1. Wires, Fuses, And Connections
A blown fuse or a disconnected wire can cause an electrical problem with your Honda Odyssey, so it’s worth checking the systems whenever you see a problem.
You might notice dimmed headlights or faulty brake lights if these components malfunction.
2. Drive Belt Issues
You may not notice any electrical problems with your alternator, but the serpentine belt connecting it to the engine may need to be changed.
The connection between this part and the alternator can loosen due to wear and tear. This results in reduced energy conversion.
3. Battery Problems
In general, Honda Odyssey batteries last between three and five years, so you’ll likely see “Check Charging System” along with “Replace Battery/Change Battery” messages during that period.
If you don’t see the battery message, you may be experiencing another problem with your battery.
Unless there is an immediate indication that the battery needs to be replaced, the terminals and cables should be checked first. Look for corrosion, loose connections, and any other minor problems.
These problems can be much more easily repaired than a complete battery replacement, so consider yourself lucky if you encounter them.
4. Bad Alternator
The primary cause of battery problems in cars is a faulty alternator. This component converts Motor energy into electrical energy while the vehicle moves.
Electrical components are powered using electric energy, and batteries are recharged simultaneously.
A malfunctioning alternator causes the “Check Charging System” message to appear, and you may notice a decline in interior lights, radios, and other electrical accessories.
If you try to jump-start a car with a faulty alternator, the engine will only run briefly before failing again.
You can test the alternator by disconnecting the battery if you have a multimeter or voltmeter at home. By taking this step, you can save time when you visit your Honda service center in the future.
5. Faulty ECU
Lastly, you may be experiencing a computer issue with your older Honda Odyssey.
It can cause your car’s battery light, “Check Charging System” message, and engine light to illuminate if the Engine Control Unit (ECU) is malfunctioning.
How To Fix Honda Check Charge System?
You can try the following to fix the “check charging system” warning light or message on the dashboard; it also works for the “service battery charging system” and “battery” lights:
- Alternator replacement
- Drive belt inspection
- Charge system parts should be cleaned
- Wiring Check
- Minimize the accessories
- ECU change
- Drive a lot
- Battery replacement
- Alternator replacement
The alternator is the most common and possible cause of the check charging system light coming on. It is best to replace an alternator if it is too old or has several problems. Ask your mechanic or the automaker to recommend the perfect alternator for your car.
It is important to remember that alternators can last seven years after traveling at least 80,000 miles. It may lose some of its beautiful qualities. With the new charging system, the system is more accurate and fresh.
1. Inspect the Drive Belt
If your alternator makes odd noises, you should pay attention to it. Make sure the belt does not show signs of wear or dirt. The result is a reduction in the stress placed on the pulley. As a result, power will be provided by the alternator. Get a new one if it becomes damaged or worn after the spring wears out. The service pricing system will work properly as soon as it is excellent.
2. Clean the Charging System Parts
While cleaning your vehicle, keep the charging system in mind. Keep an eye out for any oil leaks around each component. Corrosion can also be removed easily if decay has taken place.
Due to this, your battery has been given a longer life. The inside components of the system will not be subjected to additional dust. There will be a smooth flow of electricity. With water, you never miss the starter and alternator. As a result, you won’t receive as many notifications regarding service charges.
3. Check on The Wiring
Wiring must be reliable and secure for the charging system to work correctly. Your car can blow up due to unsafe cables, which may result in the check battery system light going on. Wires that are dated and damaged can be easily repaired. Taking your mechanic’s advice will help you make the best decisions.
Be sure to follow the wiring instructions for your car to ensure that each wire is connected correctly. Ask the mechanic for assistance if you’re unsure. The vehicle will be safer for you to drive.
4. Reduce the Accessories
Cars are valued more if they have features. Despite this, your charging system is under additional stress. To reduce the extra current draw, cut back on these additions. When the car is not running, you should lessen how often you listen to the stereo.
Leaving your lights on after driving is also dangerous. There will be a rapid depletion of your battery. However, avoiding it will help your car’s charging system function properly.
5. Change The ECU
When your car’s ECU malfunctions, it is best to replace it. You will be able to operate your alternator more effectively and safely. The new components for the ECU are excellent. ECU parts that are new, however, are more expensive.
The cost will vary depending on the vehicle and the ECU you desire. If it has trouble codes, check it with an OBD II scanner before replacing it.
6. Drive Many Times
Properly charged batteries are secure. Driving your car for 20 minutes daily keeps your battery in excellent condition. When you drive frequently, your car won’t have starting problems. However, if you won’t be going every day, you’ll need a float charger. There won’t be many alerts from the service charge system.
7. Replace the Battery
You should replace your battery if it’s over seven years old and doesn’t charge properly. In addition, replace it immediately if you find that its capacity has been reduced using a multimeter. Make sure the batteries you purchase are the right ones for your vehicle. Make sure that the battery you choose meets the alternator’s capacity. Ensure that your car company or dependable technician takes care of this. It reduces future costs and eliminates the service charge system alert.
Furthermore, examine it frequently before changing it to ensure it is in perfect condition. Ensure the device is in good working order and shape after a few days. You can accomplish this by using a multimeter and an insulating kit.
Each cable must be in excellent condition. It allows the alternator’s current to flow correctly to other auto components. When it becomes outdated, it is safe to replace it.
How To Reset The Check Charging System On A Honda Odyssey?
If your 2011 Honda Odyssey shows a “Check Charging System” notification, the only way to disable it is to have the entire system evaluated and repaired by a skilled technician.
You should seek the assistance of a mechanic unless you are an expert in Honda’s automotive technology.
As soon as you become aware of the “Check Charging/Charge System” notification, you must schedule an appointment with a Honda dealership.
Consider visiting an independent repair shop and using aftermarket repair parts to save money.
Can You Drive With A Charging System Warning Light?
You cannot guarantee how long to continue driving after receiving a charging system error message on your Odyssey.
Consider these recommendations to ensure you reach the mechanic before any severe issues arise:
- Keep your vehicle running as long as possible by avoiding turning it off.
- You should keep your engine running and go straight to the mechanic to prevent a quicker battery discharge.
- You should minimize using electrical controls, such as voice commands or power windows.
- Turn off any electrical accessories you’re not using whenever you’re driving.
Final Words
It indicates that your automobile is only powered by its battery when the “Check Charging System” light illuminates.
If the problem persists and your charging system fails, your battery cannot recharge, causing it to drain rapidly.
When this light appears, it is crucial to act immediately. Dead batteries can quickly ruin your day. Identify the root of the issue with the help of a reputable mechanic and have it resolved as soon as possible.
Battery lights, check charging system lights, or both may be found on your automobile, depending on its model. You can find out which warning lights your vehicle has by checking your owner’s manual.
You should not ignore the warning light as it significantly impacts your car’s performance and could cause hazards.
Read more of our Articles Here.
FAQs
What does the “Check Charging System” warning mean in my Honda Odyssey?
An “Check Charging System” warning indicates that your vehicle’s charging system might malfunction. Various electrical problems can result from a battery that is not charging correctly.
Why does a Honda Odyssey display a “Check Charging System” warning?
Common reasons include a faulty alternator, a weak or dead battery, damaged or loose wiring, or a malfunctioning voltage regulator.
What is the problem with my Honda Odyssey’s alternator?
Voltmeters can be used to check the voltage at the battery terminals while the engine is running to test the alternator. The alternator may malfunction if the voltage is below 13.8-14.2 volts.
What should I do when I see the “Check Charging System” warning on my Honda Odyssey?
A professional mechanic should inspect your vehicle after you pull over safely, turn off the engine, and turn it off. If the charging system fails, the battery can deplete, and the vehicle could stall.
If the warning appears, can I still drive my Honda Odyssey?
To avoid drained batteries and an inoperable Honda Odyssey, do not drive with the “Check Charging System” warning illuminated.
When should I have my Honda Odyssey’s charging system checked?
Maintaining your vehicle regularly is essential. Inspect your charging system at routine service intervals. Usually, every 12,000 to 15,000 miles is a good practice.